• Skip to main content
  • Skip to primary sidebar
  • Skip to secondary sidebar

Sixth Street Sundries

Emily Midgett

  • Home
  • About Me
  • Contact
  • OLO Marker Color Swatch Chart
  • Shop

die cut inlay

One Die + Specialty Papers = Two Unique Cards with Simon Says Stamp!

April 21, 2026

This post was sponsored by Simon Says Stamp. Thanks, Simon! *I have gathered links to all of the products used at the bottom of the post for your convenience, using affiliate links at no extra cost to you. Thank you for shopping with my links! I truly appreciate your support for my work!*

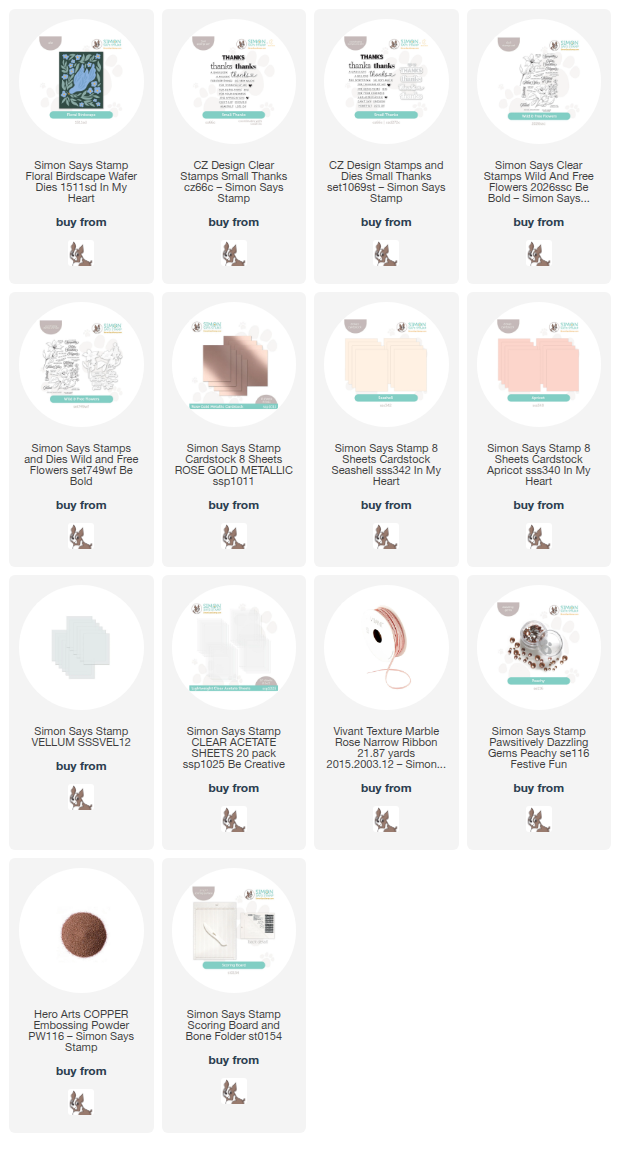
Hi friends! I have another two-fer for you today using a gorgeous newer cover plate die from Simon Says Stamp! The beautiful Floral Birdscape cover plate die lends itself so beautifully to a die cut inlay technique, and when you pair it with some gorgeous specialty papers and a fun top-fold design, you can create this elegant pair of projects super quickly. Let’s get started with the details on my projects!

My main ingredient for both of these projects was the Floral Birdscape die cuts, using both the positive and negative die cuts so that nothing went to waste! The positive die cuts also feature some gorgeous debossed details, making them even more special and that much easier to use as a focal point for another project! I never tire of the stunning Rose Gold Metallic cardstock from Simon Says Stamp, and paired with a blush or peachy color palette is pure perfection.

For my first project, I used the negative die cut created with the Floral Birdscape die, cutting it once from the Rose Gold Metallic cardstock and once from Simon Says Stamp’s new Seashell cardstock. I made sure to reserve the die cut pieces for my second project. Before adhering my cover plate die cut to my card front, I decided to create a unique top-fold card using an A2 panel of Apricot cardstock for the back and a panel of vellum for the front, cut to 4.25″ x 6″ and scored along the top at 1/2″. I adhered the vellum to the Apricot panel to create this fun card with a semi-transparent front that would allow that pretty peach back to come through very subtly! To the vellum, I adhered the shining rose gold cover plate die cut with liquid adhesive, tucking the large Seashell bird die cut in it’s proper spot, as well.

Here’s a shot of the card when opened up. The area behind the bird is the perfect spot for writing a message to your recipient without it marring the pretty card front!

For the greeting, I heat embossed a simple thank you sentiment from the Wild & Free Flowers stamp set using Copper embossing powder onto more Apricot cardstock, die cutting the scripty “thank you” with it’s coordinating die. I popped these sentiment pieces onto the card front with some thin foam adhesive squares, then added a pretty bow and some Peachy Pawsitively Dazzling Gems for a bit of extra texture! I think this creates such a fun and unusual project.

For my second project, I used the leftover positive die cuts from the Floral Birdscape die to create a patterned card front. First, I created the A2 card base itself, this time with Seashell cardstock for the back and a 4 1/4″ x 6″ panel of acetate, scored at 1/2″ and adhered to the Seashell panel with strong tape to create a top fold card with an acetate front! To ensure correct placement for my die cuts, I used some low-tack tape to temporarily add the leftover Seashell cover plate die cut on the acetate card front, then adhered each remaining positive die cut in it’s appropriate negative space. Once these die cuts had dried, I removed the tape and the cover plate die cut to reveal each positive die cut in exactly the right place!

For the greeting, I used the Small Thanks stamp set from CZ Design, embossing the two greeting stamps onto Seashell cardstock using Copper embossing powder and die cutting the larger with it’s coordinating die. I popped them up on the card front with thin foam adhesive squares, then added a slim velvet ribbon bow and some sparkling Peachy Pawsitively Dazzling Gems for added sparkle. I just love how unique this card is, and you can easily write a small message behind the generously-sized bird die cut! Such a fun departure from our normal cards, I think!

Well, that’s all for my projects today. I am having a hyperfixation on the beautiful Apricot and Seashell cardstocks from the In My Heart release! (Click HERE to see the entire new release!), so be prepared to see lots more peachy, blushy color palettes with these gorgeous colors. Thanks so much for stopping by today, and have a marvelous day!
Filed Under: simon says stamp Tagged With: acetate, CZ design, die cut inlay, die cutting, floral birdscape, small thanks, top fold card, vellum, wild and free flowers

Have a Blue Christmas + Cyber Monday FREEBIE!!

November 27, 2023

This post was sponsored by Simon Says Stamp. Thanks, Simon!

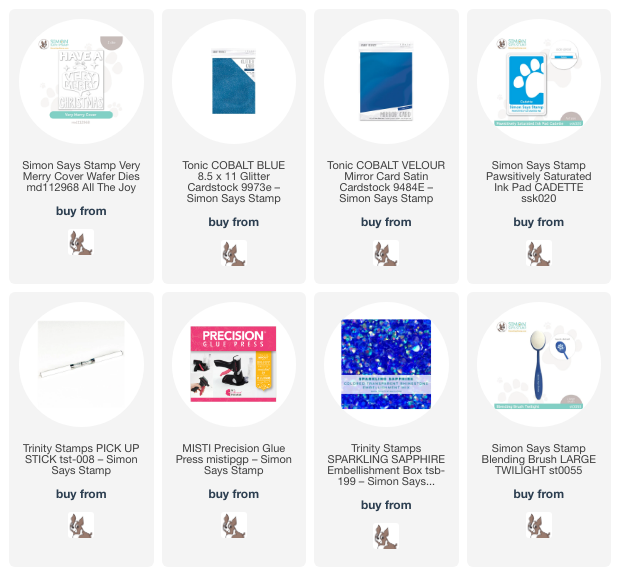
Hi friends! I hope you’ve all had a lovely holiday weekend and maybe enjoyed some treats, either in the form of pumpkin pie (or pecan!) or perhaps some crafty treats! The deals aren’t over yet, and I have a stinking adorable freebie to share with you at the end of this post. But first, I knew that I wanted to create a monochromatic card similar to THIS card using the fabulous new Very Merry Cover Plate Die. I love pairing textured specialty cardstocks in the same color family to create a super impactful and dramatic monochromatic card. Bonus: I was able to create two cards just by running the die through my machine with two different types of cardstock! Let’s get started with the details.

The Very Merry Cover Plate Die is perfect for use with the die cut-inlay technique. I began by running an A2 panel of blue glitter cardstock and a panel of blue satin foil cardstock through my machine using the Very Merry Cover Plate Die, taking care not to lose any of the die cut pieces. I carefully removed the die from the die cut panel and left all of the die cut pieces in place in the negative space.

Before I began adhering my die cut pieces to the card front, and because the cover plate panel is just slightly smaller than a typical A2 card front, I blended Cadette ink around the edges of the card front. I didn’t have any colored cardstock in quite the right shade of blue, but an extensive ink collection and blending brushes means that I can create my own panel of custom-colored cardstock lickety-split! After I had created the coordinating blue edges on my card front, I adhered the negative space of each die cut to the center of card front using a tape runner. Then, using the Trinity Pick Up Stick and the MISTI Precision Glue Press, I was able to add the die cut letters very quickly! There’s just enough contrast between the textured glitter cardstock and the super smooth satin foil cardstock to allow the words to be visible. I think the effect is super elegant!

After all of the die cuts had been inlaid, I added a few sapphire gems and a silver twine bow to the top of the ornament. Because I didn’t use any foam tape on this project, it should be super easy to drop in the mail! I love a two-fer, too. Two die cuts, two complete cards!

Now, for an adorable Cyber Monday freebie from Simon Says Stamp!!

If you purchase at least $25 of Tim Holtz brand products and follow the instructions on the graphic, you will receive this adorable Walter the Penguin die for free!

I created this super cute card using Walter and his lady friend! (Love that the bow can be either a bowtie or a hairbow, depending on placement.) I think they’re so cute! How sweet would this card be for a winter wedding?

This set is only available at Simon Says Stamp while supplies last, so don’t wait! If you’re new to Tim Holtz, I can’t recommend the Distress Inks highly enough. They are water reactive and marvelous for watercoloring, so if you’re a colorist like me, you definitely ought to check them out. The color palette is wide-ranging and so, so beautiful.

Well, that’s all for my projects today! Thanks so much for stopping by today, and happy shopping!

Filed Under: simon says stamp Tagged With: christmas card, die cut inlay, monochromatic, precision glue press, very merry cover die

The Ton Stamps Summer Release: Day 4

June 8, 2017

Good morning! We are back today with our last day of stamp debuts. All of the products you have seen this week are now available for purchase on The Ton’s website!

For The Ton’s Summer 2017, Effie has released 24 new stamp designs and 1 new couture mix! There are four new gifts with purchases that you can obtain with this new release. This promotion does not apply to prior purchases. The threshold amount is calculated before taxes and shipping. This promotion will continue until June 22 at 11:59pm EST or until supplies last. Limit one incentive package per order. No coupon code needed. All incentive products will be added to qualified orders.

Spend $75 or more: Receive a free pack of our new Summer Soiree Couture Mix
Spend $100 or more: Receive a 2×3 Floral Mini Banner Stamp (and Summer Soiree Mix)
Spend $150 or more: Receive a 2×3 Anemone Cluster Mini Stamp (and Floral Mini Banner Stamp and Summer Soiree Mix).

Spend $200 or more: Receive a 3×4 Watercolor Bouquet Set (and an Anemone Cluster Mini stamp, Floral Mini Banner Stamp and Summer Soiree Mix).

**Incentive products will not be available for purchase in our shop until July***

We have four stamp and die sets left to show you today:

City Girls Book Life
Sunnies
Watercolor Wreaths
Peony Terrace

Be sure to check out The Ton’s blog post for all of the official details about each new product! 

For my first project, I chose to make a pair of cards using the beautiful new Peony Terrace background stamp. My first instinct would be to heat emboss and watercolor it, but I wanted to show how pretty it can be when used on a monochromatic card. I first stamped a 5.5″ square panel using True Navy ink, then die cut the Brushed Hello die from the center, keeping both pieces so that I could make two cards!

For this first card, I used the negative space from the die cut background to create a foiled inlay! I simply made sure to keep all of the pieces from the inside of the die, then die cut the Brushed Hello again from some pretty blue foil, inlaid it inside the negative space of the die cut, then added in the little interior pieces. For a simple finish, I blended a bit of True Navy ink around the edges with my blending tool.

For the second card, I die cut two more of the Brushed Hello from plain white card stock, then adhered them with the die cut from the large panel to create a dimensional die cut. I stamped the coordinating sentiment from Brushed Hello onto strips of white card stock using the same True Navy ink, then popped them up with dimensional adhesive. I adhered everything to a clean white card base and added a few Glass Slippers sequins to add a touch of sparkle. Clean and crisp is slowly becoming my new favorite style!!!

For this next project, I combined the adorable heart shaped sunglasses (of which my 3 year old daughter has an identical pair!) from the brand new Sunnies with the sweet Mini Heart background stamp that was released a few months ago. I started by heat embossing the Mini Hearts onto a plain white A2 panel using gold embossing powder. Next, I used my Clarity Stencil Brushes to blend Grape Crush, Deep Sapphire, and Cobalt Breeze inks down the front of the panel. I then stamped the adorable heart shaped Sunnies using some sticky black ink, then sprinkled holographic embossing powder over the top and embossed them with my heat tool. I colored the arms of the sunglasses in with my Dark Pink Zig marker, then used my sharpest scissors to cut out the center of the sunglasses and add teal foil behind them to create some mirrored sunglasses. Super cute and so retro, don’t you think?! I heat embossed my sentiment from Sunnies onto a rectangle of vellum, adhered my sunglasses down, then added some dimensional adhesive behind them to pop the vellum panel up off of the blended heart panel. Adorable, right? I love the sassy sentiments included in the stamp set, too!! So fun.

For my last card today, I used the beautiful new Watercolor Wreath with my Zig markers to create a watered down, Monet-ish card front. I started by using my MISTI to color the wreath with my Zig markers and stamp the images onto a piece of Bristol paper. After I had gotten a sufficient amount of pigment onto the card stock, I used my damp paintbrush to blend the colors out a bit, then scribbled some of the color onto an acrylic block and watered it down, then blended the coordinating color out on the wreath to make it look very ethereal and almost impressionist. I stamped a few of the individual blooms from Watercolor Wreath in the same way and die cut them with the coordinating dies.

For the greeting, I stamped one of the beautiful banners from the new Banners set onto some vellum, heat embossed it with silver embossing powder, then die cut it with the coordinating dies. I added the individual die cut blooms on the corners and hid my dimensional adhesive behind them so as not to mar the translucent vellum. I added a touch of sparkle with some Light Sapphire sequins.

I also was able to make a coordinating envelope by stamping the beautiful Watercolor Bouquet incentive stamp with Beach Blondie onto my coordinating yellow envelope! I love when I can make the envelope just as pretty as the card within.

Well, that’s all for me today! Now, for some fun giveaway details!

For each Release Day (1 through 4), The Ton is giving away a stamp set of choice from the new release! So there are four stamps up for grabs! To qualify, you must leave a comment on The Ton’s Daily Release posts. Leave a comment on each Design Team member’s blogs to increase your chances of winning.

There will be an additional 11 stamps up for grabs for commenters on The Ton’s Design Team Blogs. Just leave a comment on the DT blogs during the release days for a chance to win a stamp set of choice. The comment period for all giveaways will close on Monday, June 12th at 11:59pm. Winners will be announced on The Ton Blog thereafter.

The Ton’s June Challenge is now live! For this month, we have a fun color palette challenge so head over now for a chance to win a $50 spree to The Ton’s shop!” *Gift certificates only apply to The Ton stamps, dies and gilding.

 Be sure to come back tomorrow for the traditional New Release Blog Hop! We have a remarkable lineup of talented guests in store for you tomorrow, plus giveaways, so you won’t want to miss it! Have a great day, and happy shopping!

Filed Under: Uncategorized Tagged With: blending, die cut inlay, the ton, the ton stamps, watercolor

Primary Sidebar

  • Facebook
  • Instagram
  • Pinterest
  • YouTube

Favorite Shops

Secondary Sidebar

Subscribe

Enter your email address to subscribe to this blog and receive notifications of new posts by email.

Instagram
Something is wrong.
Instagram token error.
Follow
Load More

Archives

Tags

3D embossing folder alcohol markers better press birthday birthday card blog hop card kit christmas christmas card christmas tag colored pencil copic copic coloring Daniel Smith die cutting embossing folder embroidery felt giveaway holiday holiday card hot foil ink blending karin brushmarker pro layered stencil masculine my monthly hero new release no line coloring no line watercolor OLO marker olo markers original illustration pawsitively saturated rainbow shaker card slimline stamping stamptember stencil thank you thinking of you valentine's day video watercolor

Popular Posts

Simon Says Stamp Sending Cheer Blog Hop- Day 2 + Freebie + Giveaway!
Joyful Snowman with New Simon Says Stamp Sending Cheer Release!
Simon Says Stamp Sending Cheer Release: Now Available!
February 2018 My Monthly Hero Blog Hop!
Altenew March 2020 Release Blog Hop+Giveaway!
Special Release: Simon Says Stamp Limited Edition STAMPtember Christmas Card Kit!
Simon Says Stamp Cozy & Bright Inspiration, Part Two!
Waffleflower December Release Blog Hop!
Altenew Build A Flower Japanese Mum Blog Hop!
Essentials By Ellen September Blog Hop!

Disclosure

Some affiliate links are used in my posts. This means that, should you click on one of my links and purchase something from that company, I will receive a small portion of the sale at no extra cost to you. I use the money earned from these sales to help maintain my blog. I so appreciate you visiting and, if you do choose to use one of my affiliate links, thank you so much for your support!
Copyright © 2026 ·Brunch Pro Theme · Genesis Framework by StudioPress · WordPress · Log in
Loading Comments...