• Skip to main content
  • Skip to primary sidebar
  • Skip to secondary sidebar

Sixth Street Sundries

Emily Midgett

  • Home
  • About Me
  • Contact
  • OLO Marker Color Swatch Chart
  • Shop

fine frames cover die

Altenew July 2024 Release Blog Hop + Giveaway 

July 10, 2024

Hi friends! I am hopping along with Altenew today to share lots of inspiration using their newest release. You should have arrived here from the Altenew Blog, and your next stop is Jaycee Gaspar. This new release is absolutely smashing, with so many beautiful new stamps, dies, press and hot foil plates, and even more additions to the marvelous Fresh Dye Ink line! I have four (yes, four!) cards to share with you today, so let’s get started with the details!

I love creating coordinating card sets, so before working with any of the new products, I selected my color palette to keep everything cohesive. I try to keep things fresh by switching up my color palettes, and as I’ve been using a lot of pink (pink is always in style with me!) and purple, I decided that I would go bold and bright with a warm yellow, black, and white color palette.

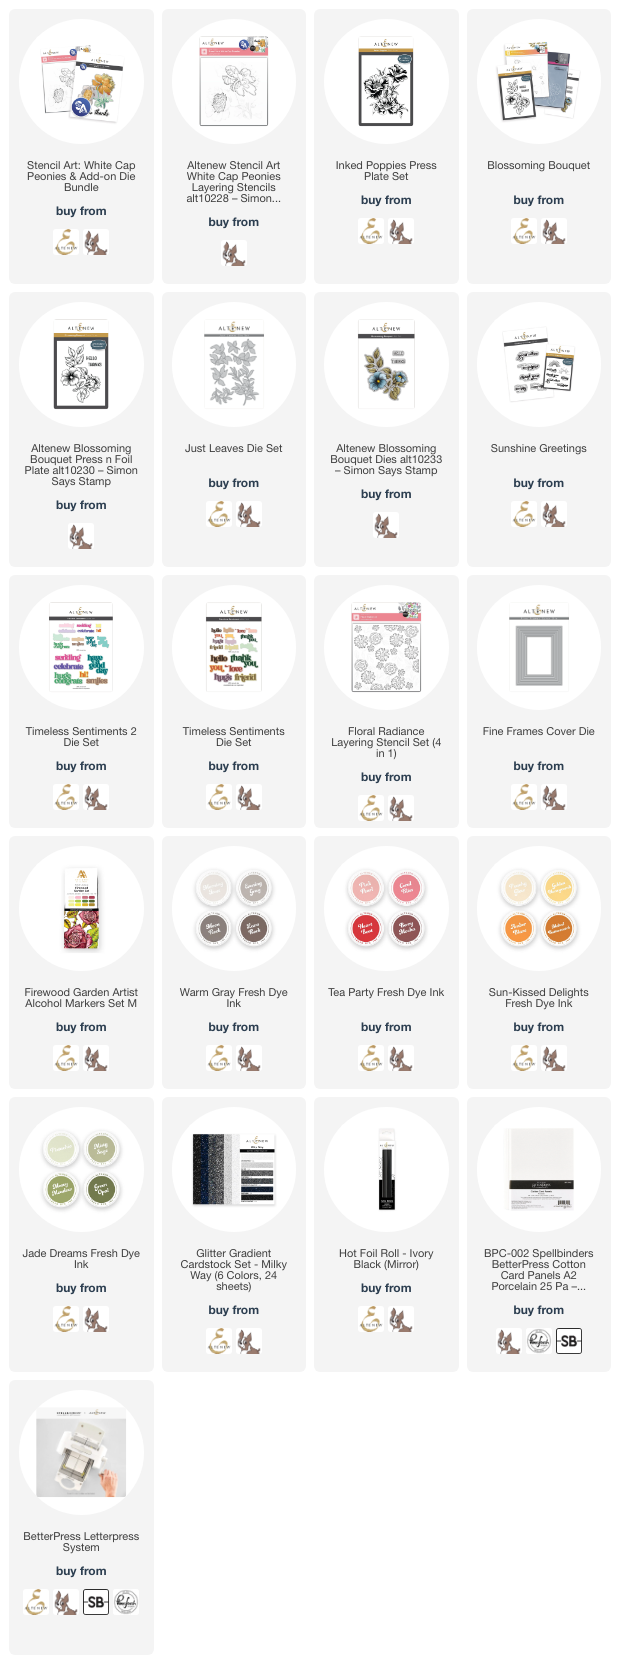
For my first project, I used the utterly luscious new Inked Poppies press plate set as the focal point for my A7 card. I inked up the press plate with black ink, then ran it through my machine using the Better Press system on a panel of Porcelain A7 Letterpress cardstock. The details on this press plate are unbelievable!! Once I had finished the letterpress, I used a blending brush to blend some Vanilla Cream Crisp Dye Ink around the edges of the panel, creating a lovely warm glow and highlighting my bold black floral image. I also used a pale yellow alcohol marker to add some details to the centers of the poppy flowers, which is not necessary but I thought really elevated the look of the background!

Once I had finished my background, I cut a simple “thank you” sentiment using the Timeless Sentiments dies, cutting the detail layer from black glitter cardstock and the shadow layer from heavyweight vellum. The vellum adds just enough softness around the edges of the black glitter sentiment to help highlight it on the busy and bold background. I popped up the greeting with some foam adhesive, then added several black gems for some lovely sparkle! I love when one image does the majority of the work for you… these cards would be gorgeous as thank you notes, and super easy to create in multiples and in a different color palette!!!

For my second card, I used the amazing Blossoming Bouquet product suite, this time as a hot foil plate rather than a press plate. I hot foiled the main floral bouquet onto some white cardstock using the new Ivory Black hot foil roll, then used the beautiful yellows and greens in the Firewood Garden Alcohol Marker set to add some vibrant color to the blooms. They reminded me of sweet little buttercups, so I thought that the yellow was the perfect color choice! I knew that I wanted those sweet yellow blooms to pop from a stark black background, so I colored around the edges of the die cut and colored flowers with a black alcohol ink marker to keep the white edges of the die cut from detracting from the overall color palette.

*You might be wondering why I didn’t just use this plate as a letter press plate if I was going to hot foil in black; I wanted to use alcohol markers, and they don’t play very nicely with the super absorbent cotton letterpress paper.*

After I had finished coloring and cutting the main floral focal point, I die cut some solid foliage using the Just Leaves dies and some black glitter cardstock. I arranged the die cuts on a solid black A2 card front, using liquid adhesive for the glittery die cuts and some foam adhesive for the colorful bouquet to add different heights and textures to my card front. I had also hot foiled a greeting from the Blossoming Bouquet product suite using some more of the black hot foil, then used some residual Vanilla Cream ink left over on my blending brush from the first card to add some warmth to my white sentiment die cut. I popped it up with some more foam adhesive and added a few gems to finish it off!

For the last card in my coordinating card set, I used the spectacular new White Cap Peonies stencil set with some yummy yellow and green inks to create this incredibly sunny card! I blended the different layers of the stencils using the older Vanilla Cream ink with the newer Sunkissed Delights Fresh Dye Ink, lessening or intensifying my blending pressure to create several values of yellow amongst all of the layers. Once I had finished blending the images, I blended some more of the Vanilla Cream ink around the edges of my card front, creating that same gorgeous, warm glow on my background. It almost looks like the sun is shining out from the card!!

For the greeting, I pressed a sentiment from the recently released Sunshine Greetings Press Plate set and coordinating dies using black ink. I thought that this particular greeting worked a treat with the sunny color palette on this card! I used a yellow alcohol marker to dye some thin white silk ribbon, which I tied in a bow and tucked beneath the popped up sentiment die cut. Finally, I added a few shimmering yellow gems for some added sparkle. I am absolutely in love with the color palette for these cards, and need to remind myself to use yellow more frequently!

For my last card, I used the new Warm Gray Fresh Dye Ink and Tea Party Fresh Dye Ink quartets with the Floral Radiance Stencil set to create this pretty floral card. I ink blended the flowers with the Tea Party inks, adding details to the flower centers with the Warm Gray and finishing the foliage off with some muted green inks. I die cut a Timeless Sentiments greeting using the Milky Way Glitter cardstock and some vellum, then added some coordinating deep gray frames from the Fine Frames Cover Die set, finishing this simple card off with a white silk bow and some sparkly gems! I love how beautifully these new Fresh Dye Inks work together!

Well, that’s all for my projects today. Now for some fun giveaway information!

$300 in total prizes! To celebrate this release, Altenew is giving away a $100 gift certificate to 1 lucky winner and a $50 gift certificate to 4 winners! Please leave a comment on the Altenew Card Blog and/or each designer’s blog post on the blog hop list below by July 16, 2024 for a chance to win. Altenew will draw 5 random winners from the comments left on each stop of this blog hop and announce the winners on the Altenew Winners Page on July 18, 2024.*The winner of the $100 gift certificate will be chosen from comments left on the Altenew blog. 

Here’s the full hop list in case you get lost:

You are invited to the Inlinkz link party!

Click here to enter

Thanks so much for stopping by today, and happy hopping!
Filed Under: altenew Tagged With: alcohol markers, better press, blossoming bouquet, fine frames cover die, floral radiance, fresh dye inks, inked poppies, just leaves, letterpress, press plates, sunshine greetings, timeless sentiments, timeless sentiments 2, white cap peonies

Altenew February 2023 Boho Chic Stamp, Die, Stencil & More Release Blog Hop #1 + Giveaway ($300 in Total Prizes!)

February 1, 2023

Hi there! Today, we are celebrating the release of Altenew’s new Boho Chic collection, a new array of products that have so many unique subjects/styles and can work seamlessly together or on their own! You can check out the full hop list HERE on the Altenew blog or check out the link list at the bottom of this post.

My projects for today’s post feature an interesting, new-to-me color combination: rose gold, blush, and teal. I began by doing some hot foiling with the new Delicate Floral Motif hot foil plate. I loved the look of the contrast of Altenew’s Rose Gold Hot Foil roll on some intense teal cardstock, so I used that as my color inspiration for both projects today, keeping the colors intense and vibrant on the hot foiled card, juxtaposing it with a lighter, more pastel version for the second project. Let’s get started with the details!

To start, I hot foiled the new Delicate Floral Motif hot foil plate with the Rose Gold Hot Foil from Altenew on some intense teal cardstock from my stash, centering it a bit to the left of the center of the A2 card front and using some low-tack tape to keep it in place when using my hot foil machine. I love how beautifully the contrast of colors showcases details from the new Delicate Floral Motif hot foil plate. To highlight the details even further and direct the eye towards the hot foiled focal point, I blended some Emerald ink around the edges of the card front, then splattered some coordinating rose gold metallic watercolor around the edges.

While my panel was drying, I hot foiled greetings from the Versatile Greetings and Sweet Sentiments hot foil and die bundles. I used the same teal cardstock and Rose Gold Hot Foil to keep the color scheme completely cohesive. I love the combination of fonts with these two sentiment sets; the chunky type font contrasts beautifully with the delicate script of the handwritten font. Once I had hot foiled and die cut the greetings, I popped them up on the card front using some foam adhesive.

Once I had added the foiled sentiment die cuts, I almost called it good, but the more I looked at it, the more it felt like I needed just one more element of that metallic rose gold. One of my favorite ways to accent a focal point is to add a rectangular frame around the edge of my card front, and the Fine Frames Cover Die creates perfectly delicate accent frames that fit so many different styles of card. I die cut the Fine Frames Cover Die from some glittery cardstock in a shade almost identical to the rose gold foil. I adhered one around the blended edge of my card front using some liquid adhesive. The rose gold foil, rose gold splatters, and rose gold frame contrast so beautifully with the dark teal background!

My second card is a light and airy version of the same color scheme used before. I know that the new Swamp Buttercup is probably meant to be done in shades of yellow, but I was in “rose gold mode,” so I took some artistic license and blended the flowers using the muted pinks of the Woodland Escape Fresh Dye Ink collection. I blended the leaves using Lagoon and Emerald inks, lightly blending a touch of the darkest shade from the Woodland Escape quartet on the edge of the foliage to add extra dimension and interest. I die cut the finished floral bouquet using the coordinating die.

For the background, I die cut the new Rattan Stripes die from two A2 panels of pale peach cardstock, rotating it 90* the second time to create a plaid pattern. I adhered them both to a white A2 card front using liquid adhesive around the edges. The pale peach cardstock creates such a subtle background, but with tons of texture to keep things interesting. I added the die cut stenciled bouquet to the plaid card front using foam tape.

For the greeting, I used the Sweet Sentiments dies to die cut a glittery greeting. I die cut the solid background piece from some heavyweight vellum, then die cut the detail layer once from plain white cardstock and once from the same glittery rose gold cardstock used on the previous card. I adhered it to the card front, nestling it amongst the flowers with some dots of liquid adhesive. The final touch was to add a few peachy gems for some sparkle.

Well, that’s all for my projects today! Now for some fun giveaway information:

$300 in total prizes! To celebrate this release, Altenew is giving away a *$100 gift certificate to 1 lucky winner and a $20 gift certificate to 10 winners! Please leave a comment on the Altenew Card Blog and/or each designer’s blog post on the blog hop list below by 02/07/2023 for a chance to win. Altenew will draw 11 random winners from the comments left on each stop of this blog hop and announce the winners on the Altenew Winners Page on 02/08/2023.
*The winner of the $100 gift certificate will be chosen from comments left on the Altenew blog.

Here’s the full hop list:

You are invited to the Inlinkz link party!

Click here to enter

Thanks so much for stopping by today, and happy hopping!

Filed Under: altenew Tagged With: delicate floral motif, fine frames cover die, hot foil, rattan stripes, swamp buttercup, sweet sentiments, versatile greetings

Primary Sidebar

  • Facebook
  • Instagram
  • Pinterest
  • YouTube

Favorite Shops

Secondary Sidebar

Subscribe

Enter your email address to subscribe to this blog and receive notifications of new posts by email.

Instagram
Something is wrong.
Instagram token error.
Follow
Load More

Archives

Tags

3D embossing folder alcohol markers better press birthday birthday card blog hop card kit christmas christmas card christmas tag colored pencil copic copic coloring Daniel Smith die cutting embossing folder embroidery felt giveaway holiday holiday card hot foil ink blending karin brushmarker pro layered stencil masculine my monthly hero new release no line coloring no line watercolor OLO marker olo markers original illustration pawsitively saturated rainbow shaker card slimline stamping stamptember stencil thank you thinking of you valentine's day video watercolor

Popular Posts

Simon Says Stamp Joy For You Blog Hop- Day 1!
Simon Says Stamp Joy For You Release-Now Available!
Frozen Fractals All Around with New Simon Says Stamp Joy For You Release!
Shaped Holiday Shaker Card with New Simon Says Stamp Jolly Season Card Kit of the Month!
Holiday Postage with New Simon Says Stamp!
Simon Says Stamp Glory to the Newborn King Holiday Kit-Part II!
Pinkfresh Studio 5th Birthday!
Altenew Build A Flower: Fuchsia Blog Hop+Giveway!
Holiday Joy in Pink and Green with New Simon Says Stamp DieCember!
Honey Bee Stamps September Release Blog Hop!

Disclosure

Some affiliate links are used in my posts. This means that, should you click on one of my links and purchase something from that company, I will receive a small portion of the sale at no extra cost to you. I use the money earned from these sales to help maintain my blog. I so appreciate you visiting and, if you do choose to use one of my affiliate links, thank you so much for your support!
Copyright © 2026 ·Brunch Pro Theme · Genesis Framework by StudioPress · WordPress · Log in
Loading Comments...