• Skip to main content
  • Skip to primary sidebar
  • Skip to secondary sidebar

Sixth Street Sundries

Emily Midgett

  • Home
  • About Me
  • Contact
  • OLO Marker Color Swatch Chart
  • Shop

vintage holiday

VIDEO: Monochromatic Iridescent Christmas Tags with Simon Says Stamp!

October 24, 2024

This post was sponsored by Simon Says Stamp. Thanks, Simon!

Hi friends! I have some inspiration to share with you today using a lovely and serene hunter green color palette today, featuring lots of gorgeous new botanical holiday goodies from the Simon Says Stamp Sweet Wishes release! THIS post featured some super modern and vibrant holiday cards, but today I’ve switched things up to create these peaceful, nature-inspired tags with tons of shimmer and shine. The juxtaposition of differing styles that still scream “Christmas” never fails to fascinate me. I have a video to show you how I created two holiday tags from one large embossed image, so let’s get started with the details!

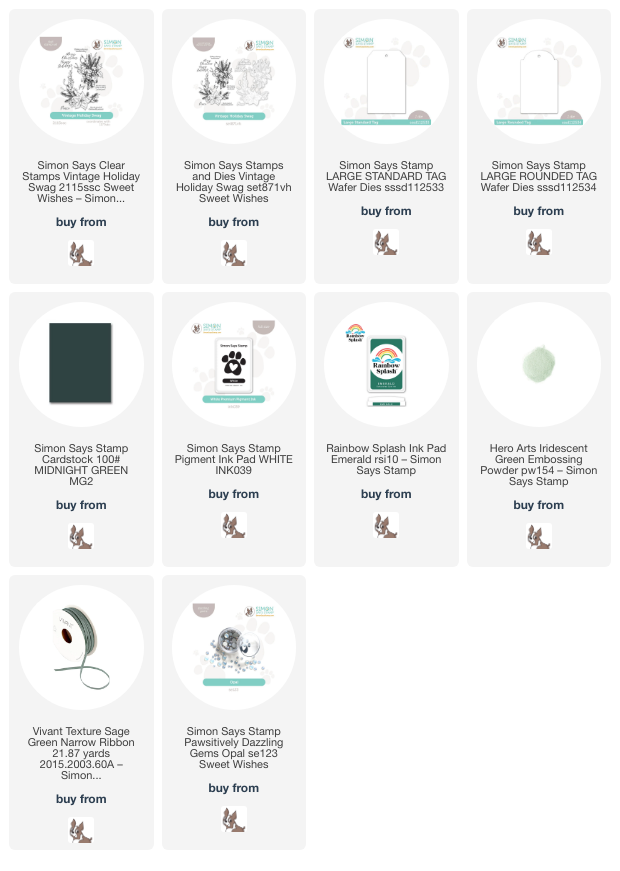
*I have linked all of the products used at the bottom of the post for your convenience using affiliate links. Thank you for shopping with my links! I truly appreciate your support for my work!*

I never tire of the serenity that a deep, lush green provides. I am loving how dramatic hunter green is when used to “color drench” a room, creating a moody and calming space, bringing the peace of the outdoors inside your home. I wanted to channel that peace with my projects today, bringing the peace and calm during those reflective moments that Christmas can bring amidst the chaos of the day. For my tag set, I took advantage of the beautifully detailed and overwhelmingly peaceful imagery in the new Vintage Holiday Swag stamp and die set. I find myself wanting to create handmade tags to go along with holiday gifts, but I struggle to justify the time spent on something that will be thrown away with the wrapping paper. Well, I’ve found that large floral images and some shimmering embossing powder are the answer to this conundrum! Watch the quick video on how I created this pair of pretty tags below or HERE on YouTube:

In case you can’t watch the video, I will give you a quick rundown of the process. I started by die cutting the Large Standard Tag and the Large Rounded Tag two times each from Simon Says Stamp’s Midnight Green cardstock. My die cutting plate is well-loved and so makes the backs of my die cuts look less-than-lovely, and to make sure that both sides of my tags are nice and smooth, I adhere the two unattractive sides together, creating a smooth, clean surface on both sides of the tag. I used a blending brush to blend Emerald Rainbow Splash Ink on the bottom corners of each of the tags to add a bit of contrast and dimension behind my die cuts.

To embellish my tags, I took advantage of the large size of the floral arrangements in the beautiful new Vintage Holiday Swag set. I began by stamping one of the large images and several sentiments onto some more Midnight Green cardstock using white pigment ink, then added some Iridescent Green embossing powder over the top. The white pigment ink helps the semi-transparent embossing powder pop beautifully from the deep green cardstock, and the details on these super intricate images show up magnificently! I cut the image in half with my trimmer and added them to the tag fronts with some foam squares, embellishing both tags with some Opal Pawsitively Dazzling Gems and some lovely green ribbon. On the back, I wrote a simple “to” and “from” using a silver paint pen!

Well, that’s all for my project today! I love creating simple tags to add that extra special touch to my wrapped holiday gifts, and this solution of using one image as a “two-fer” really cuts down on the amount of time while not cutting down on the elegance. Thanks so much for stopping by today, and have a marvelous day!
Filed Under: simon says stamp Tagged With: christmas card, christmas tag, holiday card, large rounded tag, large standard tag, vintage holiday

Honey Bee Stamps Vintage Holiday Release!

October 14, 2021

Hi there! I’m so excited to be sharing some of my projects created with the new Honey Bee Stamps Vintage Holiday release! It’s a giant release filled with an abundance of new products in such a wide variety of styles that you are sure to find several things that you love! I wish I’d had time to make more projects, but three will have to do for today. Let’s get started with the details! (Affiliate links used where possible. Thank you for your support!)

This first card features the absolutely stunning new Fancy Flakes cover plate die set. The detail in each individual die is amazing in it’s own right, but together… serious wow-factor. I began by die cutting the base layer die from some pale aqua cardstock, then ran it through my die cut machine again using the pierced layer. The detail, the grace…. it’s just incredible. I backed the detailed die cut layer with some white glitter cardstock.

For the die cut greeting, I used the new Noel Honey Cuts from some heavyweight vellum and the same icy blue cardstock, adhering them together with liquid adhesive.

I added the remainder of the greeting using the new Inside Holiday Sentiments stamp set. I stamped the greeting on the same icy blue cardstock using some gray pigment ink, then covered it with pearlescent white embossing powder and heated it to create a pearlescent charcoal. I prefer this pearly charcoal to black embossing on a light, bright card like this one. It is a bit lighter and less stark contrast than the black might be. I popped up the sentiment pieces on the card front using foam adhesive. So much dimension, so many textures on this card… simple, but elegant!

My next two cards are an homage to cheery, bright red juxtaposed with crisp white and black. I don’t use red very much throughout the year, but at Christmas, I can’t seem to help myself from using vibrant red and bright white. The vintage feel throughout the release is modernized a bit with the crisp, bright colors . It’s amazing what a difference color choices make on your cards! These same cards would have a completely different feel on Kraft paper.

My first card features the beautiful new Merry Mail stamps and coordinating Honey Cuts. I began by stamping several of the images on some white cardstock using the Honey Bee Stamps Intense Black, which is Copic-friendly. I used my Copic markers to color the images in a red, white, green, and cool gray color scheme.

Once I had finished coloring all of the images, I die cut a frame from the Hexagon Solid Stack dies from some coordinating cherry red cardstock. I also stamped a greeting from the Tag You’re It: Holidays stamp set on a small rectangle of white cardstock, again using black ink.

For the card base, I used the beautiful new Falling Snow Background stamp. I used Honey Bee’s Embossing Ink and some holographic glitter to create a beautifully sparkling, subtle background, on which I adhered the die cuts and sentiment using foam adhesive. The final touch was to add a few sparkling gems from the Unicorn Rhinestone pack.

My final project features the fabulous new Sleigh Bells Ring stamp set. This set features an amazing vintage sleigh, stamped in several layers of solid and detail, as well as various accoutrements to decorate it! I began by stamping the main part of the sleigh using some colorful shades of cherry red and darker maroon red ink for the woodgrain. I also stamped several of the accompanying images using the Intense Black ink from Honey Bee. I colored the outline images using some coordinating shades of Copic markers, adding in a touch of bright green for the foliage. I die cut the finished images using the coordinating Honey Cuts.

I die cut the “Christmas” die cut layers using the new Bitty Buzzwords Holidays from some white cardstock, with the top layer cut from some silver glitter paper. I stamped the other part of the greeting from the Bitty Buzzwords: Holiday Stamps on a strip of white cardstock.

I used the Fancy Flakes Pierced Layer to add some subtle texture to the white background, then adhered all of the die cut pieces and sentiment pieces using a mixture of foam and liquid adhesive. The final touch was a few more gemstones from the Unicorn Rhinestone pack.

Well, that’s all for today’s projects! I highly encourage you to check out the entire Vintage Holiday release. It’s absolutely smashing. I could easily buy my weight in holiday stamps and dies each year… and this is one of my most favorite releases that Honey Bee has ever done. I hope you will take a peek and find something that you like!

Filed Under: holiday card, Honey Bee Stamps Tagged With: bitty buzzwords, fancy flakes, holiday card, merry mail, noel, sleigh bells ring, vintage holiday

Primary Sidebar

  • Facebook
  • Instagram
  • Pinterest
  • YouTube

Favorite Shops

Secondary Sidebar

Subscribe

Enter your email address to subscribe to this blog and receive notifications of new posts by email.

Instagram
Something is wrong.
Instagram token error.
Follow
Load More

Archives

Tags

3D embossing folder alcohol markers better press birthday birthday card blog hop card kit christmas christmas card christmas tag colored pencil copic copic coloring Daniel Smith die cutting embossing folder embroidery felt giveaway holiday holiday card hot foil ink blending karin brushmarker pro layered stencil masculine my monthly hero new release no line coloring no line watercolor OLO marker olo markers original illustration pawsitively saturated rainbow shaker card slimline stamping stamptember stencil thank you thinking of you valentine's day video watercolor

Popular Posts

Simon Says Stamp October 2026 Card Kit of the Month: Homespun Gratitude!
Altenew Craft A Flower: Poppy Blog Hop+Giveaway!
Honey Bee Stamps Cheerful Love Blog Hop!
Autumn Legs with Colorado Craft Company and Catherine Pooler!
Simon Says Stamp Cozy & Bright Inspiration, Part Two!
February 2018 My Monthly Hero Blog Hop!
The Ton Anniversary Release- Day 2
Sunflower Home Decor with Simon Says Stamp!
Simon Says Stamp STAMPtember Surprise: Boo Bundle Halloween Card Kit!
Hero Arts Spring 2020 Catalog Release Blog Hop+Giveaway!

Disclosure

Some affiliate links are used in my posts. This means that, should you click on one of my links and purchase something from that company, I will receive a small portion of the sale at no extra cost to you. I use the money earned from these sales to help maintain my blog. I so appreciate you visiting and, if you do choose to use one of my affiliate links, thank you so much for your support!
Copyright © 2026 ·Brunch Pro Theme · Genesis Framework by StudioPress · WordPress · Log in
Loading Comments...