• Skip to main content
  • Skip to primary sidebar
  • Skip to secondary sidebar

Sixth Street Sundries

Emily Midgett

  • Home
  • About Me
  • Contact
  • OLO Marker Color Swatch Chart
  • Shop

large rounded tag

Fun with Felt-Gift Bag and Tag!

February 7, 2025

This post was sponsored by Simon Says Stamp. Thanks, Simon!

Hi friends! I am starting a new series here on my blog: Fun with Felt! Once a month, I am planning to share projects created using all of the gorgeous felt that I’ve acquired over the last few months. I have been practicing embroidery after long contemplation (the struggle is real on picking up new hobbies, friends. I seem to enjoy the supply-purchasing portion of the new hobby, but not actually implementing them!), and now my goal is to incorporate these new techniques and supplies into my stamping! I started out my crafting journey a long time ago as a general non-discriminatory crafter, creating everything from jewelry to home decor, then eventually found my way into cards, but after 11~ years of focusing on cardmaking, I am starting to get, well, bored. So to keep things interesting and fun, I am going to try new ways to integrate all of my hobbies and interests and hope that you won’t mind my sharing them here!

For Christmas, I received a large set of acrylic paint markers, and I’ve been itching to try them out. I have also been collecting small fabric items that I could customize with my stamping and felt supplies, including this canvas bag that I found while shopping, perfect for filling with treats or gifts. To customize the bag, I pulled some stamps and dies from my Simon Says Stamp bins that would work to create this little gift set, so let’s get started with the details!

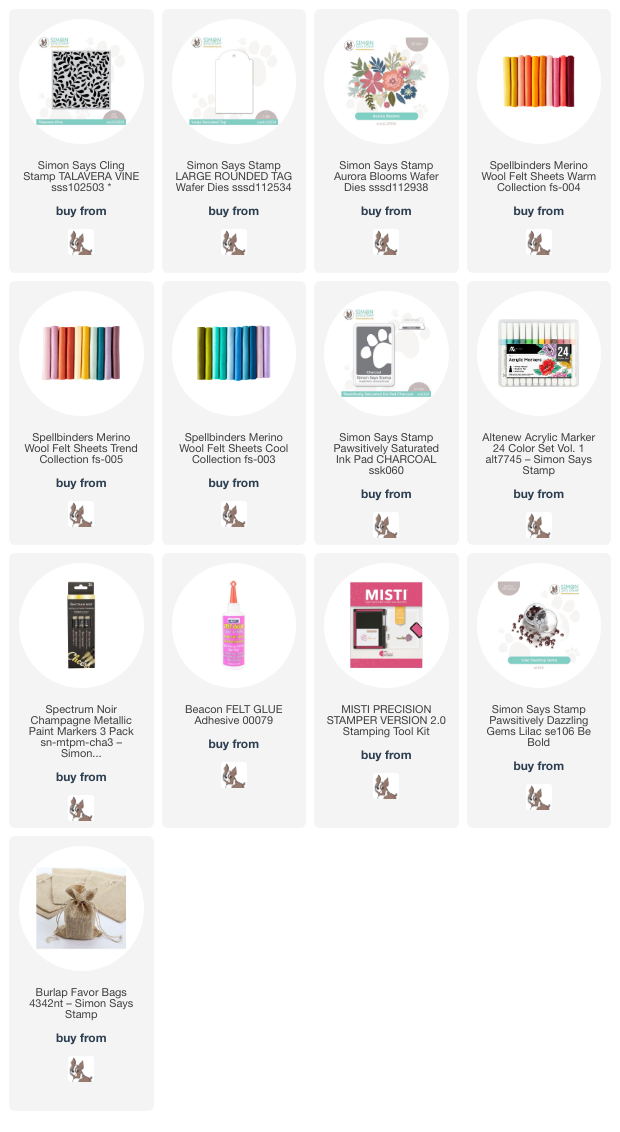
*I have gathered links to all of the products used at the bottom of the post for your convenience, using affiliate links. Thank you for shopping with my links! I truly appreciate your support for my work!*

I love to take solid stamped images and customize them, typically using white pigment ink or no-line coloring ink to stamp them, then using either watercolors or colored pencils to add lots of details and definition to these solid images. The Talvera Vine cling stamp is a lovely neutral pattern, excellent for use as a backdrop for detailed floral images or as a focal point, as I’ve done here.

To create the pretty pattern on the canvas bag, I stamped the Talvera Vine cling stamp onto the inexpensive canvas bag, keeping everything in place with my MISTI. As you can see in the photo, perfect stamping was not necessary for this project and not very attainable due to the texture on the canvas bag; the end goal was to make sure that there was more of a “guide” for my paint markers to create the pattern! The magnets on the MISTI were very helpful in holding the bag in place and to ensure that my pattern was straight.

After stamping the image on the bag, I used a single deep green acrylic paint marker (the Altenew Acrylic Paint Markers are excellent and I have hopes that they will release more colors to the collection soon!) to color over the stamped images. This deep green had excellent coverage over the Charcoal Pawsitively Saturated Ink image. After I had colored all of the leaves and outlined the vines themselves, I added a few swipes of a champagne paint marker to create the vines on the leaves, adding a touch more definition and shape to the images. I also dotted some berries on the bare spots, creating a pretty, simple patterned bag that is neutral enough to work with lots of different floral additions!

I’ve really been enjoying creating projects that have a bit more “longevity” to them than typical cards; I have fears that the cards on which I work for hours will simply get tossed in the trash without a care as to how meticulously they were crafted, so I have been enjoying adding felt to my repertoire of mediums over the last few months. I created this decorative “tag” to add to my painted gift bag that can be repurposed as a tag on a backpack, purse, or even as a bookmark if one left off the gems! Because the Talvera Vine stamp is such a neutral botanical background, I thought it would look lovely with some vibrant flowers. I die cut the Large Rounded Tag die from some ivory felt, then created a few mauve and maroon blooms using the Aurora Blooms dies. I arranged the blooms and some foliage on the felt tag die cut, adhering everything with felt glue, then added some champagne glitter felt centers and Lilac Pawsitively Dazzling Gems for sparkle!

Well, that’s all for my projects today. I am so enjoying stepping outside of my papercrafting zone and creating projects that are a bit more long-lasting. Thanks so much for stopping by today, and have a marvelous day!
Filed Under: simon says stamp Tagged With: altenew acrylic markers, aurora blooms, canvas bag, embroidery, felt, fun with felt, gift bag, large rounded tag, merino felt, painting, sewing, talavera vine

VIDEO: Monochromatic Iridescent Christmas Tags with Simon Says Stamp!

October 24, 2024

This post was sponsored by Simon Says Stamp. Thanks, Simon!

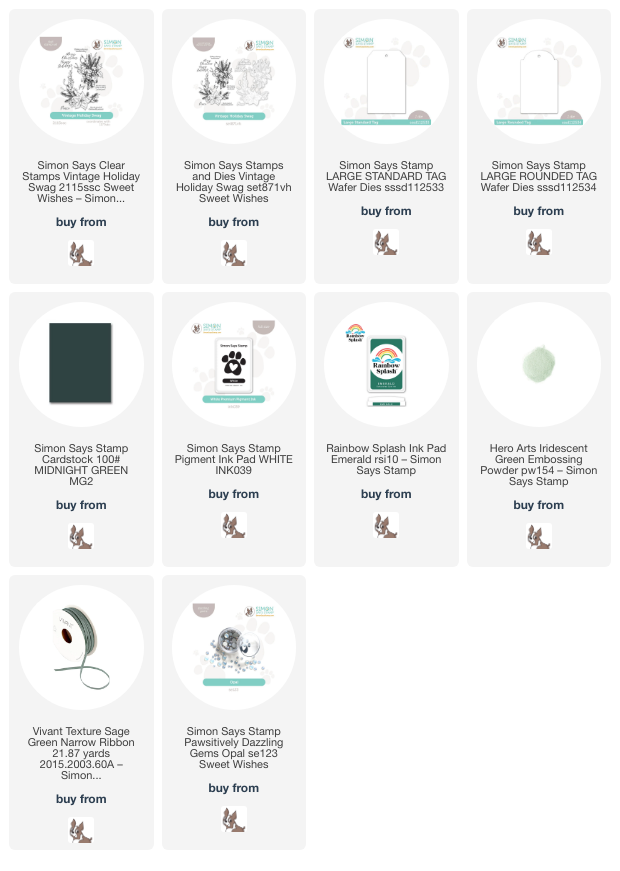
Hi friends! I have some inspiration to share with you today using a lovely and serene hunter green color palette today, featuring lots of gorgeous new botanical holiday goodies from the Simon Says Stamp Sweet Wishes release! THIS post featured some super modern and vibrant holiday cards, but today I’ve switched things up to create these peaceful, nature-inspired tags with tons of shimmer and shine. The juxtaposition of differing styles that still scream “Christmas” never fails to fascinate me. I have a video to show you how I created two holiday tags from one large embossed image, so let’s get started with the details!

*I have linked all of the products used at the bottom of the post for your convenience using affiliate links. Thank you for shopping with my links! I truly appreciate your support for my work!*

I never tire of the serenity that a deep, lush green provides. I am loving how dramatic hunter green is when used to “color drench” a room, creating a moody and calming space, bringing the peace of the outdoors inside your home. I wanted to channel that peace with my projects today, bringing the peace and calm during those reflective moments that Christmas can bring amidst the chaos of the day. For my tag set, I took advantage of the beautifully detailed and overwhelmingly peaceful imagery in the new Vintage Holiday Swag stamp and die set. I find myself wanting to create handmade tags to go along with holiday gifts, but I struggle to justify the time spent on something that will be thrown away with the wrapping paper. Well, I’ve found that large floral images and some shimmering embossing powder are the answer to this conundrum! Watch the quick video on how I created this pair of pretty tags below or HERE on YouTube:

In case you can’t watch the video, I will give you a quick rundown of the process. I started by die cutting the Large Standard Tag and the Large Rounded Tag two times each from Simon Says Stamp’s Midnight Green cardstock. My die cutting plate is well-loved and so makes the backs of my die cuts look less-than-lovely, and to make sure that both sides of my tags are nice and smooth, I adhere the two unattractive sides together, creating a smooth, clean surface on both sides of the tag. I used a blending brush to blend Emerald Rainbow Splash Ink on the bottom corners of each of the tags to add a bit of contrast and dimension behind my die cuts.

To embellish my tags, I took advantage of the large size of the floral arrangements in the beautiful new Vintage Holiday Swag set. I began by stamping one of the large images and several sentiments onto some more Midnight Green cardstock using white pigment ink, then added some Iridescent Green embossing powder over the top. The white pigment ink helps the semi-transparent embossing powder pop beautifully from the deep green cardstock, and the details on these super intricate images show up magnificently! I cut the image in half with my trimmer and added them to the tag fronts with some foam squares, embellishing both tags with some Opal Pawsitively Dazzling Gems and some lovely green ribbon. On the back, I wrote a simple “to” and “from” using a silver paint pen!

Well, that’s all for my project today! I love creating simple tags to add that extra special touch to my wrapped holiday gifts, and this solution of using one image as a “two-fer” really cuts down on the amount of time while not cutting down on the elegance. Thanks so much for stopping by today, and have a marvelous day!

Filed Under: simon says stamp Tagged With: christmas card, christmas tag, holiday card, large rounded tag, large standard tag, vintage holiday

Primary Sidebar

  • Facebook
  • Instagram
  • Pinterest
  • YouTube

Favorite Shops

Secondary Sidebar

Subscribe

Enter your email address to subscribe to this blog and receive notifications of new posts by email.

Instagram
Something is wrong.
Instagram token error.
Follow
Load More

Archives

Tags

3D embossing folder alcohol markers better press birthday birthday card blog hop card kit christmas christmas card christmas tag colored pencil copic copic coloring Daniel Smith die cutting embossing folder embroidery felt giveaway holiday holiday card hot foil ink blending karin brushmarker pro layered stencil masculine my monthly hero new release no line coloring no line watercolor OLO marker olo markers original illustration pawsitively saturated rainbow shaker card slimline stamping stamptember stencil thank you thinking of you valentine's day video watercolor

Popular Posts

Simon Says Stamp October 2026 Card Kit of the Month: Homespun Gratitude!
Honey Bee Stamps Cheerful Love Blog Hop!
Altenew Craft A Flower: Poppy Blog Hop+Giveaway!
Autumn Legs with Colorado Craft Company and Catherine Pooler!
Simon Says Stamp Cozy & Bright Inspiration, Part Two!
February 2018 My Monthly Hero Blog Hop!
The Ton Anniversary Release- Day 2
Sunflower Home Decor with Simon Says Stamp!
Hero Arts Spring 2020 Catalog Release Blog Hop+Giveaway!
Altenew Standalone Die Blog Hop+Giveaway!

Disclosure

Some affiliate links are used in my posts. This means that, should you click on one of my links and purchase something from that company, I will receive a small portion of the sale at no extra cost to you. I use the money earned from these sales to help maintain my blog. I so appreciate you visiting and, if you do choose to use one of my affiliate links, thank you so much for your support!
Copyright © 2026 ·Brunch Pro Theme · Genesis Framework by StudioPress · WordPress · Log in
Loading Comments...