• Skip to main content
  • Skip to primary sidebar
  • Skip to secondary sidebar

Sixth Street Sundries

Emily Midgett

  • Home
  • About Me
  • Contact
  • OLO Marker Color Swatch Chart
  • Shop

windswept leaves

Aqua Thinking of You with Simon Says Stamp!

February 20, 2026

This post was sponsored by Simon Says Stamp. Thanks, Simon! *I have gathered links to all of the products used at the bottom of the post for your convenience, using affiliate links at no extra cost to you. Thank you for shopping with my links! I truly appreciate your support for my work!*

Hi friends! I am back today with a monochromatic sympathy card that takes advantage of the detailed textures from the new Fancy Rose Bouquet embossing folder from the Heart to Heart Release  from Simon Says Stamp (click HERE to check out the entire release!). Whenever I am creating a monochromatic project, my secret to keeping things interesting is to add as much texture and visual interest as possible to ensure that the details of the individual elements do not get lost in the single color palette. There are several ways to achieve this, especially with embossing folders, but one of my favorite ways to add interest and texture is to add shading to embossed images while still maintaining the monochromatic color palette. Let’s get started with the details on my project!

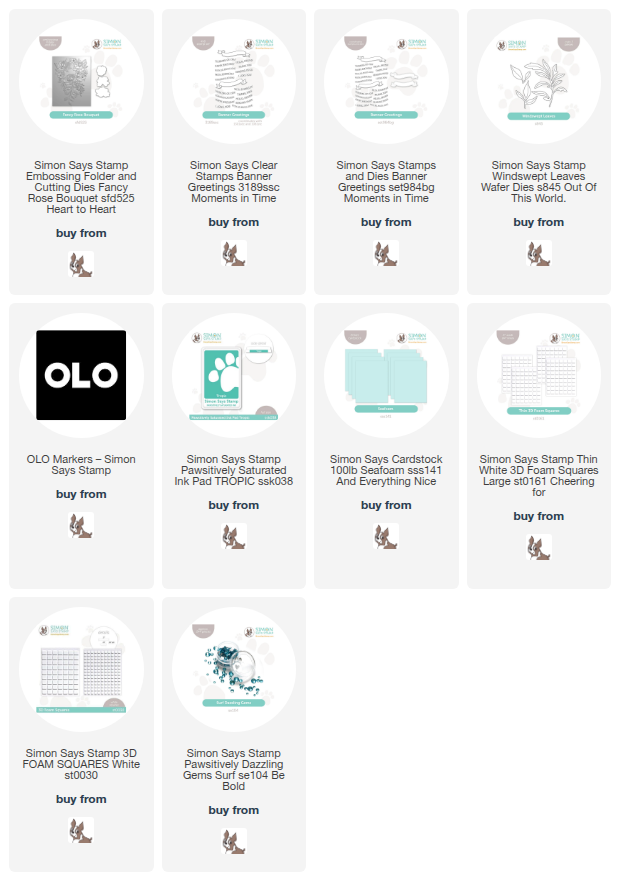
I began my project by embossing the new Fancy Rose Bouquet onto an A2 panel of Simon Says Stamp Seafoam cardstock. This soft aqua blue cardstock is absolutely dreamy; definitely one of my favorite cardstock colors from Simon Says Stamp! I selected some coordinating pale aqua markers from my OLO Marker stash, as well as the Zero marker (similar to a colorless blender) and used these markers to add some shading and details to the embossed images. I also die cut and embossed a few individual roses from the Fancy Rose Bouquet, as well as some standalone greenery using the Windswept Leaves die set, also using Seafoam cardstock, to which I added marker shading. The Zero marker helps to soften the edges of those harsh lines and still allows the color of the cardstock to show through.

For the greeting, I kept things simple, stamping a delicate banner from the Banner Greetings stamp set using Tropic Pawsitively Saturated Ink and a versatile “thinking of you” sentiment from that set. I selected an ink color that was quite a bit darker than the alcohol marker shadows that I added to the embossed flowers to ensure that it would pop from the Seafoam background.

Once I had all of the components stamped, colored, and die cut, I used thin and thick foam adhesive squares to add all of the die cuts to the embossed and colored card front, arranging the standalone flowers and greenery around the banner, tucking some behind the banner while others were spilling over the top. For a final touch, I added some Surf Pawsitively Dazzling Gems to add a bit of sparkle!

Well, that’s all for my project today. I never tire of monochromatic projects; they’re so luxurious and the details are so fun to put together!! Thanks so much for stopping by today, and have a marvelous day!
Filed Under: simon says stamp, Uncategorized Tagged With: banner greetings, die cutting, fancy rose bouquet, no line coloring, olo markers, sympathy card, thinking of you, windswept leaves

Blog Party to Celebrate Simon Says Stamp STAMPtember + Free Gift With Purchase!

September 2, 2025

This post was sponsored by Simon Says Stamp. Thanks, Simon!

Hi friends! Happy STAMPtember! Today, we are having a huge blog party to share tons of inspiration using the fabulous new goodies from the new Simon Says Stamp STAMPtember release. If you’re new to STAMPtember, every year throughout the month of September, Simon Says Stamp celebrates our wonderful hobby by partnering with many of our favorite companies to bring you exclusive, limited edition stamp sets, as well as contests, prizes, special promotions, announcements, and more surprises! We kicked off the STAMPtember celebration with an enormous Simon Says Stamp-branded release (which you can check out HERE). I shared a project in THIS blog post that features my newest illustration, called Sunflower Dreams, but I thought for today’s blog party, I would share a celebration of autumn with some of the beautiful new autumnal products that were released with this STAMPtember release. Let’s get started with the details!

*I have gathered links to all of the products used at the bottom of the post for your convenience, using affiliate links. Thank you for shopping with my links! I truly appreciate your support for my work!*

To begin, I die cut and embossed a mum from the new Magnificent Mums Embossing Folder using white cardstock, as well as the new Autumn Leaf Branch. I blended Pawsitively Saturated Inks in shades of Cabernet, Terracotta, and Cheeky using blending brushes, creating a unique peach and maroon color palette. I find it challenging to work with the typical red, yellow, and orange autumn colors, so in order to make the autumnal imagery fit my own personal tastes, I try to select colors within the same families but with a bit of a twist. Instead of the typical red, orange, and yellow, I chose maroon, burnt orange, and peachy pink, blending the colors on the white cardstock to create these pretty autumn images.

To accent my embossed and blended die cuts, I also die cut the oak leaves from the new Acorn Bundle from some shimmery chocolate brown cardstock, as well as a few more Autumn Leaf Branch leaves from some shining deep rose colored mirror foil cardstock. For the background, I ran a panel of super pale peach cardstock through my die cutting machine using the previously-released Windswept Leaves embossing folder, which I splattered with some metallic copper watercolors to add additional texture.

For the greeting, I die cut the delicately detailed new Nuvelli Script With Sympathy from some chocolate brown glitter cardstock. I also trimmed a strip of matte pink foil cardstock down upon which to build my bouquet around the detailed sentiment die cut. This strip has the benefit of both stabilizing the super delicate sentiment die cut while also providing a “ground” for the bouquet, as well as a blank canvas for the main focal point images on the textured background. I popped up the strip with some thin foam squares, adhered the sentiment die cut on the strip with liquid adhesive, then began to build my floral arrangement. I adhered the different die cut pieces with a variety of adhesive heights, using double and single layers of foam adhesive as well as liquid adhesive for maximum dimension and interest. Finally, I finished the project off with some Peachy Pawsitively Dazzling Gems to add some subtle sparkle to this multi-textured project.

Well, that’s all for my project today! To celebrate the start of this month-long homage to stamping, Simon Says Stamp is having a scavenger hunt throughout today’s blog party. Each participant in the blog party has a unique promotional code so that you can hop through each blog, decide which promotion suits you best, and take advantage of the fabulous freebies available! You can follow the instructions in the graphic at the top of my blog to receive the fabulous Fancy Birthday die set as a free gift with purchase.

You can see all of the participants in the blog party HERE on the Simon Says Stamp Blog. Be sure to check them all out so that you can figure out which free gift is your favorite!!

Thanks so much for stopping by today, and Happy STAMPtember!! Let the fun begin!

Filed Under: simon says stamp Tagged With: 3D embossing folder, acorn bundle, autumn, die cutting, ink blending, magnificent mums, windswept leaves, with sympathy

Ceramic Tile Inspiration with Simon Says Stamp!

August 30, 2025

This post was sponsored by Simon Says Stamp. Thanks, Simon!

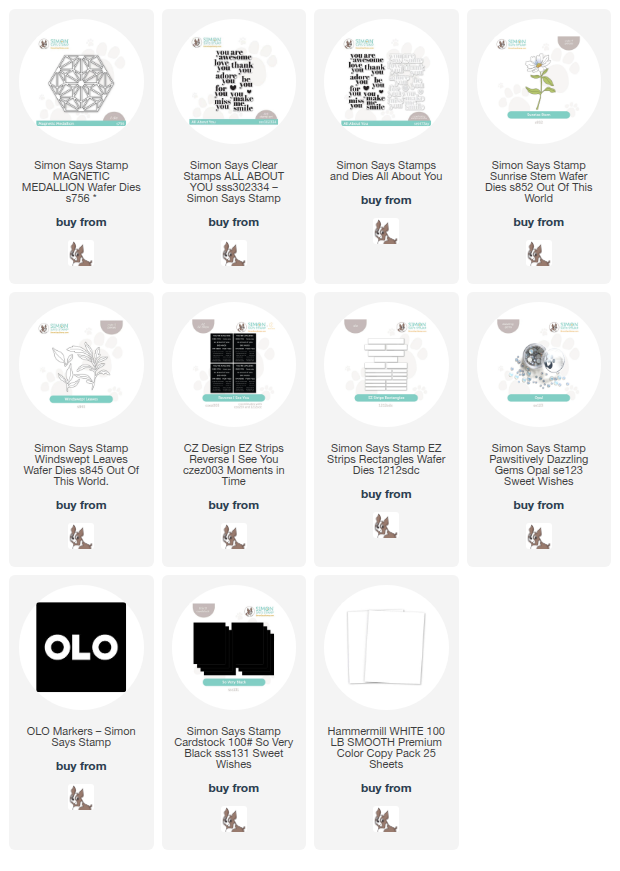
Hi friends! So my husband and I have been working on his grandfather’s house, adding on and remodeling to make it fit our (rather large) family. During my research into various tiles and color palettes, I have seen the most beautiful star-patterned tiles used for bathroom, kitchen, foyer, and laundry room floors, and as I was perusing my dies from Simon Says Stamp, I found the gorgeous Magnetic Medallion and immediately was reminded of the pattern on these gorgeous tiles. I decided to make a bold, black and white card featuring this beautiful die to create an intricate and daring background. Let’s get started with the details!

*I have gathered links to all of the products used at the bottom of the post for your convenience, using affiliate links. Thank you for shopping with my links! I truly appreciate your support for my work!*

To begin, I die cut several Magnetic Medallion images from plain white cardstock. After I had as many die cuts as I could get from one piece of A2 cardstock, I began arranging them on my panel of plain black cardstock, starting with one whole medallion die cut towards the center of the A2 card front, adhered with liquid adhesive. I then began placing the rest of the medallion die cuts around this central die cut, making sure that each die cut nestled snugly against the previous, until I had the entire card front covered in as many full die cuts as would fit. I trimmed off any excess and used those excess bits to fill in any gaps around the edges. I did have to cut a few more partial medallions from white scraps to complete the entirety of the panel, but all in all, I feel like this created a super striking patterned panel that is totally trendy, at least from a home decor perspective!

After I had finished creating the background, I wanted to add some botanicals to the card, juxtaposing the bold, straight lines of the medallion background with some softer, more naturally curved lines. I die cut the Sunrise Stem and Windswept Leaves dies from some more plain white cardstock, then used my OLO markers to add vibrant lime green to the leaves and pale yellow to the center of the flowers only, leaving the flowers themselves completely white. To help add a bit more definition and interest to these plain white blooms, I adhered the two layers of the flowers together with thin foam adhesive to add extra dimension.

For the greeting, I heat embossed a sentiment from All About You with white embossing powder on more black cardstock, using the coordinating die to cut the finished sentiment out. I enhanced the bold greeting with a delicate sentiment strip from the Reverse I See You EZ Strips, cut using the EZ Strips Rectangles (how super quick and easy do those sentiment cards and the coordinating die make it to finish off a card?!). I arranged the flowers around the sentiment pieces, tucking the blooms amongst the greeting and adding the vibrant lime green foliage beneath and around the greetings. Finally, I finished everything off with some sparkling Opal Pawsitively Dazzling Gems, which is one of my favorite ways to add subtle shimmer to a bold card like this one.

Well, that’s all for my project today! Prepare yourselves… STAMPtember is coming!! I have *so much* to share with you! It’s going to be amazing! Thanks so much for stopping by today, and have a marvelous day!

Filed Under: simon says stamp Tagged With: die cutting, EZ strips rectangles, ez strips reverse i see you, magnetic medallion, olo markers, tile, windswept leaves

Embossed Pencil Florals with New Simon Says Stamp!

April 30, 2025

This post was sponsored by Simon Says Stamp. Thanks, Simon!

Hi friends! I am back with another floral project using new goodies from the You Are My Favorite Release. I shared THIS project during the blog hop using the spectacular new Fantastic Florals Embossing Folder, and while that project uses only the embossing folder, I knew that I wanted to allow those gorgeous die cut floral images to have their moment in the sun, as well! I love using my coloring mediums to color those deeply-embossed images; I feel like the addition of the super-detailed coloring makes them almost jump off of the card with their almost life-like qualities. Let’s get started with the details on my card!

*I have gathered links to all of the products used at the bottom of the post for your convenience, using affiliate links. Thank you for shopping with my links! I truly appreciate your support for my work!*

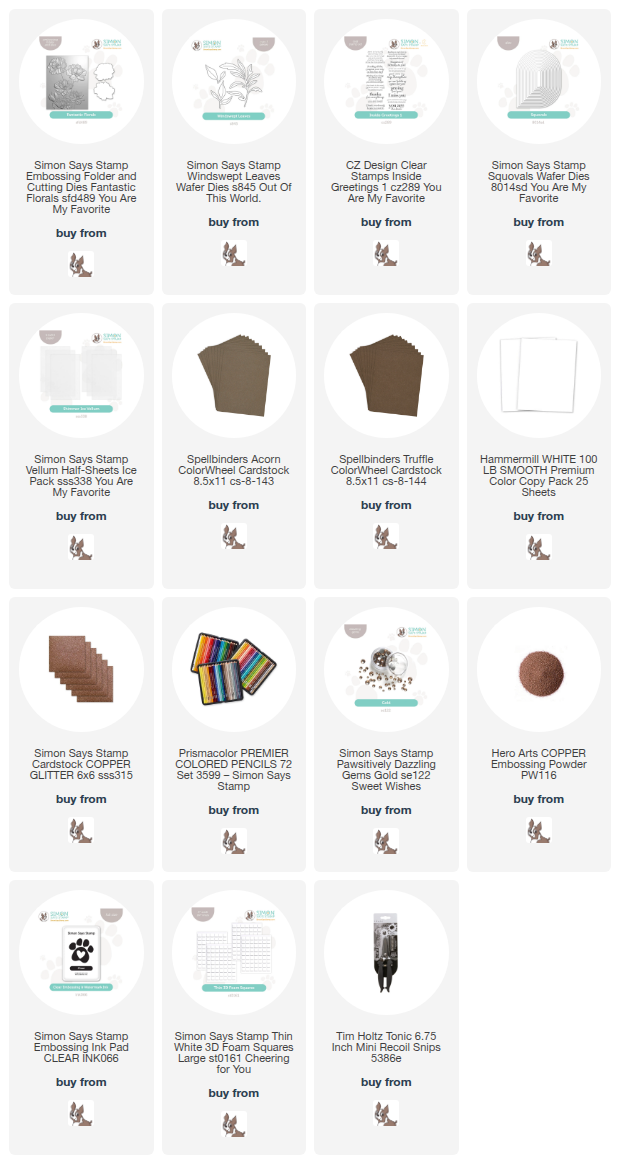
To begin, I die cut two of the blooms from the Fantastic Florals Embossing Folder product suite using white cardstock, then placed them in their coordinating spot in the embossing folder and ran it through my die cutting machine. I then used my favorite colored pencils to add vibrant bubblegum pink to the blooms, leaving the edges of the petals practically white to allow for maximum contrast and depth of shadows and light. I used a sparkling gel pen to add shimmery details to the floral stamens in the center, as well.

To ground my florals, I decided to die cut a piece of the new Simon Says Stamp Ice Vellum using the new Squovals Nested Dies, then ran it through my die cutting machine using the Fantastic Florals Embossing Folder to add some lovely, coordinating texture behind my meticulously-colored floral die cuts. I also die cut one of my favorite foliage sets, called Windswept Leaves, from Copper Glitter Cardstock, arranging the flowers and foliage off to the side of the textured vellum die cut and adhering with both liquid and foam adhesive squares for extra dimension. Once I had adhered the botanical pieces to the vellum panel, I flipped them all over and added liquid adhesive behind the solid die cut pieces to keep the visible vellum nice and clean, then adhered them to a chocolatey brown A2 panel of cardstock. Pink and brown are such a classic combination, in my opinion!

For the greeting, I heat embossed a sentiment from the new Inside Greetings 1 stamp set using Copper embossing powder on dark chocolate cardstock, allowing for maximum contrast between the metallic sentiment and the deep brown cardstock. I used my sharp scissors to fussy cut the sentiment, then used a double layer of thin foam adhesive squares to pop the sentiment up on my card front, nestling it amongst the flowers and foliage. Finally, I added some Gold Pawsitively Dazzling Gems to the card front to add a bit more sparkle and to fill in any blank spots on my floral arrangement.

Well, that’s all for my project today! I can’t believe that tomorrow is May 1 (it’s gonna be MAY-iykyk). This year is simultaneously flying by and moving at a glacial pace! It will be time to start designing holiday product soon… no joke! But for now, I will keep playing with pretty flowers and enjoying the sunshine. Thanks so much for stopping by today, and have a marvelous day!

Filed Under: simon says stamp Tagged With: 3D embossing folder, colored pencils, die cutting, fantastic florals, inside greetings 1, nesting dies, no line coloring, squovals, thank you card, windswept leaves

One Peony Panel, Two Cards!

August 30, 2023

This post was sponsored by Simon Says Stamp. Thanks, Simon!

Hi friends! I love a good patterned background stamp; don’t you? I especially love a background stamp like the Pretty Peonies Background Stamp, which gives you enough detail as to be able to use it on its own (like I did HERE) or to put your coloring skills to use like I did for today’s card. After taking the time to paint the image, I wanted to maximize the amount of projects that I could create with it and ended up with a pair of cards! Let’s get started with the details.

I began by stamping the Pretty Peonies Background Stamp onto some Fabriano Artistico Cold Press watercolor paper using black pigment ink and heat embossed with clear embossing powder. The black pigment ink picks up the smaller details beautifully, while the clear embossing powder makes the watercoloring super easy, creating little wells for each individual image so that the colors don’t spill into each other! I taped my embossed image down to my watercolor board, then used Karin Brushmarker Pro markers to watercolor the images. I like to scribble my watercolor markers onto a glass mat or ceramic palette, then pick up the color with a damp paintbrush. I find that this method (rather than putting the marker directly to the paper) helps me control the vibrancy of the color that is added to the images, allowing me to maximize the contrast and create shadows and depth on the images.

After I had finished painting the image, I trimmed it down to A2 size, then die cut the very center of the image using the Nested Domed Arches dies, creating a window within my floral panel. I backed this window with some clear acetate and added a frame of Black Foam Adhesive around the open window. I filled the shaker with an abundance of shimmering black and charcoal gems and sequins from my stash and backed the entire panel with a piece of plain black cardstock, highlighting the crisp black embossed lines.

Once I had filled my shaker window, I white embossed a greeting from Elegantly Modern Greetings onto some more black cardstock and die cut it with the coordinating die. (Side note-I love how detailed these dies are! So intricate and beautiful!) I popped it up over the window of the card front using more Black Foam Adhesive, then added a couple of sparkling black leaf sprigs, cut using Black Glitter Paper and the Windswept Leaves dies. So many fun details going on with this card, and those dramatic pops of black against the vivid pink peonies are just so beautiful!

My second project features the “leftover” watercolored peony die cut. I die cut another Nested Domed Arches die from some more Black Glitter Paper, creating a sparkling black frame around my pink peony die cut. I also die cut the Laurel Leaves Background Plate from some more black cardstock and adhered it to an A2 panel of black cardstock. This black-on-black adds just a hint of patterned texture to the background to keep things interesting behind the peonies! Because we have two different patterns going on this card front, that solid black glitter frame around the peonies acts as a bit of a visual buffer between the two patterns!

After popping up my arches die cuts on the textured black background using foam adhesive, I heat embossed another greeting from the Elegantly Modern Greetings set and popped both pieces up on the peony panel using foam adhesive. I added a few shimmering pink gems to finish things off.

This minimal color palette card features so many different textural elements and lots of height to keep things interesting!! I love when I can get two different cards from one watercoloring session. It makes it so easy to build up a stash of cards this way. Thanks so much for stopping by today, and have a marvelous day!

Filed Under: simon says stamp Tagged With: elegantly modern greetings, karin brushmarker pro, laurel leaves, nested domed arches, pretty peonies background, shaker card, watercolor, windswept leaves

  • Page 1
  • Page 2
  • Go to Next Page »

Primary Sidebar

  • Facebook
  • Instagram
  • Pinterest
  • YouTube

Favorite Shops

Secondary Sidebar

Subscribe

Enter your email address to subscribe to this blog and receive notifications of new posts by email.

Instagram
Something is wrong.
Instagram token error.
Follow
Load More

Archives

Tags

3D embossing folder alcohol markers better press birthday birthday card blog hop card kit christmas christmas card christmas tag colored pencil copic copic coloring Daniel Smith die cutting embossing folder embroidery felt giveaway holiday holiday card hot foil ink blending karin brushmarker pro layered stencil masculine my monthly hero new release no line coloring no line watercolor OLO marker olo markers original illustration pawsitively saturated rainbow shaker card slimline stamping stamptember stencil thank you thinking of you valentine's day video watercolor

Popular Posts

Simon Says Stamp October 2026 Card Kit of the Month: Homespun Gratitude!
Altenew Craft A Flower: Poppy Blog Hop+Giveaway!
Honey Bee Stamps Cheerful Love Blog Hop!
Simon Says Stamp Cozy & Bright Inspiration, Part Two!
February 2018 My Monthly Hero Blog Hop!
Simon Says Stamp STAMPtember Surprise: Boo Bundle Halloween Card Kit!
The Ton Anniversary Release- Day 2
Hero Arts Spring 2020 Catalog Release Blog Hop+Giveaway!
Altenew Standalone Die Blog Hop+Giveaway!
Autumn Legs with Colorado Craft Company and Catherine Pooler!

Disclosure

Some affiliate links are used in my posts. This means that, should you click on one of my links and purchase something from that company, I will receive a small portion of the sale at no extra cost to you. I use the money earned from these sales to help maintain my blog. I so appreciate you visiting and, if you do choose to use one of my affiliate links, thank you so much for your support!
Copyright © 2026 ·Brunch Pro Theme · Genesis Framework by StudioPress · WordPress · Log in
Loading Comments...