• Skip to main content
  • Skip to primary sidebar
  • Skip to secondary sidebar

Sixth Street Sundries

Emily Midgett

  • Home
  • About Me
  • Contact
  • OLO Marker Color Swatch Chart
  • Shop

Archives for February 2022

Guest Post: Simon Says Stamp+Orchid Rose Bouquet+Video!

February 18, 2022

Hi there! I am back today with a watercoloring video sharing my favorite tips on how to watercolor white flowers, featuring the Orchid Rose Bouquet stamp set that I illustrated for Simon Says Stamp. Watercoloring white objects can be challenging; I have a few tricks to share on how I add shadows and depth while still maintaining an overall white flower! Here’s the video:

or you can watch here on my YouTube channel.

One of my most helpful tricks (for me anyway) is to develop a stark contrast between the white flower and the areas around it. It’s almost like visual reverse psychology; having that intense color next to the white flower makes the flower seem almost brighter white. It also helps to keep the amount of shadows that you add in perspective, because it’s easy to go overboard when adding shadows, and then you just end up with a dingy flower. Don’t be stingy with your water, either. Using very diluted pigment and lots of water will give just the tiny hints of shadow, while still allowing the white of your watercolor paper to be the main color on your white flower.

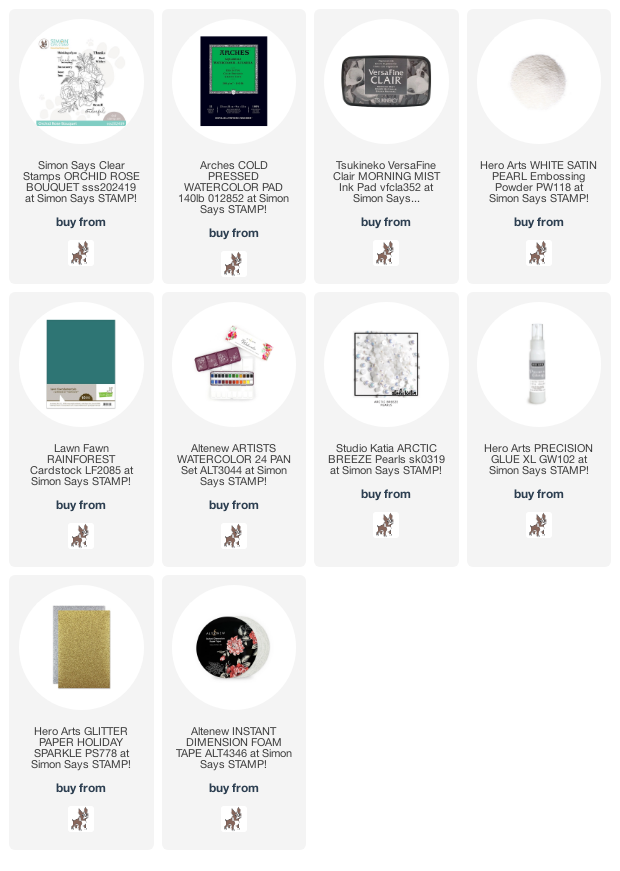
Once I’d finished watercoloring my image, I added a heat embossed greeting using one of the sentiments, which I backed with some glittery silver cardstock. The final touch was to add a few iridescent white pearls for an extra hint of shine and sparkle!

Well, that’s all for today’s post! I hope that you will try painting a white flower yourself. It can be intimidating, I know, but hopefully my tips will help make it a little simpler! Thanks so much for stopping by today, and have a marvelous day!
Filed Under: simon says stamp Tagged With: Orchid Rose Bouquet, video, watercolor, white flower

Simon Says Stamp Good Luck Charm Release!

February 16, 2022

Hi there! My friends over at Simon Says Stamp just released their fabulous new Good Luck Charm collection, and I am super excited to share a project that I made using several of the new goodies! Now, I know it’s usually all florals all the time around here, but I’ll let you in on a little secret: I love making birthday cards almost as much as I love painting flowers. Balloons, confetti, birthday cake… I love it all! The new Good Luck Charm release has several fantastic new birthday-themed products, and I combined a few of them to create this festive project. Let’s get started with the details!

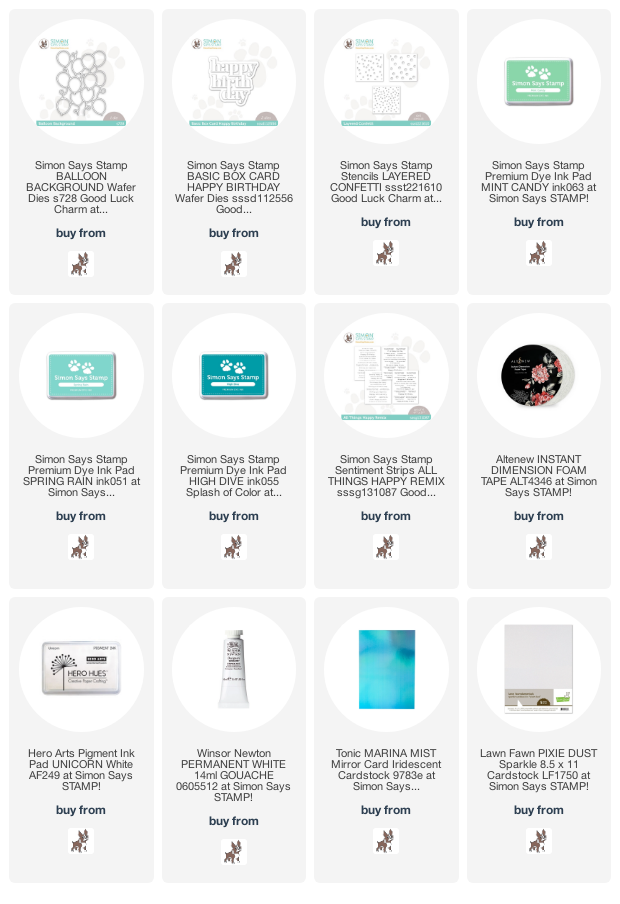
I began by die cutting the Balloon Background die from some shiny holographic blue foil cardstock. To coordinate with the colors in the iridescent foil cardstock, I created a colorful card base by blending Spring Rain, High Dive, and Mint Candy inks. I blended some white pigment ink over the Layered Confetti stencils, then splattered some white and silver gouache to make a festive, colorful background with lots of levels of dimension and texture. I adhered the shiny foil balloon die cut with some liquid adhesive.

For the greeting, I die cut the Basic Box Card Happy Birthday dies three times from some deep teal cardstock, then once from white, iridescent glittery cardstock. I adhered all of the pieces together to create a dimensional die cut. To help make the greeting stand out a bit more, I used the included outline die to cut a piece of vellum and adhered the dimensional die cut greeting to it. I popped up the greeting die cut with some foam adhesive to add lots of dimension and height. I also trimmed one of the preprinted All Things Happy Sentiment Remix panels and added it to the card front with some more foam adhesive.

After I’d added the greeting die cuts, I thought that the card needed a bit more of the shiny holographic foil, so I added a few of the extra balloons from the Balloon Background with some foam tape. Finally, I added a few sequins to add a touch more sparkle.

Well, that’s all for my project today! I’ve been busy creating a few more projects that I’ll share in a few days. In the meantime, I hope you’ll take a peek at the Good Luck Charm release! Thanks so much for reading, and have a marvelous day!

Filed Under: simon says stamp Tagged With: balloon background, basic box card happy birthday, birthday card, ink blending, layered confetti stencils

Hero Arts 2022 Spring Catalog Launch Blog Hop+Giveaway!

February 15, 2022

Hi there! Today, I am super excited to be hopping along with Hero Arts as we debut the new products in the Spring 2022 Catalog! You should have arrived here from Debi Adams, and your next stop is Ilina Crouse. The new catalog is chock full of beautiful new products, with imagery so evocative of spring and summer! I have two projects for you today, so let’s get started with the details on my projects.

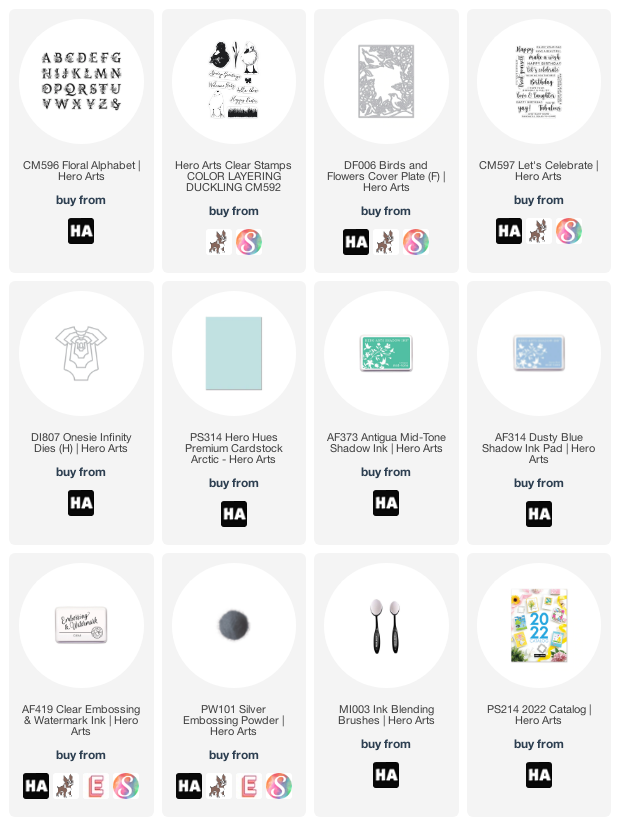
My first project would be a perfect card to accompany a baby shower gift, using the beautiful new Floral Alphabet stamps. I began by die cutting four teeny onesies from Arctic cardstock using the Onesie Infinity Dies. Using the negative spaces on the cardstock from which I cut the onesies, I used my MISTI to white emboss the B-A-B-Y from Floral Alphabet onto the aqua onesies. So cute!

Next, I trimmed down an Arctic cardstock slimline card base as well as another layer, slightly smaller than the slimline card base. I used Antigua ink to stamp a little border of grass (from the new Color Layering Duckling) and daisies (from the new Color Layering Bunny) along the bottom edge of the slightly smaller panel of cardstock for a simple tone-on-tone effect. Just enough to add a bit of interest to the background, but not too much to distract from the main focal point!

Next, I arranged my heat embossed onesies so that they were draped as though on a clothesline. I adhered them with some foam adhesive, then added a couple of white twine bows to complete the clothesline/banner idea. Finally, I added the “hello there” greeting on a strip of Arctic cardstock using some more foam adhesive. Simple, but the delicate images and monochromatic color scheme are perfect for a baby card!

My next card is quite a bit more involved, in both technique and color scheme. I combined the gorgeous new Birds and Flowers Cover Plate die with my Copic markers to create a chinoiserie effect. These detailed cover plate dies are some of my absolute favorite products from Hero Arts; the amount of detail that you can add with your favorite coloring medium is amazing, but you also have the option to simply die cut the images and use them as silhouettes! I die cut the Birds and Flowers Cover Plate die from some white, Copic-friendly cardstock and used a variety of Copic markers in vivid, springy shades to add lots of color and detail to the die cut, hopefully evoking chinoiserie imagery!

Once I’d finished my coloring, I used silver embossing powder to emboss a greeting from the new Let’s Celebrate sentiment stamp set on some strips of plain white cardstock. I also lightly blended some Dusty Blue ink around the edges of my A2 card base with a super soft Hero Arts Blending Brush, just to give a bit of extra interest to the background.

Once all of my components had been completed, I used lots of foam adhesive to adhere the vivid Copic-colored die cut and embossed sentiment strips to the blended card base. I just love the bright, springy colors after the dreary winter days we’ve been having lately!

Well, that’s all for my projects today!

I hope you will check out the entire Spring 2022 Hero Arts catalog. SO many fun new products, including a new line of Hero Tools that are going to make life so much easier! Tons of new tools, including small, medium, large, and extra large sizes of blending brush, a Handy Holder tool caddy, metal snips, and the piece de resistance: a new Compact Cutter! These products will begin shipping in March, and I highly encourage you to sign up to be notified when they’re back in stock. Anybody who signs up to be notified via email when they become available will be entered into a drawing to win the entire line of Hero Tools!

Hero Arts is also hosting a giveaway to celebrate the new catalog!

Hero Arts is giving away THREE $50 gift cards, drawn from the comments left across the hop. Enter by Sunday, February 20 at 11:59pm pacific, and the winner will be announced on the Hero Arts blog the following week. The more comments you leave, the more chances you have to win!

Well, that’s all for my projects today! Your next stop is Ilina Crouse. Thanks so much for stopping by, and happy hopping!

Filed Under: Hero Arts Tagged With: baby card, Birds and Flowers cover plate, birthday card, catalog, Color Layering Bunny, Color Layering Duckling, copic, copic coloring, Floral Alphabet, giveaway, ink blending, Onesie Infinity Dies

Spellbinders Bibi’s Butterflies Collection!

February 14, 2022

Hi there! Today, I’m super excited to help share the news about my friend Bibiana Cameron’s new collection for Spellbinders, called Bibi’s Butterflies! If you love butterflies, you are going to absolutely adore all of the different die sets in this collection. I was lucky enough to get the opportunity to work with the Butterfly Card Creator dies, and I’m excited to share my project with you today. Let’s get started with the details!

(affiliate links used where possible)

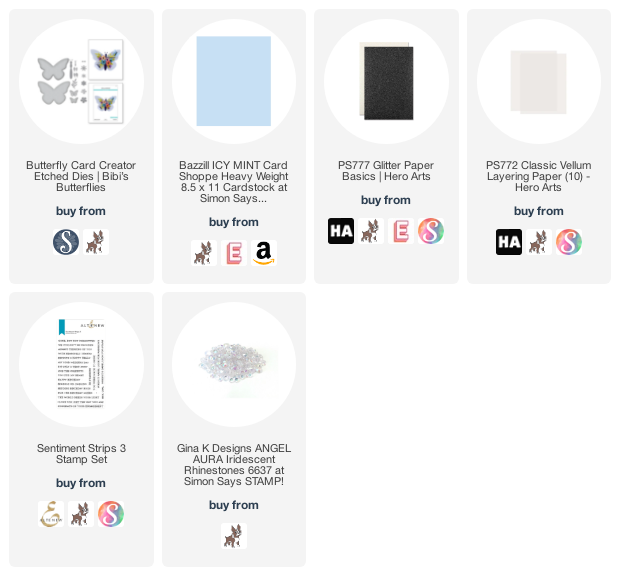
The Butterfly Card Creator dies feature large dies to create a fun shaped card, but also several smaller detailed butterflies, flowers, and foliage dies. I used these dies to create a beautifully intricate card front using pale aqua, white, vellum and glitter cardstocks. I spent a few minutes die cutting several of each of the smaller dies from the different shades of cardstock.

When working with limited color palettes, I like to try to mix textures to provide as much contrast as possible. I backed the delicate filigree butterflies with solid vellum to create an ethereal look, and die cut the foliage from vellum and white glitter cardstocks to differentiate them from the matte white cardstock flowers. I arranged the die cuts on a coordinating pale blue A2 card front using both liquid and foam adhesive for tons of dimension.

I added a “thinking of you” greeting, white embossed on a thin strip of the same pale blue cardstock. I thought the muted color palette was perfect for a sympathy card. I added a few iridescent gems to fill in any holes in the design.

Well, that’s all for my project today! I hope you’ll check out the new Bibi’s Butterflies collection from Spellbinders. The products are all absolutely beautiful. Many congratulations to my friend Bibi on her wonderful designs!! Thanks so much for stopping by today, and have a marvelous day!

Filed Under: spellbinders Tagged With: bibi's butterflies, butterfly card creator

Colorado Craft Company Free Shipping Days!

February 13, 2022

Hi there! Just popping in quickly to let you all know that Colorado Craft Company‘s Free Shipping Days ends tonight! I have a sweet little project featuring one of the new sets from the new Kris Lauren release-Mouse House. Let’s get started with the details on this fairly straightforward project!

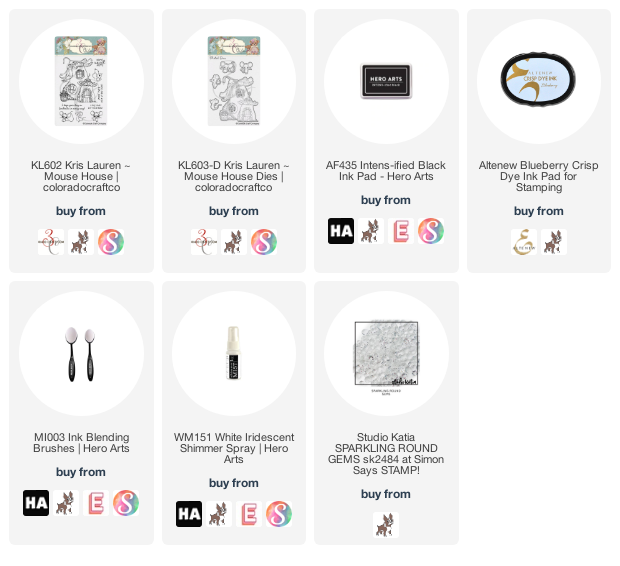
I began by stamping the darling little mouse cottage and mouse from Mouse House onto some Copic-friendly white cardstock using Hero Arts’ Intensi-fied Black ink. I colored the image with my Copic markers, using my Colorless Blender to pull some of the color away from the house so that I could add some colorful flowers and moss on the edge of the cottage. I die cut the colored images using the coordinating dies.

For the card base, I lightly blended some very pale blue ink along the edges using a blending brush just to create the slightest suggestion of blue sky. I also spritzed some iridescent shimmer spray to add a hint of shimmer to this matte card.

I arranged the die cuts on the shimmering card front and adhered them using foam adhesive. I added a greeting from Mouse House, backed with some glittery black cardstock to give it a little extra emphasis. A perfect sentiment for a birthday card! I added a few clear gems for a bit of added texture. I think they look like dew drops falling on the teeny little mouse!

Well, that’s all for my project. I hope you’ll take a peek at the new release from Colorado Craft Company. The new illustrator is absolutely fantastic! Today is also the last day to take advantage of the Free Shipping Days for this new release!

Through midnight tonight, you can receive free shipping on your order from the Colorado Craft Company website by adding the code FREESHIPPINGEM at checkout!

Thanks so much for stopping by today, and have a marvelous day!

Filed Under: colorado craft company Tagged With: copic, ink blending, mouse, mouse house

  • « Go to Previous Page
  • Page 1
  • Page 2
  • Page 3
  • Page 4
  • Go to Next Page »

Primary Sidebar

  • Facebook
  • Instagram
  • Pinterest
  • YouTube

Favorite Shops

Secondary Sidebar

Subscribe

Enter your email address to subscribe to this blog and receive notifications of new posts by email.

Instagram
Something is wrong.
Instagram token error.
Follow
Load More

Archives

Tags

3D embossing folder alcohol markers better press birthday birthday card blog hop card kit christmas christmas card christmas tag colored pencil copic copic coloring Daniel Smith die cutting embossing folder embroidery felt giveaway holiday holiday card hot foil ink blending karin brushmarker pro layered stencil masculine my monthly hero new release no line coloring no line watercolor OLO marker olo markers original illustration pawsitively saturated rainbow shaker card slimline stamping stamptember stencil thank you thinking of you valentine's day video watercolor

Popular Posts

Simon Says Stamp Joy For You Blog Hop- Day 1!
Simon Says Stamp Joy For You Release-Now Available!
Frozen Fractals All Around with New Simon Says Stamp Joy For You Release!
Shaped Holiday Shaker Card with New Simon Says Stamp Jolly Season Card Kit of the Month!
Holiday Postage with New Simon Says Stamp!
Simon Says Stamp Glory to the Newborn King Holiday Kit-Part II!
Holiday Joy in Pink and Green with New Simon Says Stamp DieCember!
Pinkfresh Studio 5th Birthday!
Altenew Build A Flower: Fuchsia Blog Hop+Giveway!
July My Monthly Hero Blog Hop+Giveaway!

Disclosure

Some affiliate links are used in my posts. This means that, should you click on one of my links and purchase something from that company, I will receive a small portion of the sale at no extra cost to you. I use the money earned from these sales to help maintain my blog. I so appreciate you visiting and, if you do choose to use one of my affiliate links, thank you so much for your support!
Copyright © 2026 ·Brunch Pro Theme · Genesis Framework by StudioPress · WordPress · Log in
Loading Comments...