• Skip to main content
  • Skip to primary sidebar
  • Skip to secondary sidebar

Sixth Street Sundries

Emily Midgett

  • Home
  • About Me
  • Contact
  • OLO Marker Color Swatch Chart
  • Shop

distress paint

Simon Says Stamp Moments In Time Release Blog Hop- Day 2!

May 31, 2025

This post was sponsored by Simon Says Stamp. Thanks, Simon!

Hi friends! I am hopping along with my friends at Simon Says Stamp to celebrate their newest release: Moments in Time! You should have arrived here from Debby Hughes and your next stop is Yana Smakula. You can also start back at the beginning at the Simon Says Stamp Blog in case you get lost. I am always over the moon excited when one of my illustrations are released, and this one is extra special to me. My husband and I got married 16 years ago this June, and one of the cards that we received with a wedding gift had the sentiment “May your troubles be less, and your blessings be more, and nothing but happiness come through your door.” It made such an impact on me that I still remember it (so many) years later, and so when I was designing Orange Blossom Blessings, I absolutely had to include it with the sentiments for this wedding-themed set. We are past the wedding phase of our mid-20’s now, but we do have a wedding coming up this summer for a friend of my husband’s, so I took the opportunity to use Orange Blossom Blessings to create a wedding gift and card. Let’s get started with the details!

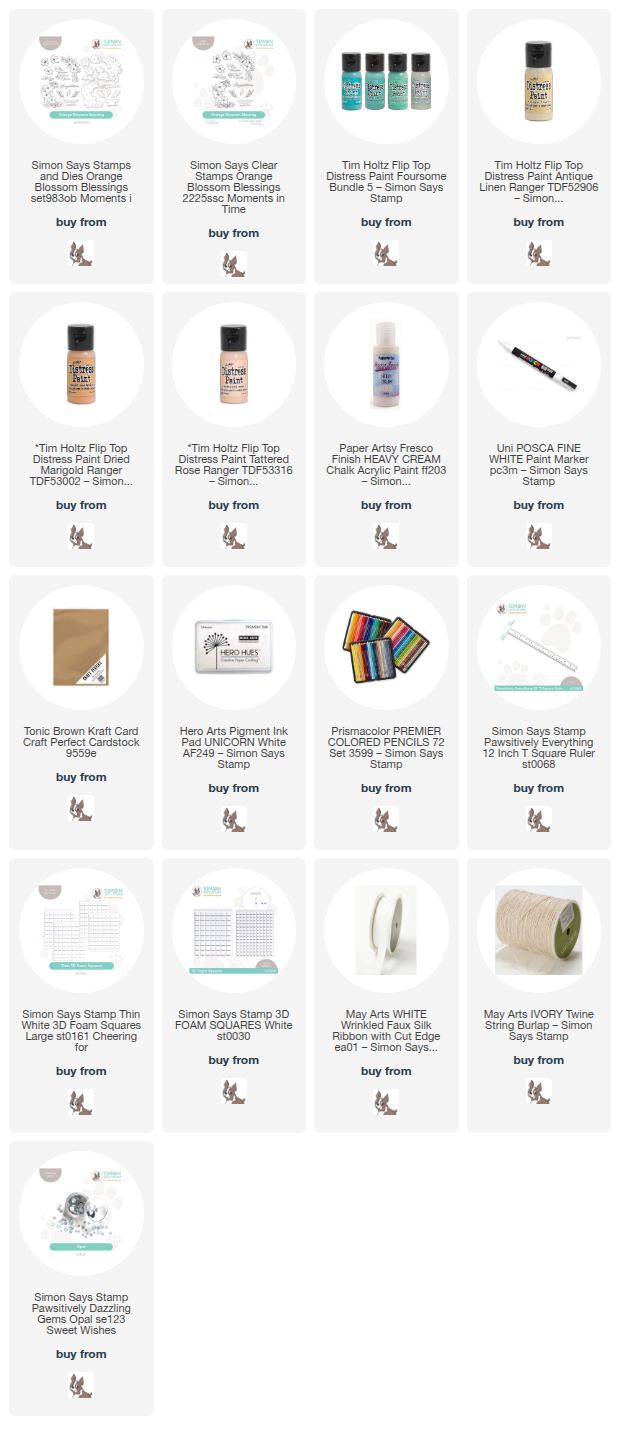
*I have gathered links to all of the products used at the bottom of the post for your convenience, using affiliate links. Thank you for shopping with my links! I truly appreciate your support for my work!*

I’ve been doing some organizing and cleaning in my craft room closet; my mom was living in my craft house for six months while she recuperated from a nasty car accident, so while I was helping to care for her, my office organization was sorely neglected. She went home a couple of weeks ago, so as I have been slowly trying to get my office back under control, and I found these papier machê ornaments that I purchased long ago to embellish. I thought they’d look gorgeous with orange blossoms painted on to create a keepsake ornament for the bride and groom, and of course I had to make a coordinating card!

I stamped one of the floral swags directly onto the papier machê ornament using Simon Says Stamp White Pigment Ink Pad and pulled out my acrylic paints in shades of peach, buttery yellow, and muted teal to add some color to the ornament. I have not really worked with acrylic paints before, though I have a fairly extensive collection (ha) so it was a bit of a learning experience for me, but I am thrilled with the results. I can’t wait to play with them even more! I kept the colors light and bright, creating a lovely contrast between the mid-brown background from the pastel blooms. After I had finished painting the flowers, I used a white paint pen to add a “Mr. & Mrs.” to commemorate the bride and groom’s special day! Once I had completed the ornament, I added a white bow to the top with my glue gun. I hope the happy couple love it!

To create the coordinating card, I stamped some more of the blooms from Orange Blossom Blessings onto an A7 panel of Kraft Cardstock using the Simon Says Stamp White Pigment Ink Pad. I love working with colored pencils on colorful (even brown) cardstock; I think that the seamless pop of color on the background is so unique and lovely! I stamped the orange blossom swag in one corner, then rotated my cardstock in my MISTI to stamp the same swag in the opposite corner. I also stamped a few individual blooms and foliage on a separate panel of Kraft cardstock. I used my colored pencils to add vibrant color to each of the images, die cutting the individual images once colored. I also used the Simon Says Stamp T-square Ruler to create a frame around the edges of the card front, drawing the eye to the center of the card. I love using this trick to create a bit smaller visual canvas for my focal point!

After I had finished coloring and die cutting the floral images, I used white pigment ink with embossing powder to stamp my favorite sentiment from Orange Blossom Blessings on some more Kraft cardstock. I used the coordinating die to cut the greeting out, then adhered it to the card front with foam adhesive. I tucked the individual flowers next to the die cut sentiment with some thin foam adhesive squares. I tied a double twine bow and adhered it beneath the floral accents, finally adding a few Opal Pawsitively Dazzling Gems for some sparkle!

Well, that’s all for my projects today. Now for some fun giveaway and freebie information!

Simon Says Stamp is giving away a $25 coupon to every stop on the hop, selected from each blog comment section. Winners will be selected and posted on the Simon Says Stamp blog on Wednesday the 4th of June. All winners can email Simon Says Stamp to claim his/her prize!

Simon Says Stamp is also offering a sweet freebie for blog hoppers! Simply make any purchase from the Moments in Time collection to receive the to-be-released Best Fishes stamp set totally free!

Your next stop on the hop is Yana Smakula. Thanks so much for stopping by today, and happy hopping!
Filed Under: simon says stamp Tagged With: acrylic paint, colored pencil, distress paint, kraft, orange blossom blessing, ornament, wedding card, wedding gift

Adore Frame for Valentine’s Day with Simon Says Stamp!

February 14, 2025

This post was sponsored by Simon Says Stamp. Thanks, Simon!

Hi friends, and Happy Valentine’s Day! As a busy mom, sometimes it’s hard to get organized enough to decorate for each holiday. I am usually able to do some major Christmas decorating, and some autumnal switches, but outside of that… our decor remains pretty neutral throughout the year. I have ambitions to change that, and so have been trying to create more home decor items with my crafting supplies. I went to my local dollar store and found the most adorable wooden frames that are perfect for customizing based on the season! I want to make a series of them that we can easily switch out for each mini-holiday, starting with Valentine’s Day. I covered this frame with pink, hearts, and lots of sparkle, so let’s get started with the details!

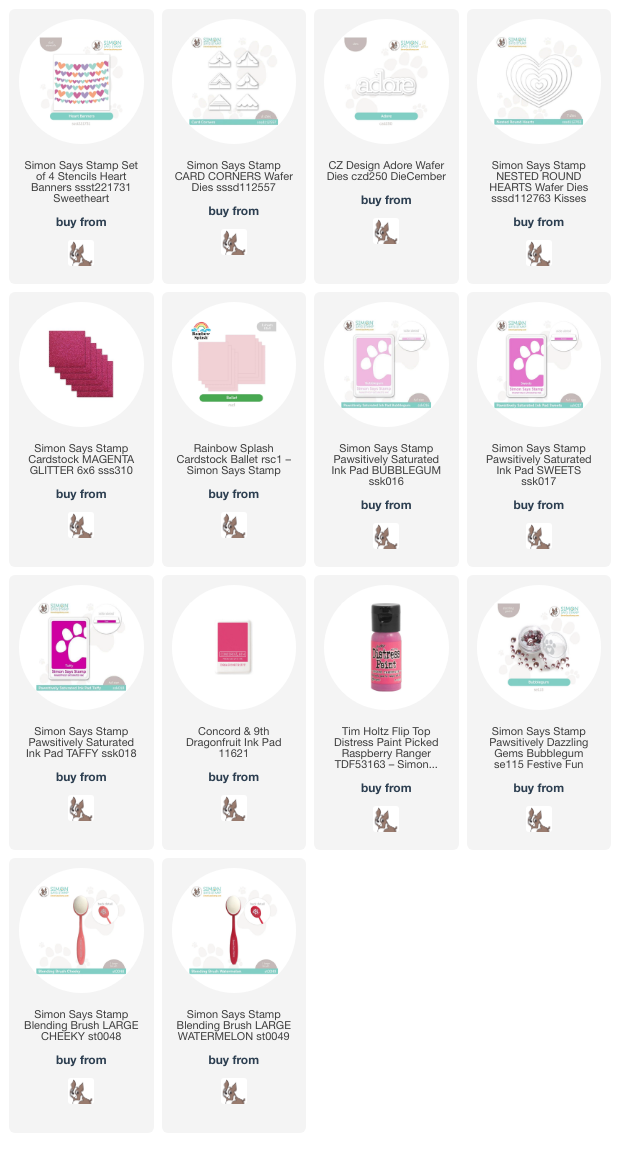
*I have gathered links to all of the products used at the bottom of the post for your convenience, using affiliate links. Thank you for shopping with my links! I truly appreciate your support for my work!*

To begin my project, I painted the wooden frame with Tim Holtz Distress Picked Raspberry Distress Paint, creating a perfectly pink base on which to decorate with my stencils and dies! As it was drying, I used Bubblegum, Taffy, and Sweets Pawsitively Saturated Inks with Dragonfruit ink from Concord and 9th to blend the sweet pattern from the Heart Banners Stencil set onto some pale pink cardstock. I love the variated shades of pink on this background!

After my frame had finished drying, I adhered the stenciled heart background panel inside (the original frame comes with a little chalkboard, but that’s easy enough to cover up with some Tear-rifically Tacky Tape!), then die cut the detail layer of the Adore die from some Magenta Glitter Cardstock and the shadow from a leftover piece of the same pale pink used for the background. I popped the sentiment up with foam adhesive, then “framed” it in with the adorable Card Corners dies cut from deep pink and more Magenta Glitter Cardstock. I adorned the wooden frame’s corners with some glittery pink Nested Round Hearts die cuts and some Bubblegum Pawsitively Dazzling Gems for extra sparkle.

Well, that’s all for my project today. This 4×6 frame is just the right size to put on a mantle or even on your desk at work! I am having so much fun customizing these simple wooden frames, and super inexpensively, too! Thanks so much for stopping by today, and Happy Valentine’s Day!

Filed Under: simon says stamp Tagged With: card corners, distress paint, heart banners, home decor, ink blending, layered stencil, nested round hearts, valentine's day

Primary Sidebar

  • Facebook
  • Instagram
  • Pinterest
  • YouTube

Favorite Shops

Secondary Sidebar

Subscribe

Enter your email address to subscribe to this blog and receive notifications of new posts by email.

Instagram
Something is wrong.
Instagram token error.
Follow
Load More

Archives

Tags

3D embossing folder alcohol markers better press birthday birthday card blog hop card kit christmas christmas card christmas tag colored pencil copic copic coloring Daniel Smith die cutting embossing folder embroidery felt giveaway holiday holiday card hot foil ink blending karin brushmarker pro layered stencil masculine my monthly hero new release no line coloring no line watercolor OLO marker olo markers original illustration pawsitively saturated rainbow shaker card slimline stamping stamptember stencil thank you thinking of you valentine's day video watercolor

Popular Posts

Simon Says Stamp Sending Cheer Blog Hop- Day 2 + Freebie + Giveaway!
Altenew October 2026 Release Blog Hop + Giveaway!
Simon Says Stamp Sending Cheer Release: Now Available!
Simon Says Stamp October 2026 Card Kit of the Month: Homespun Gratitude!
A Double Leftovers Card Set with New Simon Says Stamp Stencils and Dies!
Simon Says Stamp November 2025 Card Kit: Give Thanks!
Joyful Snowman with New Simon Says Stamp Sending Cheer Release!
Hero Arts Partners Blog Hop: Lawn Fawn!
Altenew February 2020 Stamp+Die+Watercolor Blog Hop+Giveaway!
Altenew Standalone Die Blog Hop+Giveaway!

Disclosure

Some affiliate links are used in my posts. This means that, should you click on one of my links and purchase something from that company, I will receive a small portion of the sale at no extra cost to you. I use the money earned from these sales to help maintain my blog. I so appreciate you visiting and, if you do choose to use one of my affiliate links, thank you so much for your support!
Copyright © 2026 ·Brunch Pro Theme · Genesis Framework by StudioPress · WordPress · Log in
Loading Comments...