• Skip to main content
  • Skip to primary sidebar
  • Skip to secondary sidebar

Sixth Street Sundries

Emily Midgett

  • Home
  • About Me
  • Contact
  • OLO Marker Color Swatch Chart
  • Shop

mini slimline

Yellow for Springtime with New Simon Says Stamp Be Bold!

March 27, 2024

This post was sponsored by Simon Says Stamp. Thanks, Simon!

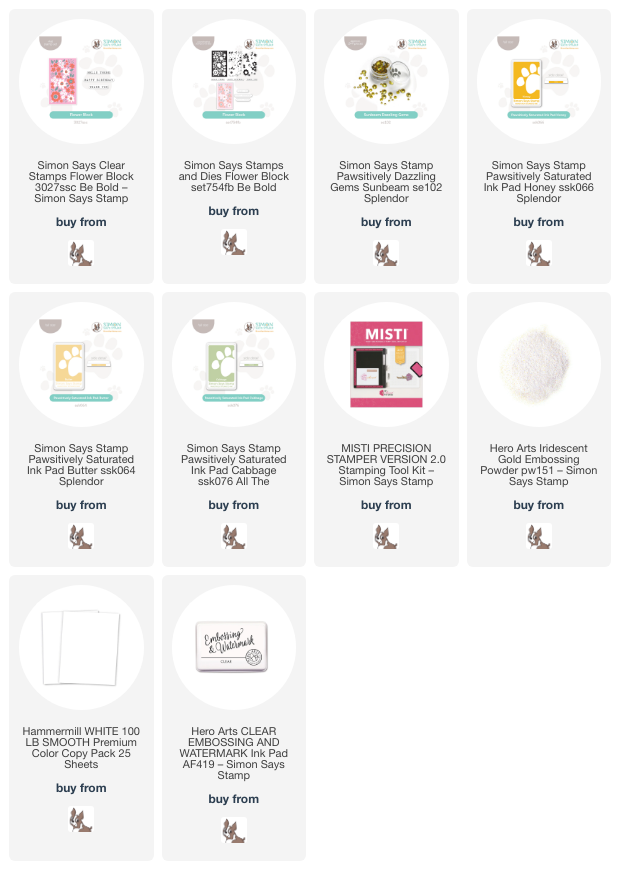
Hi friends! I don’t use yellow very much, but when I do, I really lean into it. The utterly lush lemon meringue shades in Simon Says Stamp’s Pawsitively Saturated Ink Trio 27 were so unique that I found them irresistible, particularly the two outlying shades in the trio: Honey and Butter. I don’t usually love primary colors, preferring instead to have colors that are a degree or two off of the more typical colors. These two shades from the Ink Trio 27 are so unique and lovely, particularly when paired with Cabbage ink. I thought the combination looked so perfectly springy that it would look marvelous with the new Flower Block product suite from the Be Bold release. I created a mini-slimline card for you today, so let’s get started with the details!

To start my project, I stamped layers of the the Flower Block stamps three times on three separate sheets of white cardstock using Honey, Butter, and Cabbage inks, making sure to get perfect placement each time by using my MISTI. Once I had finished stamping each image in that luscious color combination, I used the Flower Block dies to die cut the patterned images. I love how delicate, yet modern, these beautiful floral images are; I find the fact that some of the flowers are left blank so that whatever cardstock color you choose remains an integral part of the color palette. The pattern reminds me of something you would find in an upscale stationery shop!

**The Pawsitively Saturated Ink Trio 27 is currently out of stock, but the stock will be replenished in the next few weeks, so be sure to sign up to be notified via email when it returns! You don’t want to miss these beautiful yellow**

For the greeting, I kept things simple so as to allow those pretty floral blocks to be the main attraction on this project. I didn’t want to use black for my sentiment, preferring instead to keep the color scheme limited to my sunny yellows, so I stamped the simple, typeface “hello there” onto white cardstock using Honey ink, then stamped it again over the top, ensuring perfect placement with my MISTI, using embossing ink, and heat embossing it with Hero Arts’s Iridescent Gold embossing powder. This powder is somewhat translucent, providing amazing shine and shimmer in a way that I’ve not seen with more traditional gold embossing powders. (Side note: all of Hero Arts’s newer iridescent embossing powders are so unique, especially when layered with a colored ink or on colored cardstock! My favorites are the Iridescent Gold and the Iridescent Purple.)

I trimmed and scored a mini-slimline card base, creating a 3.5″ x 6″ card, then mounted the stamped blocks on the front with foam squares. I centered the middle block in the center of my card base, then turned the other two blocks 180* and adhered them in the center of the remaining white card front. I added some Sunbeam Pawsitively Dazzling Gems to the center of some of the flowers, then popped up the die cut sentiment strip. I love that the sentiment die cuts are rounded. So unique and classy!

Well, that’s all for my project today!! I absolutely love this Flower Block product suite. It was a breeze to stamp and would be beautiful in almost any color combination! It would be perfect to customize for a wedding card to match the wedding colors, don’t you think? Thanks so much for stopping by today, and have a marvelous day!
Filed Under: simon says stamp, Uncategorized Tagged With: flower block, mini slimline

Simon Says Stamp STAMPtember + Altenew!

September 16, 2023

Being able to play with the different collaboration stamp sets for Simon Says Stamp’s STAMPtember celebration is such a joy and helps reinforce my love of this hobby-turned-job, which is basically the entire point of STAMPtember!! The Altenew STAMPtember collaboration set is indicative of Altenew’s general aesthetic: elegant. I had such fun coloring this beautiful rose arrangement, adding a few special touches to make it really pop. Let’s get started with the details!

To start, I stamped the Altenew STAMPtember collaboration stamp set using Contour Ink from Hero Arts onto a mini-slimline card front of Hammermill cardstock. I wanted to highlight the beautiful and detailed stamp with a simple layout, so I stamped the bouquet smack dab in the center of this mini-slimline card front. I colored the images in some lovely shades of coral and red, with warm green foliage, using OLO markers. When working with alcohol markers, I always try to make sure that I have at least four markers in a gradient to ensure that I have maximum contrast and depth. No-line coloring can be a bit fussy, but the only part that I find truly challenging is the flower centers. Those tiny areas are a bit difficult to get perfect, so I have a trick to share with you: opaque pens. I used the Karin Star Sparks Deco Gel Pens and Karin Milky Way Deco Gel Pens to add the stamens to the center of each flower, using a few different colors to add variety and interest! I just love how this turned out!

Because I wanted to keep things simple to allow that beautiful floral bouquet to stay the star of my card, I created a simple frame around my colored image using 1/4″ masking tape right up against the edges of my mini-slimline card front. I used a blending brush to lightly blend Altenew Dusty Rose Fresh Dye Ink around my colorful image. The light shade of warm pink accents the red flowers beautifully without altering the colored image.

For the greeting, I heat embossed one of the sentiments from the Altenew STAMPtember collaboration set onto some white cardstock using Rose Gold embossing powder from Altenew. I trimmed the sentiment down and popped it up on the colored, blended panel using foam adhesive. I added a few shimmering gems for one last sparkling touch!

Well, that’s all for my project today! The gorgeous Altenew STAMPtember collaboration set also comes as a set with dies so that you can easily create beautiful cards with dimensional die cuts, as well! If you love this set as much as I do, I wouldn’t wait too long, because these sets usually sell out very quickly, and once they’re gone, they won’t be restocked. Thanks so much for stopping by, and happy STAMPtember!!

Filed Under: altenew, simon says stamp Tagged With: alcohol markers, collaboration, ink blending, mini slimline, no line coloring, olo markers, stamptember

Pinkfresh Studio June 2023 Stamp, Die, Stencil, and Hot Foil Release

June 26, 2023

Good morning! Today, Pinkfresh Studio is releasing their June 2023 collection of products, and it’s full of stunning new florals that are sure to uplift your cards and cardmaking process! I pulled out my watercolors to do lots of no-line watercoloring today, and I’m excited to share the projects with you. Let’s get started with the details!

I began by stamping the Humbled and Grateful stamp set (PFS|SSS) twice on Fabriano Artistico Hot Press watercolor paper using no-line coloring ink. Using a finely tipped paintbrush and my Karin Brushmarker Pro watercolor markers, I added soothing blue and purple flowers with soft green foliage. I find that I get better results with the Karin markers when I scribble the color out onto my ceramic palette; I can better control the intensity of the color and the amount of water that gets onto my paper that way. I also find that the smooth hot press paper works beautifully with the transparent markers. (I have more tips on how to get good results with the Karin markers in my most recent video on the Pinkfresh Studio YouTube channel, which you can check out HERE.)

Once I had finished watercoloring the two floral clusters, I used the Humbled and Grateful dies (PFS|SSS) to cut the images out.

To create a coordinating, subtle, ethereal “sky” background, I very lightly blended Slumber and Lavender inks in a circular motion on my white A2 card base, starting with the Slumber in the center and then lightly tapering into Lavender around the edges. These two ink colors coordinated beautifully with my watercolored blurple floral sprays! I also die cut a white Art Deco Frame die and mounted it on the blended panel with some foam adhesive.

I snipped one of the watercolored Humbled and Grateful floral die cuts apart, then arranged the smaller pieces amongst the intact die cut of the floral pieces in a “meadow,” tucking the ends behind the white frame to hide them. I heat embossed a greeting from Humbled and Grateful onto some white cardstock using silver embossing powder, then added it to the card front with some more foam tape, creating a double layer of foam adhesive. Finally, I added some Matte Silver Pearls to add one last bit of shine!

My next project for today features the beautiful new Peony Fantasy Stamps (PFS|SSS). I can never get enough peonies, and because their growing season is so short, I am so happy to have access to beautiful gardens of peonies throughout the year with stamps! I stamped the tiny beauties from Peony Fantasy onto some Arches Cold Press watercolor paper with no-line coloring ink, then used my Holbein watercolors to add beautiful bubblegum pink to the images, adding light washes of coral on a few petals to provide some variation in color.

After I’d finished watercoloring, I die cut the finished flowers using the Peony Fantasy Dies (PFS|SSS).

For the background, I hot foiled the older Geo Arch Hot Foil Plate onto some peachy cardstock using orange hot foil. Monochromatic backgrounds are one of my most favorite ways to use hot foil. They provide subtle interest behind the focal point without overpowering it! I chose to highlight the coral washes in the peonies by keeping the background peachy. I also used the Modern Script Hot Foil Sentiments to hot foil a coordinating greeting using the same shades of cardstock and foil.

To ground my florals and sentiment, I die cut the smaller Essentials: Mini Slimline Frame die from some coordinating magenta cardstock to accent the pink peonies, also cutting the same small die from vellum to inlay inside the frame. I turned the frame 90*, oriented it to the right side of my card, and trimmed off the excess, making this mini-slimline product work beautifully for an A2 card front! I arranged the watercolored peonies and greeting around the frame and adhered them using foam tape, then added the frame to the card front using another layer of foam tape, creating tons of dimension. The final touch was to add some Bubblegum gems for some sparkle!

Well, that’s all for my projects today! Now for some fun giveaway information:

Pinkfresh Studio will be giving away the full release on the Pinkfresh blog & YouTube channel. 
They will also be giving away a total of TEN $25  gift cards along the hop. The winners will be selected from the comments, so be sure to leave a comment on each stop along the hop for maximum entries and chances to win! Winners will be announced on July 5, 2023 on our GIVEAWAY PAGE. Winners must check that page & claim their prize within 2 weeks.

Here’s the full hop list:

You are invited to the Inlinkz link party!

Click here to enter

Thanks so much for stopping by today, and happy hopping!

Filed Under: pinkfresh studio Tagged With: art deco frame, geo arch, hot foil, humbled and grateful, karin brushmarker pro, mini slimline, modern script sentiments, no line watercolor, peony fantasy, watercolor

Simon Says Stamp Dear Friend Release + 2 NEW Illustrations!

May 18, 2023

Hi friends! Simon Says Stamp is releasing their new Dear Friend collection tonight, and I have illustrated two new stamp sets for this release: Peony Background and Blissful Bouquet! I have a minor (okay, major) love affair with peonies, and my friend Caly Person (you can check out her blog HERE) sent me the most stunning photos of peonies from her garden last year… I couldn’t resist drawing them, and then Simon Says Stamp turned my illustration into a big, bold, red rubber background stamp!

I immediately stamped the Peony Background stamp on both Fabriano Artistico watercolor paper and Hammermill paper with black ink so that I could do some watercoloring and some alcohol marker coloring. These huge peony images are perfect to sit down and relax with your favorite coloring medium…. they’re so huge that you can really dig down into the nooks and crannies and practice adding dimension and depth. I colored the watercolor panel with Karin Brushmarker Pro markers (I find that the Fabriano Hot Press watercolor paper works beautifully with the Karin Brushmarkers; the markers’ dye is transparent and I find that that transparency works wonderfully with the super smooth surface of the hot press paper.), and I colored the Hammermill panel with OLO markers. I decided to focus on the OLO panel for today’s cards and save the watercolored panel for a rainy day!

The large Peony Background creates a slightly larger than 5.5″ square panel, which makes it perfect for use on an A2 card, creating a square card, mini slimline… or, as I’ve done here, cutting it in half and creating two different cards! I stamped the Peony Background onto my Hammermill cardstock using Hero Arts’s Intens-ified Black ink, my go-to for alcohol marker coloring or watercoloring, stamping a few times to be sure of a crisp black line. I then used my OLO markers to color the peonies in bright shades of bubble gum pink, deep magenta, and a dark lilac purple (a peony color which I don’t believe truly exists in real gardens, but it’s fun to dream!), adding beautiful emerald to the leaves. Once I had finished coloring the images themselves, I added black marker to the background to make sure that those brightly colored peonies were the stars of the show!

To create the A2 card and mini-slimline card, I cut the 5.75″ square panel in two sections, one 3″x5.5″ for the mini-slimline, leaving the remaining 2.75″x5.5″ for the A2 card. I was sure to keep as much of the two large peonies intact as I could, which worked out well to keep the majority of the cool pinks to one side and the deep magenta on the other panel!

For the first card, I used the A2-sized panel as the jumping off point for the rest of my project. I trimmed a very thin piece of Amethyst cardstock from Hero Arts, as it worked perfectly with the beautiful purple peony “marshmallow” buds in the corners and picked up the cool purple tones in the larger bubble gum pink peony nicely. I also clear embossed the entire Peony Background on a panel of Pitch Black cardstock using clear embossing powder to add a bit more interest to the black panel. I placed the colorful panel along the right edge of my black embossed panel, then nestled the purple strip right up against the other edge of the colorful piece to create a touch of contrast between the two patterned pieces.

After I had created my background, I set to work on my sentiment. I die cut the Big Hugs die from some glittery black foam from Spellbinders, adding extra dimension, height, and texture, but keeping those crisp, dramatic black accents true! I also trimmed down one of the greeting strips from the new Reverse Bold Hello Sentiment Strips and popped it up beneath the glittery black foam greeting with some black foam adhesive.

Once I had adhered the sentiment components, I added a few Perfume Bottle gems from Trinity Stamps to accent the purple tones in my card.

I kept things very simple for my mini-slimline card, simply trimming down the large floral panel to 3×5.5″, which I matted on a 3 1/8″x5 5/8″ panel of pink cardstock to create the slimmest of hot pink outlines around my colorful background, accenting the vivid colors on my black mini slimline (3.5″x6″) card front.

For the greeting, I die cut the Here For You die from some of Simon Says Stamp’s Glossy Black cardstock and adhered it towards the bottom of my card front so that I wasn’t covering up too much of my meticulously-colored magenta peony bloom. The final touch was to add a few iridescent black Melanite Magic gems to add a touch of sparkle. This card is simple in layout, but those enormous flowers make such a huge statement on their own; you don’t really need much more to create a dramatic card!

Well, that’s all for my projects today. I have a few more projects to share with you during the blog hop, so be sure to stop back by on Saturday to see some more inspiration using the new Simon Say Stamp Dear Friend release! Thanks so much for stopping by today, and have a marvelous day!

Filed Under: OLO markers, original illustrations, simon says stamp Tagged With: mini slimline, olo markers, original illustration, peony, peony background, watercolor

Video: No-Line Watercoloring and Faux Hand-lettered Stenciled Sentiment with Pinkfresh Studio!

March 15, 2023

Hi there! I am up on the Pinkfresh Studio YouTube channel today with this pretty-in-purple card. I received a lot of positive feedback about the stenciled/faux watercolored sentiment from THIS post, so I thought I would show you how I created it in this month’s video! You can check it out below:

Or click HERE to see it in HD on YouTube.

In case you can’t watch the video, I will share a few of the tricks that I used to create this project!

One of my favorite things about the Pinkfresh Studio dye inks is that they are dye based, so they work beautifully for watercoloring! I used Soft Lilac ink for both the blended, stenciled sentiment from Circle Florals Stencils, as well as the outline of the You’re the Best stamped images.

To start, I simply blended the Thank You sentiment from Circle Florals Stencils onto some watercolor paper using Soft Lilac ink and one of the new Blending Brushes. Because the ink is dye based, my Daniel Smith watercolors glided over it super smoothly. I began by using my slightly-more-than-damp, clean paintbrush to add clean water directly over the top of the stenciled sentiment, then while the paper was still wet, dropped in some amethyst purple watercolor. The damp watercolor paper allowed the watercolor to bloom beautifully, creating that gorgeous, artistic watercolor look that we love so much! Tip: a paintbrush with a nice, sharp point is crucial for this technique as well as no-line watercoloring. The crisp point allows you to get a smooth, sharp edge on your images, thus allowing the definition of the original image to remain.

I die cut the finished sentiment with the Circle Florals Dies. I love that there are dies for nearly all of the sentiments included in the stamp and stencil sets! The entire suite of products works so beautifully together.

I had also stamped the delicate, simple flowers from You’re the Best, again using Soft Lilac ink on some Fabriano Artistico watercolor paper. (The Fabriano Artistico is a nice, bright white, not too creamy or yellowed, but still with great texture and movement on the watercolor.) I used the same vibrant Carbazole Violet watercolor from Daniel Smith to add beautiful purple color to the flower. The key with no-line coloring is to make sure that the wet sections remain separate so that they don’t bloom into each other and muddy your crisp edges, which will cause your image to lose its definition. I worked in three different layers, adding a base layer of purple, going in for a second layer to deepen shadows and clean up the edges of the petals (tip: long brush strokes are your friend for crisp, smooth edges), then a final layer of the same Carbazole Violet mixed with my favorite Indanthrone Blue on a few of the petals that were tucked behind each other. I made sure to allow the topmost petal to have the lightest, brightest white highlights to show that it was the top petal and closest to my light source. I die cut the finished floral swag with the coordinating dies.

I had previously hot foiled the Geo Arch hot foil plate onto some beautiful lavender cardstock using purple foil (tone-on-tone hot foil is basically my most favorite thing ever besides coloring), but it was an A2 panel and I wanted to create a mini-slimline card front (3.5″x6″). I trimmed it down to 3″x4.25″ so that it would fit nicely in the center of a mini-slimline card front, then matted with an ever-so-slightly larger piece of dark purple cardstock, which I mounted on my mini-slimline card front. I also die cut a small white Art Deco Frame. I wanted to have at least 3 elements of white on my card front: the card base, the white outline on the floral and sentiment die cuts, and now the white frame. I adhered all of the die cuts using foam adhesive for lots of dimension, then added a few Glacier gems for one last touch of shine!

Well, that’s all for my project today. We are working on the March release from Pinkfresh Studio, and it’s so beautiful! I am especially excited to have another design coming out this month… it’s one of my favorites! Thanks so much for stopping by today, and have a marvelous day!

Filed Under: pinkfresh studio Tagged With: circle florals, Daniel Smith, hot foil, ink blending, mini slimline, no line coloring, no line watercolor, stencil, video, watercolor, watercolored sentiment, you're the best

  • Page 1
  • Page 2
  • Page 3
  • Go to Next Page »

Primary Sidebar

  • Facebook
  • Instagram
  • Pinterest
  • YouTube

Favorite Shops

Secondary Sidebar

Subscribe

Enter your email address to subscribe to this blog and receive notifications of new posts by email.

Instagram
Something is wrong.
Instagram token error.
Follow
Load More

Archives

Tags

3D embossing folder alcohol markers better press birthday birthday card blog hop card kit christmas christmas card christmas tag colored pencil copic copic coloring Daniel Smith die cutting embossing folder embroidery felt giveaway holiday holiday card hot foil ink blending karin brushmarker pro layered stencil masculine my monthly hero new release no line coloring no line watercolor OLO marker olo markers original illustration pawsitively saturated rainbow shaker card slimline stamping stamptember stencil thank you thinking of you valentine's day video watercolor

Popular Posts

Simon Says Stamp Sending Cheer Blog Hop- Day 2 + Freebie + Giveaway!
Altenew October 2026 Release Blog Hop + Giveaway!
Rustic Monochromatic Stars for Christmas with Rainbow Splash!
Hero Arts Partners Blog Hop: Lawn Fawn!
Waffleflower July Release Blog Hop!
December 2018 My Monthly Hero Blog Hop + Giveaway!
March 2020 Essentials By Ellen Blog Hop+Giveaway!
The Ton Anniversary Release: Day 1!
The Ton Stamps Summer Release: Day 1
Autumn Legs with Colorado Craft Company and Catherine Pooler!

Disclosure

Some affiliate links are used in my posts. This means that, should you click on one of my links and purchase something from that company, I will receive a small portion of the sale at no extra cost to you. I use the money earned from these sales to help maintain my blog. I so appreciate you visiting and, if you do choose to use one of my affiliate links, thank you so much for your support!
Copyright © 2026 ·Brunch Pro Theme · Genesis Framework by StudioPress · WordPress · Log in
Loading Comments...