• Skip to main content
  • Skip to primary sidebar
  • Skip to secondary sidebar

Sixth Street Sundries

Emily Midgett

  • Home
  • About Me
  • Contact
  • OLO Marker Color Swatch Chart
  • Shop

peony

Simon Says Stamp Dear Friend Release + 2 NEW Illustrations!

May 18, 2023

Hi friends! Simon Says Stamp is releasing their new Dear Friend collection tonight, and I have illustrated two new stamp sets for this release: Peony Background and Blissful Bouquet! I have a minor (okay, major) love affair with peonies, and my friend Caly Person (you can check out her blog HERE) sent me the most stunning photos of peonies from her garden last year… I couldn’t resist drawing them, and then Simon Says Stamp turned my illustration into a big, bold, red rubber background stamp!

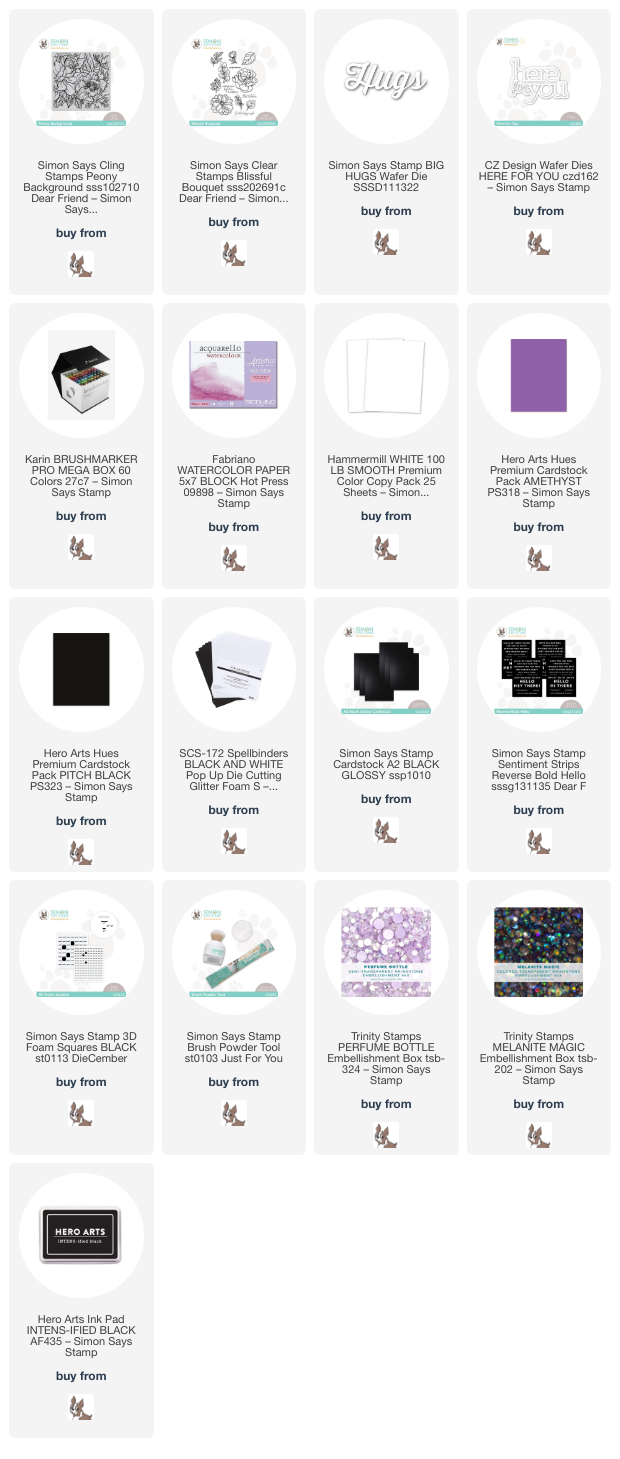
I immediately stamped the Peony Background stamp on both Fabriano Artistico watercolor paper and Hammermill paper with black ink so that I could do some watercoloring and some alcohol marker coloring. These huge peony images are perfect to sit down and relax with your favorite coloring medium…. they’re so huge that you can really dig down into the nooks and crannies and practice adding dimension and depth. I colored the watercolor panel with Karin Brushmarker Pro markers (I find that the Fabriano Hot Press watercolor paper works beautifully with the Karin Brushmarkers; the markers’ dye is transparent and I find that that transparency works wonderfully with the super smooth surface of the hot press paper.), and I colored the Hammermill panel with OLO markers. I decided to focus on the OLO panel for today’s cards and save the watercolored panel for a rainy day!

The large Peony Background creates a slightly larger than 5.5″ square panel, which makes it perfect for use on an A2 card, creating a square card, mini slimline… or, as I’ve done here, cutting it in half and creating two different cards! I stamped the Peony Background onto my Hammermill cardstock using Hero Arts’s Intens-ified Black ink, my go-to for alcohol marker coloring or watercoloring, stamping a few times to be sure of a crisp black line. I then used my OLO markers to color the peonies in bright shades of bubble gum pink, deep magenta, and a dark lilac purple (a peony color which I don’t believe truly exists in real gardens, but it’s fun to dream!), adding beautiful emerald to the leaves. Once I had finished coloring the images themselves, I added black marker to the background to make sure that those brightly colored peonies were the stars of the show!

To create the A2 card and mini-slimline card, I cut the 5.75″ square panel in two sections, one 3″x5.5″ for the mini-slimline, leaving the remaining 2.75″x5.5″ for the A2 card. I was sure to keep as much of the two large peonies intact as I could, which worked out well to keep the majority of the cool pinks to one side and the deep magenta on the other panel!

For the first card, I used the A2-sized panel as the jumping off point for the rest of my project. I trimmed a very thin piece of Amethyst cardstock from Hero Arts, as it worked perfectly with the beautiful purple peony “marshmallow” buds in the corners and picked up the cool purple tones in the larger bubble gum pink peony nicely. I also clear embossed the entire Peony Background on a panel of Pitch Black cardstock using clear embossing powder to add a bit more interest to the black panel. I placed the colorful panel along the right edge of my black embossed panel, then nestled the purple strip right up against the other edge of the colorful piece to create a touch of contrast between the two patterned pieces.

After I had created my background, I set to work on my sentiment. I die cut the Big Hugs die from some glittery black foam from Spellbinders, adding extra dimension, height, and texture, but keeping those crisp, dramatic black accents true! I also trimmed down one of the greeting strips from the new Reverse Bold Hello Sentiment Strips and popped it up beneath the glittery black foam greeting with some black foam adhesive.

Once I had adhered the sentiment components, I added a few Perfume Bottle gems from Trinity Stamps to accent the purple tones in my card.

I kept things very simple for my mini-slimline card, simply trimming down the large floral panel to 3×5.5″, which I matted on a 3 1/8″x5 5/8″ panel of pink cardstock to create the slimmest of hot pink outlines around my colorful background, accenting the vivid colors on my black mini slimline (3.5″x6″) card front.

For the greeting, I die cut the Here For You die from some of Simon Says Stamp’s Glossy Black cardstock and adhered it towards the bottom of my card front so that I wasn’t covering up too much of my meticulously-colored magenta peony bloom. The final touch was to add a few iridescent black Melanite Magic gems to add a touch of sparkle. This card is simple in layout, but those enormous flowers make such a huge statement on their own; you don’t really need much more to create a dramatic card!

Well, that’s all for my projects today. I have a few more projects to share with you during the blog hop, so be sure to stop back by on Saturday to see some more inspiration using the new Simon Say Stamp Dear Friend release! Thanks so much for stopping by today, and have a marvelous day!
Filed Under: OLO markers, original illustrations, simon says stamp Tagged With: mini slimline, olo markers, original illustration, peony, peony background, watercolor

Altenew May 2023 Marvelous Monthly Series Release Blog Hop + Giveaway ($300 in Total Prizes!)

May 18, 2023

Good morning, friends! The new May release for Altenew’s Marvelous Monthly series is here, and the new subscription products are just so beautiful! We’re hopping along to celebrate and inspire you today. You should have arrived here from Agnieszka, and your next stop is Virginia. You can also see the full hop list at the bottom of the post! We have some beautiful new stamps, dies, annnnnd… new colors in the Fresh Dye Ink line! Eeep! I have two projects to share with you today, so let’s get started with the details.

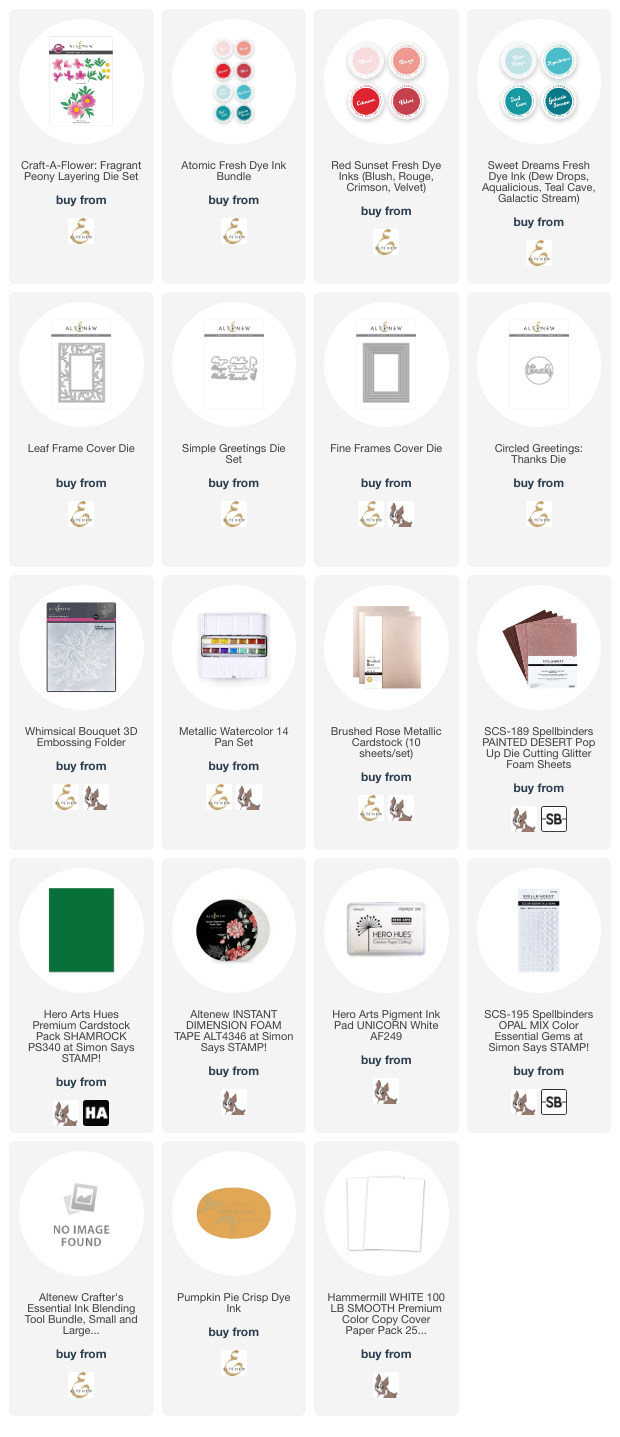
My first project features the luscious new Craft-A-Flower: Fragrant Peony. First, I began by die cutting the layers for the flower itself using the Craft-A-Flower: Fragrant Peony dies and plain white cardstock. Before I assembled the layers, I used a small blending tool to blend Rouge ink very lightly in the center of the peony, concentrating the color a bit more heavily towards the center of each layer and tapering off as I radiated out from the center of the flower, leaving the ends of the petals almost completely white. I also die cut the center of the flower from some bright yellow cardstock, toning it down by blending some Pumpkin Pie ink around the edges, which helps to highlight the beautiful texture embossed on the die cut.

Even when the peonies are crisp and pale and almost bleached, the foliage on the peony bushes remain a vibrant, verdant green, so I die cut my foliage dies from some deep, bottle green cardstock. Because I had two blooms, I wanted to make sure that I had an odd number of floral elements by cutting three different leaves. (An odd number of elements is more visually pleasing-an unwritten rule of design! I try to follow that rule when designing and adding embellishments.)

To allow my very lightly-colored peony blooms to stand out, I decided to keep my card base a bright, crisp white, adding some textural interest with white die cuts. I die cut two Leaf Frame Cover Dies from some white cardstock and layered them together to create a little extra height on my background, making the texture a bit more visible. I arranged my peony die cuts in a cluster and adhered them with foam adhesive, then nestled a “hugs” dimensional die cut greeting in amongst the foliage, cut three times from white cardstock using the Simple Greetings die set. The texture on this card is so fun, while still remaining that crisp, bright white!

My second project features the beautiful ink colors in the Red Sunset Crisp Dye Inks as the focal point. I began by blending an ombré gradient background using all four colors in the Red Sunset set, working from light to dark. I did blend two layers of ink to make sure that the blend was seamless and the colors were really saturated throughout the background.

Once I had my background completely blended and allowed a couple of minutes to dry, I used the Whimsical Bouquet embossing folder to add some beautiful 3D texture to the blended background. I also ran a white pigment ink pad over the top of the raised areas to help enhance the texture even further. The springy foam on the pigment ink pad combined with a light touch helps keep the white ink on only the raised areas. I also splattered some metallic watercolor from the Metallic Watercolor 14 Pan set to add some metallic texture to the background.

I didn’t want to pull attention too far from the vibrant background, so I kept the sentiment and accents simple. I die cut the Fine Frames Cover Die from some Brushed Rose Metallic Cardstock, then added two frames, one thick and one thin, on my blended card front. I also die cut a greeting using the Circled Greetings: Thanks die, cut from some glittery rose gold foam for extra dimension. Finally, I added a few opalescent gems for one last touch of texture!

Well, that’s all for my projects today, and now for some fun giveaway information!

$300 in total prizes! To celebrate this release, Altenew is giving away a $50 gift certificate to 2 lucky winners and a $25 gift certificate to 8 winners! Please leave a comment on the Altenew Card Blog and/or each designer’s blog post on the blog hop list below by 05/24/2023 for a chance to win. Altenew will draw 10 random winners from the comments left on each stop of this blog hop and announce the winners on the Altenew Winners Page on 05/26/2023.

*The winners of the $50 gift certificate will be chosen from comments left on the Altenew blog. 

~~Craft Your Life Project Kit updates~~

Please note: The Craft Your Life Project Kit will no longer be released to the public in the Altenew store, not like other subscription products. It will only be available via the Ultimate Subscription Plan or Craft Your Life Project Kit Monthly Subscription Plan.

If you find yourself loving the subscription products more and more each month, you can check out the Ultimate Subscription Plan, which automatically sends you *all* of the subscription products each month at an awesome discount! You can also subscribe to the individual subscription products to receive just the pieces that you want, but the discount isn’t quite as awesome as with the Ultimate Subscription Plan.

Here’s the full hop list:

You are invited to the Inlinkz link party!

Click here to enter

Thanks so much for stopping by today, and happy hopping!

Filed Under: altenew Tagged With: 3D embossing folder, craft a flower, ink blending, peony, whimsical bouquet

Altenew Build A Flower Cora Louise Blog Hop+Giveaway!

January 1, 2021

Hi there! Happy New Year! Let’s get the year started with some pretty flowers, shall we? Altenew is releasing a brand new Build A Flower today, called Cora Louise Peony, showcasing large, gorgeous blooms and foliage, and we’re celebrating with a blog hop! You should have arrived here from Jessie Banks and your next stop is LauraJane, or you can start at the beginning at the Altenew blog.

This gorgeous new addition to the Build A Flower series (subscribe here to receive these beautiful sets each month at a discount!) features a beautiful large-scale peony bloom that can be layered or stamped in the outline and colored with your choice of coloring medium! I have chosen to showcase the beautiful detail of this gorgeous stamp with some heat embossing, colored cardstock, and ink blending. Let’s get started with the details!

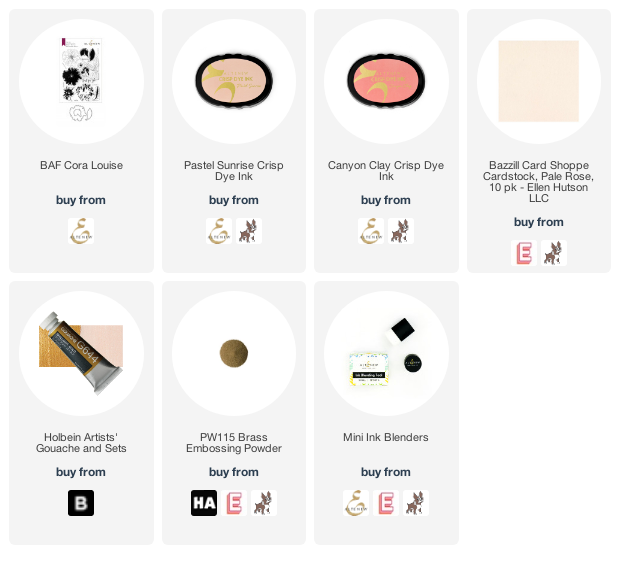
To start, I heat embossed two of the blooms and several leaves from Cora Louise Peony using some brass embossing powder on a gorgeous pale blush cardstock and die cut them with the coordinating dies. I then used Pastel Sunrise and Canyon Clay inks with some blending brushes to add some color to the centers of the flowers.

When doing a monochromatic project like this, I will keep things as simple as possible, colorfully-speaking, by doing the card base in the same color as the floral die cuts. I cut another pale blush panel of A2 cardstock, then did some more blending in just one corner using the same Pastel Sunrise and Canyon Clay inks. I also added some pretty metallic gold splatters using gold gouache and a wet paintbrush to create a pretty textured background.

Once my gouache splatters had dried, I used foam tape to pop up the floral die cuts on the card front. I heat embossed a greeting from Cora Louise Peony on a strip of the same blush cardstock, then mounted that sentiment strip on a slightly larger strip of sparkling gold glitter cardstock to help it stand out from the rest of the monochromatic card. The final touch was to add some metallic gems for some shine! I love that I used just one main color for this entire card, but it’s definitely not boring! The many different textures of metallics and additional ink blending helps to add interest and keep the monochromatic look from being too simple.

Well, that’s all for my project today! As always, Altenew is doing several giveaways to celebrate their newest installment of the Build A Flower series! $200 in total prizes! To celebrate this release, Altenew is giving away a $50 gift certificate to 1 lucky winner and a $15 gift certificate to 10 winners! Please leave a comment on the Altenew Card Blog and/or each designer’s blog post on the blog hop list below by 01/07/2021 for a chance to win. Altenew will draw 11 random winners from the comments left on each stop of this blog hop and announce the winners on the Altenew Winners Page on 01/09/2021.

Your next stop is LauraJane. Thanks so much for stopping by today, and have a marvelous day!

Filed Under: altenew Tagged With: build a flower, cora louise, ink blending, peony

Hero Arts+Altenew- Partners Blog Hop+Giveaway!

October 23, 2019

Good morning! Today, I have the pleasure of taking part in another Hero Arts Partners blog hop. You should have arrived here from Caly Person, and your next stop is Ilina Crouse. Hero Arts is celebrating a whopping 45 years in this fantastic crafting industry, and to help them celebrate this momentous occasion and our fantastic industry in general, several different crafting companies have partnered up with Hero Arts to release collaborative stamp sets! This month, we’re pairing up with Altenew to release this absolutely stunning floral: Bloom and Grow. This stamp set features an incredible, gigantic peony bloom, as well as several fantastic sentiments. I’ve paired this beautiful flower with some no-line pencil coloring, ink blending, and white splatters, so let’s get started with the details!

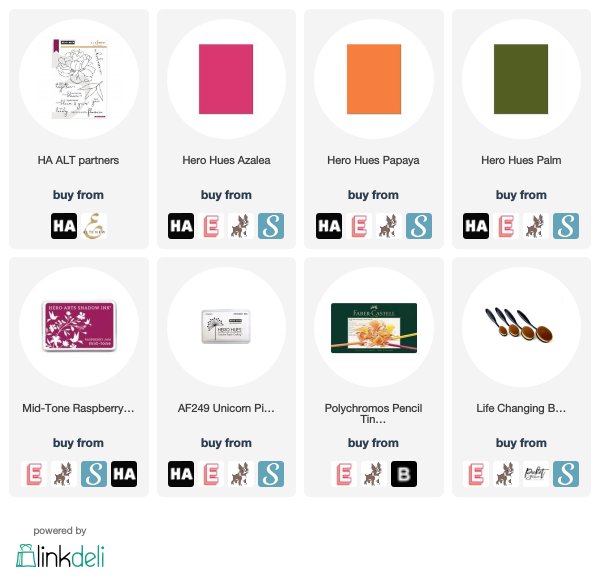
Any time I do no-line pencil coloring on colored cardstock, 99% of the time, I will reach for my Hero Arts Unicorn White ink pad. It stamps details beautifully and crisply on colored cardstock, as well as blending into the pencil coloring seamlessly. I stamped the large peony image from Bloom and Grow on an A2 panel of Papaya Hero Hues cardstock using Unicorn White ink, then using some Post-It notes as masks, stamped the foliage in three different spots as well.

Once I had all of the stamping finished, I dug out my long-neglected Polychromos colored pencils (I just can’t seem to find the time to really dig in with my colored pencils these days!), because this blooms was just dying to be colored in pencils. It’s so massive that you can really dig down into the nooks and crannies and get some fabulous shading and depth. I’m not going to lie; this was not a quick process, and while some might find the amount of time that I spend on my pencil projects excessive, I find the coloring completely therapeutic and just what I needed after some really tough weeks.

Once I had finished coloring, I lightly blended some Raspberry Jam ink on the opposite corner of the penciled panel, then covered the flower up with some more Post-It notes and splattered some White Liquid Watercolor in the blended area. I added a greeting that I’d white embossed on some Palm cardstock using foam tape, then trimmed just a bit off of the penciled panel and mounted it in the top corner of an Azalea panel.

Well, that’s all for my project! Now, we have some fun giveaways for you:

There will be 3 prizes, drawn from comments left across the blog hop:
– One winner will receive the stamp set!
– One winner will receive a $25 shopping spree at Altenew
– One winner will receive a $25 shopping spree at Hero Arts

Hoppers have until Sunday, October 27th to leave their comments, and the winner will be announced on the Hero Arts blog the following week. The more comments you leave, the more chances you have to win!

Your next stop is Ilina Crouse. I’ve also got the whole hop list below in case you get lost. Happy hopping!

Hero Arts
Altenew
Ashlea Cornell
Caly Person
Emily Midgett
Ilina Crouse
Jaycee Gaspar
Jen Schow
Kathy Racoosin
Laurie Willison
Libby Hickson
Lilith Eeckels
Maryám Pérez
Michelle Short
Nathalie DeSousa
Nichol Spohr
Norine Borys
Svitlana Shayevich
Virginia Lu
Yana Smakula
his

Thanks so much for stopping by today, and have a marvelous day!

Filed Under: altenew, Hero Arts Tagged With: colored pencil, no line coloring, partners, peony, polychromos

Giant Blooms and a New Exploring with Emily Video!

July 18, 2019

Hi there! Today, I’m sharing the latest installment of the Exploring with Emily series with Ellen Hutson. This month, I am working with the new Hero Hues Reactive Inks. These inks debuted during the Hero Arts 45th Anniversary catalog release, and they are absolutely fantastic. They blend beautifully, and in the video I show how easily and perfectly they work as watercolors. You can watch it below or here on the Ellen Hutson YouTube channel:

The stamp used in the video is from a new-to-me stamp company: Colorado Craft Company. They have a beautiful group of Big and Bold stamps that feature some utterly massive blooms: Hydrangea, Peony, and Rose (that I used in the video above). I created two more watercolored projects using the Hydrangea and Peony stamps and my Daniel Smith watercolors.

For my first project, I used the beautiful Get Well Hydrangea stamp, first stamping it with Versafine Onyx ink and heat embossing it with White Satin Pearl embossing powder on some Arches Cold Press watercolor paper. The combination of the black embossing powder and the pearlescent powder creates a pretty pearlescent charcoal!

I wanted to create a light pink, antiqued hydrangea, one with many different highlights and lowlights and variations in color, as real hydrangeas do. I tend to saturate images with color to start, adding layer after layer of color until the light image that I’d envisioned in my head is no more. In order to keep the hydrangea light, I began by saturating the area around the flower with bright blue and turquoise watercolors. I found that the contrast of the vibrant background helped to keep my hand light on the flowers themselves. I tried to add lots of variations of color, keeping the petals on the top the lightest with very diluted color, the petals beneath quite dark with very concentrated color, and adding a few touches of very pale yellow to indicate sunshine hitting the bloom

After I’d finished watercoloring the bloom, I needed to add a sentiment, but didn’t want to cover up too much of my meticulously-watercolored panel. My favorite way to add subtle sentiments is to heat emboss a greeting on a piece of heavyweight vellum, which allows the background to still shine through, though slightly muted. I white embossed the greeting from Get Well Hydrangea on a rectangle of heavyweight vellum, then added tiny dots of adhesive behind the embossing to hide the adhesive and not ruin the overall look of the vellum.

For my second project, I focused on the gorgeous, massive peony, but I wanted to do some no-line watercoloring. I began by stamping the image Arches Cold Press using Ink On 3’s Fadeout Ink and my Misti.

I can never get enough pink peonies, so I watercolored the gorgeous flower using my Daniel Smith watercolors in shades of pink, lavender, adding some shadows of deep purple and highlights of pale yellow, again to add variation where the sunlight would hit the petals.

I used the same idea for the greeting as I did for the previous project; I silver embossed the sentiment from Missing You Peony on a strip of vellum, then hid tiny dots of liquid adhesive on the back of the embossed sentiment strip. An effective way to add a subtle greeting to your detailed card front, no?

Well, that’s all for me today! I hope you’ve enjoyed my first explorations into these beautiful blooms from Colorado Craft Company. They have many darling stamps, including some huge stamps of various sweets that I’m dying to play with. I hope you’ll check them out! Thanks so much for stopping by, and have a marvelous day!

Filed Under: colorado craft company, Ellen Hutson, ink on 3, watercolor Tagged With: big and bold, exploring with emily, fadeout ink, get well hydrangea, hydrangea, missing you peony, no line watercolor, peony, rose, watercolor

  • Page 1
  • Page 2
  • Go to Next Page »

Primary Sidebar

  • Facebook
  • Instagram
  • Pinterest
  • YouTube

Favorite Shops

Secondary Sidebar

Subscribe

Enter your email address to subscribe to this blog and receive notifications of new posts by email.

Instagram
Something is wrong.
Instagram token error.
Follow
Load More

Archives

Tags

3D embossing folder alcohol markers better press birthday birthday card blog hop card kit christmas christmas card christmas tag colored pencil copic copic coloring Daniel Smith die cutting embossing folder embroidery felt giveaway holiday holiday card hot foil ink blending karin brushmarker pro layered stencil masculine my monthly hero new release no line coloring no line watercolor OLO marker olo markers original illustration pawsitively saturated rainbow shaker card slimline stamping stamptember stencil thank you thinking of you valentine's day video watercolor

Popular Posts

Simon Says Stamp Sending Cheer Blog Hop- Day 2 + Freebie + Giveaway!
Joyful Snowman with New Simon Says Stamp Sending Cheer Release!
Simon Says Stamp Sending Cheer Release: Now Available!
Altenew October 2026 Release Blog Hop + Giveaway!
February 2018 My Monthly Hero Blog Hop!
Altenew March 2020 Release Blog Hop+Giveaway!
Special Release: Simon Says Stamp Limited Edition STAMPtember Christmas Card Kit!
Simon Says Stamp Cozy & Bright Inspiration, Part Two!
Waffleflower December Release Blog Hop!
Altenew Build A Flower Japanese Mum Blog Hop!

Disclosure

Some affiliate links are used in my posts. This means that, should you click on one of my links and purchase something from that company, I will receive a small portion of the sale at no extra cost to you. I use the money earned from these sales to help maintain my blog. I so appreciate you visiting and, if you do choose to use one of my affiliate links, thank you so much for your support!
Copyright © 2026 ·Brunch Pro Theme · Genesis Framework by StudioPress · WordPress · Log in
Loading Comments...