• Skip to main content
  • Skip to primary sidebar
  • Skip to secondary sidebar

Sixth Street Sundries

Emily Midgett

  • Home
  • About Me
  • Contact
  • OLO Marker Color Swatch Chart
  • Shop

polychromos

Sweet Snowy Birds and Punny Sentiments!

January 22, 2024

This post was sponsored by Simon Says Stamp. Thanks, Simon!

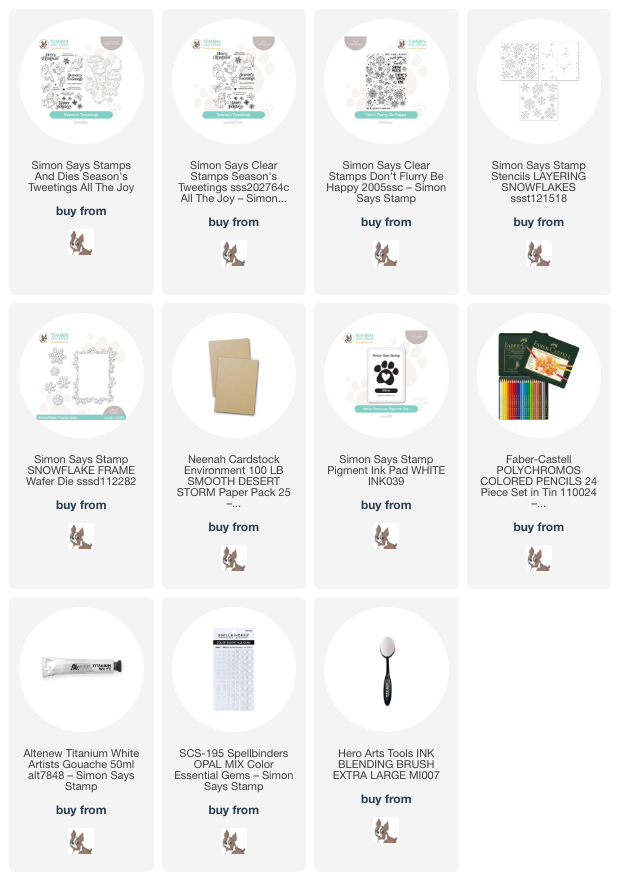
Hi friends! We have another snow day for my kiddos today, so I am snatching a few moments while my kiddos are occupied to share a pair of cards with a completely appropriate theme for the current weather outside! I used to shy away from the more “cutesy” critter illustrations, but after seeing Debby Hughes’s masterful coloring on things I would previously have not considered to work well with my coloring style, I decided that I could still apply my own preferred coloring techniques and mediums no matter the illustrative style! I love these sweet birds from Simon Says Stamp’s Season’s Tweetings; we have a cardinal pair that live in the trees outside of my house, and it never fails to cheer me when I hear their precious little cheeps. I paired the Season’s Tweetings set with my colored pencils and some Kraft cardstock to create these unique winter projects. Let’s get started with the details!

I love the look of colored pencil on colored cardstock, and pencil images pop so magnificently on Kraft cardstock. I find that I forget about Kraft cardstock in favor of the rainbow of vivid colorful cardstock in my stash, but when I use it I am always astonished at how much I like the finished look! I recently found a wintry card that I made a long time ago using colored pencils on Kraft with crisp white snowflakes created with white pigment ink, and thought how darling it would be recreated with these sweet birds from Season’s Tweetings. I also wanted to show that these birds don’t have to just be used for Christmas cards, as well!

For my first card, I stamped the cardinal from Season’s Tweetings onto Kraft cardstock using white pigment ink and used colored pencils to color him in, creating the vibrant ruby red feathers that are such a welcome sight in the bleak winter landscape and adding a vivid turquoise scarf to protect him from the chill. I die cut the finished bird with the coordinating die and began work on my background.

White pigment ink shows up so beautifully on Kraft cardstock, so I created a wintry backdrop for my bright feathered friend using the Layering Snowflakes Stencil and white pigment ink. I have a blending brush dedicated just to white pigment ink, which is great to have in your toolbox for several different techniques. I blended the snowflakes, then used the blending brush to blend more white pigment ink around the edges of the card to create the feel of a frosted windowpane. To top it off, I splattered the background with some white gouache, as well, adding further texture.

After I had created the background, I heat embossed a couple of sentiments from Don’t Flurry Be Happy onto some vellum using white embossing powder. I used sharp scissors to fussy cut the greetings, then used foam squares to adhere the cardinal and clear dimensional adhesive to adhere the greetings on my snowy card front. To accent the die cuts, I cut the individual snowflakes from the Snowflake Frame die set from plain white cardstock and tucked them in around the cardinal and greeting. I love how the white cardstock pops on the Kraft background! Finally, I scattered a few white gems for one more addition of texture.

For my second card, I colored a sweet bluebird from Season’s Tweetings on more Kraft cardstock using colored pencils. I stamped him first using white pigment ink, then used the pencils to add vibrant jewel-bright colors to make him pop from the brown background. I find that white pigment ink is my favorite for use with colored pencils on colored cardstock; it doesn’t quite absorb fully into the cardstock, but becomes part of the pencil layer, allowing a super smooth image with crisp edges. After I’d finished coloring, I used the coordinating die to cut my little birdie out.

For the background, rather than create an all-over pattern, I decided to create a small highlighted area in the center of my Kraft card front, first by blending white pigment ink in the center of the card, then stamping snowflakes from Season’s Tweetings with white pigment ink. I also added a few snowy dots amongst the stamped snowflakes with a white gel pen. I find that adding different gradients of white can be a great way to add extra interest and texture to a snowy background. I popped up the bird and a white embossed sentiment strip, also from Don’t Flurry Be Happy, using foam squares, then tucked a few more white die cut snowflakes around the main focal point. Don’t you just love how that bright blue bird just pops off of the background??

Well, that’s all for my projects today! I hope this will inspire you to take a second look at stamp sets that you didn’t think would vibe with your personal style, because taking stamp sets and fitting them into my own vision and aesthetic is one of the best things about this hobby. Thanks so much for stopping by today, and have a marvelous day!
Filed Under: simon says stamp Tagged With: colored pencil, don't flurry be happy, layering snowflakes, polychromos, season's tweetings, snowflake frame, stencil, winter card

Hero Arts+Altenew- Partners Blog Hop+Giveaway!

October 23, 2019

Good morning! Today, I have the pleasure of taking part in another Hero Arts Partners blog hop. You should have arrived here from Caly Person, and your next stop is Ilina Crouse. Hero Arts is celebrating a whopping 45 years in this fantastic crafting industry, and to help them celebrate this momentous occasion and our fantastic industry in general, several different crafting companies have partnered up with Hero Arts to release collaborative stamp sets! This month, we’re pairing up with Altenew to release this absolutely stunning floral: Bloom and Grow. This stamp set features an incredible, gigantic peony bloom, as well as several fantastic sentiments. I’ve paired this beautiful flower with some no-line pencil coloring, ink blending, and white splatters, so let’s get started with the details!

Any time I do no-line pencil coloring on colored cardstock, 99% of the time, I will reach for my Hero Arts Unicorn White ink pad. It stamps details beautifully and crisply on colored cardstock, as well as blending into the pencil coloring seamlessly. I stamped the large peony image from Bloom and Grow on an A2 panel of Papaya Hero Hues cardstock using Unicorn White ink, then using some Post-It notes as masks, stamped the foliage in three different spots as well.

Once I had all of the stamping finished, I dug out my long-neglected Polychromos colored pencils (I just can’t seem to find the time to really dig in with my colored pencils these days!), because this blooms was just dying to be colored in pencils. It’s so massive that you can really dig down into the nooks and crannies and get some fabulous shading and depth. I’m not going to lie; this was not a quick process, and while some might find the amount of time that I spend on my pencil projects excessive, I find the coloring completely therapeutic and just what I needed after some really tough weeks.

Once I had finished coloring, I lightly blended some Raspberry Jam ink on the opposite corner of the penciled panel, then covered the flower up with some more Post-It notes and splattered some White Liquid Watercolor in the blended area. I added a greeting that I’d white embossed on some Palm cardstock using foam tape, then trimmed just a bit off of the penciled panel and mounted it in the top corner of an Azalea panel.

Well, that’s all for my project! Now, we have some fun giveaways for you:

There will be 3 prizes, drawn from comments left across the blog hop:
– One winner will receive the stamp set!
– One winner will receive a $25 shopping spree at Altenew
– One winner will receive a $25 shopping spree at Hero Arts

Hoppers have until Sunday, October 27th to leave their comments, and the winner will be announced on the Hero Arts blog the following week. The more comments you leave, the more chances you have to win!

Your next stop is Ilina Crouse. I’ve also got the whole hop list below in case you get lost. Happy hopping!

Hero Arts
Altenew
Ashlea Cornell
Caly Person
Emily Midgett
Ilina Crouse
Jaycee Gaspar
Jen Schow
Kathy Racoosin
Laurie Willison
Libby Hickson
Lilith Eeckels
Maryám Pérez
Michelle Short
Nathalie DeSousa
Nichol Spohr
Norine Borys
Svitlana Shayevich
Virginia Lu
Yana Smakula
his

Thanks so much for stopping by today, and have a marvelous day!

Filed Under: altenew, Hero Arts Tagged With: colored pencil, no line coloring, partners, peony, polychromos

A New Mondo from Essentials By Ellen!

October 12, 2019

Hi! I have some more inspiration for you using the newest Mondo stamp set from the October Essentials By Ellen release. This month, Mondo Chrysanthemum was added to the Mondo floral lineup, and it’s such a beautiful set! I have a card featuring a pretty coral color scheme, as well as my latest Exploring With Emily video showing a neat monochromatic technique using some of the latest Mondo florals. Let’s get started with the details!

I began by stamping the Mondo Chrysanthemum stamp set using Intens-ified Black ink on some Copic-friendly cardstock. I then used some pretty shades of coral Copic markers to add some color and shading to the image.

I die cut the colored images using the coordinating dies. I also stamped a greeting from the new Totally Random Sayings, Vol. 3 on a rectangle of white cardstock.

I used the Stitches Cover Plate die to die cut a clean, white, textured background, upon which I layered the Copic-colored Chrysanthemum and sentiment. The final touch was to add a few gems for a touch of sparkle!

For this month’s Exploring With Emily video, I paired the Mondo Chrysanthemum and Mondo Amaryllis stamp sets with some colored cardstock, Copic markers, and Polychromos pencils to create two different monochromatic projects. Here’s the video:

Or you can watch the video here on YouTube.

The coloring is very subtle, allowing the colored cardstock to do most of the work!

I love how these turned out! I hope you’ll check out the video and maybe try your hand at a monochromatic coloring project!

Well, that’s all for me today! Thanks so much for stopping by today, and have a marvelous day!

Filed Under: Ellen Hutson, polychromos Tagged With: chrysanthemum, colored pencil, copic, mondo chrysanthemum, monochromatic, polychromos

Altenew Color Therapy Blog Hop+GIVEAWAY!

July 12, 2018

Good morning! I am excited to be a part of Altenew’s Color Therapy Blog Hop! You should have arrived from Barb Engler‘s blog, and your next stop is Zinia Redo. This hop was organized by Altenew to help encourage people to color just because they love to color. If you’ve followed me for any length of time, you know that coloring is my passion. Any medium. (And I must have them ALL lol!) I always get so sad when the Daily Marker 30 Challenge is over, because I don’t have an “excuse” to color on a daily basis anymore, but the truth is that I shouldn’t need an excuse to do something that I love every single day! Coloring is my safe space, my meditation, my version of yoga. (Well, that and online shopping haha!) I’m so happy to have been included in this blog hop doing something that I love! I hope you’ll read to the end, because I have a few tricks to help you make the most of not one, but TWO mediums… plus, there’s giveaway information at the end! 😉

Because they’re awesome like that, Altenew is also running a sale on their Artist Markers, so I decided to combine the Artist Marker Set A with my Polychromos pencils to really get a lot of bright, happy colors with depth and dimension. I started by stamping several images from my all-time favorite Altenew stamp set: A Beautiful Day using alcohol marker-friendly black ink.

I colored the images in using most of the markers from the Artist Marker Set A, using only two of the pink markers on my largest bloom. I wanted to keep the bloom more coral than red, so I decided to omit the two darkest pink markers and use my Polychromos pencils to add depth and shadows instead. You can see the difference adding the colored pencils made on the depth of the flower! I also added some dark blues to the smaller sprigs.

After I’d added sufficient extra shading and gotten into every nook and cranny, it was time to assemble my card. I die cut the florals and foliage using the coordinating dies, then used the Creative Edges: Lace die at the bottom of a white card stock panel.

After I’d determined the placement of the flowers on the card front, I stamped a sentiment from Altenew’s Celebrations stamp set. (The fonts in that set are SO beautiful… I can’t believe I’ve never used them before now!) I also added a strip of glittery black card stock at the bottom. I adhered the florals using foam adhesive to add extra dimension, and added a few gems for some sparkle.

Well, that’s all for that project! What a difference adding that bit of colored pencil made to my project. I hope you’ll try adding some extra oomph to your colored projects by combining your mediums!!

Now, for some fun announcements: Altenew is running a sale on their Artist Markers, so if you’ve wanted to try them, now would be a great time to get your fingers on them at a great price! They’re so fun to work with, and the color range is just beautiful. Use code HAPPYCOLORS at checkout to receive 15% off of the artist markers!

Giveaway Information:

Altenew is giving away a $30 gift certificate to six lucky winners! Please leave a comment on the Altenew Card Blog and/or Altenew Scrapbook Blog by Wednesday, July 18th for a chance to win. Six winners will be announced on the Altenew blogs on 7/22/2018.

Not only is Altenew giving away a $30 gift certificate on their own blog, but they’ve also given me a $20 gift certificate to give away to my own blog readers! All you have to do to be eligible: 1) be a blog follower/subscriber. (I will check!) 2) Leave a comment here telling me which coloring medium is your favorite! Leave your comments by 7/15/18, and I will announce the winner on 7/16/18!! Thanks so much for stopping by! Happy hopping!

Altenew Card Blog

Kathy Racoosin

Kelly Latevola

Laura Jane

Svitlana Shayevich

Lydia Fiedler

Kristina Pokazanieva

Kymona Tracey

Gayatri Murali

Laurie Willison

Altenew Scrapbook Blog

Barb Engler

Emily Midgett<— you are here

Zinia Redo

Dana Gong

Virginia Lu

Erica A-B

Leigh Houston

Norine Borys

Agnieszka Malyszek

Kelly Griglione

Justine Hovey

Lilith Eeckels

Michelle Short

Nina-Marie Trapani


Filed Under: altenew, giveaway, polychromos Tagged With: artist markers, blog hop, colored pencils, giveaway, polychromos

The Stamp Market Instagram Hop!

June 20, 2018

Good morning! I am participating in a special Instagram hop today using some new goodies from The Stamp Market. I have been having a mild obsession with their products since the company first opened, and the stamp sets in this release just might be my favorite stamps from them ever. We are hopping over on Instagram today, but I thought I’d share my cards here for those readers who don’t follow me on Instagram. 🙂 I made two, one using the new Friendly Bunch (my personal favorite from this release) and Tropical Blooms (which has absolutely gorgeous flowers that I can’t wait to play with more!). I’ve blogged the first one here, but I will have the second one up on Instagram, where you can find me as @eamidgett. 🙂 Come find me! There are several people in this little hop today, and lots of beautiful inspiration to be had using the new release from The Stamp Market!

Amy’s design for the Friendly Bunch stamps is just divine. I love coloring flowers this shape, in particular, because the petals are large enough that you can really work at them and get some great depth and dimension. Sometimes, if the petals or the flower itself is fairly small, it can be challenging to add much in the way of shading, simply because your pencil cannot be sharpened fine enough to get in those tiny nooks and crannies. But these beautiful blooms from Friendly Bunch are just the perfect size and shape for really adding fabulous dimension with Polychromos pencils.

I started by stamping the main image using white pigment ink onto a piece of Jelly Bean card stock from Bazzill. Bazzill cardstock has very nice tooth, making it perfect for use with colored pencils. I then used my Polychromos pencils to color the image, first laying down a layer of white pencil (as I would with Prismacolors) and then coloring as I normally would over the top. With Polychromos pencils, you keep adding layers of color until you achieve a nice smooth blend, and that layer of white helps to cut down on the amount of time you have to spend shading each petal.

After I had finished coloring, I die cut the “smile” from the coordinating die set for Friendly Bunch using some white cardstock upon which I had sprayed some Hero Arts White Shimmer Spritz. I added the die cut to the card front, then added the sentiment on a strip and adhered it to the card front as well. The final touch was to add some pretty purple jewels from Pretty Pink Posh.

Well, that’s all for me on this post! Remember, head over to Instagram to see all of the projects from the hop participants. There is lots of fantastic inspiration to be had, not to mention a GIVEAWAY! I hope you’ll check it out!


Filed Under: polychromos, the stamp market Tagged With: floral, instagram hop, new release, polychromos

  • Page 1
  • Page 2
  • Go to Next Page »

Primary Sidebar

  • Facebook
  • Instagram
  • Pinterest
  • YouTube

Favorite Shops

Secondary Sidebar

Subscribe

Enter your email address to subscribe to this blog and receive notifications of new posts by email.

Instagram
Something is wrong.
Instagram token error.
Follow
Load More

Archives

Tags

3D embossing folder alcohol markers better press birthday birthday card blog hop card kit christmas christmas card christmas tag colored pencil copic copic coloring Daniel Smith die cutting embossing folder embroidery felt giveaway holiday holiday card hot foil ink blending karin brushmarker pro layered stencil masculine my monthly hero new release no line coloring no line watercolor OLO marker olo markers original illustration pawsitively saturated rainbow shaker card slimline stamping stamptember stencil thank you thinking of you valentine's day video watercolor

Popular Posts

Simon Says Stamp Sending Cheer Blog Hop- Day 2 + Freebie + Giveaway!
Joyful Snowman with New Simon Says Stamp Sending Cheer Release!
Simon Says Stamp Sending Cheer Release: Now Available!
February 2018 My Monthly Hero Blog Hop!
Altenew March 2020 Release Blog Hop+Giveaway!
Special Release: Simon Says Stamp Limited Edition STAMPtember Christmas Card Kit!
Simon Says Stamp Cozy & Bright Inspiration, Part Two!
Altenew October 2026 Release Blog Hop + Giveaway!
Waffleflower December Release Blog Hop!
Altenew Build A Flower Japanese Mum Blog Hop!

Disclosure

Some affiliate links are used in my posts. This means that, should you click on one of my links and purchase something from that company, I will receive a small portion of the sale at no extra cost to you. I use the money earned from these sales to help maintain my blog. I so appreciate you visiting and, if you do choose to use one of my affiliate links, thank you so much for your support!
Copyright © 2026 ·Brunch Pro Theme &middot; Genesis Framework by StudioPress &middot; WordPress &middot; Log in
Loading Comments...