• Skip to main content
  • Skip to primary sidebar
  • Skip to secondary sidebar

Sixth Street Sundries

Emily Midgett

  • Home
  • About Me
  • Contact
  • OLO Marker Color Swatch Chart
  • Shop

poinsettia swag

Painted Holiday Heart with Poinsettia Swag from Simon Says Stamp!

November 22, 2024

This post was sponsored by Simon Says Stamp. Thanks, Simon!

Hi friends! I am back with another project featuring my Poinsettia Swag illustration, this time with some different and unique-to-me mediums. I have been really enjoying creating things other than cards lately, and raided my local dollar store to find different items that I could pair with my stamps and dies. I found these birch wood heart cutouts and thought they’d make perfect ornaments or little wall hangings! I used the Altenew Acrylic Markers to add some color to my Poinsettia Swag illustration from the new Festive Fun release from Simon Says Stamp. Let’s get started with all of the details!

*I have gathered links to all of the products used at the bottom of the post for your convenience, using affiliate links. Thank you for shopping with my links! I truly appreciate your support for my work!*

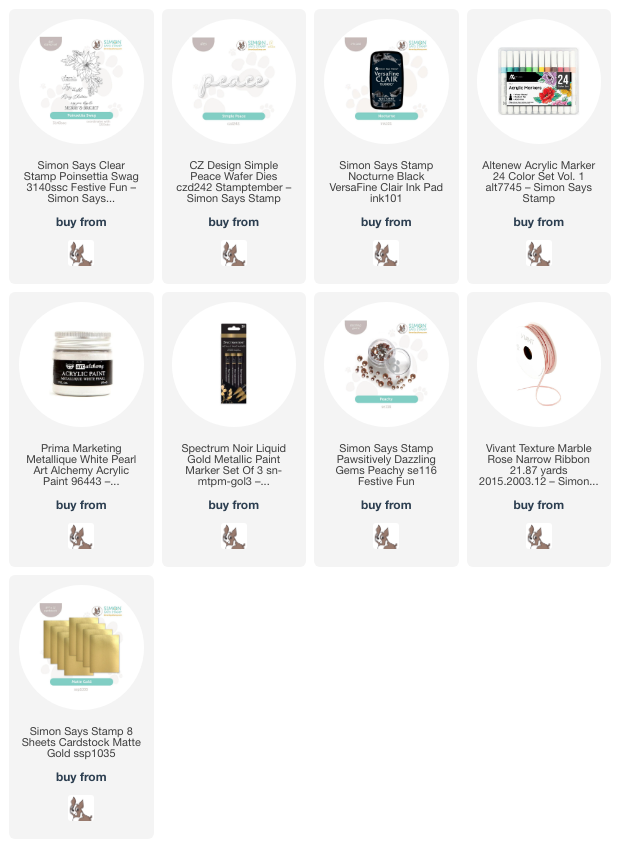
I began my project by painting the entire heart with some pearlescent white paint. I did paint it with multiple coats of this white pearl paint, allowing some dry time between each coat to allow for maximum coverage. After I had allowed the white pearl paint to dry overnight, I used Nocturne ink to stamp the floral image directly onto the painted wooden heart. I used my heat gun to dry the ink a bit, then began coloring.

The Altenew Acrylic Markers are great fun for projects like this; their opacity and viscous nature means that they can be applied to a variety of surfaces, including this painted wood! I used the markers in shades of coral-y red, peach, and minty greens to add vibrant color to the poinsettia images, then used the Spectrum Noir Liquid Gold markers to enhance the details on the individual petals. The addition of this golden metallic marker helps to add a level of luxuriousness to the project and helps to further define each individual petal. I also used the gold marker to add some little dots here and there around the bouquet, almost like I would with sequins or gems! I think it helps to balance out the images a bit.

Once I had finished coloring the image, I die cut the detail layer of the Simple Peace Die from Simon Says Stamp’s Matte Gold Metallic cardstock once and twice more from plain white cardstock, adhering the three layers together with liquid adhesive. I added the simple sentiment to the painted wooden panel with liquid adhesive, then added a few Peachy Pawsitively Dazzling Gems around the bouquet. Finally, I threaded some coordinating ribbon through the holes at the top of the wooden heart to create a hanger.

Well, that’s all for my project today. I love creating things that are a bit more tangible and purposeful than cards… things that hopefully would be kept for a bit longer than a card, ha. (I can’t be the only one who struggles thinking about their hard work getting tossed in the trash!) This would be so pretty on a Christmas tree as an ornament, or even on a door knob or just as a wall hanging, I think! Thanks so much for stopping by today, and have a marvelous day!
Filed Under: simon says stamp Tagged With: acrylic markers, altenew acrylic marker, christmas, home decor, liquid gold, metallic paint, no line coloring, original illustration, poinsettia swag, simple peace

Magenta and Gold Poinsettias for Christmas with New Simon Says Stamp!

November 13, 2024

This post was sponsored by Simon Says Stamp. Thanks, Simon!

Hi friends! I have some more inspiration to share with you using some new products from the Simon Says Stamp Festive Fun release! I always am extra excited when a stamp release includes some of my illustrations, and my new Poinsettia Swag  is so classically Christmas with some pretty sentiments… definitely a holiday staple! I created this traditional holiday card using some of the new goodies from the Festive Fun release, so let’s get started with the details!

*I have gathered links to all of the products used at the bottom of the post for your convenience, using affiliate links. Thank you for shopping with my links! I truly appreciate your support for my work!*

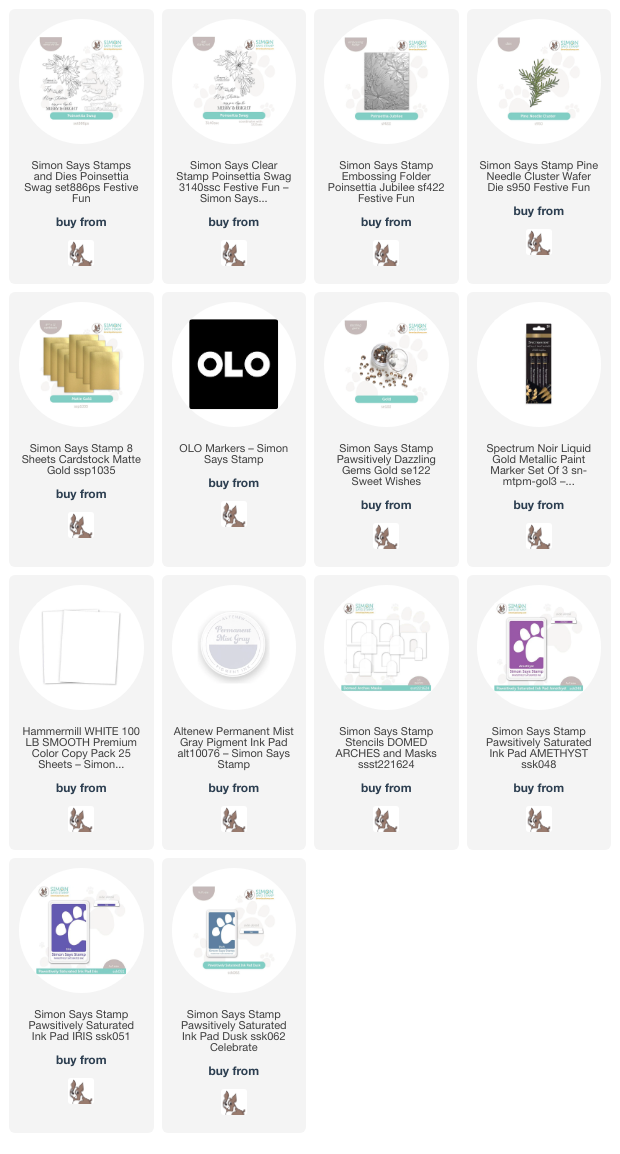
To start, I stamped the floral arrangement from Poinsettia Swag  onto some Hammermill white cardstock using Permanent Mist Gray ink, which is a great ink for no-line alcohol marker coloring. I used OLO Markers to add some vibrant magenta and lime coloring, enhancing the stamens in the center with gold acrylic paint markers. These acrylic paint markers work perfectly even with the vibrant alcohol marker coloring because of their opacity! After I had finished coloring the image, I used the coordinating die to die cut the entire image.

For the background, I kept things simple by adding some texture to a panel of white cardstock slightly smaller than A2 using the Poinsettia Jubilee Embossing Folder. I love the botanical texture that this adds to the background; it keeps things interesting behind the vibrant floral arrangement while still allowing the vibrant flowers to be the center of attention. I splattered the background with some glittering metallic gold watercolors and ran the same gold acrylic paint markers around the edge of the panel to add a bit of extra luxurious metallic shine to the card front. I placed the panel in the center of an A2 panel of white cardstock, creating a simple white frame around the edge of the textured background.

Next, I die cut the Pine Needle Cluster die from some Matte Gold foil cardstock. I popped up the floral arrangement on the textured background using foam adhesive squares, then tucked the pine needle die cuts on the ends, enhancing the arrangement and adding some extra shine to the card. I heat embossed a sentiment from Poinsettia Swag using gold embossing powder and used the coordinating sentiment to cut it out. I popped up the sentiment with a double layer of foam adhesive to help it stand out a bit more from the background. Finally, I tucked a sparkling gold twine bow next to the poinsettia bouquet and adhered a smattering of Gold Pawsitively Dazzling Gems on the card front. The shimmering metallic accents enhance the brightly colored floral swag so nicely!!

Well, that’s all for my project today! I also wanted to share that Simon Says Stamp and Gina K. Designs have teamed up to offer a fabulous freebie!

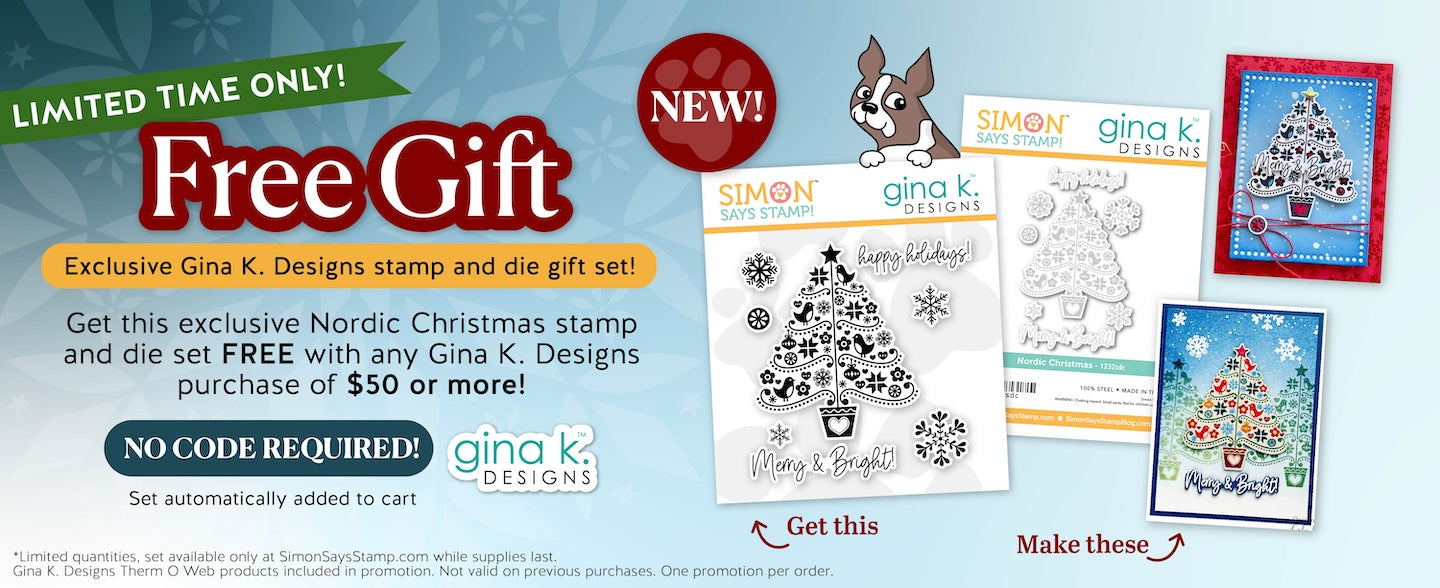
You can receive this gorgeous Nordic Christmas stamp set as a gift with any purchase of $50 worth of Gina K. Designs products! (No code required and while supplies last!) You can click HERE to see the entire Gina K. Designs catalog at Simon Says Stamp.

I created this pair of shaped tags and shimmering ombré card using the freebie set. The gorgeous details on the tree stamp are absolutely luscious.

I created an ombré image by stamping the tree using Amethyst, Iris, and Dusk Pawsitively Saturated Inks with my MISTI, then stamping again with sticky embossing ink and covering it with Iridescent Purple embossing powder. I mimicked the ombré tree by blending the same colors in the same order over an arch background using the Domed Arches Stencils, then splattered it with some metallic watercolors.

I also used some Platinum Sparkle embossing powder to create a pair of shaped tags. You don’t have to do anything super fancy to get gorgeous results with the stamp set thanks to the incredible details!

Well, that’s all for my projects today. Thanks so much for stopping by, and have a marvelous day!!

Filed Under: OLO markers, simon says stamp Tagged With: acrylic paint marker, no line coloring, olo markers, original illustration, pine needle cluster, poinsettia jubilee, poinsettia swag

Simon Says Stamp Festive Fun Blog Hop-Day 1!

November 8, 2024

This post was sponsored by Simon Says Stamp. Thanks, Simon!

Hi friends! I am hopping along with Simon Says Stamp today to celebrate their new Festive Fun release! You should have arrived here from Amy Rysavy, and your next stop is Debby Hughes. You can also find the full hop list on the Simon Says Stamp Blog. I am always excited for a new release and all of the creative possibilities that it brings, but the opportunity to play with my own illustrations always makes the creative process even more thrilling. I have two new sets that debuted with the Festive Fun release: Old Fashioned Christmas and Poinsettia Swag. I shared some inspiration using the Old Fashioned Christmas in THIS blog post on release night, but I thought I’d share a video for today’s hop using the new Poinsettia Swag set. I am a sucker for a good floral arrangement, and what flower is more iconic for the holidays than the poinsettia? You can watch the video below or click HERE to watch it on YouTube.

*I have linked all of the products used at the bottom of the post using affiliate links for your convenience. Thank you for shopping with my links! I truly appreciate your support for my work!*

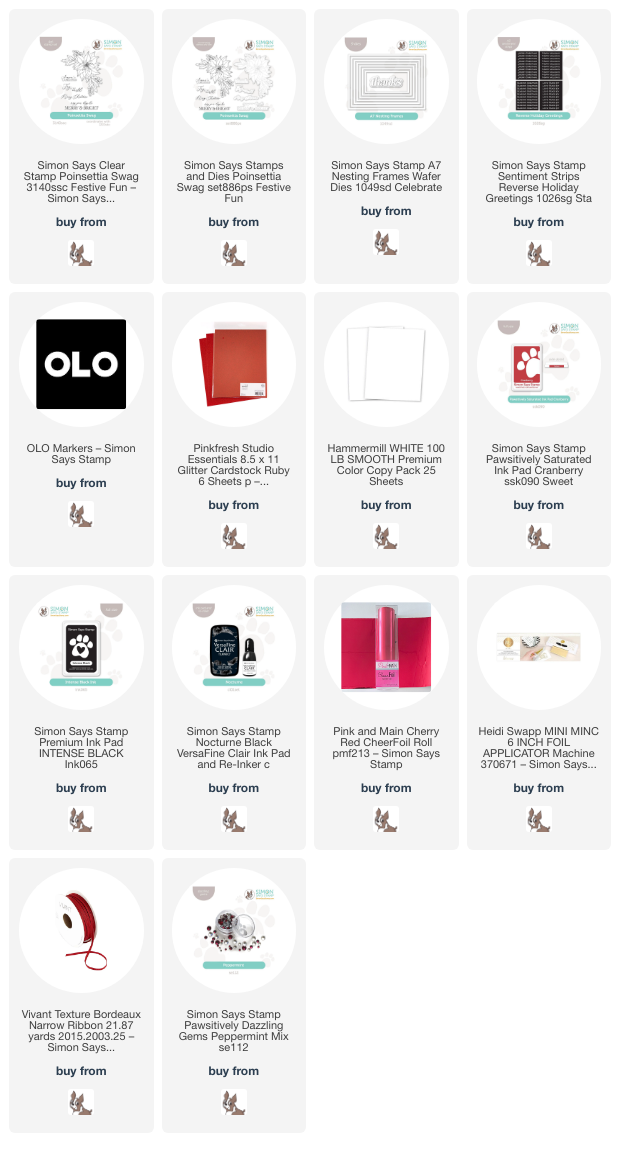
If you can’t watch the video, I’ll give a quick rundown of my process! I began by stamping my new Poinsettia Swag illustration in the corners of an A2 panel of Hammermill cardstock using Simon Says Stamp’s Intense Black Ink, then used OLO markers to add vibrant color to the images in traditional shades of vivid ruby red and jade green. I used the coordinating die to die cut the images, and because they were stamped in the corners of the A2 card front, they each have some straight edges. I didn’t mind the straight edges, because I knew that I wanted to frame them with some glittery cardstock!

To create the background for the vibrant floral arrangements, I wanted to add a very subtle pattern and colorful glow behind the floral die cuts. I used the stamping off method to add some a subtle floral pattern on the edges of my A7 card front, inking up the Poinsettia Swag stamp as normal with Cranberry Pawsitively Saturated Ink, pressing the stamp once onto a piece of scratch paper, then using the residual ink to stamp the image again on the card front. This technique creates a light pattern on the background that does not overpower the colorful floral bouquets. After I had finished stamping, I toned the pattern down even further by adding some tone-on-tone ink blending over the stamped areas.

After I had completed my background, I die cut the A7 Nesting Frames from some gorgeous Ruby Glitter Cardstock from Pinkfresh Studio. I like to leave my frame dies wired together so that I can cut a huge variety of sizes from one pass through my die cut machine! I saved the rest of the frames for a rainy day and adhered one to my stamped and blended background using liquid adhesive. I arranged the poinsettia swag die cuts around the frame, using the straight edges of the frame as a guide for where to place my florals. I popped up the flowers with some thin foam adhesive squares, then added two different greeting components. I stamped, heat embossed, and die cut a greeting from Poinsettia Swag, pairing it with a sentiment from the Reverse Holiday Greetings sentiment card set that I had foiled with some gorgeous red toner foil and my Minc machine. I tucked the greetings amongst the florals with some foam adhesive, then added a festive red bow and some Peppermint Pawsitively Dazzling Gems. Definitely a special card meant for an important person!

Well, that’s all for my project today. Now for some fun giveaway information:

Simon Says Stamp is giving away a $25 coupon to every stop on the hop! The winners will be selected from each blog comment section and posted on the Simon Says Stamp blog on Wednesday the 13th of November. Winners can email Simon Says Stamp to claim his/her prize!!

Simon Says Stamp is also offering a fabulous Free Gift With Purchase. Simply add $100 or more from the Festive Fun release to receive the adorable Cozy Together stamp and die set totally free, added to your cart automatically! What a great gift, right??

Your next stop is Debby Hughes. Thanks so much for stopping by today, and happy hopping!

Filed Under: simon says stamp Tagged With: A7 nesting frames, christmas card, copic coloring, die cutting, giveaway, holiday card, ink blending, olo markers, poinsettia swag, reverse holiday greetings, toner foil

Primary Sidebar

  • Facebook
  • Instagram
  • Pinterest
  • YouTube

Favorite Shops

Secondary Sidebar

Subscribe

Enter your email address to subscribe to this blog and receive notifications of new posts by email.

Instagram
Something is wrong.
Instagram token error.
Follow
Load More

Archives

Tags

3D embossing folder alcohol markers better press birthday birthday card blog hop card kit christmas christmas card christmas tag colored pencil copic copic coloring Daniel Smith die cutting embossing folder embroidery felt giveaway holiday holiday card hot foil ink blending karin brushmarker pro layered stencil masculine my monthly hero new release no line coloring no line watercolor OLO marker olo markers original illustration pawsitively saturated rainbow shaker card slimline stamping stamptember stencil thank you thinking of you valentine's day video watercolor

Popular Posts

Simon Says Stamp Joy For You Blog Hop- Day 1!
Simon Says Stamp Joy For You Release-Now Available!
Frozen Fractals All Around with New Simon Says Stamp Joy For You Release!
Shaped Holiday Shaker Card with New Simon Says Stamp Jolly Season Card Kit of the Month!
Holiday Postage with New Simon Says Stamp!
Simon Says Stamp Glory to the Newborn King Holiday Kit-Part II!
Pinkfresh Studio 5th Birthday!
Altenew Build A Flower: Fuchsia Blog Hop+Giveway!
Holiday Joy in Pink and Green with New Simon Says Stamp DieCember!
Honey Bee Stamps September Release Blog Hop!

Disclosure

Some affiliate links are used in my posts. This means that, should you click on one of my links and purchase something from that company, I will receive a small portion of the sale at no extra cost to you. I use the money earned from these sales to help maintain my blog. I so appreciate you visiting and, if you do choose to use one of my affiliate links, thank you so much for your support!
Copyright © 2026 ·Brunch Pro Theme · Genesis Framework by StudioPress · WordPress · Log in
Loading Comments...