• Skip to main content
  • Skip to primary sidebar
  • Skip to secondary sidebar

Sixth Street Sundries

Emily Midgett

  • Home
  • About Me
  • Contact
  • OLO Marker Color Swatch Chart
  • Shop

snow globe

Snowy Deer with Simon Says Stamp + Colored Pencils!

November 30, 2024

This post was sponsored by Simon Says Stamp. Thanks, Simon!

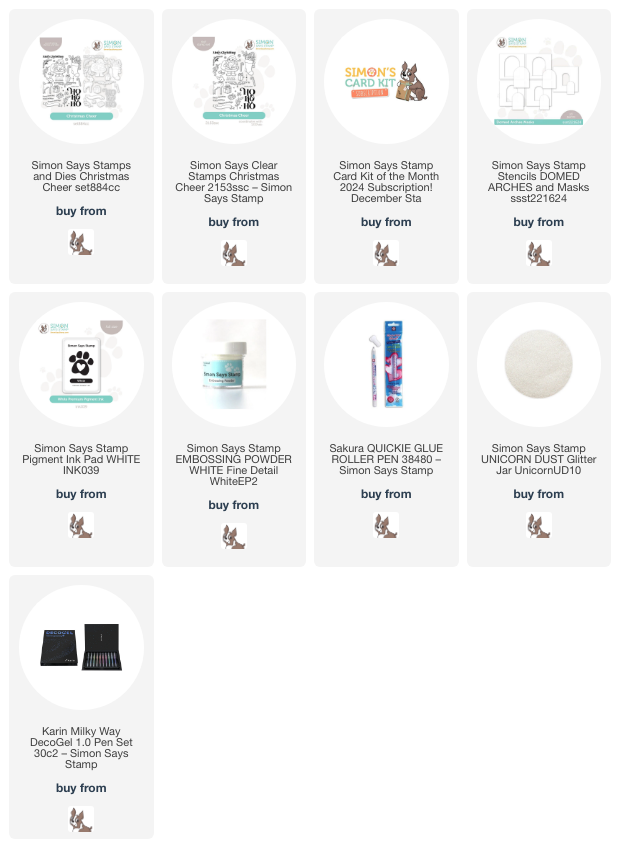
Hi friends! Today, I have a super sweet and feminine project to share with you using the beautiful new Holiday Cheer stamp set from the November 2024 Card Kit of the Month, which is sadly sold out as a kit, but the great thing about Simon Says Stamp kits is that you can almost always purchase the kit items individually! The kits are just a really excellent value, full of coordinating products that work beautifully together and separately, so it’s totally worth it to become a Subscriber. (Click HERE to read all of the details on how you can save money with a monthly subscription!) However, the precious Christmas Cheer stamp set is still available (and with coordinating dies as a set!) and I’ve used it to create this delicate and feminine holiday card. Let’s get started with the details on my project!

To begin, I stamped the deer, the holly sprigs, and the sweet bow images from the Christmas Cheer stamp set onto some pale gray cardstock using Simon Says Stamp White Pigment ink. I like to use white pigment ink when working with colored pencils on colored cardstock, as the white pigment ink lines seem to be absorbed into the colored pencil coloring beautifully so that the images pop from the colorful background! I used my favorite Caran D’Ache colored pencils to color the images in soft shades of warm gray, sweet carnation pink, and some vibrant green for the holly leaves. After I had finished coloring the main parts of the images, I used a white gel pen and a black pigment pen to add details to the deer’s eyes, nose, and spots. Mixing the mediums helps to make the deer look super polished and professional, as I can never get the tips of my colored pencils *quite* sharp enough to get perfect coverage on those teeny areas!

After I had finished the pencil coloring, I placed one of the stencils from the Domed Arches Stencils & Masks set onto the center of an A2 panel of the same light gray cardstock that I used for the images, then used a blending tool to blend Simon Says Stamp White Pigment ink on only the curved part of the stencil opening. It reminds me of a snow globe! After I had blended the snowy images, I used a white gel pen to add some tiny dots and snowflakes on just the blended area, enhancing the snow globe feel and creating an area upon which I could ground my little deer. I also used the White Pigment Ink to stamp a greeting from the Christmas Cheer set as well as the banner, adding some white embossing powder to make the sentiment look extra crisp. I used a pair of scissors to fussy cut all of the images, then adhered them to the card front with some foam adhesive squares, which helps the tone-on-tone images pop out from the background a bit!

After I had adhered the images, I decided to trim a thin strip off of the bottom of the A2 gray panel so that I could tie in some more of the color palette from the pencil colored images. I added a very thin strip of white glitter cardstock peeking out from the bottom of the gray card front, then backed it with a slightly thicker strip of pink cardstock to tie in the pink in the color palette. I also used a Quickie glue pen on the holly leaves to add some Simon Says Stamp Unicorn Dust fine glitter, adding just a tiny bit of sparkle to the card, which I think makes it extra festive and fun!

Well, that’s all for my project today. Don’t forget to come back tomorrow for the Simon Says Stamp DieCember 2024 blog party! It’s not a traditional blog hop, but there will be an absolute wealth of inspiration using the fabulous new release, as well as fun giveaways and promotions to celebrate DieCember! Thanks so much for stopping by today, and have a marvelous day!
Filed Under: simon says stamp Tagged With: caran d'ache, christmas card, colored pencil, deer, die cutting, domed arches stencils, glitter, holiday card, ink blending, no line coloring, snow globe, white pigment ink

Flat Shaker Card and Childhood Christmas Inspiration!

December 18, 2021

Hi there! I’m up on the Honey Bee Stamps blog today, and I have a bit more holiday inspiration for you! I have always loved the book Santa Mouse. It was one of my favorites as a child, and my kiddos love to read it at Christmas, too! As soon as I saw the Merry Little Mice stamp set, I knew that I needed to use it to create a Santa Mouse-themed card. The book is so sweet; a little mouse realizes that Santa might not receive any gifts himself, so he gives him the piece of cheese that he’s been saving for himself all year. So precious, and such a lovely lesson about the spirit of giving! I am loving these flat shaker cards right now, but I decided to change mine up just a tad to incorporate the darling Snow Globe Shaker dies. Let’s get started with the details!

I began by die cutting the components for the Snow Globe Shaker from some white cardstock. I backed the topper with some spare clear stamp packaging. You know, the kind that we normally throw away? I love how light and thin it is for shaker cards… makes the finished card feel so much less bulky! I stamped a tree from Merry Little Mice on the white snow globe base using Honey Bee Stamps’ No Line Coloring Ink and colored it using Copic markers. I also blended a little aqua blue ink around the edges using a blending tool, then added some snowflakes from Merry Little Mice to add some more interest to the background of my snow globe.

Next, I stamped several of the images (including some cheese wedges to create a little tower of cheese to put under the tree!) from Merry Little Mice on some white cardstock using Honey Bee Stamps’ No Line Coloring Ink. I colored the images using my Copic markers. I die cut the colored images using the coordinating Honey Cuts.

I added strong adhesive tape all around the window of my shaker and removed the release paper everywhere but at the bottom so that I could fill my shaker with sparkly glitter. Once my shaker was filled, I removed the final piece of release paper and sealed it up, then added my colored die cuts (including a teeter-tottery tower of cheese for Santa!) to the front using both liquid and foam adhesive for some extra dimension. Using the strong adhesive tape instead of foam tape makes the card nice and flat and much easier to mail. I added the darling greeting from Merry Christmouse that I stamped with teal pigment ink and embossed with white pearl embossing powder, then die cut using the coordinating Honey Cuts. Finally, I adhered the card front to a shaped card that I created by die cutting a top-folding A2 card using the base of the Snow Globe Shaker die set.

Well, that’s all for my project today! I hope you’ve enjoyed my little trip down memory lane! Santa Mouse is such a sweet book, and if you haven’t read it, I highly encourage you to find a copy. My kiddos always leave a piece of cheese for Santa Mouse when we leave out cookies for Santa, and I love the added magic it adds to Christmas Eve night! Thanks so much for reading, and have a marvelous day.

Filed Under: Honey Bee Stamps Tagged With: christmas card, copic coloring, flat shaker, holiday card, merry christmouse, merry little mice, no line coloring, shaker card, snow globe

Honey Bee Stamps Holiday Cheer Release Blog Hop!

November 5, 2020

Hi there! This week, Honey Bee Stamps is celebrating their Holiday Cheer release with inspiration coming to you on all of the social media platforms. Today, we have a blog hop for you featuring projects from the latest release. I have four cards and a video for you, so let’s get started with the details!

For today’s video, I did some Copic coloring using my new Pretty Poinsettias stamp set. (Click here to see some more inspiration using this pretty holiday floral stamp set that I illustrated for Honey Bee Stamps!) In this video, I give some tips and tricks on how to get extra depth and dimension from your Copic colored projects.

My next two projects feature the Farmhouse Tree Builder stamps, dies, and stencils. This product group is so gorgeous and so versatile… I love how easy it is to create a beautiful holiday tree!

For my first project, I created a shaker card using the new Farmhouse Tree Details Stencil and the new Snow Globe Shaker dies. I die cut the full sized background for the shaker from a panel of white cardstock, then used the Farmhouse Tree Details Stencil to add a little forest of Christmas trees and a deep blue night sky. I adhered some snowflake sequins on the card base so that there would always be flurries “falling” no matter where the rest of the shaker bits were!

To create the shaped card base, I used a regular A2 sized card base and die cut it with the base die, making sure that the fold line was beneath the top of the die. I filled my shaker with several different kinds of frosty sequins and added a greeting from last year’s Fa La La stamps and dies. I also added some sparkly snowflakes to the front to add some interest to the outside.

Look at how fun the card is open! Love making these shaped cards.

My second project features the Farmhouse Tree Builder stamps and dies. I stamped the tree using two different shades of green ink, then added details using the Farmhouse Tree Details Stencil and some iridescent texture paste. I also heat embossed several of the baubles, garland, star, and gifts from the Farmhouse Tree Builder stamps using silver embossing powder, then colored them in shades of aqua using Copic markers.

For the card base, I did some ink blending using Oxide inks in shades of Blueprint Sketch, Broken China, and Speckled Egg to create a glowing background for my Christmas tree. Once I had finished blending, I spritzed the background with some Iridescent Shimmer Spray to add some sparkle to the background. I arranged all of the die cuts on the card front, finally adding some iridescent gems to the Christmas tree for even more sparkle and texture.

I liked the Oxide Blueprint Sketch, Broken China, and Speckled Egg combination so much that I decided to blend a frosty sky background to use with the new Birch Coverplate Bundle. I die cut the Top cover plate from white cardstock, the Base Cover Plate from sparkling white glitter cardstock. I adhered the sparkling base to the blended card front using liquid adhesive, then added the top plate to the card front using foam adhesive for extra dimension.

I added a greeting from Jingle All the Way and some Moonlight gems to create some sparkling snowfall!

To celebrate this release, Honey Bee Stamps is giving away a $100 gift certificate to their store to one lucky commenter! All you have to do to be entered is leave a comment on each stop on the hop. The more comments you leave, the more chances you have to win! The winner will be announced on Sunday, November 8, 2020 on the Honey Bee Stamps blog. Your next stop on the hop is Brenda Noelke. Thanks

so much for stopping by today, and have a marvelous day!

Filed Under: Honey Bee Stamps Tagged With: birch coverplate, christmas, farmhouse tree builder, joy buzzword, pretty poinsettias, shaker, snow globe

Primary Sidebar

  • Facebook
  • Instagram
  • Pinterest
  • YouTube

Favorite Shops

Secondary Sidebar

Subscribe

Enter your email address to subscribe to this blog and receive notifications of new posts by email.

Instagram
Something is wrong.
Instagram token error.
Follow
Load More

Archives

Tags

3D embossing folder alcohol markers better press birthday birthday card blog hop card kit christmas christmas card christmas tag colored pencil copic copic coloring Daniel Smith die cutting embossing folder embroidery felt giveaway holiday holiday card hot foil ink blending karin brushmarker pro layered stencil masculine my monthly hero new release no line coloring no line watercolor OLO marker olo markers original illustration pawsitively saturated rainbow shaker card slimline stamping stamptember stencil thank you thinking of you valentine's day video watercolor

Popular Posts

Simon Says Stamp Sending Cheer Blog Hop- Day 2 + Freebie + Giveaway!
Altenew October 2026 Release Blog Hop + Giveaway!
Simon Says Stamp Sending Cheer Release: Now Available!
Simon Says Stamp October 2026 Card Kit of the Month: Homespun Gratitude!
A Double Leftovers Card Set with New Simon Says Stamp Stencils and Dies!
Simon Says Stamp November 2025 Card Kit: Give Thanks!
Joyful Snowman with New Simon Says Stamp Sending Cheer Release!
Hero Arts Partners Blog Hop: Lawn Fawn!
Altenew Standalone Die Blog Hop+Giveaway!
March 2020 My Monthly Hero Blog Hop+Giveaway!

Disclosure

Some affiliate links are used in my posts. This means that, should you click on one of my links and purchase something from that company, I will receive a small portion of the sale at no extra cost to you. I use the money earned from these sales to help maintain my blog. I so appreciate you visiting and, if you do choose to use one of my affiliate links, thank you so much for your support!
Copyright © 2026 ·Brunch Pro Theme · Genesis Framework by StudioPress · WordPress · Log in
Loading Comments...