• Skip to main content
  • Skip to primary sidebar
  • Skip to secondary sidebar

Sixth Street Sundries

Emily Midgett

  • Home
  • About Me
  • Contact
  • OLO Marker Color Swatch Chart
  • Shop

thankful

Simon Says Stamp Sweet Wishes Release-Now Available!

October 9, 2024

This post was sponsored by Simon Says Stamp. Thanks, Simon!

Hi friends! Simon Says Stamp has a new release available right now, and it’s fabulous! The Sweet Wishes Release is filled with lots of transitional products, featuring lovely florals perfect for these warm, late summer/early autumn days, truly autumnal items, and then a smattering of holiday products to jumpstart your holiday creativity! I have a pair of projects using the darling new Autumn Arrangement die set, a standalone die set that you can use to create the sweetest little pumpkin patch. Let’s get started with the details on my projects!

*I have linked all of the products used at the bottom of the post for your convenience using affiliate links. Thank you for shopping with my links! I truly appreciate your support for my work!*

The dainty little pumpkins, foliage, and flowers in the new Autumn Arrangement die set are just small enough that you can use multiples of them to create a substantial arrangement but also large enough that a single pumpkin can make a nice impact on a smaller canvas, like a tag! I’ve been loving the unusually-colored pumpkins lately, so I pulled out some peach, white, and warm rosy pink cardstock, along with some warm spring green and did lots of die cutting. Sometimes, a good half hour of repetitive die cutting is good for your mental health.

I knew that I wanted to create a miniature pumpkin patch, so I die cut a trio of pumpkins in white, peach, and that warm rosy pink, cutting a variety of florals in the same shades, as well. I used a rose gold metallic paint marker to quickly dot the center of the flowers, then embossed a greeting onto a rectangle of white cardstock from Give Thanks & Eat Pie using a coordinating shade of rose gold metallic embossing powder. I trimmed down a rectangle of vellum and arranged the pumpkins, flowers, and foliage, using the sentiment as the ground for my scene.

After I had arranged the die cuts and sentiment on the vellum, I ran a panel of white A2 cardstock through my die cut machine using the Basket Weave Embossing Folder to add some neutral texture behind the pumpkins. I flipped over my vellum panel and added some thin foam adhesive squares behind the solid die cuts, placing it in the center of the textured, embossed background. Before adhering the card front to the card base, I wrapped a length of rose gold sparkle twine around the card base and added a pretty bow, which I think adds some lovely texture and sparkle to the card. Finally, I added a smattering of the new Gold Pawsitively Dazzling Gems (there are a bunch of new neutral colors of these Pawsitively Dazzling Gems that were released tonight, but the Gold and Opal are tied for my favorite!!).

One of the great things about a die cutting marathon is having tons of die cuts with which to play! I decided to create a delicate little tag with some of the leftovers, adding some more texture with the Double Plaid Die. I started by die cutting the scalloped tag from Tag Adornments twice from some super pale peach cardstock that worked nicely with the color palette for my pumpkin and flowers. Because my die cutting plate is rather scratched up, I adhered the two together with the scratched sides facing each other to create a clean surface upon which to write!

After I had created the tag base, I die cut the Double Plaid die from white cardstock, then placed the same scalloped die in the center of the plaid pattern to align it precisely where I wanted it, then ran it through my die cutting machine. I then adhered the patterned tag die cut to the tag base using liquid adhesive, with perfectly matched edges! I arranged the little white pumpkin and flowers from Autumn Arrangement on the front of the tag using liquid and foam adhesive, then added a sparkly twine loop for hanging. How cute would this tag be on a “little pumpkin” themed baby gift?

Well, that’s all for my projects today! Be sure to check out the entirety of the Sweet Wishes Release, because there are some items that are sure to sell out super quickly! And don’t forget to come back for the fabulous blog hop this weekend. The inspiration is sure to be stupendous throughout the hop! Thanks so much for stopping by today, and have a marvelous day!
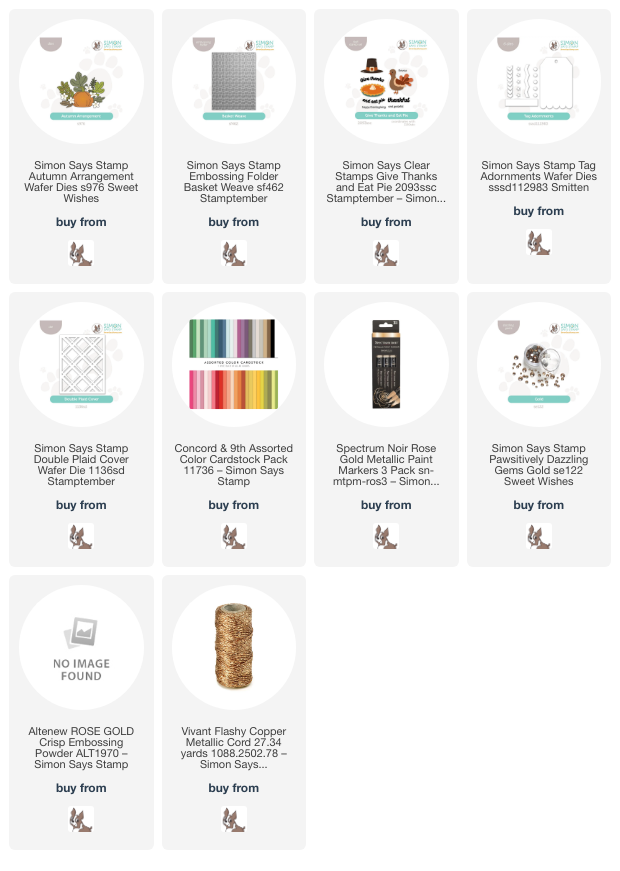
Filed Under: simon says stamp Tagged With: autumn arrangement, basket weave, die cutting, double plaid cover, embossing folder, give thanks and eat pie, pumpkins, sweet wishes, tag, tag adornments, thankful

Spring Blooms and Perfect Pearls with Honey Bee Stamps!

April 3, 2021

Hi there! I’m over on the Honey Bee Stamps blog today, and I thought I’d do something a little different for my post. The Spring Blooms background is perfect for coloring in your favorite medium, but it’s also super detailed, so much that it can stand alone to make a pretty tone-on-tone background! I’ve paired Spring Blooms with some Perfect Pearls and colored cardstock to create a pair of pretty monochromatic cards today. Let’s get started with the details!

I began by stamping the Spring Blooms background stamp with some Versamark ink onto a panel of pale blue and minty green cardstocks, then used Mint and Turquoise Perfect Pearls to create a subtle, shiny, tone-on-tone background.

For my blue card, I trimmed down the floral panel and mounted it on a panel of super shiny blue foil cardstock, orienting it to the top left corner, which left the shiny blue foil peeking out from the edge. I also die cut a Double Stitched Polygon from some vellum, oriented it to the right side and trimmed off the excess.

For the greeting, I die cut an “enjoy” from some more of the blue foil cardstock using the Enjoy Honey Cuts dies, then white embossed the coordinating sentiments from Enjoy stamp set on some strips of blue cardstock. I adhered the greeting die cuts to the card front, then added a few Moonlight gems for some sparkle. I love how the shimmery background is so subtle, but makes such an impact when the light hits it just right!

For my second project, I cut the same Double Stitched Polygon from some more vellum, as well as the pretty Thankful Buzz Word from some deep teal cardstock.

I adhered the thankful die cut to the center of the vellum polygon, then white embossed the coordinating greeting from the Grateful stamp set on some thin strips of dark teal cardstock. A few more Moonlight gems finished it off.

Well, that’s all for these projects today! I love showing how these super detailed floral stamps look so pretty by themselves without any coloring. Thanks so much for stopping by, and have a marvelous day!

Filed Under: Honey Bee Stamps Tagged With: double stitched polygons, grateful, perfect pearls, spring blooms, thankful

Honey Bee Stamps Bee Bold Release, Day 4!

August 1, 2018

Good morning! I’m back today for Day 4 of the Honey Bee Stamps Bee Bold Release! We’ve shown you versatile dies, darling bears, lovely sentiments…. now today we are showing sneak peeks of several new sets, including hmy favorite set from the release: Cosmos. These flowers are just gorgeous and SO much fun to color… I can’t wait to delve in with other mediums! I paired them with a gorgeous new sentiment set called Grateful. I can’t say enough good things about the Honey Bee word dies. They’re just so beautiful! Let’s get started with some details!

I’m sure you’ve noticed by now that no-line coloring is my new obsession, particularly with my Polychromos pencils. This stunning Cosmos set was just begging to be colored with my pencils. I started by stamping the florals and some of the foliage from Cosmos onto some white card stock using a very pale blue ink. I then used my Polychromos pencils in shades of lilac and deep purple to color the images and die cut them with the coordinating dies.

Yellow has been in my mind’s eye quite a lot recently, particularly with this release… I love mustard paired with plum and lilac. It is in the realm of fall colors, but just bright enough that it still hints of summer. I decided to pair my penciled Cosmos with a mustard hexagonal frame cut from the Hexagon stack. I placed the frame on the card front, then arranged the flowers on the side of the frame and used Press ‘n Seal to pick them up so that I could add adhesive without losing the arrangement I’d so carefully crafted. I use this method frequently with no trouble, but for some reason the slight pattern on the Press’n Seal lifted some of the pencil and added some texture…. I contemplated trying to repair it, but I decided that I liked that extra bit of texture enough to leave it.

After I’d popped up the main images with foam adhesive, I added a die cut grateful using the new Grateful dies cut from some deep purple card stock, then popped up some sentiment labels from the coordinating Grateful stamp set. The final touch was a few Twilight Rhinestones to add some sparkle.

Well, that’s all for me today! Remember, all of the products that we have been sneaking this week will be available for purchase tomorrow night, August 2, at midnight central time! Thanks so much for stopping by today, and be sure to come back again later this week to take part in the Bee Bold Release blog hop for a chance to win some very generous prizes!


Filed Under: Honey Bee Stamps, polychromos Tagged With: cosmos, floral, new release, thankful

Primary Sidebar

  • Facebook
  • Instagram
  • Pinterest
  • YouTube

Favorite Shops

Secondary Sidebar

Subscribe

Enter your email address to subscribe to this blog and receive notifications of new posts by email.

Instagram
Something is wrong.
Instagram token error.
Follow
Load More

Archives

Tags

3D embossing folder alcohol markers better press birthday birthday card blog hop card kit christmas christmas card christmas tag colored pencil copic copic coloring Daniel Smith die cutting embossing folder embroidery felt giveaway holiday holiday card hot foil ink blending karin brushmarker pro layered stencil masculine my monthly hero new release no line coloring no line watercolor OLO marker olo markers original illustration pawsitively saturated rainbow shaker card slimline stamping stamptember stencil thank you thinking of you valentine's day video watercolor

Popular Posts

Simon Says Stamp Joy For You Blog Hop- Day 1!
Simon Says Stamp Joy For You Release-Now Available!
Frozen Fractals All Around with New Simon Says Stamp Joy For You Release!
Shaped Holiday Shaker Card with New Simon Says Stamp Jolly Season Card Kit of the Month!
Holiday Postage with New Simon Says Stamp!
Simon Says Stamp Glory to the Newborn King Holiday Kit-Part II!
Pinkfresh Studio 5th Birthday!
Altenew Build A Flower: Fuchsia Blog Hop+Giveway!
Holiday Joy in Pink and Green with New Simon Says Stamp DieCember!
Honey Bee Stamps September Release Blog Hop!

Disclosure

Some affiliate links are used in my posts. This means that, should you click on one of my links and purchase something from that company, I will receive a small portion of the sale at no extra cost to you. I use the money earned from these sales to help maintain my blog. I so appreciate you visiting and, if you do choose to use one of my affiliate links, thank you so much for your support!
Copyright © 2026 ·Brunch Pro Theme · Genesis Framework by StudioPress · WordPress · Log in
Loading Comments...