• Skip to main content
  • Skip to primary sidebar
  • Skip to secondary sidebar

Sixth Street Sundries

Emily Midgett

  • Home
  • About Me
  • Contact
  • OLO Marker Color Swatch Chart
  • Shop

thanksgiving

What’s Old is New: Wine Bottle Tag with Simon Says Stamp STAMPtember!

September 8, 2024

This post was sponsored by Simon Says Stamp. Thanks, Simon!

Hi friends! I am back today with another color saturated pumpkin project, this time featuring some new goodies from the latest Simon Says Stamp-branded STAMPtember release. I used the fabulous new Autumn Gourds embossing folder and dies to adorn a custom wine bottle tag, perfect for making that Thanksgiving hostess gift extra special! After doing some craft-closet organization, during which I am finding books and magazines that I’ve kept since I started papercrafting, I am remembering how much I love to create custom packaging to make gift-giving extra special, an interest that goes back to my earliest crafting days as a new bride with a Cricut! I always had ambitions to give gifts that were made extra-special with handmade tags and gift bags, and the busier I became, the less time I had to devote to making that extra special packaging. For today’s project, I pulled out an array of different shades of orange cardstock and got to work creating this fun tag, perfect for a Thanksgiving hostess gift. Let’s get started with the details!

To start, I cut down a panel of cardstock that was 3″ x 8″, adding some rounded corners with my Corner Chomper (there are lots of different corner rounding punches available now, but I used the original!). Next, I scored the top at 3″ with the Simon Says Stamp Score Board to create a “hinge” that would allow my tag to lay more easily on the neck of my bottle of wine. I then used a simple circle die to create the opening in the center of my top square to allow plenty of room through which I could thread the neck of the bottle of wine. I can’t wait to experiment with this design some more… I think this is going to be super handy to use during the holidays!

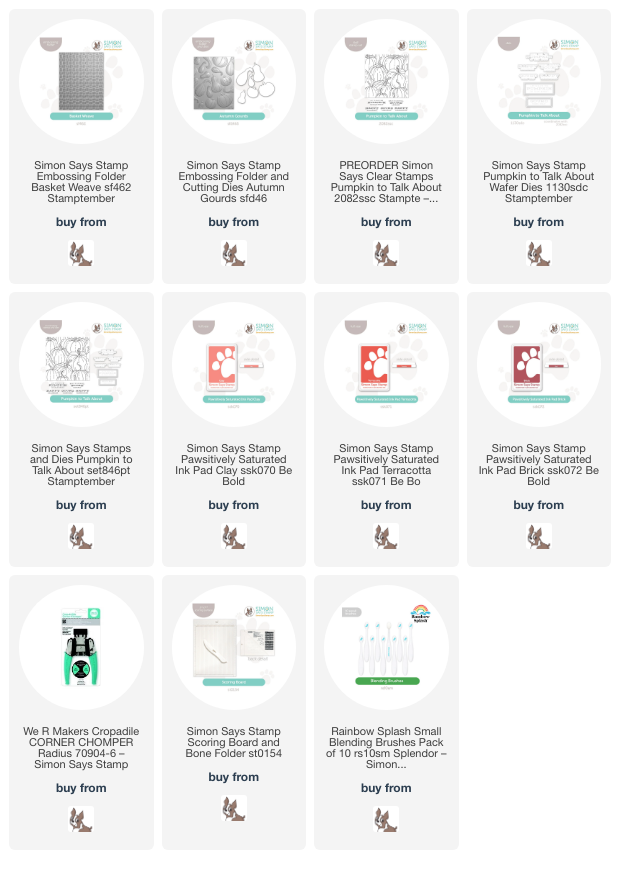
To make my wine bottle tag extra special, I selected several different shades of orange cardstock from my envelope of orange cardstock scraps, then die cut several of the images from the Autumn Gourds embossing folder and dies set and embossed them with the embossing folder. After embossing, I used detail blending brushes with Clay, Terracotta, and Brick Pawsitively Saturated InksĀ to blend around the edges of the gourd die cuts, adding even more dimension to the detailed die cuts. I know that these little pumpkins are going to be staples in my craft room! The size is so sweet; I can’t wait to pair them with some foliage die cuts and create a little pumpkin patch of my own.

After I had finished my pumpkins and gourds, I trimmed down a panel of coordinating peachy-orange cardstock that would fit nicely in the center of the bottom portion of my wine bottle tag, leaving a thin frame around the edges. I ran the panel through my die cutting machine using the Basketweave embossing folder, then used a blending brush to blend Clay ink around the edges to add more dimension and highlight that incredible embossed texture a bit more. For the greeting, I heat embossed the “Happy Thanksgiving” sentiment from Pumpkin to Talk About on some more of the peachy cardstock using gold embossing powder, then die cut it with the coordinating die, which I mounted on a vellum die cut rectangle embellished with the super delicate coordinating frame, also from Pumpkin to Talk About. I popped up the sentiment on the woven background, then arranged the pumpkins around the greeting, adhering them with both liquid and foam adhesive. Finally, I added a coordinating silk bow, dyed with an alcohol ink marker to perfectly match the deep burnt orange cardstock of the gourds.

Well, that’s all for my project today! I am having so much fun going through my old inspiration books to find ways to use my current products in fun and fresh ways. What’s old can always be made new again with a fresh perspective and some new goodies! Thanks so much for stopping by today, and have a marvelous day!
Filed Under: simon says stamp Tagged With: 3D embossing, autumn gourds, basket weave, gift packaging, hostess gift, ink blending, pumpkin to talk about, thanksgiving, wine bottle tag

Thankful and Grateful

November 22, 2023

This post is sponsored by Simon Says Stamp. Thanks, Simon!

Hi friends! Happy Thanksgiving for those readers in the United States. We are giving thanks, and as this year draws to a close, I find myself reflecting yet again on how many wonderful things and people that I have in my life for which I am so grateful. As a child, I never dreamed that my life could be what it currently is, offering peace and stability and a loving family. This year, I am also so thankful for being able to help provide for my family in a meaningful way. I couldn’t do this without your support and kind words, friends, so for that I wish to simply say: thank you. I wanted to channel that gratitude into a project, and so I pulled out several different die sets from Simon Says Stamp, some watercolor paper, and my Distress Inks to do some watercoloring. Let’s get started with the details!

To start, I die cut the Layered Berry Bird, Forest Border Frame, and Abundant Leaves dies from some Arches Hot Press watercolor paper. I left the individual die cut pieces within their negatives and used Forest Moss, Bundled Sage, Seedless Preserves, Walnut Stain, Aged Mahogany, Abandoned Coral Distress Ink reinkers to add some lovely mottled watercolor to each die cut, focusing on gorgeous shades of olive green and rich maroon, with tiny touches of coral and brown. I simply placed drops of the colors onto my palette and picked them up with a damp paintbrush to be able to control the intensity of the color.

I also added some shimmer watercolor accents to the bird and some of the foliage. I adore how intricate these die cuts are; they really do so much of the work for you! The super detailed Forest Border Frame is a perfect backdrop for the sweet Layered Berry Bird.

After I had completed my watercolored die cuts, I used a blending brush to blend the new Kale Pawsitively Saturated ink around the edges of an intense olive green A2 card base, adding some extra depth of color to match the vivid watercolored die cuts. I arranged the watercolored die cuts in the center of my blended card front and adhered them using both liquid and foam adhesive.

For the greeting, I die cut the “thankful” from the Fancy Giving Thanks die set using Purple Rain mirror cardstock. The iridescent sheen on this cardstock picks up the different colors in the watercolored die cuts so beautifully, as well as adding additional texture and shine to the card! To coordinate with this die cut word, I heat embossed a sentiment from the Thankful and Grateful stamp set using Brass embossing powder. I nestled both sentiment pieces amongst the bird and foliage, finally adding a few shimmering gems for some more sparkle.

Well, that’s all for my project today! I am so grateful to you all for being here and for supporting me through your kind comments and encouraging messages of support, as well as occasionally shopping through my affiliate links. It truly means the world to me to be able to share my art with this community as a job!

I also wanted to share that Simon Says Stamp is running a 30% off sale for all Simon-branded products. Simply enter code TKY23 at checkout to receive 30% off Simon Says Stamp-branded products from now through 11:59 pm EST on 11/23/23. Simon also is including a free gift with purchases of $100 or more. (It’s an excellent set, perfect for making tons of quick tags!!) Shop for crafty friends or even yourself with a fabulous discount and some awesome freebies!

Thanks so much for stopping by today, and have a wonderful Thanksgiving!!

Filed Under: simon says stamp Tagged With: abundant leaves, distress inks, fancy giving thanks, forest border frame, layered berry bird, thankful and grateful, thanksgiving, watercolor

Spellbinders Small Die of the Month!

October 3, 2018

Good morning! I’m back this morning with a post using the October Spellbinders Small Die of the Month. This month’s kit features a fall theme, and it’s definitely a bargain at only $12.50 a month! Here are the dies included in this month’s kit:

And here’s my project using these adorable dies:

Autumn colors aren’t really my jam in general. Brown=boring to me. My general rule of thumb: when in doubt, add gray, which I think instantly updates any color scheme. I began my shaker card by stamping a super cute and trendy gray buffalo plaid, then die cut the bottom of the acorn from the plaid panel and adding a piece of acetate behind the window. I trimmed a touch off of the edges of the plaid panel so that it would have a thin, white frame around the edge. I also die cut the intricate acorn topper from dark gray card stock, then adhered it to a scrap of white card stock and fussy cut around the edge to create some lovely contrast to really show off that detail of the acorn top.

I die cut the “Happy Thanksgiving” greeting included in the Small Die of the Month from dark orange card stock and adhered it over the top of my window. I added foam tape around the window opening, then filled the shaker with sequins. I added the card front to an A2 card base.

Well, that’s all for me today! I love the pop of deep orange from the greeting.

If you haven’t checked out the Die of the Month kits from Spellbinders, I definitely encourage you to do so! They are a fantastic value, and always quite unique. You can even subscribe so that you don’t have to remember to go buy them each month! It’s like a little surprise arriving at your door each month haha!

Thanks so much for stopping by, and have a marvelous day!


Filed Under: Concord and 9th, spellbinders Tagged With: buffalo plaid, shaker card, thanksgiving

Primary Sidebar

  • Facebook
  • Instagram
  • Pinterest
  • YouTube

Favorite Shops

Secondary Sidebar

Subscribe

Enter your email address to subscribe to this blog and receive notifications of new posts by email.

Instagram
Something is wrong.
Instagram token error.
Follow
Load More

Archives

Tags

3D embossing folder alcohol markers better press birthday birthday card blog hop card kit christmas christmas card christmas tag colored pencil copic copic coloring Daniel Smith die cutting embossing folder embroidery felt giveaway holiday holiday card hot foil ink blending karin brushmarker pro layered stencil masculine my monthly hero new release no line coloring no line watercolor OLO marker olo markers original illustration pawsitively saturated rainbow shaker card slimline stamping stamptember stencil thank you thinking of you valentine's day video watercolor

Popular Posts

Simon Says Stamp Joy For You Blog Hop- Day 1!
Simon Says Stamp Joy For You Release-Now Available!
Frozen Fractals All Around with New Simon Says Stamp Joy For You Release!
Shaped Holiday Shaker Card with New Simon Says Stamp Jolly Season Card Kit of the Month!
Holiday Postage with New Simon Says Stamp!
Simon Says Stamp Glory to the Newborn King Holiday Kit-Part II!
Pinkfresh Studio 5th Birthday!
Altenew Build A Flower: Fuchsia Blog Hop+Giveway!
Holiday Joy in Pink and Green with New Simon Says Stamp DieCember!
Honey Bee Stamps September Release Blog Hop!

Disclosure

Some affiliate links are used in my posts. This means that, should you click on one of my links and purchase something from that company, I will receive a small portion of the sale at no extra cost to you. I use the money earned from these sales to help maintain my blog. I so appreciate you visiting and, if you do choose to use one of my affiliate links, thank you so much for your support!
Copyright © 2026 ·Brunch Pro Theme · Genesis Framework by StudioPress · WordPress · Log in
Loading Comments...