• Skip to main content
  • Skip to primary sidebar
  • Skip to secondary sidebar

Sixth Street Sundries

Emily Midgett

  • Home
  • About Me
  • Contact
  • OLO Marker Color Swatch Chart
  • Shop

distress inks

Limited Edition: Simon Says Stamp Easter Kit!

February 20, 2024

This post was sponsored by Simon Says Stamp. Thanks, Simon!

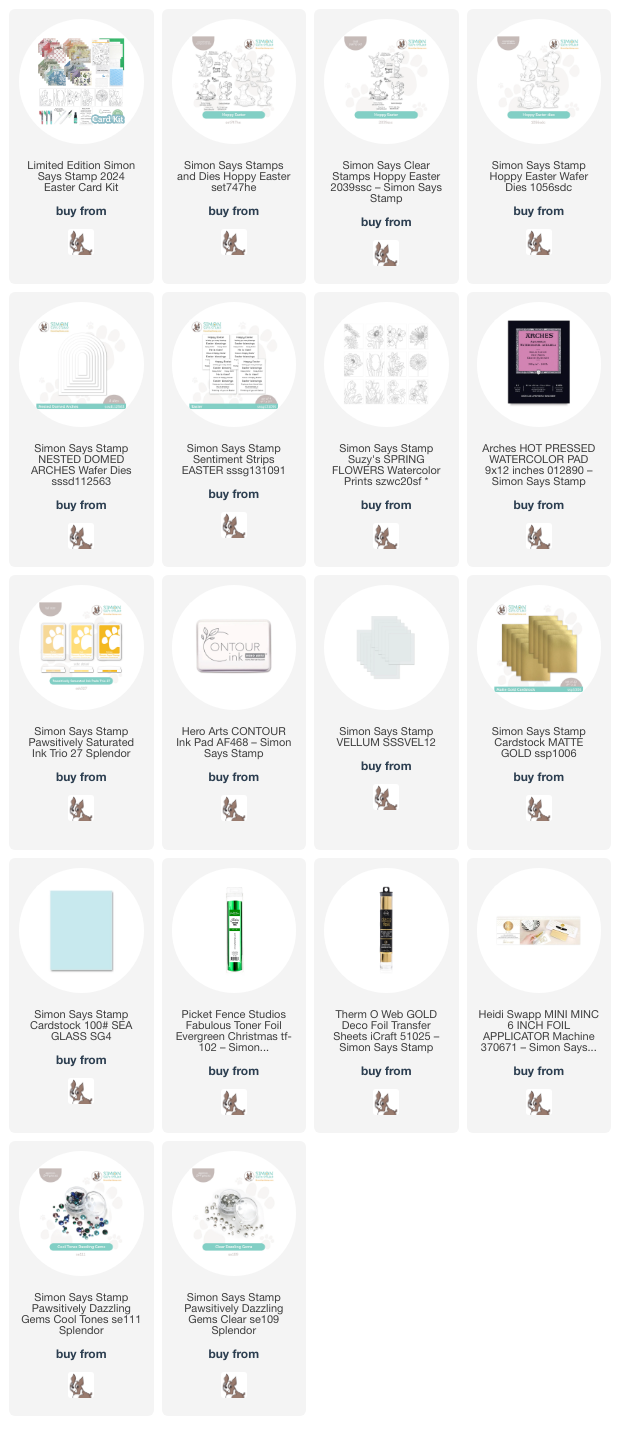
Hi friends! Simon Says Stamp released a special surprise tonight: a brand new Limited Edition Easter Kit! This kit is absolutely packed with product that is perfect for creating your Easter and springtime cards. Here’s a rundown of everything included in the kit:

NEW and EXCLUSIVE Simon Says Stamp Hoppy Easter 6×8 inch clear stamp set
NEW and EXCLUSIVE Simon Says Stamp Bunny Embossing Folder and Die 
24 double-sided 5×6 inch sheets of Tim Holtz Idea-ology Backdrops Volume 5 Assortment 
1 Simon Says Stamp Easter Sentiment Strip Sheet
5 white pom poms (bunny accents!)
Set of 6 Simon Says Stamp Suzy Watercolor Cards in a Floral Assortment
1 Detail Watercolor Brush Pen
2 A2 Scored Watercolor Notecards
1 Package of Ranger Tim Holtz Distress Holiday Pearl Crayons (including Sugary Gumdrop, Wonderland, and Frosty Mint)
1 Simon Says Stamp Exclusive 3×4 inch acrylic block
1 Ranger Pipette
1 bottle of Tim Holtz Ranger Merry Mint Mica Spray Stain
1 Sheet of 8.5 x 11 Inch Simon Says Stamp Pawsitively Velvet Cardstock in Snow White (perfect for bunnies!)
1 Sheet of 8.5 x 11 Inch 65 LB Cardstock in Gamma Green

Wowzers, such a lot of value packed into this kit for only $59.99! These kits are limited edition, meaning that they won’t be restocked, so if you’re in love with these elements, you will not want to miss out on this exceptional value! I have three cards to share with you today using lots of different components from the kit, so let’s get started with the details!

Nothing screams spring to me quite like seeing those cheerful yellow daffodils that pop up all over the place in early spring. The entire kit has tons of daffodils in the different elements, and ach of my cards features a daffodil in some form, whether it is at the feet of the sweet little Easter egg-hunting girl, the bunny hiding behind the bloom, or as the large focal point on one of Suzy Plantamura’s exceptionally lovely watercolor cards! I used Distress Inks to watercolor all of my images today, which I tapped out onto my palette and picked up with my damp paintbrush.

For my first card, I did some no-line watercoloring with some of the stamped images from the Hoppy Easter stamp set found in this Limited Edition Easter Kit. I stamped her using Contour Ink onto hot press watercolor paper, then used lots of different springy shades of Distress Inks to do some no-line watercoloring, adding some fine tipped black pen to her eyes, mouth, and tag, as well as some sparkly watercolor details and dots for added interest! I used the Hoppy Easter coordinating dies to cut the finished image out.

The Limited Edition Easter Kit also contains a wide variety of beautiful patterned papers with a beautiful vintage aesthetic. I selected three of my favorite papers in varying patterns and colors, then used my trimmer to cut down some thin strips from each paper, as well as with the white velvet paper included with the kit. I laid all of the strips down on my white A2 card base, keeping the patterns that contrasted the most next to each other to keep things from being too busy. To help ground my little watercolored Easter egg hunter, I trimmed down a block of vellum and mounted the watercolored die cut to the vellum, along with a sentiment from Hoppy Easter. To hide the foam adhesive, I flipped the vellum rectangle over and added some foam squares to the back of the solid die cuts, then adhered the entire thing to the center of the card front. Finally, I added a few Pawsitively Dazzling Clear Gems for some sparkle!

For my second card, I watercolored the precious little bunny from the Hoppy Easter stamp set using some more Distress Inks, cutting her out with the coordinating dies. Isn’t the expression on the bunny’s face so adorable? To ground the shy little bunny, I used a leftover Nested Domed Arches die cut around the edge of which I blended the new Pawsitively Saturated Trio 27. I added some strips of the papers included with the Limited Edition Easter Kit to create “grass,” as well!

For the background and the greeting, I took advantage of the fact that the Easter Sentiment Strip sheet and Suzy’s Watercolor Cards that are included with the Limited Edition Easter Kit are both toner foil-friendly! I ran both the sentiment strips and the crocus watercolor card through my Minc using some kelly green foil that coordinated perfectly with the green accents on my watercolored image, adding some beautifully shiny foil accents to the card! I splattered the crocus background with the Merry Mint Mica Spray Stain to add some more metallic green shine to the card. I popped up the arch die cut with the bunny and patterned paper strips using some foam adhesive, then popped up the sentiment strips on the arch with some more foam adhesive, finishing everything off with the Pawsitively Dazzling Clear Gems.

My last card takes advantage of the toner foil-friendly printing on Suzy’s Watercolor Cards included in the Easter Kit. I ran the gorgeous daffodil panel through my Minc using gold foil, adding some lovely shine to the crisp black lines! I used Distress Inks in shades of Scattered Straw, Wild Honey, Spiced Marmalade, Rustic Wilderness, and Speckled Egg, tapped out onto my palette and picked up with my damp paintbrush. Because these cards are printed on Distress Watercolor Paper, they work beautifully with Distress Inks! After I finished watercoloring the image, I trimmed the watercolor panel down and matted it on a slightly larger panel of Simon Says Stamp’s Matte Gold foil cardstock, framing those two pieces on a full A2 panel of Sea Glass cardstock.

For the greeting, I chose to allow the watercolored background image to be the star of the show, selecting a small Happy Easter greeting from Hoppy Easter, which I heat embossed in gold on some more Sea Glass cardstock and fussy cut with my sharp scissors. I popped the greeting up with some foam adhesive, then finished off my “rule of three” for metallic accents with a gold twine bow tucked beneath the sentiment. Finally, I added a few pale blue gems from the Pawsitively Dazzling Cool Tones gem set for even more sparkle!

Well, that’s all for my projects today! The exceptional value in this new Limited Edition Easter Kit is fantastic, so if you are loving it, don’t wait, because it won’t be restocked! Thanks so much for stopping by today, and have a marvelous day!
Filed Under: simon says stamp Tagged With: distress inks, distress watercolor, easter, hoppy easter, nested domed arches, no line watercolor, suzy's spring flowers, toner foil

Thankful and Grateful

November 22, 2023

This post is sponsored by Simon Says Stamp. Thanks, Simon!

Hi friends! Happy Thanksgiving for those readers in the United States. We are giving thanks, and as this year draws to a close, I find myself reflecting yet again on how many wonderful things and people that I have in my life for which I am so grateful. As a child, I never dreamed that my life could be what it currently is, offering peace and stability and a loving family. This year, I am also so thankful for being able to help provide for my family in a meaningful way. I couldn’t do this without your support and kind words, friends, so for that I wish to simply say: thank you. I wanted to channel that gratitude into a project, and so I pulled out several different die sets from Simon Says Stamp, some watercolor paper, and my Distress Inks to do some watercoloring. Let’s get started with the details!

To start, I die cut the Layered Berry Bird, Forest Border Frame, and Abundant Leaves dies from some Arches Hot Press watercolor paper. I left the individual die cut pieces within their negatives and used Forest Moss, Bundled Sage, Seedless Preserves, Walnut Stain, Aged Mahogany, Abandoned Coral Distress Ink reinkers to add some lovely mottled watercolor to each die cut, focusing on gorgeous shades of olive green and rich maroon, with tiny touches of coral and brown. I simply placed drops of the colors onto my palette and picked them up with a damp paintbrush to be able to control the intensity of the color.

I also added some shimmer watercolor accents to the bird and some of the foliage. I adore how intricate these die cuts are; they really do so much of the work for you! The super detailed Forest Border Frame is a perfect backdrop for the sweet Layered Berry Bird.

After I had completed my watercolored die cuts, I used a blending brush to blend the new Kale Pawsitively Saturated ink around the edges of an intense olive green A2 card base, adding some extra depth of color to match the vivid watercolored die cuts. I arranged the watercolored die cuts in the center of my blended card front and adhered them using both liquid and foam adhesive.

For the greeting, I die cut the “thankful” from the Fancy Giving Thanks die set using Purple Rain mirror cardstock. The iridescent sheen on this cardstock picks up the different colors in the watercolored die cuts so beautifully, as well as adding additional texture and shine to the card! To coordinate with this die cut word, I heat embossed a sentiment from the Thankful and Grateful stamp set using Brass embossing powder. I nestled both sentiment pieces amongst the bird and foliage, finally adding a few shimmering gems for some more sparkle.

Well, that’s all for my project today! I am so grateful to you all for being here and for supporting me through your kind comments and encouraging messages of support, as well as occasionally shopping through my affiliate links. It truly means the world to me to be able to share my art with this community as a job!

I also wanted to share that Simon Says Stamp is running a 30% off sale for all Simon-branded products. Simply enter code TKY23 at checkout to receive 30% off Simon Says Stamp-branded products from now through 11:59 pm EST on 11/23/23. Simon also is including a free gift with purchases of $100 or more. (It’s an excellent set, perfect for making tons of quick tags!!) Shop for crafty friends or even yourself with a fabulous discount and some awesome freebies!

Thanks so much for stopping by today, and have a wonderful Thanksgiving!!

Filed Under: simon says stamp Tagged With: abundant leaves, distress inks, fancy giving thanks, forest border frame, layered berry bird, thankful and grateful, thanksgiving, watercolor

Fresh Daisies with Distress Watercoloring!

August 10, 2023

This post is sponsored by Simon Says Stamp. Thanks, Simon!

Hi friends! Sometimes a color combination is all my brain needs to start the wheels turning. I created some cotton candy watercolored cards in THIS post, and I loved the color combination so much that I just had to apply it to another project! I cannot get enough of the Fresh Daisies embossing folder. I used it on both of THESE cards using ink blending and alcohol marker coloring, but wanted to try doing some watercoloring with it as well. The gorgeous Distress color palette that I used earlier this week seemed to lend itself perfectly to these sweet daisies! Let’s get started with the details.

I began by running a slightly-larger-than-A2 panel of Arches Cold Press watercolor paper through my die cut machine using the Fresh Daisies Embossing Folder. I find that the texture and heavy weight of this watercolor paper is perfect for use with embossing folders! I made sure that the panel was a little larger than A2 size so that I could tape the entire panel to my watercoloring board. When saturating your watercolor panels with moisture, as I intended to do with this project, I find it very helpful to tape all of the edges of your panel to a watercolor board to help reduce warping.

Before I started adding details to the embossed images, I used Saltwater Taffy, Tattered Rose, Milled Lavender Broken China, and Speckled Egg Distress Inks to watercolor a cotton candy sky behind the flowers. I used plenty of clean water on my paintbrushes to make sure that the colors on the background were loose and ethereal.

Once my background was completely dry, I used Worn Lipstick, Saltwater Taffy, Tattered Rose, Milled Lavender, Broken China, Speckled Egg, Shabby Shutters, and Iced Spruce to watercolor the images no-line style! When watercoloring on these embossed panels, I approach each area as I would a typical no-line colored piece: keep the wet sections separate. If the wet sections touch, the colors will bleed together and ruin any definition on each image. After I had finished my watercoloring, I allowed the panel plenty of time to dry while still taped down to my board. Once it was bone dry, I splattered some sparkling metallic watercolors just on the bottom corner by the flowers. I think it looks like dewdrops settling on the flowers at sunrise!

After all of my watercoloring, I wanted a very simple greeting to allow the watercoloring to stay the star of the card. I die cut the Simply Thank You die from some champagne Luxe Glitter Classic cardstock, backing the detail layer with a vellum background layer to help it stand out from the colorful background. I popped up the greeting on the card front using clear foam adhesive, then added a few sparkling jewels for one last touch of sparkle!

Well, that’s all for my project today! If you haven’t tried watercoloring your embossing folders, I highly encourage you to give it a try. The effect is absolutely magical! Thanks so much for stopping by today, and have a marvelous day!

Filed Under: simon says stamp Tagged With: distress inks, embossing folder, fresh daisies, luxe glitter, thank you, watercolor

Rediscovering an Old Love-Watercoloring with Distress Inks!

July 3, 2023

This post was sponsored by Simon Says Stamp. Thanks, Simon!

I’ve been working hard at making a lot of cards lately. So much so, that I am experimenting with different mediums…. basically, just playing and having fun! I will let you in on a secret: I started my love/obsession with watercolor by tapping Distress Inks onto an acrylic block and painting with them. As my style and skills have evolved, so too have my array of mediums, working instead with more traditional “artist” mediums like Daniel Smith, Holbein, and Schmincke watercolor pans or Caran D’Ache and Polychromos colored pencils. However, in my recent organizational endeavors in my craft room, I rediscovered my stash of Distress Ink cubes and couldn’t wait to put them to use watercoloring. The color palette for the Distress Inks are so much more muted and subtle in comparison to my normal bright and vibrant colors that I thought it would be a great way to stretch my color sensibilities! I paired the Distress Inks with the Blissful Bouquet stamp set that I illustrated for Simon Says Stamp to create this elegant wedding card. Let’s get started with the details!

The traditional Distress Inks are quite different from the Distress Oxide inks; the traditional inks are water-based, translucent inks and are marvelous for both inky techniques and watercoloring, while the Oxide inks are opaque pigment inks, great for doing blending techniques. You can watercolor with the Oxide inks, but the effect is quite different. I will share some inspiration using Oxide inks for watercoloring at a later date!

I began by stamping all of the blooms and foliage from Blissful Bouquet onto some Arches Cold Press Watercolor paper using Intens-ified Black ink, which is waterproof and perfect for watercoloring. I then used Tattered Rose, Victorian Velvet, Milled Lavender, Dusty Concord, Aged Mahogany, Iced Spruce, Bundled Sage, and Pine Needles Distress Inks to watercolor the images. I simply tapped the colors out onto my ceramic palette, then picked them up as normal with my damp paintbrush and applied them to the stamped images, pulling the color out to a smooth fade with a clean, damp paintbrush.

Once I had the initial layer of color laid down, I went back two and three times with deeper, more concentrated colors to enhance shadows and depth on the images. After I had die cut all of the finished watercolored flowers, I used a black alcohol marker around the edge to create even more drama and keep the die cuts as clean as possible on my planned black background. I am so in love with the muted color palette that the combination of these inks created!!

For the card base, I trimmed down a panel of crisp Pitch Black cardstock to 3.5″ x 8.5″, creating a full-size slimline card front. I splattered the background with some handmade metallic glitter watercolors in coordinating shades to add some artistic interest to the background. When the splatters were dry, I arranged the flowers to create some lovely floral corners on opposing corners of the card front, using Press’n’Seal to pick them up in the desired arrangement and adding foam adhesive to the backs. The additional step of adding the black marker around the edges was totally worth it to keep the drama to the maximum on this intense card front!

I thought these large flowers screamed wedding or bridal shower, so I pulled out some wedding-themed stamps and dies for the greeting! I die cut the large Happily Ever After die cut twice, once from some of Simon Says Stamp’s Metallic Rose Gold cardstock, and once from some more black cardstock, layering them together to add a bit more stability to this super intricate die cut. I also heat embossed a tiny greeting from the Happily A Lifetime stamp set. I arranged the sentiment pieces on the slimline card front, finally adding a few Melanite Magic gems for even more sparkle and drama.

Well, that’s all for my project today! If you haven’t tried using your Distress Inks as watercolors before, I hope you will give it a try. It’s such a thrill to rediscover mediums and bring them new life. Thanks so much for stopping by today, and have a marvelous day!

Filed Under: simon says stamp, watercolor Tagged With: blissful bouquet, distress inks, original illustration, shower card, wedding card

Primary Sidebar

  • Facebook
  • Instagram
  • Pinterest
  • YouTube

Favorite Shops

Secondary Sidebar

Subscribe

Enter your email address to subscribe to this blog and receive notifications of new posts by email.

Instagram
Something is wrong.
Instagram token error.
Follow
Load More

Archives

Tags

3D embossing folder alcohol markers better press birthday birthday card blog hop card kit christmas christmas card christmas tag colored pencil copic copic coloring Daniel Smith die cutting embossing folder embroidery felt giveaway holiday holiday card hot foil ink blending karin brushmarker pro layered stencil masculine my monthly hero new release no line coloring no line watercolor OLO marker olo markers original illustration pawsitively saturated rainbow shaker card slimline stamping stamptember stencil thank you thinking of you valentine's day video watercolor

Popular Posts

Simon Says Stamp Joy For You Blog Hop- Day 1!
Simon Says Stamp Joy For You Release-Now Available!
Frozen Fractals All Around with New Simon Says Stamp Joy For You Release!
Shaped Holiday Shaker Card with New Simon Says Stamp Jolly Season Card Kit of the Month!
Holiday Postage with New Simon Says Stamp!
Simon Says Stamp Glory to the Newborn King Holiday Kit-Part II!
Pinkfresh Studio 5th Birthday!
Altenew Build A Flower: Fuchsia Blog Hop+Giveway!
Holiday Joy in Pink and Green with New Simon Says Stamp DieCember!
Honey Bee Stamps September Release Blog Hop!

Disclosure

Some affiliate links are used in my posts. This means that, should you click on one of my links and purchase something from that company, I will receive a small portion of the sale at no extra cost to you. I use the money earned from these sales to help maintain my blog. I so appreciate you visiting and, if you do choose to use one of my affiliate links, thank you so much for your support!
Copyright © 2026 ·Brunch Pro Theme · Genesis Framework by StudioPress · WordPress · Log in
Loading Comments...