• Skip to main content
  • Skip to primary sidebar
  • Skip to secondary sidebar

Sixth Street Sundries

Emily Midgett

  • Home
  • About Me
  • Contact
  • OLO Marker Color Swatch Chart
  • Shop

thankful and grateful

April Showers Bring May Flowers: Stencil Edition!

May 16, 2024

This post was sponsored by Simon Says Stamp. Thanks, Simon!

Hi friends! I was thrilled to be asked to help teach at a booth at Simon Says Stamp’s amazing in-person creative event last weekend, appropriately called CREATE, and on Saturday, we used a new-to-me product that was so lovely that I just had to go purchase on my break: Floral Whimsy Stencil! We used a beautiful ink combination of Cheeky, Tidepool, and Ocean to create a springy, cool color palette, but my dress for Saturday featured pretty yellow blooms on a white linen background, and all I could think about was trying out this stencil set with a similar color palette when I got home. I went to town blending and create two different projects with very different feel to them, so let’s get started with the details!

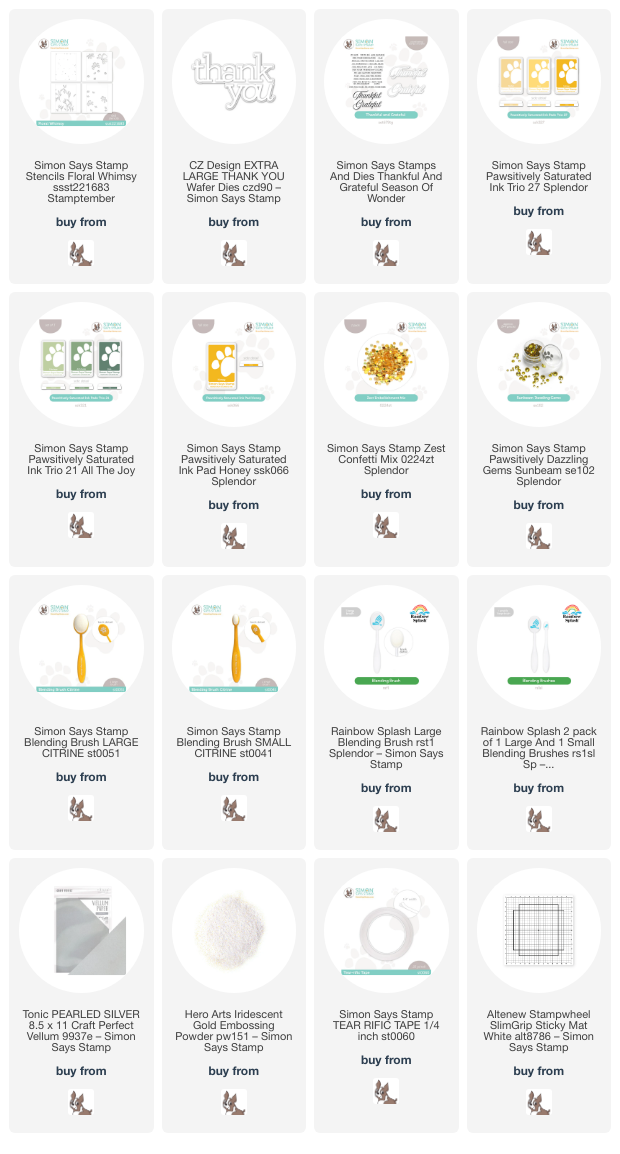
For both of my projects, I paired the Floral Whimsy Stencil with the luscious lemony tones of the Pawsitively Saturated Ink Trio 27 and used Cabbage and Artichoke Pawsitively Saturated Inks from Ink Trio 21 to create the foliage. If you’ve followed my blog for any length of time, you’ll know that I love monochromatic projects, adding in fun textures and accents to keep things interesting. I have been looking at home remodeling ideas on social media, and one of the popular trends right now is called “color drenching,” which perfectly coincides with my monochromatic style! Everything is painted the same color, from the doors to the trim to the walls, and it creates the most elegant and luxurious effect. I wanted to channel that a bit today, creating one project with a traditional crisp white background, but also creating a “color drenched” project with some sunny yellow cardstock.

For my first project, I placed a panel of sunshine yellow cardstock in the center of my sticky mat and blended the pattern with the inks listed above using the the Floral Whimsy Stencil, adding some extra interest with dark and light inks by using both the small and large blending brushes. One of my favorite things about this stencil is that each stencil has registration marks lasered around the edge of the pattern that line up perfectly with your A2 card front so that you can get exact placement of each stencil. Super user-friendly!

Once I had finished blending my color-drenched background, I die cut the detail layer of the Thank You XL die (another purchase last weekend!) twice from some deep green cardstock, adhering the layers together to get some extra height and dimension. I die cut the shadow layer from some silver pearl vellum and adhered all of the layers together, adding them to the card front with some thin strips of foam adhesive. Finally, I finished off this simple, color-drenched card with some coordinating, sparkly Sunbeam Pawsitively Dazzling Gems.

For my second project, I decided to create a flat shaker card, this time with a more lemon meringue color palette, blending the Floral Whimsy Stencil on white, rather than yellow, cardstock. I blended the images in the same fashion, using the two different sizes of blending brush to help add extra shading to the centers of the flowers and leaves, etc. I trimmed the panel down by 1/4″ on all sides, then blended some of the darkest yellow ink from the Pawsitively Saturated Ink Trio 27 around the edges to create a glow on my patterned background. To create the shaker, I adhered some leftover clear stamp packaging from a stamp set around the entirety of the patterned panel with some super sticky double sided tape, then filled it with Zest sequins. I love the effect of these flat shakers; they’re so fun and so sparkly!

For the greeting, I stamped some sentiments from the Thankful & Grateful set onto some white cardstock using Honey ink, then stamped directly over the top with some sticky embossing ink and added some Iridescent Gold embossing powder. This extra step of adding the iridescent sheer embossing powder adds a little extra shimmer and interest to the sentiment. I used the coordinating die for the large “grateful” sentiment, then used my trimmer to trim the sentiment strips. I added the sentiment strips to the center of my shaker with some foam squares and mounted the entire shaker panel with some more super strong double sided tape onto a full size panel of white cardstock. Such a fun way to make a simple stenciled panel a little extra special!

Well, that’s all for my projects today. I hope these sunny yellow cards bring some sunshine to your Thursday! Thanks so much for stopping by today, and have a marvelous day!
Filed Under: simon says stamp Tagged With: extra large thank you, flat shaker, floral whimsy, ink blending, layered stencil, pawsitively saturated, stencil, thankful and grateful

Thankful and Grateful

November 22, 2023

This post is sponsored by Simon Says Stamp. Thanks, Simon!

Hi friends! Happy Thanksgiving for those readers in the United States. We are giving thanks, and as this year draws to a close, I find myself reflecting yet again on how many wonderful things and people that I have in my life for which I am so grateful. As a child, I never dreamed that my life could be what it currently is, offering peace and stability and a loving family. This year, I am also so thankful for being able to help provide for my family in a meaningful way. I couldn’t do this without your support and kind words, friends, so for that I wish to simply say: thank you. I wanted to channel that gratitude into a project, and so I pulled out several different die sets from Simon Says Stamp, some watercolor paper, and my Distress Inks to do some watercoloring. Let’s get started with the details!

To start, I die cut the Layered Berry Bird, Forest Border Frame, and Abundant Leaves dies from some Arches Hot Press watercolor paper. I left the individual die cut pieces within their negatives and used Forest Moss, Bundled Sage, Seedless Preserves, Walnut Stain, Aged Mahogany, Abandoned Coral Distress Ink reinkers to add some lovely mottled watercolor to each die cut, focusing on gorgeous shades of olive green and rich maroon, with tiny touches of coral and brown. I simply placed drops of the colors onto my palette and picked them up with a damp paintbrush to be able to control the intensity of the color.

I also added some shimmer watercolor accents to the bird and some of the foliage. I adore how intricate these die cuts are; they really do so much of the work for you! The super detailed Forest Border Frame is a perfect backdrop for the sweet Layered Berry Bird.

After I had completed my watercolored die cuts, I used a blending brush to blend the new Kale Pawsitively Saturated ink around the edges of an intense olive green A2 card base, adding some extra depth of color to match the vivid watercolored die cuts. I arranged the watercolored die cuts in the center of my blended card front and adhered them using both liquid and foam adhesive.

For the greeting, I die cut the “thankful” from the Fancy Giving Thanks die set using Purple Rain mirror cardstock. The iridescent sheen on this cardstock picks up the different colors in the watercolored die cuts so beautifully, as well as adding additional texture and shine to the card! To coordinate with this die cut word, I heat embossed a sentiment from the Thankful and Grateful stamp set using Brass embossing powder. I nestled both sentiment pieces amongst the bird and foliage, finally adding a few shimmering gems for some more sparkle.

Well, that’s all for my project today! I am so grateful to you all for being here and for supporting me through your kind comments and encouraging messages of support, as well as occasionally shopping through my affiliate links. It truly means the world to me to be able to share my art with this community as a job!

I also wanted to share that Simon Says Stamp is running a 30% off sale for all Simon-branded products. Simply enter code TKY23 at checkout to receive 30% off Simon Says Stamp-branded products from now through 11:59 pm EST on 11/23/23. Simon also is including a free gift with purchases of $100 or more. (It’s an excellent set, perfect for making tons of quick tags!!) Shop for crafty friends or even yourself with a fabulous discount and some awesome freebies!

Thanks so much for stopping by today, and have a wonderful Thanksgiving!!

Filed Under: simon says stamp Tagged With: abundant leaves, distress inks, fancy giving thanks, forest border frame, layered berry bird, thankful and grateful, thanksgiving, watercolor

Thankful For Your Friendship & Care with Simon Says Stamp Season of Wonder!

October 10, 2023

This post was sponsored by Simon Says Stamp. Thanks, Simon!

Hi friends! I am back with another muted autumnal project today using goodies from the new Simon Says Stamp Season of Wonder release. I am embracing the more muted colors of autumn these days, appreciating the beauty in a less vivid color palette. I realized that I had not really done anything with the Rainbow Splash Caramel cardstock and thought it would work beautifully with the new Wooden Planks Embossing Folder. Let’s get started with the details on my project!

I began by running an A2 sized panel of Rainbow Splash Caramel cardstock through my die cutting machine using the Wooden Planks Embossing Folder. The details on this embossing folder are so fine and so beautifully crisp! Such a unique folder. I used a blending brush to blend coordinating Rainbow Splash Caramel ink around the edge of the embossed panel, creating a vignette for my focal point.

To accent the details on the woodgrain background, I die cut the new Lovely Leaves die twice: once from brown glitter cardstock from Hero Art’s Fall Glitter Cardstock pack and once from a deep maroon cardstock from my stash. I thought that the juxtaposition of the detailed embossed background worked so well with the simplicity of the foliage arrangement!

For the greeting, I heat embossed and cut out two sentiments from the new Thankful & Grateful stamps + dies using Brass embossing powder onto some more of the deep mahogany cardstock. I love the contrast of colors between the rich metallic brass and the deep maroon of the cardstock! I arranged the foliage die cuts on the blended and embossed card front, offsetting them slightly to create a fuller “bouquet.” I tucked the greeting die cuts amongst the foliage and finally added a few shimmering gems for more sparkle!

This card is so full of fun textures and finishes between the embossed background and the different types of shine and sparkle. I love pairing interesting finishes to create a unique project! Thanks so much for stopping by today, and have a marvelous day!

Filed Under: simon says stamp Tagged With: caramel, embossing folder, gender neutral, ink blending, lovely leaves, rainbow splash, thankful and grateful, wooden planks

Primary Sidebar

  • Facebook
  • Instagram
  • Pinterest
  • YouTube

Favorite Shops

Secondary Sidebar

Subscribe

Enter your email address to subscribe to this blog and receive notifications of new posts by email.

Instagram
Something is wrong.
Instagram token error.
Follow
Load More

Archives

Tags

3D embossing folder alcohol markers better press birthday birthday card blog hop card kit christmas christmas card christmas tag colored pencil copic copic coloring Daniel Smith die cutting embossing folder embroidery felt giveaway holiday holiday card hot foil ink blending karin brushmarker pro layered stencil masculine my monthly hero new release no line coloring no line watercolor OLO marker olo markers original illustration pawsitively saturated rainbow shaker card slimline stamping stamptember stencil thank you thinking of you valentine's day video watercolor

Popular Posts

Simon Says Stamp October 2026 Card Kit of the Month: Homespun Gratitude!
Honey Bee Stamps Cheerful Love Blog Hop!
Altenew Craft A Flower: Poppy Blog Hop+Giveaway!
Autumn Legs with Colorado Craft Company and Catherine Pooler!
Simon Says Stamp Cozy & Bright Inspiration, Part Two!
February 2018 My Monthly Hero Blog Hop!
The Ton Anniversary Release- Day 2
Sunflower Home Decor with Simon Says Stamp!
Simon Says Stamp STAMPtember Surprise: Boo Bundle Halloween Card Kit!
Hero Arts Spring 2020 Catalog Release Blog Hop+Giveaway!

Disclosure

Some affiliate links are used in my posts. This means that, should you click on one of my links and purchase something from that company, I will receive a small portion of the sale at no extra cost to you. I use the money earned from these sales to help maintain my blog. I so appreciate you visiting and, if you do choose to use one of my affiliate links, thank you so much for your support!
Copyright © 2026 ·Brunch Pro Theme · Genesis Framework by StudioPress · WordPress · Log in
Loading Comments...