• Skip to main content
  • Skip to primary sidebar
  • Skip to secondary sidebar

Sixth Street Sundries

Emily Midgett

  • Home
  • About Me
  • Contact
  • OLO Marker Color Swatch Chart
  • Shop

Archives for May 2022

Hero Arts 2022 Mixed Media Release+Blog Hop!

May 18, 2022

Hi there! Today, Hero Arts is celebrating the release of their new Mixed Media Catalog with a blog hop, and we are hoping to inspire you to step outside of your comfort zone. You should have arrived here from Debi Adams, and your next stop is Ilina Crouse. I will admit, my initial thought was that Mixed Media was a bit too far of a departure from my normal style, but guess what I learned? For a project to be considered “mixed media,” it only needs to mix more than one medium-embossing, painting, stamping, ink blending, pastes, pearls… something that we do frequently as cardmakers!! I combined some of the new products from the Mixed Media Catalog with some older products and art supplies to create this card/tag combo, so let’s get started with the details!

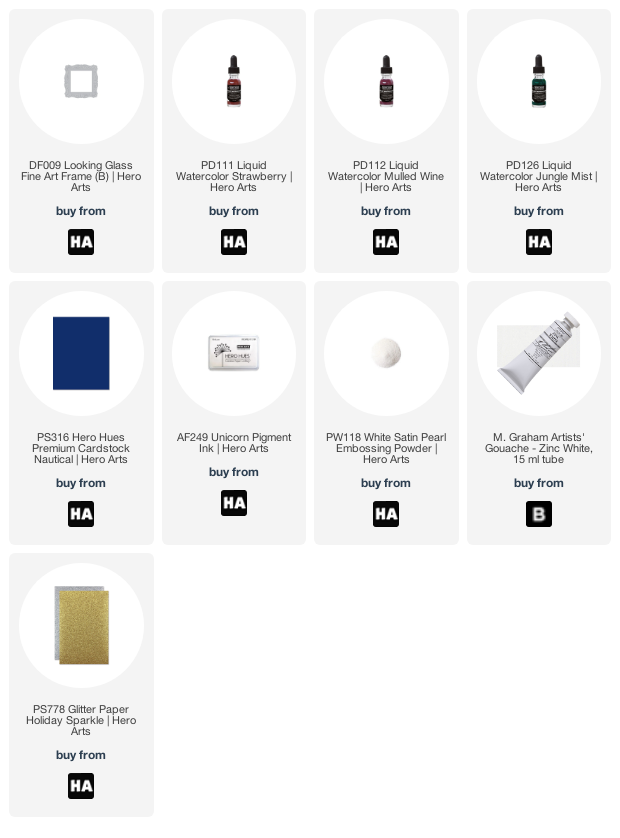
Both of my projects feature the Floral Silhouettes stamps as the base of the projects. I love using colored pencils on vibrant colored cardstock, and thought it would be great fun to combine the Hero Arts Liquid Watercolors with white gouache to do some painting on Nautical cardstock. I stamped the images from Floral Silhouettes onto Nautical cardstock using Unicorn White pigment ink, then created a lovely pastel palette by mixing gouache with Strawberry, Mulled Wine, and Jungle Mist liquid watercolors. The opacity of the gouache makes it stand out perfectly on the dark navy blue cardstock.

Painting with gouache is a bit different than my normal painting technique. I painted the images flat, then added highlights to create definition on the individual areas, which is a bit of a departure from my usual technique of adding shadows to my images. The Floral Silhouettes stamps are solid silhouettes, so they leave some room for imagination when it comes to adding details. I fussy cut the finished images using my sharp scissors.

For my card base, I used White Satin Pearl embossing powder to emboss the new Calligraphy Bold Prints on a full size A2 panel of Nautical cardstock. I trimmed down a thick strip of more Nautical cardstock, adding a thinner strip of silver glitter cardstock on either side, then adhering it to the embossed card base. I added the greeting on a strip of cardstock using some foam adhesive, then arranged my flowers above the sentiment strip like they were exploding from the top of the sentiment strip. I love how the colorful gouache painting pops so beautifully from the dark blue cardstock. This is an experiment that I definitely will try again!

My tag features some of the leftover gouache flowers and another embossed background from the Calligraphy stamp, this time backing a Looking Glass Fine Art Frame, die cut from more navy blue cardstock. I arranged the flowers and foliage, as well as a sentiment, then punched a hole in the top and threaded a ribbon through to create a tag. Simple, and would look so lovely adorning a plain gift bag!

Well, that’s all for my projects today. I so enjoyed stepping out of my comfort zone creating these projects-I can’t wait to try more gouache/liquid watercolor experiments! Solid silhouette stamps are just the foundation for some really fun techniques!

To celebrate this new catalog release, Hero Arts is giving away a super fun prize pack. You can check out the Hero Arts Blog for all of the details on the items included in the prize pack from the new release. Simply leave comments along the hop to be entered to win. The more comments you leave, the more chances you have to win!

Your next stop is Ilina Crouse. Thanks so much for stopping by today, and happy hopping!
Filed Under: Hero Arts Tagged With: floral silhouettes, gouache, mixed media

New Video: Adding “Iridescent” Details to your No-Line Watercoloring!

May 18, 2022

Hi there! I am up on the Pinkfresh Studio YouTube channel today with this video featuring my new Magnolia stamps and some “iridescent” watercoloring. Take a peek at the video here on my blog or watch HERE on YouTube to see how I created this iridescent look!

If you can’t watch the video, I’ll give a quick rundown of how I created this pretty card!

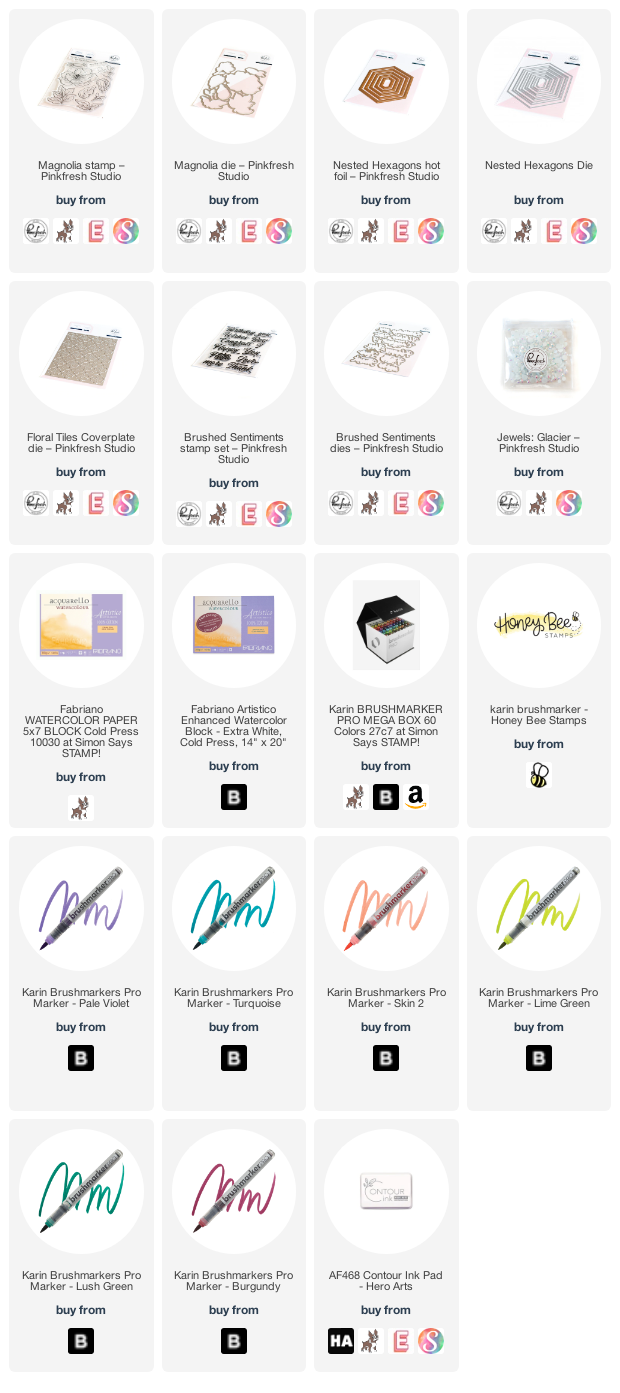
When I’ve got all of the stuff out for hot foiling, I will hot foil a bunch of different pieces to use at a later date for projects. I hot foiled the super versatile new Nested Hexagons hot foil frames using Aura foil, which is an absolutely stunning iridescent gold foil from Spellbinders, and I thought that the new Magnolia stamps would be perfect to do a video with some more no-line watercolor tricks, as well as showing how I create an “iridescent” look to my watercolored images!

I began by stamping the Magnolia images onto some Fabriano Artistico watercolor paper using Contour Ink from Hero Arts. I used my Karin Brushmarker watercolor markers to add some light pink color to the images, keeping the pinks and lavender shadows concentrated towards the center of the flower, making sure to keep the edges nice and crisp by keeping the wet sections separate, as well as using plenty of water to allow the pink to smoothly fade into white around the edges of the petals.

After I’d added the main color to the pink flowers, I added some very diluted washes of coral, lime green, and aqua blue Karin markers to the edges of the petals, mirroring the iridescent shine on the Nested Hexagon foiled frame. I was able to make the colors super pale and translucent by scribbling them onto my ceramic palette and adding lots of clean water to create the subtle wash. I die cut the finished watercolored images using the coordinating Magnolia Dies.

To create the background for my watercolored images, I die cut a Nested Hexagon die the same size as my foiled frame from the center of a Floral Tiles cover plate die, cut from some white cardstock. I nested the foiled frame inside of the die cut opening, then added both pieces to a solid white card base using foam adhesive. I arranged the watercolored magnolia flowers to the front of the card in a bouquet, then adhered them with more foam adhesive, creating a double layer of foam adhesive. For the greeting, I added a sentiment from Brushed Sentiments, which I heat embossed in white on some heavyweight vellum and die cut using the coordinating dies. The final touch was to add a few iridescent white gems for some sparkle!

Well, that’s all for this project! It was so fun picking up the rainbow colors in the iridescent foil in my watercoloring. It’s subtle, but I think it adds so much interest to the finished painting. Thanks so much for stopping by, and have a marvelous day!

Filed Under: karin, pinkfresh studio, video Tagged With: birthday card, hot foil, magnolia, nested hexagon, no line watercolor

Simon Says Stamp Yay You Release Blog Hop+Givewaway!

May 13, 2022

Hi there! I’m so excited to be part of Simon Says Stamp’s Yay You blog hop today, celebrating their newest collection release. You should have arrived here from Bibi Cameron, and your next stop is Miriam Prantner. You can also start back at the beginning at the Simon Says Stamp Blog in case you get lost! I have a trio of wedding-themed projects to share with you today, all with a coordinated feel but each their own unique finished product. Let’s get started with the details!

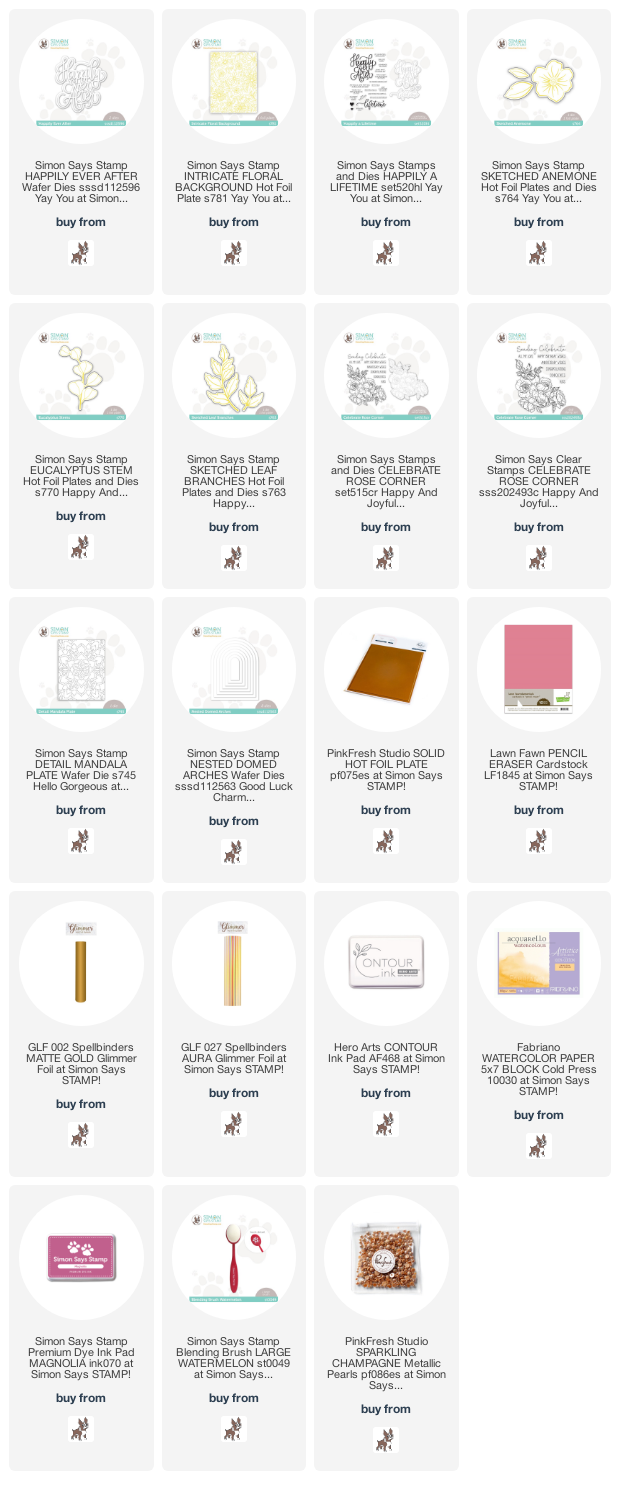
My first projects feature several of the stunning new hot foil goodies from the Yay You release. I came a little late to the hot foil game, only recently becoming slightly obsessed with the magic that is hot foiling, and these gorgeous new floral hot foil plates are just making me love it even more. I have found that the Pinkfresh Studio Solid Hot Foil Plate is an absolute game changer when it comes to hot foil. It allows you to get twice as much mileage from your hot foiling products, and it creates such an incredibly unique look with the solid foiled pieces.

For this first project, I wanted to create some bold matte gold floral images, so I combined the new Sketched Anemone hot foil plates with the Solid Hot Foil Plate to create some matte gold foil ephemera for my card front. I also created some foliage using the Eucalyptus Stem hot foil plate, as well as a few vellum Sketched Leaf Branches for some textural variety.

I die cut a Domed Arches die from some Lawn Fawn Pencil Eraser cardstock, which I find to be a most unique shade of pink-something that I truly have never seen before amongst my (somewhat copious) collection of colored cardstock! I placed the arch die cut on the Detail Mandala die and ran it through my die cut machine to add some subtle interest to the background. I popped the pierced dome die cut up on an A2 card base made from Pencil Eraser cardstock with some foam tape. I arranged the foiled floral swag on the dome die cut, then added a greeting from the new Happily A Lifetime. Such a gorgeous sentiment set! A few iridescent pearls finished the project off and added one final bit of textural contrast.

My second project features several of the same products used on the first project, as well as an identical color scheme, but this project features a completely different layout. I began this project by hot foiling the beautifully detailed new Intricate Floral hot foil plate onto some more Pencil Eraser cardstock using Aura foil from Spellbinders. This was my first occasion to use the Aura foil, and its iridescent gold shimmer does not disappoint in the slightest! The combination of the iridescent foil impressed into the unique melon pink background makes my heart flutter.

I trimmed the foiled background down slightly and added a strip of glittery gold along the edge, then mounted that on a full size A2 Pencil Eraser card base using foam adhesive. I heat embossed another greeting from Happily A Lifetime onto some more pink cardstock using white embossing powder for maximum contrast, then popped the greeting and some golden foiled eucalyptus die cuts up using a double layer of foam adhesive for tons of height and contrast. A few more iridescent pearls finished the project off.

My last project for today features the gorgeous, gigantic new Happily Ever After die. I thought the romantic font and sheer size of this die would work beautifully with my Celebrate Rose Corner stamps. Roses+weddings go together like peanut butter+jelly, right? I stamped the Celebrate Rose Corner using Contour Ink from Hero Arts, then did some no-line watercoloring on the roses using Holbein watercolors and Fabriano Artistico watercolor paper. Once I’d finished watercoloring, I die cut the large image using the coordinating die.

For the card base, I trimmed down an A7 card front from some more Pencil Eraser cardstock, which coordinated beautifully with the muted mauve-y pinks in the roses. To add a bit of interest to the background, I blended some Magnolia ink using a blending brush, then splattered some handmade shimmery gold watercolor on blended the background. I popped up the watercolored roses using foam adhesive, then added the glittery gold Happily Ever After die cut. I also tucked a couple of Eucalyptus Stem hot foiled vellum die cuts for added textural interest, as well as a few rose gold gems for even more sparkle. The sparkles and size make it super festive for a wedding card, but the soft colors and pretty flowers are so romantic, don’t you think?

Well, that’s all for my projects today! To celebrate their latest release, Simon Says Stamp is generously giving away a $25 coupon to every stop on the hop, selected from the blog comment section. Winners will be chosen and posted on the Simon Says Stamp blog on Wednesday, the 18th of May. The more comments you leave along the hop, the more chances you have to win!

Simon Says Stamp is also offering a fun gift with purchase freebie! Simply add code BEAUTY at checkout to receive the Beautiful die set for free!

Your next stop on the hop is Miriam Prantner. Thanks so much for stopping by today, and happy hopping!

Filed Under: simon says stamp Tagged With: celebrate rose corner, holbein watercolor, hot foil, original illustration, watercolor

Simon Says Stamp Yay You Release!

May 10, 2022

Hi there! My friends over at Simon Says Stamp are releasing a brand new collection of products tonight, and I was lucky enough to get to play with them last week! The new Yay You collection has a wide variety of products and styles, but I particularly fell in love with several of the new hot foil plates. I have a card to share with you featuring one these gorgeous new floral hot foil plates, so let’s get started with the details!

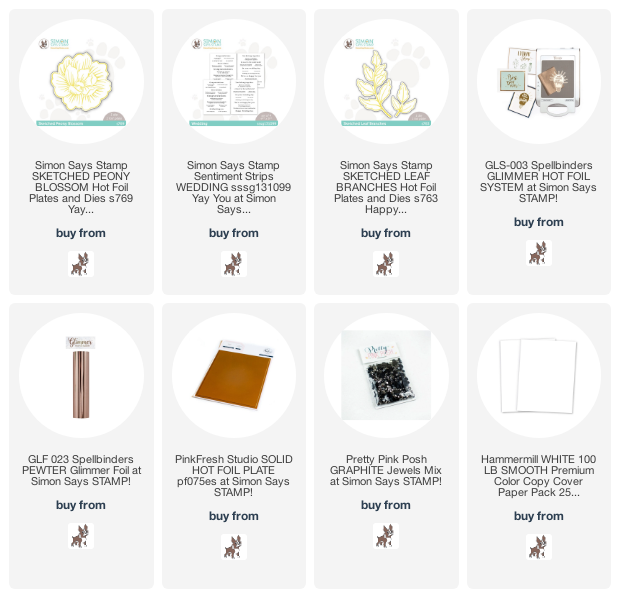
My first project features the absolutely stunning new Sketched Peony Blossom Hot Foil Plate + Die. I love that these hot foil plates come bundled with the coordinating die so that you can use them with or without the dies! I used my Glimmer hot foil machine with some Pewter Foil to hot foil the beautiful Sketched Peony Blossom Hot Foil Plate. I used the OLO Markers to add lots of intense color to the large bloom. It’s big enough to really get down into the nooks and crannies to create lots of dimension.

I hot foil the Sketched Leaf Branches Hot Foil Plate + Dies using the same Pewter foil. I also used the Pinkfresh Studio Solid Hot Foil Plate to use the leftover foil to create some solid foliage, which I die cut with the coordinating die.

I arranged the flower and greenery on a white A2 card front, adhering the pieces with some foam adhesive. I added a greeting from the CZ Sentiment Strips Wedding, which I popped up using a double layer of foam tape to make it really stand out. I added a few Graphite gems to coordinate with the charcoal foil.

Well, that’s all for me today! I will be back later this week with some more inspiration using the new goodies from the Yay You collection from Simon Says Stamp. Thanks so much for reading, and have a marvelous evening!

Filed Under: simon says stamp Tagged With: glimmer hot foil, hot foil, sketched peony, solid hot foil plate

Flower On the Grain: Pre-Orders Now Open!!

May 8, 2022

Hi there! Today, my husband and I are opening preorders for our business: The Flower On the Grain. We had been looking for something that we could do together as a couple, and this collaboration combines both of our talents: his woodworking (the grain) and my floral illustrations (the flower). Thus, The Flower On the Grain was born. While I’ve worked hard to improve my artistic skills, he’s come up with clever and incredibly useful tools for me to use in my art studio, and now we are so excited to be able to offer them to you, as well! We previously had sold them last Christmas, and with life and all of these kiddos keeping us busy, we haven’t been able to open preorders up again until now.

If you’ve watched my live painting demonstrations before, you’ll have seen my watercolor board that I use nearly every time I paint. My husband has made a few of these watercolor boards as gifts for friends, but we have now decided to offer them for sale, along with a few other useful crafty tools that he has crafted and we have embellished with laser engravings of my illustrations, personalizing them even further with names, monograms, or initials.

Without further ado, please allow me to (re-)introduce our new products:

First up, we have our original product: The FOTG Watercolor Board.

Make your watercoloring table a little prettier and a lot more functional with these customized watercoloring boards! These 8.5″x11.5″ wooden boards are created from beautifully grained 9-layer birch plywood, cut to fit, then engraved with your choice of floral illustration and name/initials/monogram and stained and sealed to protect your beautiful board!

The hinged stand creates a slight angle for your watercoloring, and it is complete with inlaid magnets to ensure that the hinges stay closed when you are working with the flat board. The sealed surface creates a large, smooth area for you to tape your watercolor pieces down, helping to minimize warping on your finished watercolored piece, while the sealant creates a waterproof surface to help protect the wood of your board. 

Four stain options are available from which to make your selection: Kona, Antique Walnut, Weathered Gray, and Natural. The featured board in the first photograph is stained with the Antique Walnut. The board pictured has been stained with the Antique Walnut selection. 

Customized FOTG Watercolor Board Price (not including shipping): $65


Next, we are proud to introduce the FOTG Wooden Watercolor Palette.

These wooden watercolor palettes have been carefully designed and crafted with your watercoloring needs in mind. They are crafted from fine hard maple wood, and have been cut and carved to fit 40 half pans. We have added a metal piece to the bottom of the base, so that you can attach your magnetic pans to the bottom of your palette and easily be moved or removed at your leisure! (We are waiting for these custom sized metal components to arrive later this week, which explains their absence in the photo.)

The watercolor palettes also feature inlaid earth magnets to ensure that your watercolors are safely enclosed inside your palette while traveling!

These boards can be customized with your choice of floral illustration and name, monogram, or initials.

FOTG Customized Wooden Watercolor Palette: $70

***The following photos show the different customization options available for your FOTG wooden artist supplies***

Each of these five illustrations has been drawn by me and are exclusive to the FOTG product line! Your choice of illustration will be laser engraved on your board, as well as your name, initials, blog name, or other customization of your choice.

Here are the individual images shown a bit large to better capture the detail. It’s amazing what incredible detail the laser can capture!

We also have assembled a selection of fonts for you to add your name, initials, or other customization to your FOTG wooden artist supplies:

You have four choices of stain to add color to your FOTG wooden artist supplies:

Be sure to look carefully at all of the choices before making your final selections!

We are also offering a discounted bundle featuring the FOTG Wooden Watercolor Board + Watercolor Palette.

Individually, these two items would cost $135, but we are offering a 10% discount on this bundle for $121+shipping!

Our final product reveal for today is our new FOTG Monogram Metal Palette.

These metal palettes are a more inexpensive option for those who want to add the beauty and functionality of our wooden palette to their art table at a price that is a bit more budget-friendly! These white tins are super smooth and silky (think the outside of your Yeti cup) and make the perfect canvas for the exclusive, detailed Anemone Wreath+Monogram!

The crisp white of the palettes is a perfect background for the detailed Anemone Wreath drawing and monogram of your choice!

These palettes are 4″x6.5″, and easily hold 48 watercolor half pans. The metal base means that the magnetic bottom of your pans will quickly adhere to the bottom, while also being easily moved and removed.

FOTG Metal Monogram Palette: $40+shipping

Now for the ordering details:

As you might know, my husband Chris and I have four young children (two sets of twins, aged 8 and 2), as well as a full time job for him and my job as momma and illustrator/stamper, so this new venture is something that we are enjoying doing as a side business. Because of this, we are going to structure this release similarly to my coloring panel releases, with preorders open for a certain period of time so that we have a better idea of popularity of each item. Think of it as our “store hours.”

For this release, the “store is open” from today, Sunday May 8, through Sunday, May 15, 2022, during which time we will accept preorders.

To order your own custom pieces from The Flower On the Grain, please send an email to
eamidgettsketches (at) gmail (dot) com.

***Be sure to include the following information in your email:***

~Which piece(s) you would like to order- FOTG Watercolor Board, FOTG Wooden Watercolor Palette, or FOTG Metal Monogram Palette.

For your wooden pieces, please also include the following information:

Select one of the five exclusive floral illustrations to adorn your watercoloring board:

1-Rose and Berries

2- Black Eyed Susan 

3- Anemone Corner

4-Cosmos Corner

5- Tree Peony

Please also select your choice of stain and font.  Examples and names of each are in the photos above. 

For your wooden pieces, be sure to include in your email your floral illustration, stain, and font selections, and what name/monogram/initials you would like engraved on your pieces.

For your FOTG Metal Monogram Palette orders, please include which initial you would like on your engraved palette.

(Paint, brushes, and magnetic pans seen in the photos are not included.)

Once all of the necessary information has been verified, we will send an invoice to be paid no more than 48 hours later. Shipping costs will be calculated based on the number of items ordered and the weight of those items. *We have tried to price the pieces as reasonably as possible while still making this venture worthwhile, and with shipping prices increasing rapidly, we unfortunately cannot offer free shipping.*

Custom orders can also be accommodated for an extra fee, so please don’t hesitate to reach out for something truly unique! 

***These items are custom, made to order pieces. Please allow at least 10 days from the date of payment before shipping, and plan accordingly. Quality craftsmanship is worth the wait!***

Emotional blurb alert:

Thank you all for the incredible support you’ve given both myself and my husband over the last few years. There is a graphic that I’ve seen many times recently on social media, the main message being that when you purchase from a small business, a real person does a happy dance. With each purchase-whether it is coloring panels from me, a pen from 51 Woodworks, or one of these new artist supplies, you are helping to support not just our side business, but our family. For that, we truly thank each of you.

Thank you so much for reading, if you’ve read all the way to the bottom, and happy shopping!!

Filed Under: original illustrations, the flower on the grain, Uncategorized

  • « Go to Previous Page
  • Page 1
  • Page 2
  • Page 3
  • Go to Next Page »

Primary Sidebar

  • Facebook
  • Instagram
  • Pinterest
  • YouTube

Favorite Shops

Secondary Sidebar

Subscribe

Enter your email address to subscribe to this blog and receive notifications of new posts by email.

Instagram
Something is wrong.
Instagram token error.
Follow
Load More

Archives

Tags

3D embossing folder alcohol markers better press birthday birthday card blog hop card kit christmas christmas card christmas tag colored pencil copic copic coloring Daniel Smith die cutting embossing folder embroidery felt giveaway holiday holiday card hot foil ink blending karin brushmarker pro layered stencil masculine my monthly hero new release no line coloring no line watercolor OLO marker olo markers original illustration pawsitively saturated rainbow shaker card slimline stamping stamptember stencil thank you thinking of you valentine's day video watercolor

Popular Posts

Simon Says Stamp Joy For You Blog Hop- Day 1!
Simon Says Stamp Joy For You Release-Now Available!
Frozen Fractals All Around with New Simon Says Stamp Joy For You Release!
Shaped Holiday Shaker Card with New Simon Says Stamp Jolly Season Card Kit of the Month!
Holiday Postage with New Simon Says Stamp!
Simon Says Stamp Glory to the Newborn King Holiday Kit-Part II!
Holiday Joy in Pink and Green with New Simon Says Stamp DieCember!
Pinkfresh Studio 5th Birthday!
Altenew Build A Flower: Fuchsia Blog Hop+Giveway!
July My Monthly Hero Blog Hop+Giveaway!

Disclosure

Some affiliate links are used in my posts. This means that, should you click on one of my links and purchase something from that company, I will receive a small portion of the sale at no extra cost to you. I use the money earned from these sales to help maintain my blog. I so appreciate you visiting and, if you do choose to use one of my affiliate links, thank you so much for your support!
Copyright © 2026 ·Brunch Pro Theme · Genesis Framework by StudioPress · WordPress · Log in
Loading Comments...