• Skip to main content
  • Skip to primary sidebar
  • Skip to secondary sidebar

Sixth Street Sundries

Emily Midgett

  • Home
  • About Me
  • Contact
  • OLO Marker Color Swatch Chart
  • Shop

big hugs die

On Wednesdays, We Wear Pink with Simon Says Stamp and Concord & 9th!

June 5, 2024

This post was sponsored by Simon Says Stamp. Thanks, Simon!

Hi friends! Confession: I have never seen the movie “Mean Girls.” I think it’s somewhat sacrilegious for a woman of my generation, but it is what it is. (Jane Austen books/movies were more my speed in high school, ha.) However, I think you would have to have lived under a rock to not know one of the most famous lines from the movie: “On Wednesdays, we wear pink!” and I thought that it was too perfect to ignore for this pinkalicious pair that I am posting on a Wednesday! A bit of a meandering explanation to introduce these pretty pink cards, teehee. My ink collection is, shall we say, extensive, and I am particularly susceptible to shades of pink. The pinks from Concord and 9th are exceptionally gorgeous, with Dragonfruit being a particular favorite amongst all of the shades of pink in my possession. I used that vivacious pink as the creative springboard for these two pink pretties. Let’s get started with the details!

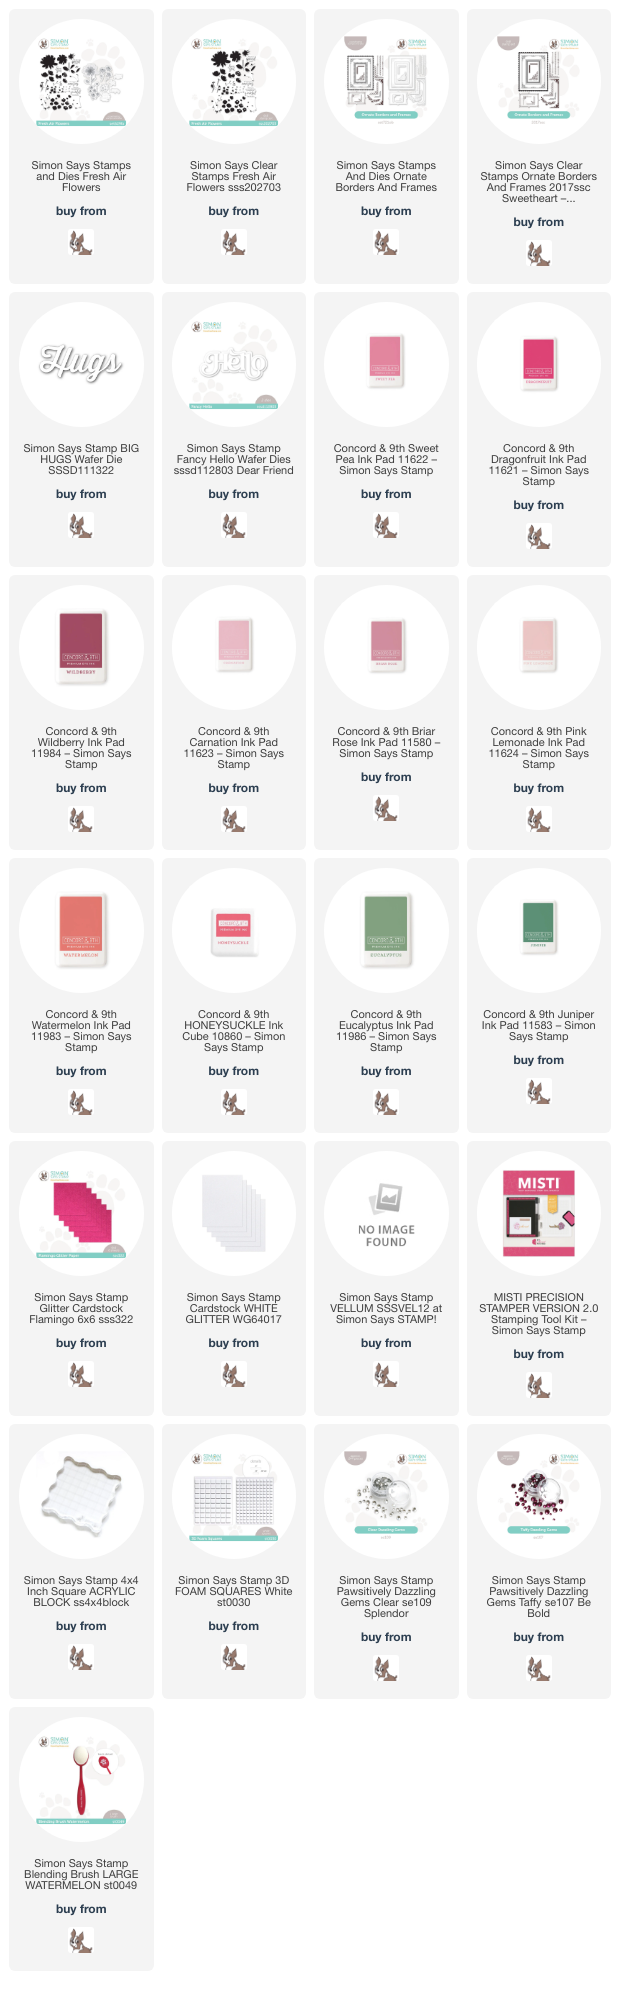
For both of my cards today, I paired the beautiful, artistic blooms from the Fresh Air Flowers layering stamp set with inks from Concord and 9th: Sweet Pea, Dragonfruit, and Wildberry for the large blooms, Carnation and Briar Rose for the medium round blooms, Pink Lemonade, Watermelon, and Honeysuckle for the tiny coral sprigs, and Eucalyptus and Juniper for the foliage. I wasn’t 100% sure how much I loved the combination of flowers after I had stamped the individual die cuts, but once I put them all together, I thought the combination was lovely! Using my MISTI, I stamped individual die cuts using the ink combination listed above, then used a traditional acrylic stamping block to stamp a pretty floral background on another A2 panel of white cardstock.

For my first card, I used the Fresh Air Flowers die cuts to adorn a pretty frame from the Ornate Borders and Frames. I stamped the uniquely detailed frame using Dragonfruit ink, then die cut it with the coordinating die. I popped up the frame on a plain white A2 card front with foam adhesive squares and arranged the floral die cuts in a swag in the corner of the frame.

For the greeting, I wanted to go bold with a large die cut, so I die cut the Big Hugs die from some Flamingo glitter cardstock. The glitter in this cardstock has an iridescent sheen to it, making it a perfect match for the varying shades of pink of my floral bouquet! I popped up the greeting with another layer of foam tape to add some extra height and help it stand out from my colorful floral bouquet. Finally, I added a smattering of Clear Pawsitively Dazzling Gems for added shimmer!

For my second project, I used the bold patterned paper that I created using the Fresh Air Flowers stamps. Whenever I am stamping custom patterned paper, I always start with my largest image first, stamping it usually three times and rotating the stamp before stamping again to create a more random effect, rather than precise and calculated. I work from the largest to the smallest images, filling in the bare spots with each subsequent stamp. After I had finished stamping the pattern, I used a blending brush to blend Dragonfruit ink around the edges, creating a pretty pink glow on the card.

After I had finished my background, I used the individual bracket stamp in the Ornate Borders and Frames set with Wildberry ink, stamping the image twice to create a full frame. I popped the frame die cuts up with foam adhesive, then added a leftover Fresh Air Flowers die cut and a greeting cut using the Fancy Hello die set with white glitter cardstock for the detail layer and vellum for the shadow. Finally, a few Taffy Pawsitively Dazzling Gems added some extra sparkle.

Well, that’s all for my projects today! I am not wearing pink today, but my cards are surely following the rules set down by Regina George and her crew, haha! Thanks so much for stopping by, and have a marvelous day!
Filed Under: simon says stamp, Uncategorized Tagged With: big hugs die, fancy hello, fresh air flowers, ornate borders and frames

Team Alcohol Marker or Team Glitter? Floral Die Cuts Two Ways with Simon Says Stamp!

April 10, 2024

This post was sponsored by Simon Says Stamp. Thanks, Simon!

Hi friends! My oldest son recently asked me what my favorite color is, and do you know… I couldn’t answer. I love too many to have one particular favorite! Case in point, my infatuation with Concord and 9th’s Fig. It’s the most luscious shade of purple- not quite fuchsia, not quite plum…. so unique and gorgeous. I found some glitter paper in my stash that matches it absolutely perfectly, and thought to myself that I needed to make a project with some detailed tone-on-tone die cutting. I couldn’t stop at just one, so I created two of course! I used the new Meadow Swag dies from the Simon Says Stamp Be Bold release, working with them in two completely different “mediums” (if you can truly call glitter cardstock a medium, ha!). Let’s get started with the details!

For my projects, I pulled out some Fig cardstock from the Concord and 9th cardstock sampler pack, matching it with Plum Glitter cardstock from Simon Says Stamp. I always say that it pays to have specialty card stock in lots of different shades in your stash, because you never know when something will match perfectly! I also pulled out the coordinating Concord and 9th Fig ink and a plethora of dies, new and old, to create my pair of purplicious cards.

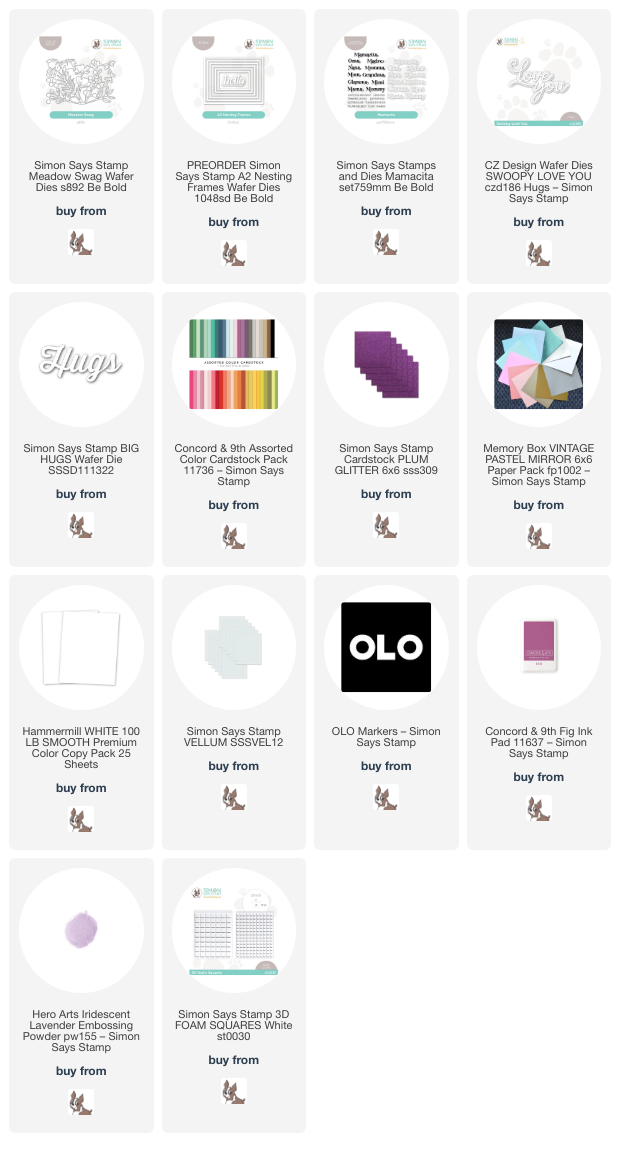
For my first card, I die cut the Meadow Swag dies twice from white cardstock, then used my OLO Markers to add lots of vibrant color. The purple markers from OLO are truly special and are such unique shades amongst the alcohol marker brands. I love that with some simple white cardstock and your alcohol markers, you can create completely customized die cuts even if you don’t care to keep an abundant stash of colorful cardstock like, ahem, some people do! (Not that I would know anything about that…..) Before adhering my colorful floral arrangement to my A2 sized Fig card front, I added an iridescent white frame cut using the new A2 Nesting Frames dies, centering it on my card front. I popped up the vibrant flowers using lots of foam squares. It’s a bit tedious to add these foam squares to such an intricate arrangement, but I think the dimension it adds is totally worth it!

For the greeting, I heat embossed the “madre” sentiment from the new Mamacita stamp and die set. I took four years of Spanish in high school and have called my mom “madre” for (yikes) twenty years, so I was so excited to see this stamp included in the Mamacita set. I heat embossed the sentiment on some Fig cardstock using Hero Arts Iridescent Lavender embossing powder. This translucent and iridescent embossing powder looks incredible on both white and colored cardstock. Definitely a must-have, in my opinion! I also die cut the detail layer of the Swoopy Love You Dies from some Plum Glitter cardstock and backed it with a vellum shadow layer, which helps the tone-on-tone glitter sentiment stand out a bit better from the colorful floral background. I added the greeting die cuts in the center of the floral arrangement with some more foam adhesive, then added a few shimmering gems for one last touch of sparkle. Such an intricate, eye-catching card, I think! That purple just grabs your attention!

My second card is a bit simpler in concept, allowing the intricacy of the Meadow Swag dies and the vibrant plum hues in the Fig cardstock and the Plum Glitter cardstock to do most of the work for me. I die cut the Meadow Swag from the Plum Glitter cardstock a couple of times, then trimmed down some Fig cardstock to both an A2 panel and a piece to 3.75″ x 5″. I blended the coordinating Concord and 9th Fig ink around the edge of the smaller panel and splattered it with some iridescent lavender glitter watercolors from my stash to add extra interest to the background. I arranged the glittering floral die cuts around the edge of the blended panel, creating almost a sunset silhouette effect against the blended cardstock.

After I had adhered all of the intricate floral die cuts on the blended panel using liquid adhesive, I placed the entire patterned panel in the center of a full size A2 Fig card front. For the greeting, I die cut one of my favorite sentiment dies from Simon Says Stamp: the Big Hugs die. To get lots of contrast and allow the sentiment to stand out from the monochromatic patterned background, I cut this bold sentiment from some more iridescent white mirror cardstock, then popped it up in the blank area of the patterned glittery panel using foam adhesive. Finally, I added a few more shiny gems for more contrast and sparkle!

Well, that’s all for my projects today! Which do you like better: the alcohol marker die cuts or the monochromatic glitter die cuts? If I have the time, I will always love coloring my standalone die cuts, but you can’t beat the dramatic effect of the glittery die cuts, especially when you’re short on time! Thanks so much for stopping by today, and have a marvelous day!

Filed Under: simon says stamp Tagged With: A2 Nesting Frames dies, Be Bold release, big hugs die, concord and 9th cardstock, mamacita, meadow swag, monochromatic, OLO marker, swoopy love you

Make Your Sentiment Die Cuts Pop with Foam!

August 26, 2023

This post was sponsored by Simon Says Stamp. Thanks, Simon!

I love giving card sets as gifts. Sending cards on the whole is not a very common method of communication anymore, even when you have super pretty cards to send; I myself am guilty of sending a text rather than a cards, and we all know the sheer volume of cards that I create! With that being said, I wanted to share a trio of pretty notecards that I created using a simple process: a big black foam sentiment on a pretty floral background. Let’s get started with the details!

All three of my cards today feature the gorgeous Pretty Peonies background stamp from Simon Says Stamp. This is another stamp that I’ve been keeping (hoarding?) in my stash for too long, waiting for just the right project on which to use it! I love using super detailed stamps like this, with its intricate floral pattern, to create lush backgrounds, allowing the large sentiments to be the star of the card. I decided to stamp the three notecards in three lovely shades of pink: Sweets, Watermelon, and Blush Pawsitively Saturated Inks. I stamped an A2 panel of white cardstock using each of these three shades of ink, then used Blending Brushes with the coordinating shade of ink to blend around the edges of each panel, creating a halo of color around the patterned center!

My first card uses the Blush stamped panel. I used the large scale You’re In Our Thoughts sentiment die to die cut a greeting from black glitter foam. The black glitter foam creates a dimensional die cut that stands out beautifully from the soft pink floral background! I also stamped a sentiment on a strip of white cardstock from the Clean Line Stacks stamp set.

I adhered the sentiment pieces to the card front, then added a few white die cut dogwood flowers around the sentiment pieces. I accented the centers of the dogwood flowers with some black gems, then added a few Milk Glass Gems for some more sparkle!

The second card features the Pretty Peonies background stamp stamped in Watermelon ink. I die cut the Big Hugs die from some more black glitter foam, as well as another black stamped sentiment from the Clean Line Stacks stamp set. The flexibility is one of the biggest benefits of using the dimensional glitter foam die cuts. I adhered the sentiment at a bit of an angle, curving it slightly around the sentiment strip.

I added a few more white dogwood flowers, popped up with foam adhesive and accented with some more jewels!

My last project features the bright pink background, stamped with Sweets ink. I die cut the super generously-sized Huge Big Thank You greeting from some more glittery black foam. I also added a black frame cut using the A2 Thin Frames dies and some crisp black cardstock.

I arranged the sentiment die cut on the card front with some liquid adhesive, curling it slightly so that it covered more of the card front. I popped up the sentiment strip using foam tape, then added a few milk glass gems for some more sparkle!

Well, that’s all for these projects! The Pretty Peonies background stamp is so lovely that it can easily stand on its own, but I can’t wait to color it up, as well! Thanks so much for stopping by today, and have a marvelous day!

Filed Under: simon says stamp Tagged With: background stamp, big hugs die, card set, huge big thank you, pretty peonies

Primary Sidebar

  • Facebook
  • Instagram
  • Pinterest
  • YouTube

Favorite Shops

Secondary Sidebar

Subscribe

Enter your email address to subscribe to this blog and receive notifications of new posts by email.

Instagram
Something is wrong.
Instagram token error.
Follow
Load More

Archives

Tags

3D embossing folder alcohol markers better press birthday birthday card blog hop card kit christmas christmas card christmas tag colored pencil copic copic coloring Daniel Smith die cutting embossing folder embroidery felt giveaway holiday holiday card hot foil ink blending karin brushmarker pro layered stencil masculine my monthly hero new release no line coloring no line watercolor OLO marker olo markers original illustration pawsitively saturated rainbow shaker card slimline stamping stamptember stencil thank you thinking of you valentine's day video watercolor

Popular Posts

Simon Says Stamp Joy For You Blog Hop- Day 1!
Simon Says Stamp Joy For You Release-Now Available!
Frozen Fractals All Around with New Simon Says Stamp Joy For You Release!
Shaped Holiday Shaker Card with New Simon Says Stamp Jolly Season Card Kit of the Month!
Holiday Postage with New Simon Says Stamp!
Simon Says Stamp Glory to the Newborn King Holiday Kit-Part II!
Altenew Build A Flower: Fuchsia Blog Hop+Giveway!
Holiday Joy in Pink and Green with New Simon Says Stamp DieCember!
Pinkfresh Studio 5th Birthday!
Honey Bee Stamps September Release Blog Hop!

Disclosure

Some affiliate links are used in my posts. This means that, should you click on one of my links and purchase something from that company, I will receive a small portion of the sale at no extra cost to you. I use the money earned from these sales to help maintain my blog. I so appreciate you visiting and, if you do choose to use one of my affiliate links, thank you so much for your support!
Copyright © 2026 ·Brunch Pro Theme · Genesis Framework by StudioPress · WordPress · Log in
Loading Comments...