• Skip to main content
  • Skip to primary sidebar
  • Skip to secondary sidebar

Sixth Street Sundries

Emily Midgett

  • Home
  • About Me
  • Contact
  • OLO Marker Color Swatch Chart
  • Shop

country basket

Simon Says Stamp STAMPtember Grateful Moments Collection Release + Flash SALE!

September 29, 2026

This post was sponsored by Simon Says Stamp. Thanks, Simon! *I have gathered links to all of the products used at the bottom of the post for your convenience, using affiliate links at no extra cost to you. Thank you for shopping with my links! I truly appreciate your support for my work!*

Hi friends! As we wind down on a fabulous STAMPtember celebration, Simon Says Stamp still has a few surprises up their sleeves to share with you! Today, they have released a special collection called Grateful Moments, which is a specially-curated product suite consisting of stamps, coordinating dies and stencils, and couple of extra dies that work beautifully with the Grateful Moments product suite! Click HERE to see the entire collection! These stamps, dies, and stencils will also be restocked if/when they sell out- hooray! I have created two projects today filled with pretty flowers, saturated colors, and gratitude, so let’s get started on the details!

For both of my projects, I wanted to select a color palette that worked beautifully with the autumnal feel of these products from the Grateful Moments product suite, but also had a touch of vivid summertime color. I started with a gorgeous pinky-coral for the card fronts, but then added in burgundy, a rich burnt orange, multiple shades of pink, and some metallics! I think these colors are so striking together!

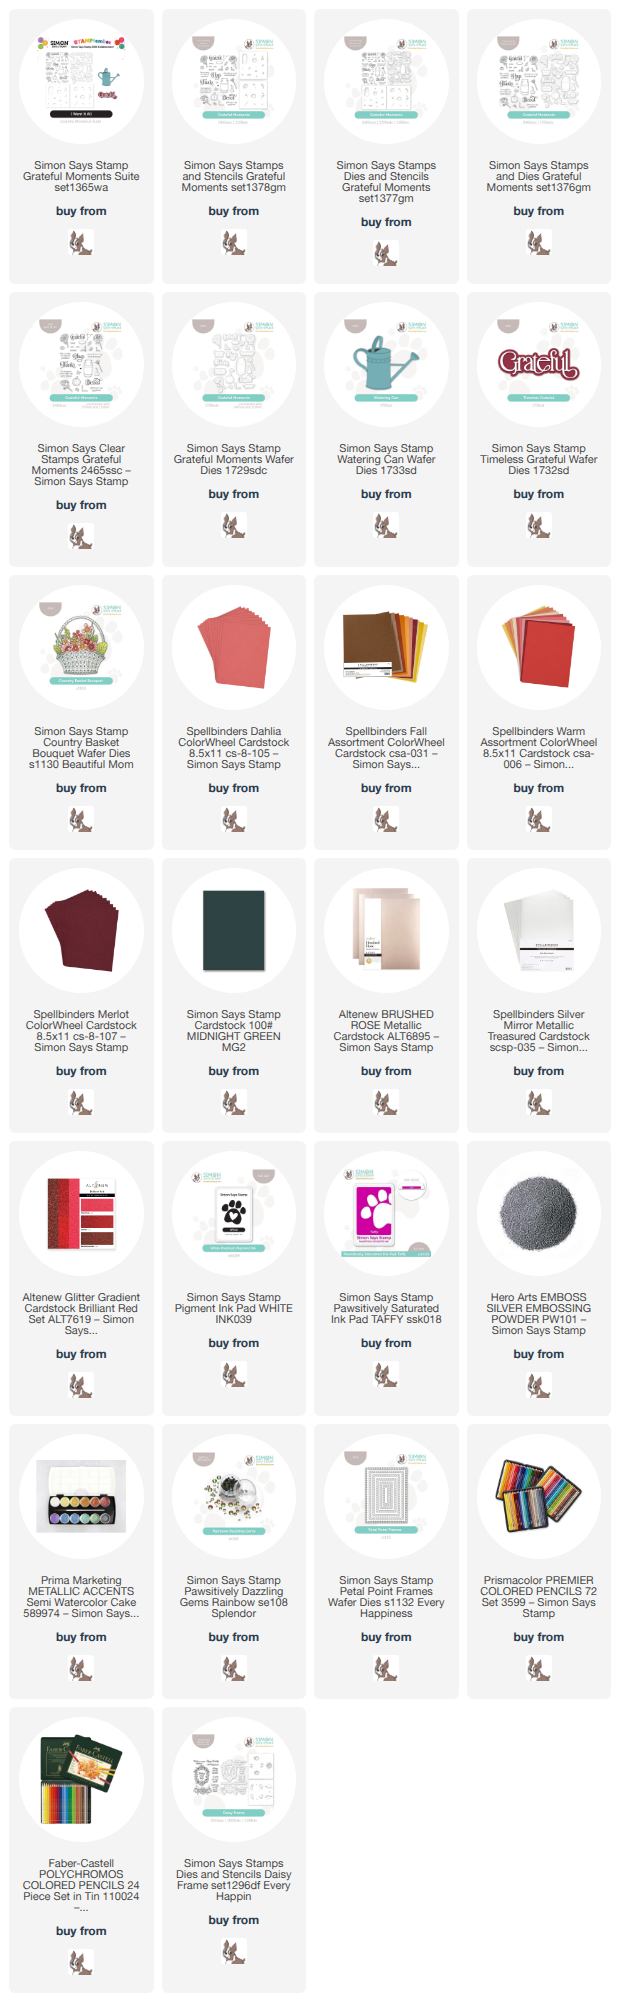
While these stamps and dies work beautifully with their coordinating stencils, I wanted to take advantage of these absolutely beautiful images by really getting into the weeds with some detailed pencil coloring. I stamped many of the gorgeous images from the Grateful Moments stamp set onto some of that pinky-coral cardstock using Simon Says Stamp’s White Pigment Ink, then used my colored pencils to add lots of vibrant color to the milk jug, flowers, gourd, and pumpkins. I think the effect of the opaque pencils on the colored cardstock is so striking! I cut the finished images out with their coordinating dies.

To ground my cluster of images, I die cut one of the Petal Point Frames from the same pinky-coral cardstock. I also stamped one of the poignant greetings from Grateful Moments onto the colored cardstock using White Pigment Ink, adding white embossing powder over the top to make it really crisp and clean. I also die cut a Timeless Grateful, cutting the detail layer three times-once from rose gold metallic cardsock and twice more from white scrap cardstock, which I layered to create a dimensional greeting, then adhered that onto a burgundy glittery shadow layer. Before I arranged all of the die cuts onto the A2 pinky-coral card front, I blended Taffy Pawsitively Saturated Ink to coordinate with the beautiful pinks of the bouquet and splattered some coppery metallic watercolors on the blended background. I arranged all of the die cuts, adhering them with a variety of heights of foam adhesive, then added a few Rainbow Pawsitively Dazzling Gems to the card. The Rainbow gems really pick up the variety of colors included with all of the images! So much color saturation on this card!

My second card keeps the color palette in the same family, but switches the rose gold for a shining silver! I die cut the new Watering Can standalone die from some shining silver foil cardstock, cutting the accent lines from plain black cardstock. After assembling all of the pieces, I used scraps of cardstock in the same color palette (rich burnt orange, magenta, autumn rose, and hibiscus) along with some jewel green foliage to create a gorgeous floral arrangement in the watering can using the flowers from the previously-released Country Basket Bouquet die set. The size of these blooms worked beautifully with the proportions of the watering can!!

For the greeting, I stamped a sentiment from Grateful Moments onto some deep burgundy cardstock and embossed it with silver embossing powder to tie into the silver watering can. I die cut the sentiments with their coordinating dies. To adorn the pinky-coral A2 card front, I trimmed down some thin strips of cardstock with my guillotine trimmer and adhered them across the bottom with liquid adhesive, creating a ground for my bouquet and greeting so that they were not floating on the card! I arranged all of the die cuts on the card front, adhering them with different heights of foam adhesive, then finally finishing the card with some sparkling Clear Pawsitively Dazzling Gems.

I am just obsessed with this semi-analogous color palette! It’s a bit of a refreshed autumn palette, adding in those cool pinks and coral, but it still definitely has a fall aesthetic!

The folks at Simon Says Stamp are offering a fabulous FLASH SALE to celebrate this newest Grateful Moments release:
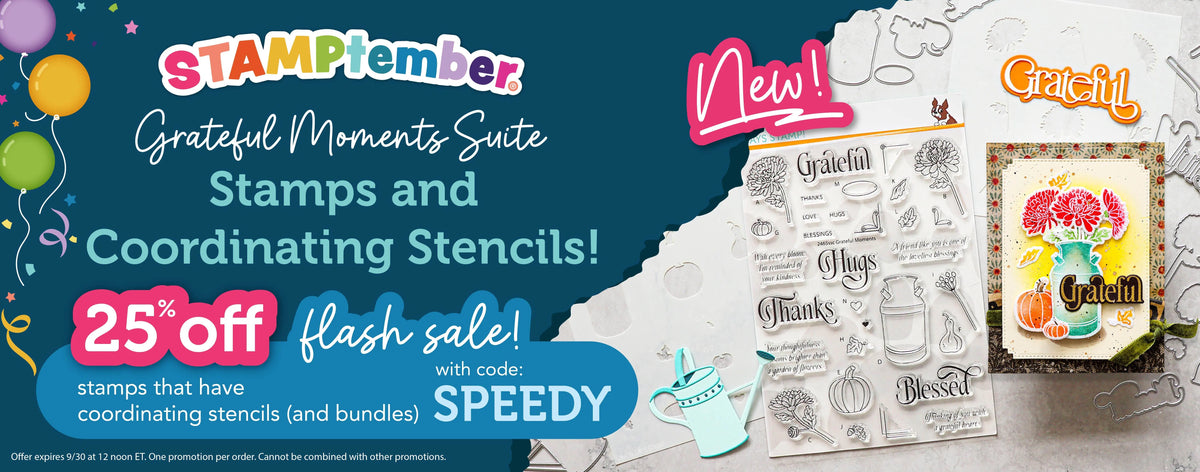
All Simon Says Stamp-branded stamps and coordinating stencils are 25% off using code SPEEDY at checkout! (Click HERE to see everything included with the sale!) The offer expires tomorrow at noon Eastern time, so don’t wait! While I didn’t use the stencils on my projects today, I absolutely adore the ease and speed with which you can create a unique and detailed project without having to dig out your coloring mediums. If coloring isn’t your thing, you definitely will want to take advantage of this sale. I even have one of my own illustrations and it’s coordinating stencils included with this sale! Click HERE to check out the Daisy Frame collection!

Well, that’s all for me today. Thanks so much for stopping by today, and Happy STAMPtember!
Filed Under: simon says stamp Tagged With: colored pencil, country basket, die cutting, grateful, grateful moments, ink blending, no line coloring, petal point frame, stencils, timeless grateful, watering can

A Friend Like You with New Simon Says Stamp!

March 17, 2026

This post was sponsored by Simon Says Stamp. Thanks, Simon! *I have gathered links to all of the products used at the bottom of the post for your convenience, using affiliate links at no extra cost to you. Thank you for shopping with my links! I truly appreciate your support for my work!*

Hi friends! I am back today with a sweet project that uses some old, some new, and some leftovers! I love when I can pull so many different elements together to create a cohesive project, and adding in some pretty blooms and cute critters just makes it that much sweeter. The Friend Like You mini stamp set is such a sweet little set that gives you a lot of bang for your buck, especially if you add in the coordinating dies. I created this sweet springtime friendship card with lots of texture and small details, even using some of my leftovers from a previous card. Let’s get started with the details!

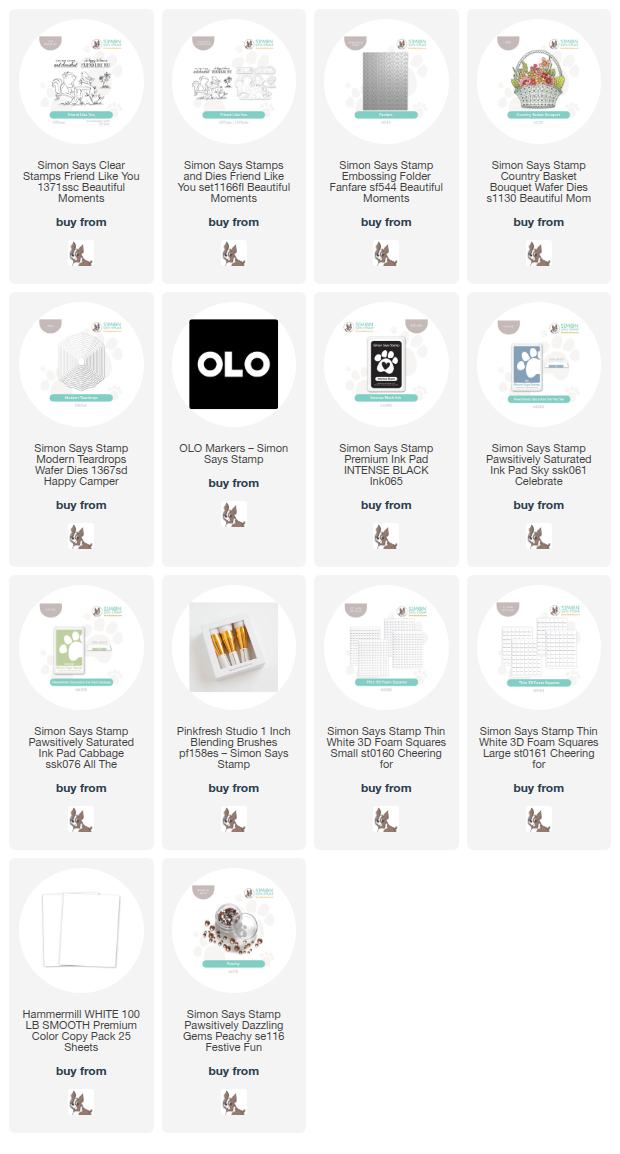
To begin, I die cut a panel of white cardstock using one of the nested Modern Teardrops dies, then stamped the adorable little critter pals from Friend Like You using Simon Says Stamp Intense Black ink, which works nicely with alcohol markers. I colored the images using my OLO Markers, keeping things simple because the images are modest enough to not need a ton of shading details. Once I had finished coloring the stamped image, I used blending brushes to lightly blend Cabbage & Sky Pawsitively Saturated Ink for some “grass” and “sky” respectively.

I wanted to add some interesting but relatively simple texture behind the main image, so I ran an A2 panel of white cardstock through my die cutting machine using the new Fanfare embossing folder. This is such a pretty and unique pattern, and I think that the points on the individual embossed teardrops complement the points on the ends of the Modern Teardrop die cut so nicely! I popped up the colored and blended die cut in the center of the embossed panel using thin foam adhesive squares.

After stamping a greeting from Friend Like You, again using Simon Says Stamp Intense Black ink, I used the coordinating die to cut it out neatly. I had some colorful leftover blooms and leaves from THIS project, so I decided to embellish my sentiment with some pretty flowers. I popped up the greeting with thick foam adhesive squares, then tucked the blooms from Country Basket around and beneath the sentiment, using both liquid and thin foam adhesive for lots of dimension on my project. Finally, I added a trio of Peachy Pawsitively Dazzling Gems to the points on each side of my Modern Teardrop die cut for a little added sparkle!

Well, that’s all for my project today. Sadly, an annoying polar vortex has turned all of the budding daffodils and tulip trees a depressing wrinkly brown. The warm springy weather should be back tomorrow, though, so fingers crossed things start to perk up and look colorful again soon! Until then, we will just have to channel springtime with paper and ink. Thanks so much for stopping by today, and have a marvelous day!

Filed Under: simon says stamp Tagged With: alcohol markers, beautiful moments, country basket, fanfare, friend like you, friendship, ink blending, modern teardrop

Simon Says Stamp Beautiful Moments Blog Hop Day 1 + Giveaway + Free Gift With Purchase!

February 27, 2026

This post was sponsored by Simon Says Stamp. Thanks, Simon! *I have gathered links to all of the products used at the bottom of the post for your convenience, using affiliate links at no extra cost to you. Thank you for shopping with my links! I truly appreciate your support for my work!*

Hi friends! Welcome to Day 1 of the Beautiful Moments Blog Hop, celebrating Simon Says Stamp’s most recent release, called Beautiful Moments! (Check out the full Beautiful Moments release HERE!) You should have arrived here from the Simon Says Stamp Blog, and your next stop is Nichol Spohr. You can see the full hop list at the Simon Says Stamp Blog, as well! This release is chock full of springtime imagery, with beautiful flowers, precious critters, excellent floral and textured embossing folders, even a new stitching die! (You can check out my springtime decor using the new Stitching Bunny die HERE.) For today’s project, I thought I’d shift gears a bit and share some more bunny inspiration, this time creating a sweet Easter card with a punny little greeting. Let’s get started with the details on my project!

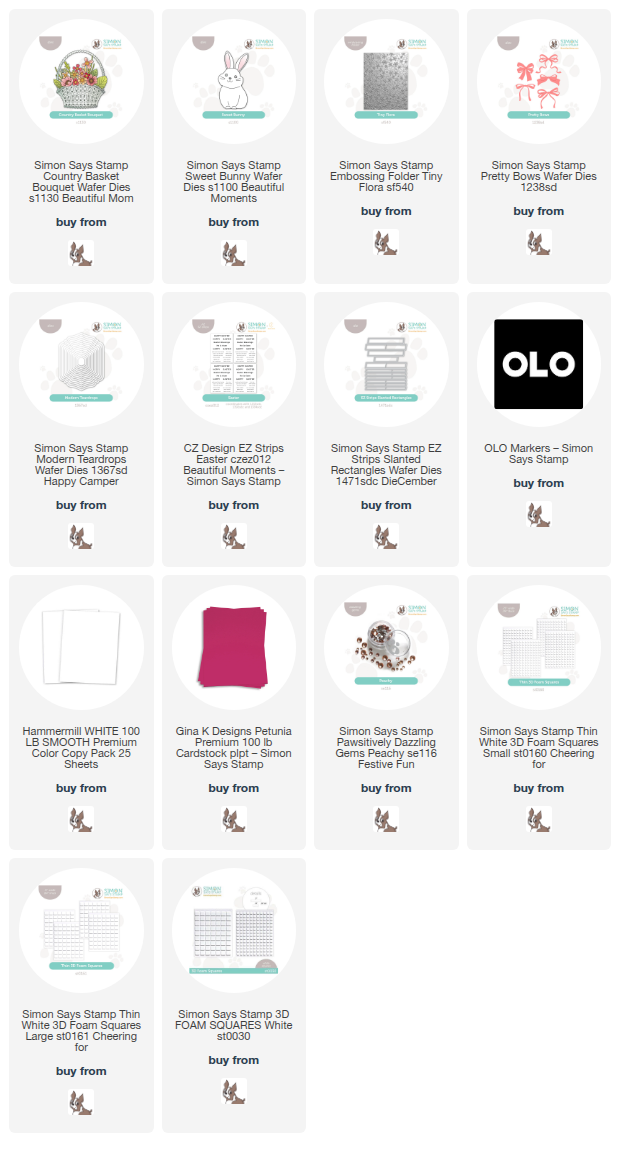
For today’s project, I used lots and lots of white cardstock. White cardstock is one of those things that I keep in large quantities in my craft room; it’s the ultimate blank canvas for so many mediums and techniques! To begin my project, I die cut the beautiful new Country Basket Bouquet from Hammermill white cardstock, die cutting the basket components and an abundance of blooms with which to fill it! I also die cut a darling little bun bun using the new Sweet Bunny die set, again using white cardstock. Before assembling the die cuts, I used my OLO Markers to add lots of beautiful springtime color to these images, selecting a peach, pale pink, and magenta color palette, adding verdant greens and a warm gray bunny. Those white die cuts certainly come to life with a few flicks of your favorite alcohol markers!!

After I had finished coloring all of the die cut elements, I worked on the background behind my colorful basket of blooms. I wanted to add some subtle texture, so I ran another panel of white cardstock through my die cutting machine using the new Tiny Flora embossing folder. I love adding delicate floral texture behind a boldly colorful focal point! To help ground my bunny and basket, I also die cut a frame from more white cardstock (I told you I used a ton of white cardstock for this one!), cutting the center from an A2 panel using the Modern Teardrops nesting die set. I used thin foam adhesive to add this negative frame to the embossed panel, reserving the positive die cut for a future project.

I arranged the basket, bunny, and blooms (say that three times fast!) over my frame, using a combination of thin and thick foam adhesive for tons of dimension. To embellish my frame a bit more, I added a coordinating hot pink bow cut using one of the dies from the Pretty Bows die set. I die cut a greeting from the new Easter EZ Strips sentiment card set using the EZ Strips Slanted Rectangles, which die cuts a ton of sentiments in one pass through your die cutting machine! I tucked the sentiment strip on the card front next to the bunny with some more foam adhesive, then added a few Peachy Pawsitively Dazzling Gems for a touch of sparkle to the card front.

Well, that’s all for my project today! Now for some fun giveaway information”

Simon Says Stamp is giving away a $25 coupon to every stop on the hop, chosen from the blog comment section. Winners will be selected and posted on the Simon Says Stamp blog on Wednesday the 4th of March. Be sure to check out the blog to see if you’re the winner and where to claim your prize!

Simon Says Stamp is also offering a fabulous gift with purchase! The not-yet-released Clover Shaker Sentiments will be automatically added to your cart when you make any purchase from the new Beautiful Moments release (click HERE to check out the full release).

Your next stop on the hop is Nichol Spohr. Thanks so much for stopping by today, and happy hopping!

Filed Under: simon says stamp Tagged With: bunny, country basket, die cutting, easter, embossing folder, EZ strips, modern teardrops, olo markers, pretty bows, sweet bunny, tiny flora

Primary Sidebar

  • Facebook
  • Instagram
  • Pinterest
  • YouTube

Favorite Shops

Secondary Sidebar

Subscribe

Enter your email address to subscribe to this blog and receive notifications of new posts by email.

Instagram
Something is wrong.
Instagram token error.
Follow
Load More

Archives

Tags

3D embossing folder alcohol markers better press birthday birthday card blog hop card kit christmas christmas card christmas tag colored pencil copic copic coloring Daniel Smith die cutting embossing folder embroidery felt giveaway holiday holiday card hot foil ink blending karin brushmarker pro layered stencil masculine my monthly hero new release no line coloring no line watercolor OLO marker olo markers original illustration pawsitively saturated rainbow shaker card slimline stamping stamptember stencil thank you thinking of you valentine's day video watercolor

Popular Posts

Simon Says Stamp Sending Cheer Blog Hop- Day 2 + Freebie + Giveaway!
Joyful Snowman with New Simon Says Stamp Sending Cheer Release!
Simon Says Stamp Sending Cheer Release: Now Available!
Altenew October 2026 Release Blog Hop + Giveaway!
Special Release: Simon Says Stamp Limited Edition STAMPtember Christmas Card Kit!
February 2018 My Monthly Hero Blog Hop!
Altenew March 2020 Release Blog Hop+Giveaway!
Simon Says Stamp Cozy & Bright Inspiration, Part Two!
Essentials By Ellen September Blog Hop!
Waffleflower December Release Blog Hop!

Disclosure

Some affiliate links are used in my posts. This means that, should you click on one of my links and purchase something from that company, I will receive a small portion of the sale at no extra cost to you. I use the money earned from these sales to help maintain my blog. I so appreciate you visiting and, if you do choose to use one of my affiliate links, thank you so much for your support!
Copyright © 2026 ·Brunch Pro Theme · Genesis Framework by StudioPress · WordPress · Log in
Loading Comments...