• Skip to main content
  • Skip to primary sidebar
  • Skip to secondary sidebar

Sixth Street Sundries

Emily Midgett

  • Home
  • About Me
  • Contact
  • OLO Marker Color Swatch Chart
  • Shop

die cut

Extra Large Blue Ombré with New Simon Says Stamp Celebrate!

April 26, 2024

This post was sponsored by Simon Says Stamp. Thanks, Simon!

Hi friends! I am back today with an extra large project featuring some extra large dies from Simon Says Stamp’s new Celebrate release. If you’ve followed my blog for any length of time, you will most likely have seen me use frames on my cards. I think die cut frames are the most perfect back drop upon which you can build a floral bouquet. They’re also marvelous for scene-building; I find building scenes with critters and such rather intimidating, lacking much imagination for creating tableaus for the stamped creatures, and so minimizing the amount of space that I have to cover by containing my scene within a frame helps to make that process infinitely simpler. I love the nested frame dies that Simon Says Stamp has recently released, first in A2 Nesting size and most recently in A7 Nesting size. I created this mammoth card with lots and lots of floral and foliage dies to create a beautiful bouquet backed by a textured frame. Let’s get started with the details!

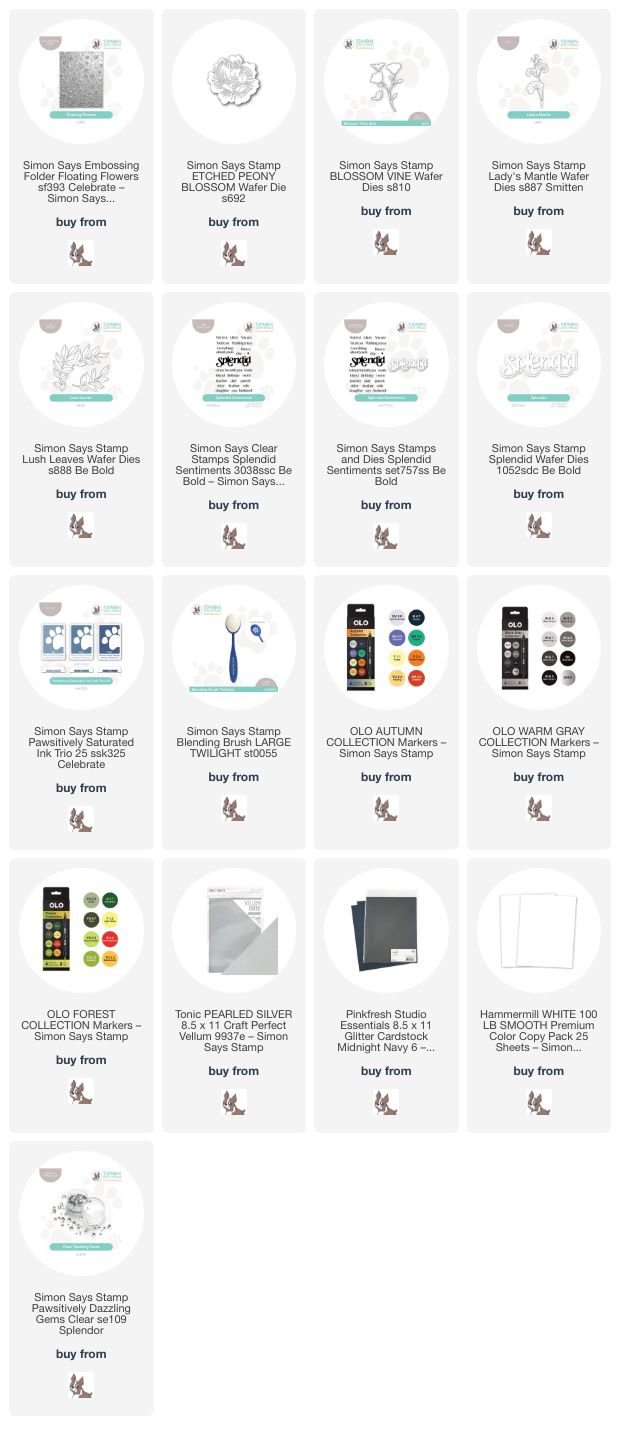
I started my project by trimming down a panel of A7 Hammermill cardstock, then used a blending brush to blend the new Pawsitively Saturated Ink Trio 25 in a vibrant ombré down the front of the card. I tend to do at least two layers of color whenever I am blending an ombré background like this to ensure that the individual colors blend smoothly into each other.

I knew that I wanted to create an ethereal, textured background featuring the new Floating Flowers Embossing Folder and the new A7 Nesting Frames dies. I die cut the A7 Nesting Frames from some super sparkly navy blue glitter paper, then ran a panel of silver pearl vellum through my die cutting machine with the Floating Flowers Embossing Folder. I selected one of the sparkly frames and trimmed the vellum down to be proportionally similar to the frame, allowing it to be slightly larger than the frame. I adhered the frame in the center of the blended card, hiding the adhesive on the back of the solid frame die cut so that it did not mar the sheer pearlescent vellum.

To adorn my frame and textured background, I die cut the Etched Peony Blossom, Blossom Vine, Lady’s Mantle, and Lush Leaves die from Hammermill cardstock, then used OLO Markers to add color to the individual die cuts, keeping the colors nice and cool to complement the vibrant blue ombré background. For the “white” peony, I used a pale BV marker to add some shadows, then used the colorless Zero marker to blend out the harsh edges. This method adds just a hint of shadow to the individual petals, creating some contrast between the shadowed areas and the white petals.

For the greeting, I heat embossed some of the sentiments from Splendid Sentiments onto deep navy blue cardstock using white embossing powder and trimmed them down with my trimmer. I also die cut the Splendid die from some more navy blue glitter paper, tucking the sentiment pieces amongst my floral bouquet. A smattering of sparkling
finished the project off!

Well, that’s all for my project today! I love creating super sized projects like this. It’s fun to get out of the A2 box sometimes, right? Thanks so much for stopping by today, and have a marvelous day!

Filed Under: simon says stamp Tagged With: 3D embossing folder, A7 nesting frames, blossom vine, die cut, etched peony, floating flowers embossing folder, floral, lush leaves, no line coloring, OLO marker, splendid sentiments

Ellen Hutson December 2018 Release!

December 10, 2018

Good morning! Have you checked out the new Ellen Hutson December 2018 release?!?? I intended to have this post up yesterday with my projects, but I wasn’t feeling the best over the weekend and took some time to just veg. I’m not normally one to sit still for long; I like to watch TV and movies, but only when my hands (and mind!) are busy. But this weekend, my mind and body just needed some time to chill out. 🙂 Anyway, let’s get on with the project that I have for you today! Ellen released some absolutely darling letterboard dies over the weekend, and I just couldn’t resist creating a card with a cheeky, custom sentiment! 

This card is comprised entirely of die cuts. I began by die cutting the “board” itself from aqua card stock  from the Letterboard Essentials die set. I then die cut the “bonjour” from the Letterboard Large Alpha die set using plain white card stock, then the “is fancy for,” also from the Letterboard Essentials die set. The “hello” is from Letterboard Script 2 die set,  cut from black glitter card stock. 

After I’d die cut all of the words, I used some pale pink and darker aqua card stock to cut some flowers from the Bold Blossom die set. I arranged the die cut letters on the letterboard, adhering them with liquid adhesive. Lining up the letters to be nice and straight was super simple because of the handy score lines on the letterboard die cut! 

I mounted the entire letterboard on a panel of A2 black card stock and called it quits!

Well, that’s all for this release project! Be sure to check out the rest of the Ellen Hutson December 2018 release, because there are some super cute (and wicked clever!) stamps and dies beyond what I’ve shown today! 

Thanks so much for stopping by today, and have a marvelous day! 

Filed Under: Ellen Hutson Tagged With: die cut, die cutting, letterboard, new release

The 25 Tags of Christmas with Concord and 9th!

November 14, 2017

Good morning! Today, the Where Creativity Meets C9 team has the pleasure of participating in this year’s 25 Days of Christmas Tags, hosted by Tracey McNeely! We were challenged to create a holiday tag using our Concord and 9th products, and I chose an icy, non-traditional color scheme with, you guessed it, florals. Let’s get started on the details!

I started by stamping the beautiful Blooms Fill In background from Concord and 9th (C9|SSS|EH) with Mountain Mist ink from Altenew, then added the “fill-in” bits with Cosmic Berry, Purple Wine, and Puffy Heart, then added the leaves with Volcano Lake and Lagoon inks. I die cut the two full bouquets using the coordinating dies (C9|SSS|EH) (which are super clever and include the lovely inked edge!), which left me several partial bouquets on the full panel that were turned into a totally new project. 😉

For the tag itself, I used the absolutely gorgeous Plaid Builder stamp set (C9|SSS|EH) that Concord and 9th released in October. I started by heat embossing the buffalo plaid in white on some very pale gray card stock. I wanted a very subtle, but still textured background for my pretty flowers. I then die cut the hexagon shape from the Blooms Fill In die set (C9|SSS|EH).I used my giant Crop-A-Dile (that I bought eons ago and still keep around for just such an occasion) to add an aqua colored eyelet to the top for my white velvet ribbon. I die cut a few sprigs (also from the Blooms Fill In die set!) using silver glitz paper, then arranged my bouquet and sprigs in the center of the plaid tag and adhered everything down with dimensional adhesive.

To complete the “Christmas” element of this tag, I added a silver foil die cut sentiment from the Season of Cheer dies by Concord and 9th (C9|SSS|EH). I used a glittery clothes pin to attach my tag to the top of my goody bag, but you could easily modify this with twine and tape it down beneath a pretty bow!


Well, that’s all for me today! I hope you enjoyed this pretty, non-traditional holiday tag. The Where Creativity Meets C9 team has provided some beautiful holiday tag inspiration for you over on Tracey’s Blog for the 25 Days of Christmas Tags, so be sure to head over there to get linked up to all of the projects! Have a marvelous day, friends!


Filed Under: Concord and 9th, Where Creativity Meets C9 Tagged With: 25 days of Christmas tags, buffalo plaid, christmas, die cut, heat emboss, holiday, non traditional holiday, stamping, tag

Where Creativity Meets C9 November Edition!

November 9, 2017

Good morning! Today is November 9, (ahem, just where did this year go?!), so that means the start of a new challenge for Where Creativity Meets C9! This month’s challenge is designed to help you pull out your holiday goodies from Concord and 9th and get a head start on some of those Christmas cards!

As soon as I saw the new Blooms Fill In stamps and dies, I knew that I wanted to use it to make floral Christmas cards. You don’t normally see much in the way of floral holiday cards, other than poinsettias. These fabulous stamps and dies lend themselves beautifully to SO many different color combinations. For today’s project, I created a trio of holiday cards lickety split. This set is perfect for mass producing Christmas cards!

To start, I used my MISTI to stamp the large background panel from Floral Fill In three times on an A2 panel of card stock using Altenew’s Emerald ink (SSS|EH). It’s the perfect Christmas green, don’t you think? I used a regular stamp block to stamp the rest of the details on the panels, adding Ruby Red (SSS|EH) to the large flowers, Velvet (SSS|EH) to the berries, Volcano Lake (SSS|EH) to the leaves, and Morning Frost (SSS|EH) to the smaller flowers to add a shadow to a “white” flower. I repeated this process with all three panels. These flowers are super easy to line up, and even if they’re not perfect, it still fits with the hand-drawn aesthetic! Love it.

To finish off the cards, I die cut the unique hexagon shape included in the coordinating Blooms Fill in die set from red foil and red glitter card stock. I added the sentiment from one of my all time favorite Concord and 9th stamp and die sets: Happy Words. This is seriously one of the most versatile (and cleverest) sets in my arsenal. I die cut the “happy ” from plain white card stock and stamped the “holidays” from the coordinating stamp set onto a strip of white card stock, then mounted them on the red hexagons. The final touch was to scatter some Foil Gems on the card fronts! These cards came together SO quickly, and they’re just pretty. I also was able to make another card using bits and pieces from these floral panels, but that’s a different blog post. 😉

Now, it’s your turn! Use your Concord and 9th stamps and dies to create a Christmas project, then link it up to our blog to be eligible for a $25 from our fabulous sponsors, Concord and 9th!  You have until 11/29/2017 to enter your project(s). Have fun, and good luck!

PS- Have you checked out the new Concord and 9th release? It’s TOTALLY fabulous. Such great new sets this month. You can check it out here.


Filed Under: Concord and 9th, Where Creativity Meets C9 Tagged With: christmas, christmas card, clean and simple, die cut, die cut sentiment, holiday

Honey Bee Stamps November 2017 Release!

November 5, 2017

Good morning! Today is Day 3 of the Honey Bee Stamps November release. Are you loving all of the new goodies like I am? Today, we are unveiling Miracle of Christmas and Adore Him stamp sets, as well as some fabulous new dies that can be made into a snowglobe or an ornament! Neat, right? I chose to pair the new standalone Ornament dies with the word dies released yesterday. Let’s get started on the details!

For my first project, I created an A2 snowglobe shaker card with the new Snow Globe Ornament dies. I started by die cutting the solid piece for the backer from a panel of Yupo paper that I added alcohol inks in shades of turquoise, blue, and lavender. I die cut another solid piece from clear card stock and added it to a minty green pearlescent “ornament” from the die set. I added foam adhesive, then filled the shaker with a variety of sequins and our new snowball embellishments. I added the snow globe “bottom,” cut from some lovely blue foil card stock.

For the card base, I added some silver and white snowflakes from the new Snowbirds set onto a lavender card base, then swiped a white pigment ink pad around the edges to give a really frosty look (it didn’t show up very well in the photos, but it’s definitely there in real life!) For the greeting, I die cut the new Merry and Bright dies from some sparkly silver glitter paper and adhered them to the front of the shaker. I adhered it to the lavender card front. Pretty straightforward, but wintry and definitely has a holiday vibe!

This photo shows the comparison of the Snow Globe tag next to the A2 card dies. It’s the perfect size for adding to a gift bag! And it’s great because you can make it into an ornament shaker, a snow globe shaker, or a flat tag.

I used some more alcohol ink backgrounds that I had created a few weeks ago. I simply die cut the solid backer portion of the Ornament Tag die from the alcohol ink background as well as from a piece of clear card stock, then cut the frame portion of the die set from some more solid blue foil. I added the ornament topper (cut from more glitzy silver glitter paper), and added the sentiment from Snow Birds, for which the “warm” was die cut with the coordinating dies. (Love that Melissa includes dies for the script words in the stamp sets! So handy!) I filled the shaker with some Winter Tree sequins, some Diamonds, and some of the new Snow Ball embellishments. To finish it off, I added some twine and a twine bow.

Well, that’s all for me today! I hope you enjoyed these projects and are enjoying the fabulous release thus far. Be sure to visit the Honey Bee blog tomorrow for even more sneak peeks of this fabulous release! Thanks for stopping by, and have a marvelous Sunday!

Filed Under: Honey Bee Stamps Tagged With: alcohol inks, christmas, die cut, holiday, shaker card, shaker tag, tag

  • Page 1
  • Page 2
  • Go to Next Page »

Primary Sidebar

  • Facebook
  • Instagram
  • Pinterest
  • YouTube

Favorite Shops

Secondary Sidebar

Subscribe

Enter your email address to subscribe to this blog and receive notifications of new posts by email.

Instagram
Something is wrong.
Instagram token error.
Follow
Load More

Archives

Tags

3D embossing folder alcohol markers better press birthday birthday card blog hop card kit christmas christmas card christmas tag colored pencil copic copic coloring Daniel Smith die cutting embossing folder embroidery felt giveaway holiday holiday card hot foil ink blending karin brushmarker pro layered stencil masculine my monthly hero new release no line coloring no line watercolor OLO marker olo markers original illustration pawsitively saturated rainbow shaker card slimline stamping stamptember stencil thank you thinking of you valentine's day video watercolor

Popular Posts

Simon Says Stamp Sending Cheer Release: Now Available!
Joyful Snowman with New Simon Says Stamp Sending Cheer Release!
Autumn Legs with Colorado Craft Company and Catherine Pooler!
February 2018 My Monthly Hero Blog Hop!
Altenew Paint A Flower: Carnation Blog Hop+Giveaway!
Special Release: Simon Says Stamp Limited Edition STAMPtember Christmas Card Kit!
Altenew March 2020 Release Blog Hop+Giveaway!
Pinkfresh Studios June Washi and Stamp Release Blog Hop!
Pinkfresh Studio 5th Birthday!
2018 Autism Awareness Hop!

Disclosure

Some affiliate links are used in my posts. This means that, should you click on one of my links and purchase something from that company, I will receive a small portion of the sale at no extra cost to you. I use the money earned from these sales to help maintain my blog. I so appreciate you visiting and, if you do choose to use one of my affiliate links, thank you so much for your support!
Copyright © 2026 ·Brunch Pro Theme · Genesis Framework by StudioPress · WordPress · Log in
Loading Comments...