• Skip to main content
  • Skip to primary sidebar
  • Skip to secondary sidebar

Sixth Street Sundries

Emily Midgett

  • Home
  • About Me
  • Contact
  • OLO Marker Color Swatch Chart
  • Shop

fancy tidings of cheer

Frosty Christmas Inspiration with Simon Says Stamp!

November 30, 2025

This post was sponsored by Simon Says Stamp. Thanks, Simon!

Hi friends! I have some frosty winter inspiration to share with you today, featuring one of the marvelous goodies that was available as a free gift last week! It’s currently out of stock, but the Draping Lights embossing folder is so gorgeous that I couldn’t wait to make something with it. (It is currently out of stock, but be sure to sign up to be notified for when it’s back in stock!) It is so full of delicately beautiful details that it was on the top of my list for products to use! I never tire of the deeply textured effect that Simon Says Stamp’s 3D Embossing Folders create, and finding ways to enhance those details is one of my favorite crafty techniques. Let’s get started with the details on my project!

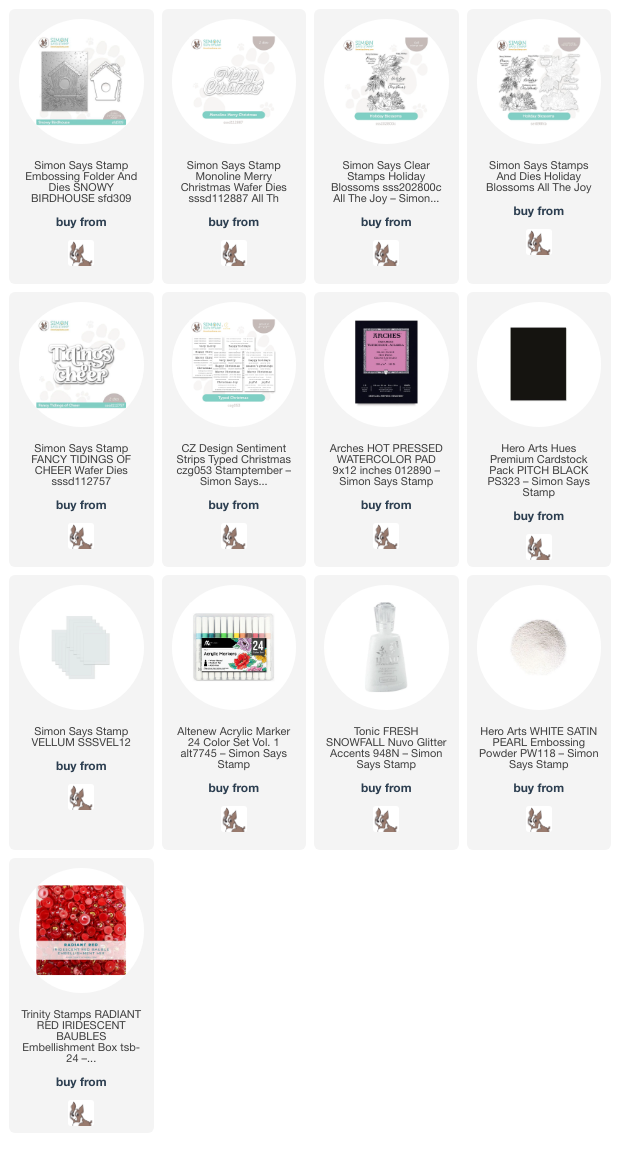
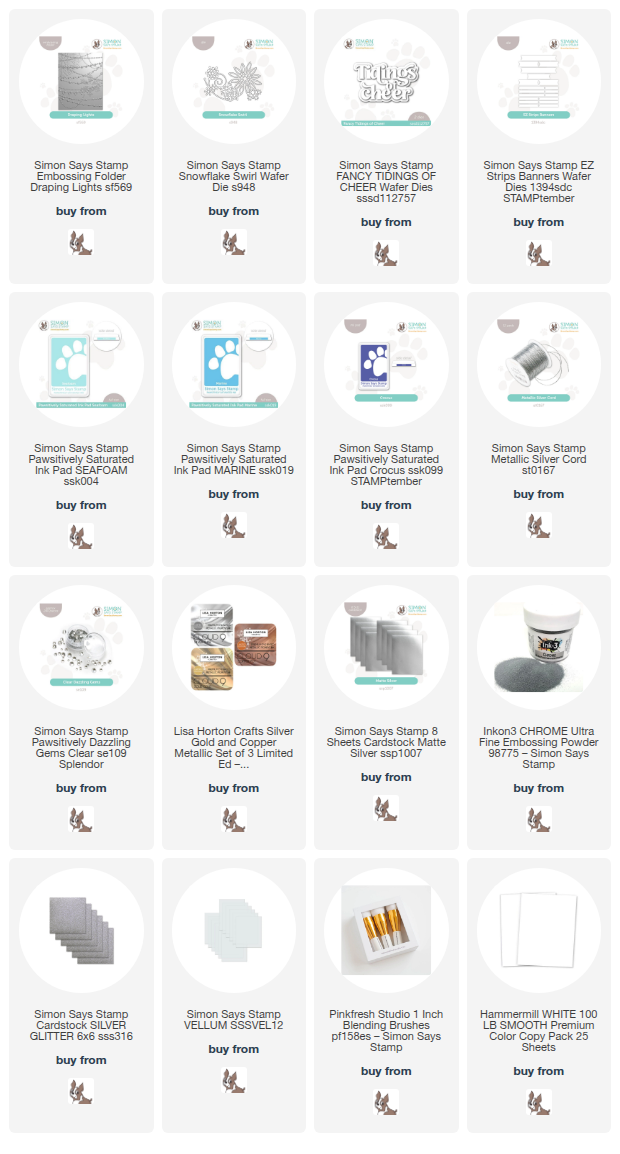
*I have gathered links to all of the products used at the bottom of the post for your convenience, using affiliate links at no extra cost to you. Thank you for shopping with my links! I truly appreciate your support for my work!*

To begin, I wanted to create an icy, wintry background, so I began by using blending brushes to blend Pawsitively Saturated Inks in shades of Seafoam, Marine, and Crocus on an A2 panel of white cardstock. Once I had blended the colors seamlessly, (I blend each color at least twice to ensure a smooth blend) I ran the panel through my die cutting machine using the Draping Lights embossing folder. To add some extra interest and festive shimmer to the card front, I lightly swiped a silver pigment ink pad over the raised areas, helping to enhance the details with the shiny, shimmering silver ink! I also added some silvery watercolor splatters for a magical, mixed media effect.

For the greeting, I die cut the older Tidings of Cheer dies, cutting the detail layer from silver glitter cardstock and the shadow layer from vellum. I layered the two die cuts together and adhered them with liquid adhesive. To enhance the chunky die cut sentiment, I embossed a simple sentiment from another set with silver embossing powder on white cardstock. I die cut my embossed sentiment with the EZ Strips Banners, creating a clean and classic flagged banner strip to juxtapose nicely with the swirling background!

Before adding my sentiment pieces to my card front, I wanted to add some lacy snowflakes behind the sentiment die cuts in order to draw the eye to the sparkling greeting. I die cut the older-but-still-lovely Snowflake Swirl die from Simon Says Stamp’s Silver Matte Metallic foil cardstock, then adhered it to the card front with liquid adhesive. I arranged the sentiment die cut pieces over the top of the snowflakes, nestling the sentiment strip beneath the die cut greeting, and adhering both with foam adhesive squares. Finally, I added a Simon Says Stamp Metallic Silver Cord bow and some Clear Pawsitively Dazzling Gems for even more sparkle!

Well, that’s all for my project today! I hope you’ve had a wonderful Thanksgiving weekend if you’re in the US. Turkey, pie, snow, and holiday decorations filled our long weekend to the brim! Thanks so much for stopping by today, and have a marvelous day!
Filed Under: simon says stamp, Uncategorized Tagged With: christmas card, die cutting, draping lights, fancy tidings of cheer, ink blending, snowflake swirl, tidings of cheer

Christmas In July: Rustic Maroon and Dusty Blue!

July 18, 2024

This post was sponsored by Simon Says Stamp. Thanks, Simon!

Hi friends! I am back for another Christmas In July post, this time featuring rustic red paired with dusty blue to give a more country-feel to these holiday cards. I love coming up with unique color palettes for holiday cards beyond the traditional bright red and green, and the combination of the maroon and dusty blue combination reminds me of a rustic holiday tree, complete with gingham bows, pinecones, and lots of berries. I wanted to try this color combination out on one of my own illustrations after working with the sweet birdhouse image from the Snowy Birdhouse, and so pulled out the magnolia image in the Holiday Blossoms set that I illustrated for Simon Says Stamp. I thought that the maroon magnolias would be beautiful on a holiday card! Let’s get started on the details for my projects.

For both of my cards, I used Arches Hot Press watercolor paper with some of my artist-grade watercolors. I have a rather extensive collection of watercolors from a variety of brands, but frequently find myself reaching for the same medium and brands over and over, and so am trying to use my artist-grade watercolors from Schmincke. The richness of the colors never disappoints!

For my first project, I embossed the Snowy Birdhouse image on a slightly-larger-than-A2 panel of Arches Hot Press watercolor paper, then taped it down to my watercolor board to reduce further warping of the cardstock while watercoloring. I used my Schmincke watercolors to add lots of vibrant red to the snowy bird house, dotting the snowflakes with the white marker in the Altenew Acrylic Markers. I also die cut the separate snow pieces from some pearlescent white cardstock and adhered them using liquid adhesive, finally adding some sparkling “snow” on the image using Tonic Snowfall glitter. Between the embossing, various mediums, and glitter, this card front has incredible texture!

For the greeting, I kept things very simple, die cutting the detail layer from the Monoline Merry Christmas die set from Pitch Black cardstock, then adding the shadow layer behind it, cut from some vellum. After allowing plenty of time to dry, I removed the tape from the edges, trimmed the edges of the watercolored panel down 1/8″, then mounted the watercolored piece on an A2 panel of coordinating deep red cardstock. Such a simple, festive card that definitely evokes lots of winter imagery!

For my second card, I applied the same beautiful deep red and dusty blue color palette to the magnolia image from my Holiday Blossoms set. To create a large, full bouquet for an A7 card, I heat embossed the image twice onto some Arches Hot Press watercolor paper using White Satin Pearl embossing powder. I watercolored all of the images using the same color palette, keeping the colors a bit muted and rustic, and adding a pale wash of the same dusty blue watercolor around the edges of both embossed images. This wash of blue helps to enhance some of the white pearl embossed details on this super intricate image, which have the potential of getting lost on the creamy white watercolor paper.

While my images were drying, I taped down an A7 panel of Arches Hot Press watercolor paper onto another watercolor board, then used the same dusty blue watercolor with lots of water to create a lovely background for my large holiday floral bouquet, which also happens to coordinate nicely with the blue wash around the edges of the watercolored florals.

For the greeting, I die cut the detail layer of the Fancy Tidings of Cheer from Pitch Black cardstock and adhered it to a vellum shadow layer. I also trimmed down a coordinating sentiment from the Typed Christmas sentiment cards. I arranged the floral bouquet on the center of my now-dried watercolor background and popped it up with some foam adhesive. I adhered the die cut greeting over the “seam” where the two floral die cuts meet, softening the area behind the crisp black sentiment with the semi-transparency of the vellum. Finally, I added a few red pearls for added shine.

Well, that’s all for my projects today! I have one more project to share with you for Christmas In July, and I’ve saved my favorite for last! Thanks so much for stopping by today, and have a marvelous day!

Filed Under: simon says stamp Tagged With: christmas card, cz design sentiment stripes, cz design sentiment strips, fancy tidings of cheer, holiday blossoms, holiday card, monoline merry christmas, original illustration, schmincke watercolors, snowy birdhouse, watercolor

Joyful Anemones on Desert Storm!

December 21, 2023

This post was sponsored by Simon Says Stamp. Thanks, Simon!

Hi friends! I’ve been busy in my office making holiday cards to send to friends, and I have been working with some of the stamp sets that I designed for Simon Says Stamp using some unusual papers to create some really unique looks! My card today features OLO markers on Neenah Desert Storm cardstock, which is an alcohol marker-friendly cardstock that looks fabulous with brightly colored images. I paired it with my Joyful Anemones, doing some partial coloring and fussy cutting to cut down on the length of time I spent coloring. Let’s get started with the details!

I began by stamping my Joyful Anemones illustration on a panel of Neenah Desert Storm cardstock using Contour Ink to do some no-line coloring. I used OLO markers to add some vibrant, cool maroon and deep pinks to a section of the anemone illustration, one of the clusters that was complete and could be cleanly cut out. (I saw Kristina Werner do this at a retreat I was at a few months ago, and I absolutely loved the idea!) I colored the image and then used my sharp scissors to fussy cut it out. The warmth of the Desert Storm works beautifully to add a unique depth to the colored image. After fussy cutting, I used a white gel pen to add some simple accents to the stamens on the large flower and the berries.

I wanted to add some subtle texture and interest to the background to allow the colorful floral image to pop, so I pulled out the Pine Bouquet embossing folder. To enhance the pattern, I lightly brushed my white pigment ink pad over the raised areas. I also splattered the embossed panel with some glittering watercolors for a touch of color and sparkle.

I used foam adhesive to pop up the colored floral spray on the embossed panel. For the greeting, I die cut the Fancy Tidings of Cheer from some shimmering Luxe Glitter Cardstock in a similar shade to the Desert Storm cardstock. I adhered the greeting with some liquid and foam adhesive, then added some shining gems for extra sparkle!

Well, that’s all for my project today! If you haven’t used your sharp scissors to cut out only a portion of your background stamps, you’re missing out. It adds another way to use your stamps to your arsenal of crafty tricks! Thanks so much for stopping by, and have a marvelous day!

Filed Under: simon says stamp Tagged With: alcohol markers, christmas card, fancy tidings of cheer, holiday card, joyful anemone, no line coloring, olo markers, pine bouquet

Simon Say Stamp Season of Wonder Blog Hop-Day 1!

October 6, 2023

This post was sponsored by Simon Says Stamp. Thanks, Simon!

Hi friends! I am so excited to be a stop on Day 1 of the two day Season of Wonder Release Blog Hop for Simon Says Stamp! You should have arrived here from Suzy Plantamura, and your next stop is Lisa Addesa. You can also start back at the Simon Says Stamp Blog in case you get lost. This month’s Season of Wonder release is filled with stunning, classic autumn and holiday imagery, and I’ve used a few different products to create these two vibrant holiday cards. Let’s get started with the details!

I am a sucker for a gorgeous floral embossing folder, and the new Free Falling Floral Embossing Folder is an absolute stunner. I began by running an A2 sized panel of Hammermill cardstock through my die cutting machine, which was lovely on its own, but I couldn’t resist using my Copic markers to do some no-line coloring on the pretty flowers. I wanted to create a holiday floral background, so I decided to make them a deep red with beautiful jewel bright greenery to emote that holiday aesthetic. I added some white gel pen to the tips of the black stamens, adding a bit more texture and dimension to the image.

For the greeting, I kept things very simple, die cutting the detail layer of the Fancy Tidings of Cheer die from some Black Glitter Paper Basics by Hero Arts and the larger outline layer from Heavyweight Vellum. I popped the sentiment up with some foam tape, allowing it to hang slightly over the edge. I love the decadent feeling that little extra hanging off creates on your card!

To add to the festive feel and add another element of texture to the super textured and detailed card front, I tied a cherry red twine bow and tucked it beneath the sentiment at a jaunty angle. Finally, I added some more shine with some Onyx gems. I love the simplicity and crazy amount of texture on this card!

My second card features the darling new Deck the Halls set designed by my friend Alberto Gava! His illustrations are so adorable and really capture such a sweet attitude. I tend to try to keep my holiday cards a bit simpler, preferring a more graphic style rather than building a detailed scene, but I couldn’t resist creating a sweet holiday scene, perhaps a group of cousins decorating grandma’s Christmas tree. I stamped the images from Deck the Halls onto a panel of Hammermill using Hero Arts Contour Ink, then used my Copic markers to color the image.

In order to create the baubles on the tree, I used shimmery Star Spark Pens to color little glittering circles on the tree. I love that these pens are opaque enough that they can be layered over the top of colorful cardstock or coloring. I also used the Star Spark Pens to add sparkly details to the bows on the gifts! Once I had finished adding my shimmering details, I adhered clear droplet baubles over the top of the glittery circles to create a 3D effect on the tree. I think it adds such a fun textural element to the scene!

After I had finished coloring and die cutting, I used the Soft Plaid Background with Hero Arts Iridescent Blue embossing powder to heat emboss a subtle pattern on the 5″ square card front. This gorgeous embossing powder creates beautiful, subtle shimmer, perfect for allowing the colorful holiday die cuts to be the star of the show! For the greeting, I stamped the large calligraphy sentiment and sentiment block using Altenew Obsidian pigment ink, then covered it with clear embossing powder to make them nice and crisp. I die cut the embossed sentiments, then adhered all of the die cuts on the embossed background panel using both liquid and foam adhesive. Such a fun and festive card, perfect for a special friend or family member!!

Well, that’s all for my projects today! To celebrate the Simon Says Stamp Season of Wonder release, Simon Says Stamp is doing a special gift with purchase promotion:

Simply enter code HOLLY at checkout to receive the Graceful Holly 3D embossing folder with any $25 or more purchase. This gift with purchase will expire 10/8 at 11:59 pm EDT. While supplies last.

Simon Says Stamp is also sponsoring a $25 coupon giveaway at each stop on the hop! Leave a comment at each stop on the hop for maximum opportunities to win. Winners will be announced on the Simon Says Stamp blog on Wednesday the 11th of October. Winners should email Simon Says Stamp to claim his/her prize 🙂

Your next stop on the hop is Lisa Addesa. Thanks so much for stopping by today, and don’t forget to check the Simon Says Stamp blog tomorrow for Day 2 of the hop! Happy hopping!

Filed Under: simon says stamp Tagged With: 3D embossing folder, christmas card, copic markers, deck the hall, fancy tidings of cheer, free falling floral embossing folder, glitter paper, holiday card, iridescent blue embossing powder, soft plaid background, star spark pens

Primary Sidebar

  • Facebook
  • Instagram
  • Pinterest
  • YouTube

Favorite Shops

Secondary Sidebar

Subscribe

Enter your email address to subscribe to this blog and receive notifications of new posts by email.

Instagram
Something is wrong.
Instagram token error.
Follow
Load More

Archives

Tags

3D embossing folder alcohol markers better press birthday birthday card blog hop card kit christmas christmas card christmas tag colored pencil copic copic coloring Daniel Smith die cutting embossing folder embroidery felt giveaway holiday holiday card hot foil ink blending karin brushmarker pro layered stencil masculine my monthly hero new release no line coloring no line watercolor OLO marker olo markers original illustration pawsitively saturated rainbow shaker card slimline stamping stamptember stencil thank you thinking of you valentine's day video watercolor

Popular Posts

Simon Says Stamp Sending Cheer Blog Hop- Day 2 + Freebie + Giveaway!
Joyful Snowman with New Simon Says Stamp Sending Cheer Release!
Simon Says Stamp Sending Cheer Release: Now Available!
Altenew October 2026 Release Blog Hop + Giveaway!
February 2018 My Monthly Hero Blog Hop!
Altenew March 2020 Release Blog Hop+Giveaway!
Special Release: Simon Says Stamp Limited Edition STAMPtember Christmas Card Kit!
Simon Says Stamp Cozy & Bright Inspiration, Part Two!
Waffleflower December Release Blog Hop!
Altenew Build A Flower Japanese Mum Blog Hop!

Disclosure

Some affiliate links are used in my posts. This means that, should you click on one of my links and purchase something from that company, I will receive a small portion of the sale at no extra cost to you. I use the money earned from these sales to help maintain my blog. I so appreciate you visiting and, if you do choose to use one of my affiliate links, thank you so much for your support!
Copyright © 2026 ·Brunch Pro Theme · Genesis Framework by StudioPress · WordPress · Log in
Loading Comments...