• Skip to main content
  • Skip to primary sidebar
  • Skip to secondary sidebar

Sixth Street Sundries

Emily Midgett

  • Home
  • About Me
  • Contact
  • OLO Marker Color Swatch Chart
  • Shop

snowflake swirl

Frosty Christmas Inspiration with Simon Says Stamp!

November 30, 2025

This post was sponsored by Simon Says Stamp. Thanks, Simon!

Hi friends! I have some frosty winter inspiration to share with you today, featuring one of the marvelous goodies that was available as a free gift last week! It’s currently out of stock, but the Draping Lights embossing folder is so gorgeous that I couldn’t wait to make something with it. (It is currently out of stock, but be sure to sign up to be notified for when it’s back in stock!) It is so full of delicately beautiful details that it was on the top of my list for products to use! I never tire of the deeply textured effect that Simon Says Stamp’s 3D Embossing Folders create, and finding ways to enhance those details is one of my favorite crafty techniques. Let’s get started with the details on my project!

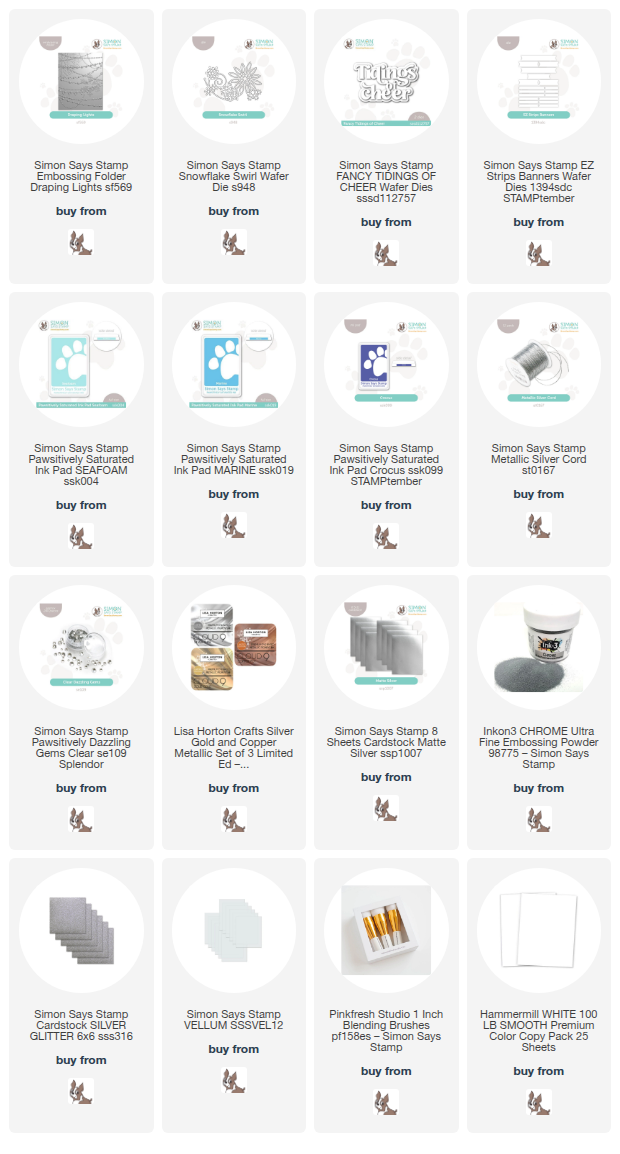
*I have gathered links to all of the products used at the bottom of the post for your convenience, using affiliate links at no extra cost to you. Thank you for shopping with my links! I truly appreciate your support for my work!*

To begin, I wanted to create an icy, wintry background, so I began by using blending brushes to blend Pawsitively Saturated Inks in shades of Seafoam, Marine, and Crocus on an A2 panel of white cardstock. Once I had blended the colors seamlessly, (I blend each color at least twice to ensure a smooth blend) I ran the panel through my die cutting machine using the Draping Lights embossing folder. To add some extra interest and festive shimmer to the card front, I lightly swiped a silver pigment ink pad over the raised areas, helping to enhance the details with the shiny, shimmering silver ink! I also added some silvery watercolor splatters for a magical, mixed media effect.

For the greeting, I die cut the older Tidings of Cheer dies, cutting the detail layer from silver glitter cardstock and the shadow layer from vellum. I layered the two die cuts together and adhered them with liquid adhesive. To enhance the chunky die cut sentiment, I embossed a simple sentiment from another set with silver embossing powder on white cardstock. I die cut my embossed sentiment with the EZ Strips Banners, creating a clean and classic flagged banner strip to juxtapose nicely with the swirling background!

Before adding my sentiment pieces to my card front, I wanted to add some lacy snowflakes behind the sentiment die cuts in order to draw the eye to the sparkling greeting. I die cut the older-but-still-lovely Snowflake Swirl die from Simon Says Stamp’s Silver Matte Metallic foil cardstock, then adhered it to the card front with liquid adhesive. I arranged the sentiment die cut pieces over the top of the snowflakes, nestling the sentiment strip beneath the die cut greeting, and adhering both with foam adhesive squares. Finally, I added a Simon Says Stamp Metallic Silver Cord bow and some Clear Pawsitively Dazzling Gems for even more sparkle!

Well, that’s all for my project today! I hope you’ve had a wonderful Thanksgiving weekend if you’re in the US. Turkey, pie, snow, and holiday decorations filled our long weekend to the brim! Thanks so much for stopping by today, and have a marvelous day!
Filed Under: simon says stamp, Uncategorized Tagged With: christmas card, die cutting, draping lights, fancy tidings of cheer, ink blending, snowflake swirl, tidings of cheer

Sparkling Teal Snowflake Ornament + Card with New Simon Says Stamp DieCember!

December 9, 2024

This post was sponsored by Simon Says Stamp. Thanks, Simon!

Hi friends! I have a pair of shimmering, sparkling holiday projects to share with you today using some utterly luscious new snowflake dies from the Simon Says Stamp DieCember release! After I completed my graduate program and got married, I began crafting in earnest as a hobby, putting my Cricut to use to personalize everything with my new last name. I purchased so many different items to personalize, but of course only had 24 hours in the day and had far more than I could ever use up. After I became a twin mom, some of those things got put in storage in my craft closet, never again to see the light of day…. until now. I have been trying to expand my crafty time to create things a bit more tangible and longer-lasting, like my felt cardinal ornament (click HERE to see it!) and the felt stocking gift card holder (click HERE to see that one), and my framed snowy holiday decor (click HERE to see those!). Today’s project puts some of those long-forgotten blank wooden ornaments to use with the gorgeous new Snowflake Swirl die, then decided to create a matching card for a sparkling snowflake gift set. Let’s get started with the details on my projects!

*I have gathered links to all of the products used at the bottom of the post for your convenience, using affiliate links. Thank you for shopping with my links! I truly appreciate your support for my work!*

My projects were inspired by the beautiful, intense teal of the new Simon Says Stamp Rain Forest cardstock. I can never resist any shade of teal…. teal, turquoise, pool, aqua, and all variations. Blue+green=perfection in my eyes. The new shades of cardstock that were released with the DieCember release are so deeply saturated with vibrant color and die cut beautifully; they’re all wonderful additions to your craft room! I used the beautiful (and perfectly coordinated) Peacock Feathers Distress Paint to paint my blank wooden ornament before adding any embellishments.

While I waited for my painted ornament to dry, I worked on my matching snowflake Christmas card. I began by creating a card base from some Simon Says Stamp Rain Forest cardstock, using the Simon Says Stamp Score Board and used the handy guide wire on my Fiskars trimmer to cut out a window from the center of one side of the scored card. I backed the window with some of the new Simon Says Stamp Shimmer Vellum, creating a shimmery, semi-opaque window upon which I could build my project.

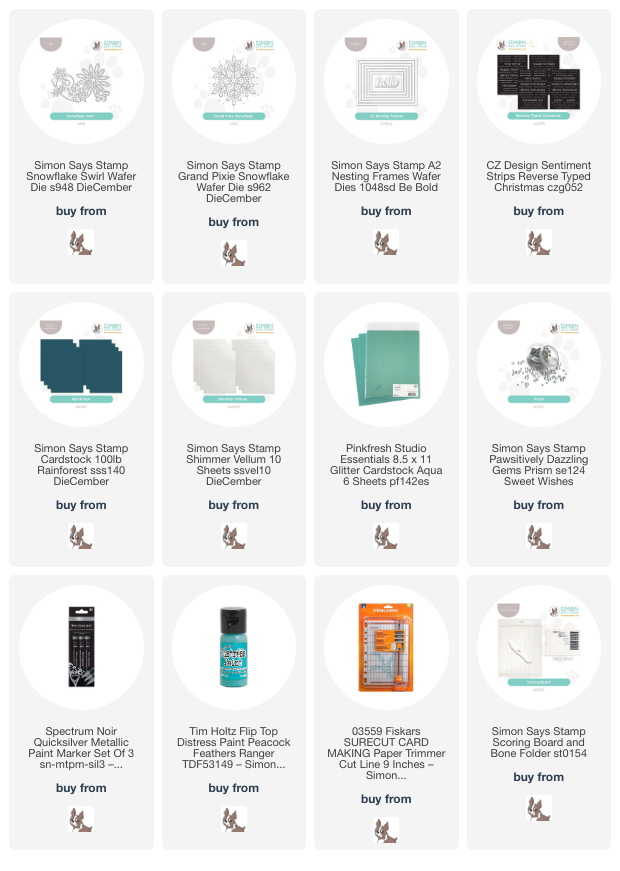
After I had created my background, I die cut the new Grand Pixie Snowflake from some Pinkfresh Studio Aqua Glitter cardstock and mounted it in the center of my shimmery vellum window with liquid adhesive. To help draw the eye to the center of the card and also add another touch of shine, I added a silver holographic foil frame cut using the A2 Nesting Frames dies. After I had added a foiled Reverse Typed Christmas to the center of the snowflake with some foam adhesive, I used some liquid adhesive to add lots of Prism Pawsitively Dazzling Gems to the snowflake and the corners of the shiny foil frame. This card has so many different shimmering elements on it, which I think makes it perfect for Christmas!

After I had allowed the deep teal paint to dry completely on my blank wooden ornament, I used a silver paint pen on the top of the ornament and on the edges to make things look nice and neat. To adorn my painted ornament, I die cut the Snowflake Swirl die twice from some more Pinkfresh Studio Aqua Glitter cardstock. I adhered one of the die cuts in the center of the painted ornament with liquid adhesive, then used my sharp scissors to add small portions of the intricate die cut around the edges of the ornament, filling in any blank spots.

After I had finished gluing the sparkling snowflakes to the ornament, I added lots of super sparkly Prism Pawsitively Dazzling Gems. These Pawsitively Dazzling Gems are made of glass, and I cannot overstate how very sparkly and shiny they are! I used more liquid glue to adhere them to the snowflakes, adding a bit more texture and shimmer to the ornament. Finally, I added a fluffy bow tied with some coordinating teal ribbon and a loop of ribbon from which the ornament could be hung on the tree. I think I am going to make a bunch of these in different colors to adorn my holiday cookie gift boxes! So fun!

Well, that’s all for my projects today! Do you enjoy making handmade decor with your papercrafting supplies? I love finding lots of uses for my crafting supplies outside of their initial intended uses! Thanks so much for stopping by today, and Happy DieCember!

PS: Don’t forget that with every $25 Tim Holtz purchase, you can receive this adorable Be of Good Cheer die set set from Tim Holtz! Click HERE to check out all of the goodies eligible for the promotion! I used the Santa set to create THIS sweet little tag. The acrylic paint that I used for my ornament today is Tim Holtz and coordinates beautifully with all of the colors in the Distress line!

Filed Under: simon says stamp Tagged With: A2 nesting frames, acrylic paint, christmas card, diecember, grand pixie snowflake, holiday card, ornament, pinkfresh glitter paper, sentiment strips, sentiment strips reverse typed christmas, snowflake, snowflake swirl

Hero Arts Winter 2020 Catalog Release Blog Hop+Giveaway!

August 26, 2020

Hi there! Are you ready for some Christmas spirit today? Hero Arts is officially unveiling their Winter 2020 Catalog today, and we are celebrating all of the gorgeous new products with a blog hop and giveaway! You should have arrived here from Debi Adams’s blog, and your next stop is Ilina Crouse. I have two non-traditional holiday projects for you today, both an homage to my favorite shade of ink from Hero Arts: Raspberry Jam. (It’s just the perfect shade of pinky red, and something so fun and different for holiday cards!) Let’s get started with the details on my projects.

For my first project, I combined the new Christmas Rose Bold Prints background stamp with the beautiful Color Layering Poinsettia Tree and dies. I began by stamping the Christmas Rose background on a panel of Peony Hero Hues cardstock using Soft Blossom ink. I then used a blender brush to blend some Unicorn White ink in the center to soften the pattern a bit and create a more solid background for my floral Christmas tree!

I stamped the beautiful new Color Layering Poinsettia Tree on some more Peony cardstock using Raspberry Jam, Bubble Gum, and Unicorn White inks, as well as some gifts. I cut everything out with the coordinating Frame Cuts. For the greeting, I heat embossed the “Happy Holidays” on a strip of Plum cardstock using white embossing powder. I trimmed down the floral, tone-on-tone background panel and matted it on an A2 panel of Plum cardstock, then mounted the tree and gift die cuts in the center using foam adhesive.

For my second project, I used the fabulous new Snowflake Swirl Bold Prints for my background, doing some ombre inking using the Hero Arts branded MISTI. To achieve this look, I first stamped the top third of the Snowflake background using Rose Madder ink, softening the edges of it a bit with a microfiber towel. I stamped it on my white cardstock and repeated the process again to get a good saturation of color. Next, I did the same thing across the center segment of the stamp using Raspberry Jam ink, softening the edges at top and bottom to create a seamless blend between the two cards. Finally, I added Grape Juice ink on the bottom, creating a lovely, non-traditional snowflake ombré on my white cardstock! The formulation on the Hero Arts inks make techniques like this so much easier, because the formula actually spreads and smooths as it dries, so the colors change smoothly, as well.

To create the shaker window, I die cut the new Joy Ornament Fancy Die from the center of the snowflake card front, as well as from some white cardstock. I backed the circular cutout on the card front using acetate, then inlaid the Joy die cut on the acetate using liquid adhesive. I added foam adhesive around the shaker opening, then added some fun iridescent sequins, finally backing it with a full A2 panel of Plum cardstock.

Well, that’s all for my projects today! These new holiday products are absolutely marvelous. Totally will get you in the holiday cardmaking spirit, even if it is super hot outside haha! Now, for some fun giveaway information:

Hero Arts will give away three $50 gift cards, drawn from the comments left across the hop. Enter by leaving a comment between now and Sunday, September 6th at 11:59pm Pacific, and the winner will be announced on the Hero Arts blog the following week. The more comments you leave, the more chances you have to win!

Your next stop is Ilina Crouse. Thanks so much for stopping by today, and happy hopping!

Filed Under: Hero Arts, holiday card Tagged With: christmas rose, color layering poinsettia tree, ink blending, joy ornament, ombre, shaker card, snowflake swirl

Primary Sidebar

  • Facebook
  • Instagram
  • Pinterest
  • YouTube

Favorite Shops

Secondary Sidebar

Subscribe

Enter your email address to subscribe to this blog and receive notifications of new posts by email.

Instagram
Something is wrong.
Instagram token error.
Follow
Load More

Archives

Tags

3D embossing folder alcohol markers better press birthday birthday card blog hop card kit christmas christmas card christmas tag colored pencil copic copic coloring Daniel Smith die cutting embossing folder embroidery felt giveaway holiday holiday card hot foil ink blending karin brushmarker pro layered stencil masculine my monthly hero new release no line coloring no line watercolor OLO marker olo markers original illustration pawsitively saturated rainbow shaker card slimline stamping stamptember stencil thank you thinking of you valentine's day video watercolor

Popular Posts

Simon Says Stamp Sending Cheer Blog Hop- Day 2 + Freebie + Giveaway!
Altenew October 2026 Release Blog Hop + Giveaway!
Altenew Build A Flower Sweet Violet+Giveaway!
Floral Follies on Canvas with New Simon Says Stamp STAMPtember!
Simon Says Stamp STAMPtember Tim Holtz Collaboration: Festive Holidays!
Rustic Monochromatic Stars for Christmas with Rainbow Splash!
Altenew March 2020 Release Blog Hop+Giveaway!
Honey Bee Stamps Bee Bold Release Blog Hop!
Waffleflower July Release Blog Hop!
Altenew Paint A Flower: Carnation Blog Hop+Giveaway!

Disclosure

Some affiliate links are used in my posts. This means that, should you click on one of my links and purchase something from that company, I will receive a small portion of the sale at no extra cost to you. I use the money earned from these sales to help maintain my blog. I so appreciate you visiting and, if you do choose to use one of my affiliate links, thank you so much for your support!
Copyright © 2026 ·Brunch Pro Theme · Genesis Framework by StudioPress · WordPress · Log in
Loading Comments...