• Skip to main content
  • Skip to primary sidebar
  • Skip to secondary sidebar

Sixth Street Sundries

Emily Midgett

  • Home
  • About Me
  • Contact
  • OLO Marker Color Swatch Chart
  • Shop

masking

Introducing …. The 12 Cards of Christmas!

January 25, 2018

Good morning! I have a fun new series starting today… I know lots of crafters feel that holiday crunch when it gets to be the beginning of December, and so I thought I would make a concerted effort to try to get a bit of a head start this year by dedicating one day a month on my blog to a holiday card! For this month, I used one of my most favorite new stamp sets from this past holiday season: Ornamental from Concord and 9th.

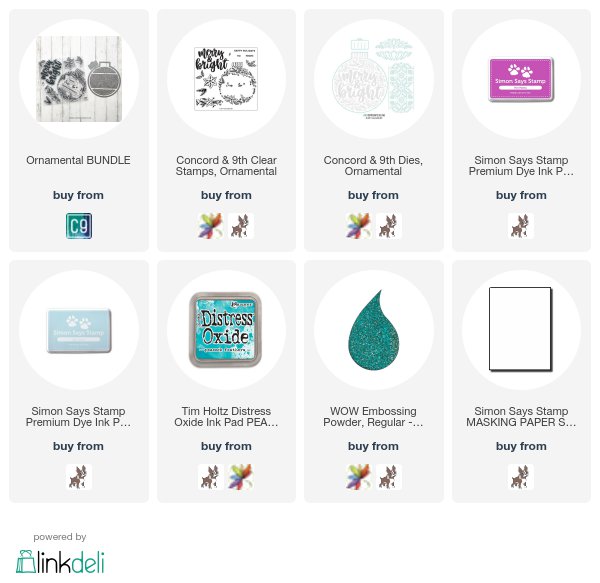
I always strive to make my holiday cards as flat (aka-easily mailed) as possible. When trying to make a flat card, masking is my best friend. I can get fabulous dimension with approximately zero layers and bulk. I started by die cutting the large ornament from Concord and 9th’s Ornamental die set from some masking paper and adhered it to the center of an A2 card base. You know the glow from those pretty, ethereal Christmas lights on your tree? When you turn all of the lights off and just sit by the light of your Christmas tree? That’s what I was going for with this card. I lightly blended Hot Mama and Sea Glass inks around the edge of the masking paper. There is just enough blue in both shades of ink to allow them to blend nicely with each other.

After I had blended around the edge of the masking paper, I removed the mask and added the floral stamp from Ornamental to the lid of my MISTI. I wanted the floral details to be multi colored, as though they were reflecting the Christmas lights in my blending, so I added Sea Glass ink in a few spots on the stamp, then pressed the lid of my MISTI down, then added some Hot Mama ink in the spots that were left, but was sure to dab away some of the ink with a microfiber cloth to make a smoother transition between the two colors. I repeated this process until I was satisfied with the coverage. For the greeting, I used the lovely, scripty sentiment included in Ornamental that fits just perfectly amongst the floral detailed stamp. I stamped it using a trick my friend Lisa taught me: Distress Oxide inks are great for heat embossing!! I stamped it with Peacock Feathers Oxide ink, then embossed it with some sparkly turquoise embossing powder.

To turn it into an “ornament,” I die cut the ornament topper from some sparkly silver glitter card stock and adhered it with liquid adhesive. Nice and flat and lots of sparkle…. perfect for Christmas! I love using non-traditional colors for holiday cards, and I think this series is going to allow me to explore lots of unique Christmas color combinations.

I hope you’ve enjoyed the first installment of The Twelve Cards of Christmas!! Have a marvelous day!

Filed Under: Concord and 9th, simon says stamp, The 12 Cards of Christmas Tagged With: christmas card, distress oxide, heat embossing, holiday card, ink blending, masking, multi colored stamping

My Monthly Hero January 2018 Blog Hop!

January 8, 2018

Well hi!! I am super excited today to be a guest on the Hero Arts My Monthly Hero blog hop for January, 2018! You should have arrived from the amazing Clare Prezzia’s blog, and I’m the last stop on the hop! These kits are just fantastic, and I am SO happy to be a guest on the blog hop this month! If you aren’t familiar with the My Monthly Hero kits, here’s a little summary: every month, Hero Arts carefully curates a kit containing stamps, dies, and complementary inks, papers, and/or embellishments. The kits are always a fantastic value for the price of $34.99, but the value of the individual elements always exceeds the price tag. Talk about bang for your buck! The kit this month is so pretty…. lovely, ornate sentiments and some pretty filigree dies, as well as some really beautiful papers and inks. Gorgeous for Valentine’s Day!

Kit Contents:

4″ x 6″ Layered on Love Clear Stamp Set
Four Coordinating dies
4 ink cubes (Passion Flower, Navy, Red Royal and Mulled Wine)
2 5″x7″ Shizen decorative paper
1 5.5″x8.5″ Stardream Coral Cardstock
1 5.5″x8.5″ Stardream Rose Quartz Cardstock
1 5.5″x8.5″ Stardream Kunzite Cardstock
Heart Sequins Mix 1.5 oz
Pink Prisma Embossing Powder 0.5 oz
I have a project for you today that combines the pretty sentiments of the kit with one of the kit add-ons: Window on Love Confetti Fancy Die. I started by die cutting one of the Love Confetti dies from some masking paper, then placed it on a panel of white card stock. I then used my blending tools to blend Raspberry Jam, Ultra Pink, and Bubble Gum inks over the top of the masking paper. Love when you pull the masking paper away and the pattern magically appears!

For the greeting, I used Hero Arts Silver embossing powder on vellum to emboss the bottom layer of the pretty “Love” and the ampersand from the main stamp set of the January My Monthly Hero kit. I fussy cut both of them out, then embossed the “sending” and “friendship” onto some plain white card stock, trimmed them down, and blended more Raspberry Jam ink so that they would pop from the background.

I trimmed the blended panel down and adhered it to an A2 sized panel of silver glitter paper to help pull the silver of the embossing together. I then adhered the greeting with some dimensional adhesive, finally adding some Ombre Blush sequins to complete the visual cascade.

The kit is available for a limited time only – once it’s gone, it’s gone. Kits begin shipping from Hero Arts on Friday January 12th. Also, you can now subscribe to receive the kit monthly and never miss one! You get such bang for your buck every single month that it’s totally worth it!

Now, for some giveaway fun! Hero Arts is generously giving away a full kit (valued at over $60!) to one lucky reader! All you have to do is comment on the blogs… One winner will be selected from comments across the blog hop, so the more comments you leave, the more chances you have to win! (If you’ve already purchased a kit and are selected as the winner, Hero Arts will reimburse you for the price of the kit!) Giveaway closes Sunday, January 14th at 11:59pm, and the winner will be announced the following week on the Hero Arts blog.

The Hero Arts Blog
Jennifer McGuire
Yana Smakula
Jessica Frost-Ballas
Wanda Guess
Lydia Fiedler
Amy Tsuruta
Laurie Willison
May Park
Janette Kausen
Michelle Short
Libby Hickson
Ilina Crouse
Clare Prezzia
Emily Midgett


Filed Under: Hero Arts Tagged With: blog hop, heat embossing, ink blending, masking, my monthly hero, valentine's day, vellum

A Blog Named Hero: One Layer!

September 4, 2017

Good morning! Today marks the beginning of another challenge for A Blog Named Hero. This month, we are teaming up with CAS-ual Fridays to present our challenge:

One layer. Eeek. Don’t panic though. The A Blog Named Hero design team is here with plenty of inspiration for you.

For my card, I worked with the Tin Roof background set from CAS-ual Fridays. It’s such a pretty, dainty set. I chose to do some masking to create a one layer card…. but I used a few layers of ink. I started by cutting an A2 sized piece of masking paper, then die cutting an oval from the center. I adhered it to my top-folding A2 card base, then stamped the pretty Tin Roof background over the top using some pale blue ink.

Next, I used the Hero Arts Hello by Lia Griffith stamp set with some Versafine ink to stamp my bold sentiment over the pale stamped background. To make it pop even more, I covered the sentiment with clear embossing powder and heated it up. It always amazes me how much more crisp lines are when you add a little clear embossing powder to it. I also used one of the tiny flowers in the mini Hero Arts set to stamp the centers of the background pattern in a bit darker shade of blue, just to add a little more interest.

The final step was to use my fine tipped black pen to add tiny little black dots to the centers of the flowers.

Not gonna lie, this month’s theme challenged me. But sometimes, that’s a good thing! It’s good to think outside your comfort zone and stretch your creative wings. Now, it’s your turn! Create a one layer card using at least one Hero Arts project, then link it up to our blog post to be eligible to win a fabulous prize from our sponsor, CAS-ual Fridays! (Be sure to read all of the rules to ensure that your project is eligible to win!)

Please help support A Blog Named Hero by shopping through our links. These are affiliate links, at no additional cost to you. We appreciate your support.
Simon Says Stamp
Ellen Hutson
Hero Arts

Have a fantastic Labor Day, friends! While you’re celebrating with barbecues and parades, I hope you’ll take a moment to thank your union members, because without them, the working world would look entirely different! Enjoy your time with your family!

Filed Under: A Blog Named Hero, Hero Arts Tagged With: masking, one layer, stamping

More Summer Blooms…

July 27, 2017

Sorry, guys, I can’t seem to get enough of these stunning new stamps from Wplus9. I stamped and die cut a big old bunch of these flowers and had several left over from my first project (which you can see here), so I decided to make another project with it.

I die cut the flowers and foliage from Wplus9’s Southern Summer Blooms 1 (and dies) and Southern Summer Blooms 2 (and dies) and stamped them with several different inks.

After I had finished stamping the flowers and leaves, I used a circle die that I had lying on my desk to draw a circle in the center of a white card base, then used the same die to die cut a circle from masking paper. I used the circle that I drew on the card base as a guide to arrange the florals, then used Press ‘n Seal to pick them up. While they were stuck to the Press ‘n Seal, I added dimensional adhesive to the back. I adhered the mask to the circled area, then used my foam blending tool to blend Altenew’s Frosty Pink around the edge of the card base, then pulled the mask away to reveal a white circle in the center of the card. I stamped the greeting from Wplus9’s Kind Soul in the center, then adhered the floral wreath, finally adding some pretty sequins to fill in some of the bare spots.

I hope you’re not tired of these pretty stamp sets! It’s been awhile since I just sat and stamped, and it was so fun! Have a marvelous day, friends!

Filed Under: altenew, Wplus9 Tagged With: masking, press 'n seal, stamping

  • « Go to Previous Page
  • Page 1
  • Page 2
  • Page 3

Primary Sidebar

  • Facebook
  • Instagram
  • Pinterest
  • YouTube

Favorite Shops

Secondary Sidebar

Subscribe

Enter your email address to subscribe to this blog and receive notifications of new posts by email.

Instagram
Something is wrong.
Instagram token error.
Follow
Load More

Archives

Tags

3D embossing folder alcohol markers better press birthday birthday card blog hop card kit christmas christmas card christmas tag colored pencil copic copic coloring Daniel Smith die cutting embossing folder embroidery felt giveaway holiday holiday card hot foil ink blending karin brushmarker pro layered stencil masculine my monthly hero new release no line coloring no line watercolor OLO marker olo markers original illustration pawsitively saturated rainbow shaker card slimline stamping stamptember stencil thank you thinking of you valentine's day video watercolor

Popular Posts

Special Release: Simon Says Stamp Exclusive Tim Holtz Coordinating Dies!
Simon Says Stamp Card Kit November 2026: Jolly Season!
Shaped Holiday Shaker Card with New Simon Says Stamp Jolly Season Card Kit of the Month!
Simon Says Stamp Glory to the Newborn King Holiday Kit-Part II!
Simon Says Stamp Glory to the Newborn King Holiday Kit-Now Available!
Altnew Craft A Flower: Daffodil+ Glitter Cardstock Release Blog Hop + Giveaway!
Altenew October 2026 Release Blog Hop + Giveaway!
Grateful Acorns with Simon Says Stamp!
Coral Wild Rose for Mother's Day with Simon Says Stamp!
Fashion Shoppe and Flower Shoppe with Concord & 9th!

Disclosure

Some affiliate links are used in my posts. This means that, should you click on one of my links and purchase something from that company, I will receive a small portion of the sale at no extra cost to you. I use the money earned from these sales to help maintain my blog. I so appreciate you visiting and, if you do choose to use one of my affiliate links, thank you so much for your support!
Copyright © 2026 ·Brunch Pro Theme · Genesis Framework by StudioPress · WordPress · Log in
Loading Comments...