• Skip to main content
  • Skip to primary sidebar
  • Skip to secondary sidebar

Sixth Street Sundries

Emily Midgett

  • Home
  • About Me
  • Contact
  • OLO Marker Color Swatch Chart
  • Shop

masking

Altenew 10th Anniversary Blog Hop Day 1 + Giveaway (over $3,500 in Total Prizes)

April 1, 2024

Hi friends! I am so excited to be part of Day 1 for Altenew’s Tenth Anniversary Blog Hop!! How thrilling is that? What a fantastic milestone! I have loved Altenew’s designs for almost as long as they’ve been around, and so being a part of their design team for the last three years has been nothing short of a dream come true. You should have arrived here from the Scrapbook & Cards Today blog, and your next stop is Svitlana Shayevich. You can also start at the beginning over at the Altenew Blog. (I highly encourage you to start at the beginning, because there are masses upon masses of prizes to be had throughout the hop!!) I have two projects to share with you today, so let’s get started with the details!

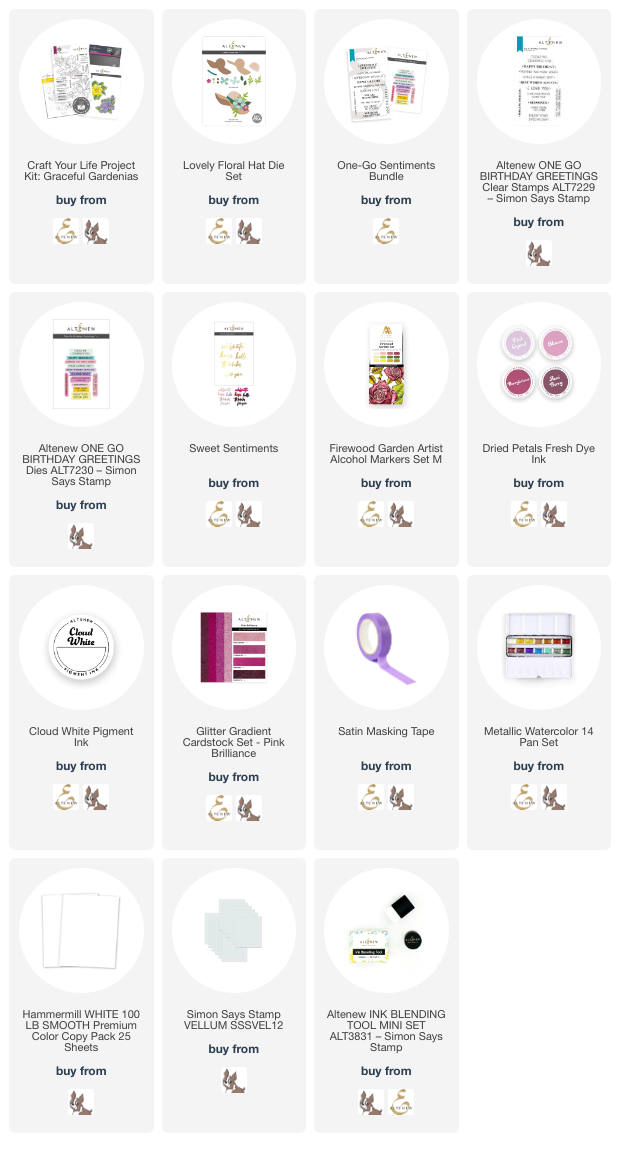
When I was perusing my Altenew bins to figure out which products to use for today’s hop, I realized that I had not put the incredibly lovely Craft Your Life Project Kit: Graceful Gardenia to use yet. These kits come with such wonderful coordinating products, from traditional stamps and dies to embossing folders and coordinating stencils that work with both the stamps and the embossing folder images. I employed some of my most favorite of the new Fresh Dye Inks and the new Firewood Garden alcohol markers to create these pretty pink cards. The embossing folders are great to use as a focal point or to add texture to the background!

For my first project, I started by embossing a panel of white cardstock using the embossing folder from the Craft Your Life Project Kit: Graceful Gardenia kit. I then used some of the colors from the Dried Petals Fresh Dye Ink set to blend around the edge of the card front. Embossing the panel first and then ink blending over the top enhances the incredible embossed details. To further enhance the details, I swiped the Cloud White pigment ink pad over the raised areas to help them stand out even more.

On top of my embossed background, I die cut a large scale sentiment from the new Timeless Sentiments 2 die set using the Rhodolite Garnet glitter paper from the Pink Brilliance Glitter Gradient cardstock set. I enhanced the die cut sentiment with some sparkly, shimmery flowers from the Lovely Floral Hat die set, which I cut with some specialty papers, including more Rhodolite Garnet glitter paper and some iridescent white mirror paper, paired with vellum foliage. I tucked a greeting from the One Go Sentiments Bundle around the glitter die cut sentiment and arranged the flowers and foliage around the sentiment. Finally, I added a few shimmering gems for sparkle!

For my second project, I used one of my favorite techniques with embossing folders: alcohol marker coloring! The Craft Your Life Project Kit: Graceful Gardenia kit comes complete with dies that coordinate with both the stamped image as well as the embossed image. I die cut the floral image that coordinated with the embossing folder using the correct die, then lined it up on the embossing folder and ran it through my die cutting machine. I then used the Firewood Garden alcohol markers to add lots of vibrant color to the embossed image. I am always amazed at how much dimension you can achieve when you combine coloring with the embossed images!!

Because this embossed, colored image was on such a large scale, I decided to create an A7 card. I trimmed down an A7 card front, then masked the edges with Satin Masking Tape and blended some mauve inks around the edges using inks from the Dried Petals Fresh Dye Ink set. While the masking tape was still in place on my card front, I used the stamps included in the Graceful Gardenia kit to stamp a tone-on-tone background around the corner of my masked area. I also splattered the blended and stamped background with some metallic watercolors for added texture and shimmer. I removed the masking tape around the edges, revealing a crisp white frame around my blended background. I popped up the embossed colored sentiment with some foam adhesive, then added a glittery greeting cut from the Sweet Sentiments set and an ethereal vellum sentiment from the new One Go: Words & Banners set. I finished the project off with a few sparkling gems!!

Well, that’s all for my projects today! Now for tons of fun giveaway information:

Over $3,500 in total prizes! We are giving away a $50 Altenew gift certificate to 10 winners, a $20 ArtistrybyAltenew gift certificate to 5 winners, and an online papercrafting class($39.99 value) from Altenew Academy Online Class to 14 winners. There are also 28 awesome companies/crafty friends who are celebrating with us, and they are offering the following prizes:

  • Altenew: 10 x $50 Altenew Gift Certificates
  • ArtistrybyAltenew: 5 x $20 ArtistrybyAltenew Gift Certificates
  • Altenew Academy: 14 x Online Papercrafting Classes($39.99 value each)
  • Crafter’s Companion: 1 x Gemini II Die Cutting and Embossing Machine ($329 value)
  • LDRS Creative: 4 x $50 LDRS Creative Gift Certificates
  • Online Card Classes: 5 x Online Card Classes ($25 value each)
  • Jennifer McGuire Ink: 1 Share Handmade Kindness goodies bag ($100 value)
  • Honey Bee Stamps: $100 Gift Certificate
  • Hero Arts: $100 Gift Certificate
  • Lawn Fawn: $100 Gift Certificate
  • Pink and Main: $100 Gift Certificate
  • Scrapbook & Cards Today: $100 Gift Certificate
  • Taylored Expressions: $100 Gift Certificate
  • Gina K. Designs: $100 Gift Certificate
  • CraftStash: $100 Gift Certificate
  • Brutus Monroe: $100 Gift Certificate
  • Picket Fence Studios: $50 Gift Certificate
  • Pelletier Craft Studio: 3 x $25 Gift Certificates
  • Michelle’s Cards and Stamps: AUD $100 Gift Certificate
  • Spellbinders Paper Arts: 2 x $25 Gift Certificates
  • Scrapbook.com: $50 Gift Certificate
  • My Craft Room: $50 Gift Certificate
  • Krafters Cart: $50 Gift Certificate
  • A Cherry on Top: $50 Gift Certificate
  • Simon Says Stamp: $50 Gift Certificate
  • My Favorite Things: $50 Gift Certificate
  • Pinkfresh Studio: $50 Gift Certificate
  • Bumbleberry Papercrafts: £25 Gift Certificate
  • Seize the Stamp: CHF 25 Gift Certificate
  • MarkerPop: $25 Gift Certificate
  • Auzz Trinklets N Krafts: AUD $25 Gift Certificate

Be sure to leave comments by 04/16/2024 for a chance to win one of 68 prizes! To make the hop more exciting, start your comment with “Hi from (city or country where you’re from)!” 68 winners will be chosen at random from the comments left on any of the blogs listed below and will be announced on the Altenew Card Blog on 04/19/2024.

Anniversary Special Offers

  • 20% Off Crafter’s Must-Have: Stampwheel on 04/01/2024 from 12:01 am EDT until 11:59 pm EDT. Shop here: https://altenew.com/products/stampwheel
  • Receive a FREE Zip ‘n’ Stash – Teal (1/pack) ($6.99 value) on orders over $69 on 04/01/2024 from 12:01 am EDT until 11:59 pm EDT. While supplies last, the free gift will be added to your cart automatically. Shop here → https://altenew.com/
  • Plus, get FREE U.S. shipping on orders over $29 (no code needed) or $10 OFF international shipping on orders over $129 with code HAPPY10TH at checkout. Valid from 04/01/2024 at 12:01 am EDT until 04/05/2024 at 11:59 pm EDT. Not valid on prior purchases. Shop here → https://altenew.com/

Here’s the full hop list in case you get lost:
You are invited to the Inlinkz link party!

Click here to enter

Filed Under: altenew Tagged With: A7 card, alcohol markers, craft your life, craft your life graceful gardenia, fresh dye inks, lovely floral hat, masking, one-go sentiments, sweet sentiments

Daisies for Babies-Adding Gilded Accents to your 3D Embossed Images!

July 22, 2023

This post was sponsored by Simon Says Stamp. Thanks, Simon!

Hi friends! Today, I have some inspiration using the utterly gorgeous Fresh Daisies Embossing Folder + dies. I have become obsessed with adding color to embossing folder images in a variety of ways, including ink blending, alcohol markers, and watercolor, and today I combine a few of those techniques for a two-fer. When I first saw the Fresh Daisies Embossing Folder + dies, I thought that the little baby’s breath flowers and daisies reminded me of a sweet baby card. White daisies are so innocent and clean, so friendly (“Don’t you think that daisies are the friendliest flowers?”), that I thought this embossing folder would make some beautiful and elegant baby cards. Let’s get started with the details!

Both of my cards today feature the Fresh Daisies Embossing Folder. I used two different techniques for these cards, though I kept the color scheme similar for both projects, using Lake Shores Ink for my main color addition.

Oh, Baby + dies

A2 Thin Frames

Lake Shores Ink

My first card pairs the Fresh Daisies Embossing Folder + dies with the Leafy Greens Embossing Folder + dies. I recently added this Leafy Greens folder to my stash with the intention of using it in conjunction with the several different embossed floral dies that are available in the Simon Says Stamp store. The leaves are beautifully delicate and a lovely, graceful shape. I die cut the daisies and the foliage from plain white cardstock, intending to add some alcohol marker coloring to them.

To achieve good results with the die cut embossed flowers, I first die cut the images from my chosen cardstock, then place the die cuts inside the embossing folder in the correct spot for that image, then run it through my die cut machine. If you tried to die cut the embossed image, you would flatten out all of the embossed dimension, so it works best to start with a clean, smooth die cut. Using my OLO Markers, I colored the daisies and foliage die cuts, using BV2.0 and the Zero markers on the “white” daisies, keeping the color mainly on the petals tucked behind the top layer of petals in order to enhance the shadows while still keeping the color a crisp white. I added golden yellow to the daisy centers and colored the leaves a lovely shade of aqua that coordinates nicely with the Lake Shores Ink.

For the background, I used Simon Says Stamp’s Very Very Low Tack Tape and some Post-It Notes to mask off the top and bottom of my white A2 card front. I lightly blended Lake Shores Ink in the center of the card front, then, keeping the masks intact, added the Daisies and Leaves Stencil, which I had lightly spritzed with Pixie Spray to keep the delicate stencil in place while blending. I blended more Lake Shores ink over the top of the stencil to create a very subtle, tone-on-tone pattern in my blended area. I also spritzed the colorful strip with some Hero Arts Iridescent Shimmer Spray. When I removed the masks, I was left with a strip of subtle, but lovely, aqua. Before adding my die cut flowers, I splattered some beautiful, sparkling warm white watercolors to add even more interest to the background.

I arranged the die cut embossed flowers on the card front, adhering them using foam tape. I also stamped a greeting from Oh, Baby onto some white cardstock using Lake Shores Ink, then, keeping the stamps and cardstock in place in my MISTI, stamped again with clear embossing ink and sprinkled some white satin pearl embossing powder over the top. This combination created a beautifully soft color-coordinated sentiment, which I die cut using the coordinating dies. I adhered the sentiment with a double layer of foam tape and added a few gems and some twine for more texture. Once I had everything arranged properly, I “gilded” the flower petals and foliage with the same sparkling white watercolor that I had splattered on the background, adding it only in the highlighted spots to add just a touch of sparkle. I am totally in love with this card; the sparkle is unreal and *so* difficult to capture in a photograph.

My second card also features the Fresh Daisies Embossing Folder and Lake Shores Ink. After embossing my white panel with the full Fresh Daisies Embossing Folder, I blended Lake Shores Ink with a blending brush over the entirety of the embossed panel. I also went back over the raised areas with the ink pad, lightly swiping the panel with the ink pad to add extra color saturation to the raised areas.

Once I’d finished blending and swiping on the panel, I used the same golden white sparkly watercolors to enhance some of the raised embossed images. Leaving the monochromatic color on the background would be fine in itself, but adding the sparkling highlights kicks it up a notch! I also splattered the entire card front with more sparkly watercolors, which I think almost creates a raindrop effect. I added a glittery white frame cut using some white glitter paper and the A2 Thin Frames dies.

For the greeting, I used another pair of die cuts from the Oh, Baby + dies, stamped again using Lake Shores ink + clear embossing ink, and embossed using White Satin Pearl embossing powder. I also lightly blended some more Lake Shores ink on the die cuts to keep them cohesive on the blue background. I popped the greeting up on the card front using foam adhesive, then added some gems and a twine bow. I think the addition of the twine bow helps to enhance the idea that this elegant card is a sweet baby card!

Well, that’s all for my projects today. If you have any iridescent or sparkly watercolors, I would encourage you to try adding some sparkly highlights to your embossed images and backgrounds. It’s super easy, and the effect is absolutely stunning! Thanks so much for stopping by, and have a marvelous day!

Filed Under: simon says stamp Tagged With: baby card, embossing folder, fresh daisies, ink blending, IUILE watercolors, leafy greens, masking, oh baby, olo markers, stencil

Hero Arts My Monthly Hero July 2023 Countdown-Day 2!

July 2, 2023

Hi friends! I’m popping in today for Day 2 of the Hero Arts My Monthly Hero countdown for July 2023! The Hero Arts kits are always full of value, and this month’s kit features such beautiful, serene imagery. There are lots of options for creating a lovely meadow, and I chose to create a masked background with some ink blending, tone-on-tone stamping, and some sparkling die cuts from the My Monthly Hero July 2023 Classic Kit. Let’s get started with the details!

I began by masking around the edges of my white A2 card front using some masking tape. I then blended Bermuda, Paradise, and Arctic inks from Hero Arts in a smooth ombré down the open area on my masked card front. While I still had the mask still around the edges, I stamped some of the meadow silhouette stamps from the Classic Kit stamp set on the bottom of the blended background using Paradise ink, which adds some very subtle botanical silhouettes. I also splattered the background with some white metallic Glimmer ink from Hero Arts, which I think adds to the ethereal feel of the background! I removed the masking tape around the edge to reveal a crisp white frame around my blended, stamped background!

To accent the pretty, dreamlike background, I die cut some of the standalone dandelion dies from the Classic Kit using white Glitter Basics cardstock. The glittery white cardstock accents the shimmering splatter on the background beautifully!

For the greeting, I heat embossed one of the sentiments from the stamp set for the Classic Kit using silver embossing powder onto a strip of white cardstock. I adhered all of the glittery dandelion die cuts to the card front using Precision Glue, reserving one. I adhered the stem of the smallest dandelion to the sentiment strip using Precision Glue, then when it was dry, I added some foam adhesive to the back of both die cuts. Adhering the stem to the sentiment strip adds a bit of extra stability to the super delicate die cut.

Well, that’s all for my project today! Check out the Hero Arts Blog for more inspiration using the new July 2023 My Monthly Hero kit. Thanks so much for stopping by today, and don’t forget to check back next week for the full reveal and blog hop for the July 2023 My Monthly Hero kit!

Filed Under: Hero Arts Tagged With: ink blending, masking, my monthly hero

Altenew Paint A Flower: Chamomile Blog Hop+Giveaway!

April 22, 2021

Hi there! Today is Altenew’s monthly Paint A Flower blog hop, and this month’s flower is the Chamomile! We are celebrating with a blog hop. You should have arrived here from Michelle Short and your next stop is Nichol Spohr. You can also start at the beginning of the blog hop at the Altenew Card Blog. These darling daisy-like flowers are so cute and cheerful, perfect for an encouragement card. Let’s get started with the details!

For today’s card, I decided to keep things simple with a little masking, a little blending, and a little coloring to create an almost-flat card that’s easily mailed. I began by stamping the image of the chamomile in the pitcher from the Paint A Flower: Chamomile stamp set, first on some Copic-friendly cardstock, then again on a piece of masking paper, which I fussy cut. I adhered the mask over the stamped image and blended some Rouge ink with blending brushes over the top to create a peachy halo around the image. I wanted to keep the flowers white (or as near to white as I could), and adding that contrasting color around the flowers helps to keep the petals looking more white.

Once I’d finished blending, I removed the mask and used my Copic markers to color the image, making the pitcher a pretty shade of light turquoise and adding the most subtle of lavender to the flower petals in the background.

I’d stamped the pitcher of flowers using a Copic-friendly dye ink, and so wanted to ensure the sentiment (also from Paint A Flower: Chamomile) stood out and was crisp. To achieve this, I stamped the greeting directly onto the colored and blended card front using Obsidian ink. This black pigment ink is perfect for maintaining that crisp detail in your stamped sentiments. I trimmed the panel down slightly and adhered it to a black A2 card base, orienting it to the top left corner to allow the black to peek out around the bottom. The final touch was to add a few black gems to help the black accents pop even more!

Well, that’s all for today’s project. As per usual, Altenew is celebrating this release with a giveaway!

$200 in total prizes! To celebrate this release, Altenew is giving away a $50 gift certificate to 2 lucky winners and a $20 gift certificate to 5 winners! Please leave a comment on the Altenew Card Blog and/or each designer’s blog post on the blog hop list below by 04/27/2021 for a chance to win. 

Altenew will draw 7 random winners from the comments left on each stop of this blog hop and announce the winners on the Altenew Winners Page on 04/30/2021.

Your next stop on the hop is Nichol Spohr. Thanks so much for stopping by today, and happy hopping!

Filed Under: altenew Tagged With: copic coloring, giveaway, masking, paint a flower, paint a flower chamomile

Altenew June 2019 Standalone Die Release Blog Hop

June 18, 2019

Hi there! Today is Altenew’s June Standalone Die blog hop, and I am so excited to be a stop on the hop! You should have arrived from Maryam Perez‘s blog, and your next stop is Kelly Janes‘s blog. Altenew’s standalone dies are so unique; this die release is no exception! I have two cards to share with you today, as well as some giveaway information, so let’s get started!

I love creating unique color combinations with mustard; it’s one of those unexpected colors that looks so meh when it’s all alone, but add it to the right color combination and it is so unique and pretty! Today’s projects are an homage to mustard and plum (which reminds me of Clue, for some reason), and I’m so excited to share these projects with you!

For my first project today, I wanted to showcase the beautiful new Delicate Mandala die. It’s a huge die, and super detailed; perfect for using as a doily behind a floral arrangement! I began by stamping several of the blooms and foliage from the oldie-but-goodie A Beautiful Day stamp set on watercolor paper using Altenew’s Enchanted Gold ink and clear embossing over the top. I then watercolored the gorgeous florals using my Daniel Smith watercolors, keeping to a plum, mustard, and jade green color scheme.

Once my flowers were finished, I die cut the beautiful new Delicate Mandala die from some golden vellum that I found in my paper stash/hoard (ha!), adhering it to the corner of my Plum card front and trimming the excess off of the edges.

I arranged the floral die cuts in a nice full arrangement, then adhered them to the floral mandala using foam adhesive and added a gold embossed sentiment on a strip of mustard card stock. The final touch was a few jewels for sparkle.

For my second project today, I used the absolutely stunning new Virginia Rose die set. It’s another fantastic layering die that creates beautiful, substantial die cut blooms that look so realistic… no stamping required! You could use these with colored card stock, watercolor your own card stock and then die cut, or even use the layering inks from Altenew to blend colored card stock and die cut from that!

For today’s project, I chose to use some beautiful Hero Hues card stock that I have, and the combination of the Canary, Mustard, and Papaya card stocks made for some beautiful yellow blooms, adding in some foliage cut from Kiwi and Pesto card stocks. The layering guide included with the Virginia Rose die set made layering easy as pie!

For the card base, I used another A2 panel of Plum card stock. I die cut a mask from some masking paper using the Delicate Mandala die, adhered it to the Plum card stock in the corner, then spritzed the Altenew Antique Gold shimmer spray and removed the mask. The result was a subtle, artistic pattern on the background of the card front, the perfect foil for the precise and detailed die cut flowers.

I popped all of the die cuts up with foam adhesive, then added a few jewels for a bit of sparkle and some extra texture!

Well, that’s all for my projects today! Now, for some fun giveaway information:

To celebrate this release, Altenew is giving away a $50 gift certificate to 6 lucky winners! Please leave a comment on the Altenew Card Blog and/or Altenew Scrapbook Blog by 6/24/2019 for a chance to win.

They’ll also draw a winner to receive a $15 gift certificate from the comments left on each designer’s blog on the blog hop list below. All winners will be announced on the Altenew blogs on 6/27/2019.

Your next stop on the hop is Kelly Janes!

Thanks so much for stopping by today, and have a marvelous day!

Filed Under: altenew, giveaway, watercolor Tagged With: a beautiful day, mandala, masking, virginia rose, watercolor

  • Page 1
  • Page 2
  • Page 3
  • Go to Next Page »

Primary Sidebar

  • Facebook
  • Instagram
  • Pinterest
  • YouTube

Favorite Shops

Secondary Sidebar

Subscribe

Enter your email address to subscribe to this blog and receive notifications of new posts by email.

Instagram
Something is wrong.
Instagram token error.
Follow
Load More

Archives

Tags

3D embossing folder alcohol markers better press birthday birthday card blog hop card kit christmas christmas card christmas tag colored pencil copic copic coloring Daniel Smith die cutting embossing folder embroidery felt giveaway holiday holiday card hot foil ink blending karin brushmarker pro layered stencil masculine my monthly hero new release no line coloring no line watercolor OLO marker olo markers original illustration pawsitively saturated rainbow shaker card slimline stamping stamptember stencil thank you thinking of you valentine's day video watercolor

Popular Posts

Simon Says Stamp Sending Cheer Blog Hop- Day 2 + Freebie + Giveaway!
Altenew October 2026 Release Blog Hop + Giveaway!
Rustic Monochromatic Stars for Christmas with Rainbow Splash!
Waffleflower July Release Blog Hop!
Hero Arts Partners Blog Hop: Lawn Fawn!
March 2020 Essentials By Ellen Blog Hop+Giveaway!
December 2018 My Monthly Hero Blog Hop + Giveaway!
The Ton Stamps Summer Release: Day 1
The Ton Anniversary Release: Day 1!
Altenew Paint A Flower: Carnation Blog Hop+Giveaway!

Disclosure

Some affiliate links are used in my posts. This means that, should you click on one of my links and purchase something from that company, I will receive a small portion of the sale at no extra cost to you. I use the money earned from these sales to help maintain my blog. I so appreciate you visiting and, if you do choose to use one of my affiliate links, thank you so much for your support!
Copyright © 2026 ·Brunch Pro Theme · Genesis Framework by StudioPress · WordPress · Log in
Loading Comments...