• Skip to main content
  • Skip to primary sidebar
  • Skip to secondary sidebar

Sixth Street Sundries

Emily Midgett

  • Home
  • About Me
  • Contact
  • OLO Marker Color Swatch Chart
  • Shop

emboss resist

Simon Says Stamp Pawsitively Saturated Blog Hop + SALE!

May 16, 2025

This post was sponsored by Simon Says Stamp. Thanks, Simon!

Hi friends! I am hopping along with my friends at Simon Says Stamp to share a most wonderful rainbow of happiness! You should have arrived here from Amy Rysavy, and your next stop is Bibi Cameron. You can also start back at the beginning at the Simon Says Stamp Blog in case you get lost! Today, we are celebrating all things ink! The exclusive Simon Says Stamp ink line, which includes the fabulous Pawsitively Saturated and Rainbow Splash ink lines are absolutely exquisite with such a gorgeous array of colors available… and they’re so dang juicy… simply luscious! Using colorful ink to make white cardstock into any color that I can dream up is one of my favorite things. To inspire you today, I have created a pair of projects with two different techniques, both featuring a gorgeous, vibrant sapphire and emerald color palette. Let’s get started with the details!

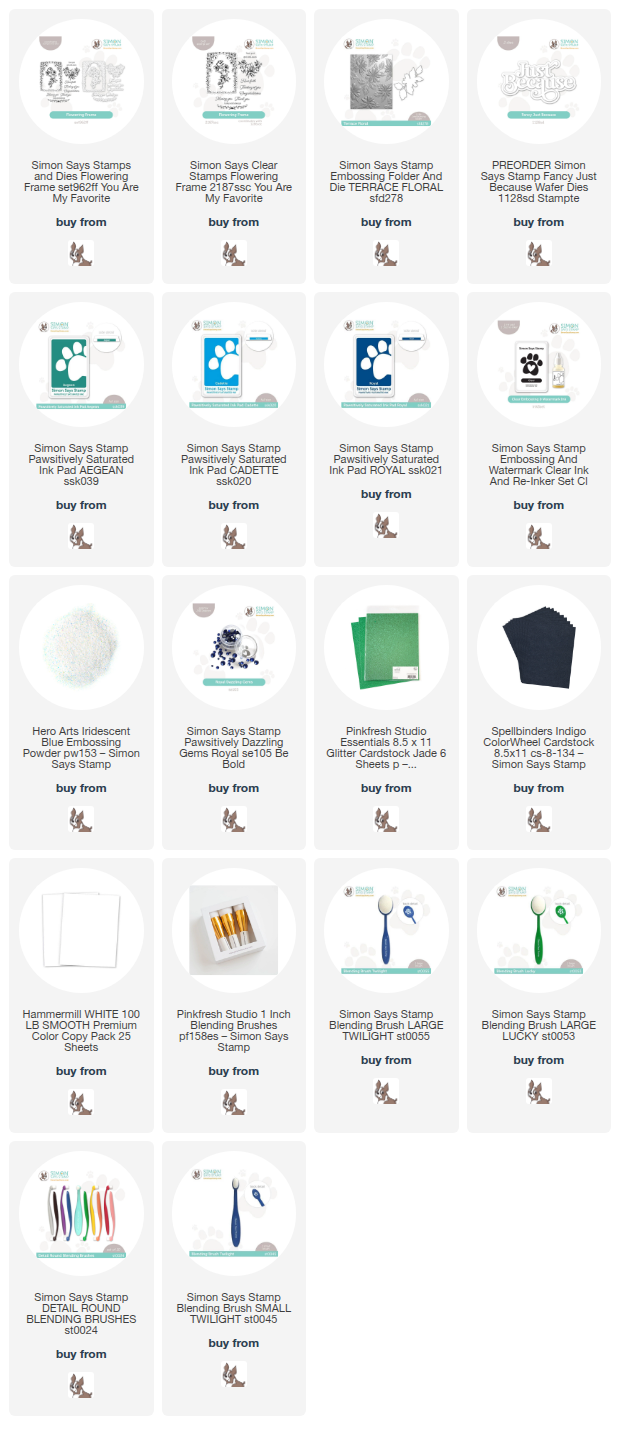
*I have gathered links to all of the products used at the bottom of the post for your convenience, using affiliate links. Thank you for shopping with my links! I truly appreciate your support for my work!*

Because this is a blog hop celebrating all things inky, I first pulled out my ink colors. I decided to pair Aegean ink with Cadette and Royal inks. These analogous colors work very nicely together if applied carefully. I love my monochromatic projects, but in the name of creativity, I decided to push myself to add another vibrant jewel tone into the mix.

For my first project, I decided to do some ink resist, highlighting the beautiful contrast between the blue and green inks. I stamped images from the Flowering Frame stamp set onto white cardstock using Aegean ink, then stamped again directly over the top with embossing ink and added Iridescent Blue embossing powder. This translucent embossing powder not only makes it possible to ink blend over the top of the images without compromising the beautiful teal green, but also adds an irresistible iridescent shimmer to these detailed images. I then used blending brushes to blend Cadette and Royal inks directly over the top of the images, concentrating the deep Royal blue on the outer edges of the panel to create almost an ombré effect.

After I had ink blended and die cut the images, I used the same Cadette and Royal inks on a plain A2 card front to create a color saturated tone-on-tone card front. I popped up the die cut images with foam adhesive, then used the same techniques to create a “thinking of you” sentiment from the Flowering Frame stamp set. I popped the sentiment up on some Jade glitter cardstock from Pinkfresh Studio, then used my sharp scissors to create a shadow layer. This added texture and sparkle from the Jade glitter cardstock allows the sentiment to stand out a bit more from the vibrant background. Finally, I added a few Royal Pawsitively Dazzling Gems to the corners and top of the frame for even more sparkle.

For my second card, I decided to use the same shades of ink in different gradations of intensity on an embossing folder. To achieve multiple shades of the same ink color, I paired ink blending with some ink swiping to create this pretty patterned card front. To start, I embossed a panel of white cardstock with the Terrace Floral embossing folder, then flipped the embossed piece over so that the embossed pattern was actually debossed; that is, the pattern is impressed down into the cardstock. I then used blending brushes to blend Cadette ink on the flowers and Aegean on the foliage, not worrying about the edges of the images, because I knew that the raised areas (that is, the negative space on the pattern) would be covered with the deep blue Royal ink. After I had finished lightly blending the images, I placed my ink pad directly on the cardstock and swiped the deep blue ink onto the raised areas. This swiping technique is so much fun and creates such a huge impact with not a ton of effort!

After I had finished creating the background, I die cut the shadow layer of the Fancy Just Because from some coordinating navy blue cardstock and the detail layer from Pinkfresh Studio Jade Glitter Cardstock. I adhered both layers together with liquid adhesive, then popped it up in the center of my patterned panel with foam adhesive squares. Finally, I added some large Royal Pawsitively Dazzling Gems to the centers of the flowers for a bit of added sparkle and texture!

Well, that’s all for my projects today. Isn’t it amazing what a little ink and white cardstock can create? These techniques are such fun and create those intensely colorful projects that I just love.

**To make this inky hop even more exciting, Simon Says Stamp is offering 20% off of their entire exclusive Simon Says Stamp -branded ink line until 5/18/25! Simply use code HUE4U at checkout to receive 20% off your Simon-branded inks and re-inkers!**

Your next stop is Bibi Cameron. Thanks so much for stopping by today, and happy hopping!
Filed Under: simon says stamp Tagged With: 3D embossing folder, analogous, emboss resist, embossing folder, fancy just because, flowering frame, ink blending, ink swiping, pawsitively saturated ink, terrace floral

Vivid Neon to Send Good Vibes!

August 18, 2023

This post was sponsored by Simon Says Stamp. Thanks, Simon!

Hi friends! In a complete style switch, I have this neon and black shaker card to share with you today! I have been playing around with ombré stamping and emboss resist techniques a lot lately, and decided I would highlight the ombré stamping with some black ink blending over the top to create this super vibrant shaker card. Let’s get started with the details!

I began my project by using my MISTI to stamp the Flower Frenzy Background stamp using Peony, Peachy, and Lemonade inks. To create this ombré stamped background, my MISTI is invaluable. I begin by tapping the top of my stamp with the first color, then using my microfiber cloth to soften the line of ink so that it lightly fades away. stamped the color on my white cardstock twice, then repeated the process with the second shade, then the third. While the stamp and cardstock were still in place in my MISTI, I stamped a layer of clear embossing ink and covered it with clear embossing powder so that the ombré image would resist the ink blending on top of it! After I’d finished heat embossing, I covered the entire panel with Charcoal and Intens-ified Black using Blending Brushes.

Next, I die cut the detail layer of the Sending Good Vibes die from white cardstock and blended over the top using the same Peony, Peachy, and Lemonade inks used on the background. I cut the outline background from the black holographic cardstock in the Luxe Glitter Basic Cardstock Assortment and layered them together using liquid adhesive. I also die cut the Fab Flower die from white and black cardstock, then blended the same ink shades on the white die cuts and layered the background and outline pieces together. The background reminds me of the groovy patterns from the 1970’s, and these Fab Flowers worked perfectly!

To create my shaker, I die cut the center of a panel of black cardstock using the Hero Arts Rounded Rectangles dies, creating a frame. I backed it with some clear acetate, then filled my shaker with Trinity Black Sparkle Spots flat sequins and Simon Says Stamp’s Sunflower Sequins and Strawberry Shortcake sequins to create a color-coordinated shaker mix. I popped up the sentiment over the top of the shaker window using foam adhesive, then tucked the blended groovy flowers behind it. Finally, I added a greeting from the Reverse Yay You sentiment card set, popped up with some more foam tape.

Well, that’s all for my project today! This ombré emboss/resist technique is so much fun, and I think it creates such an impact. I hope you’ll give it a try! Thanks so much for stopping by today, and have a marvelous day!

Filed Under: simon says stamp Tagged With: emboss resist, encouragement card, fab flower, flower frenzy, ink blending, neon, ombré stamping, sending good vibes

Fiesta Blends, Custom Embossing, and Emboss Resist with New Simon Says Stamp!

June 30, 2023

This post was sponsored by Simon Says Stamp. Thanks, Simon!

Hi friends! Today, I have a card featuring a super fun technique that I’ve been working with over the last couple of months. Heat embossing is probably one of the things that initially drew me to cardmaking; the magic of watching the crisp, metallic, shiny image meld onto the paper was intoxicating, and the arrival of the MISTI ensured that the embossing was perfect nearly every time. Well, my project today uses the MISTI to our advantage by creating a custom colored embossed image, perfect for use with the emboss/resist technique. Let’s get started with the details!

I began by stamping the beautiful frame image from the new new Folksy Cats stamp set from the Simon Says Stamp Out Of This World release onto a panel of plain white cardstock using the Lemonade ink from the new Pawsitively Saturated Yellow Sunsets Ink Cubes. Keeping my cardstock panel in place, I used my MISTI to again stamp the image directly over the top of the yellow stamped image using clear embossing ink, then embossed it with clear embossing powder. I used the same technique for the sentiment, but this time I stamped the top half of the sentiment using a darker orange, lightly tapped the edge with my microfiber cloth to soften the edge before stamping, then stamped the bottom portion with a lighter orange ink, again tapping the edge with my microfiber cloth to soften the edges. Using the microfiber cloth helps the two colors blend seamlessly together, creating a smooth ombré. I covered the sentiment with clear embossing powder again.

Once I had done all of the embossing, I had a perfect canvas to do some emboss/resist technique! The clear embossing powder resists the ink laid over the top, allowing the ink to saturate the clean cardstock while leaving the embossed area clean. I used my favorite “fiesta” combination for the blended background, blending Melon and Sherbet inks from the Yellow Sunsets Ink Cubes and adding Rose Pawsitively Saturated ink around the edges for extra contrast. I wiped the embossed areas clean with my microfiber cloth. The pale yellow floral frame resists the darker ink colors thanks to the clear embossing powder!

I kept the rest of the card very simple, adding only some super sparkly gems to the centers of some of the flowers.

This technique is a great way to fake that you have a rainbow of embossing powders available. All you need is your MISTI and your favorite shades of ink, clear embossing ink, and clear embossing powder! (I am hoping to have a video with this technique very soon.) Thanks so much for stopping by today, and have a marvelous day!


Filed Under: simon says stamp Tagged With: emboss resist, folksy cats, ink blending, pawsitively saturated ink

Shimmer and shine with Shimmerz paints!

June 29, 2017

Good morning! I’m back today with my final installment of my mini series focusing on Shimmerz Paints! Today, I used them in a totally different way, but I think that this is definitely my favorite card from this week! Let’s get started!

I began by heat embossing the main floral image from the Simon Says Stamp June card kit: Floral Bliss. This stamp set is so pretty, and I love that it comes with individual blooms as well as the floral spray! After heat embossing, I used Blue Grass and Sugar Plum Shimmerz, Gold Glimmer Blingz, Pining For You and Berry Hot Creameez, and Blue My Mind, Gosh Garnet, and Pink A Boo Inklingz to color the blooms and foliage. I fussy cut it out and turned my attention to the background.

For the background, I wanted to try something a little bit different. I started by heat embossing the beautiful Emma background from Simon Say Stamp onto watercolor paper using clear detail embossing powder. Next, I used my Ranger Mini Mister bottles, an eye dropper, and Gold Glimmer, Hi Ho Silver, and Orchid-stra Blingz to create my own custom shimmer mists! I simply dropped the color into the mister bottle with an old medicine dropper that I’d cleaned out, then filled the rest up with water and gave it a good shake.

I made three different shimmer mists with these liquid paints. Love finding multiple uses for one product! And it didn’t take very much of the paint itself to add plenty of color to my Mini Misters. You could make them even more concentrated by adding more pigment.

I spritzed my lacy background several times, sometimes blotting up areas where the pigment became too concentrated, then used a paper towel to rub off the spots on the embossing after everything had dried sufficiently.

To finish the card, I first heat embossed a sentiment from Simon Says Stamp’s Big Scripty Greetings onto some heavyweight vellum using silver embossing powder, then flagged the end. I die cut a stitched square frame using some silver glitter card stock, then die cut the shimmery background using the largest square from The Ton’s Double Stitched Square dies. I trimmed the floral spray down, then adhered the main spray to the edge of the frame using dimensional adhesive, then adhered the remaining foliage underneath with liquid adhesive.

The final step was to add some sequins for even more sparkle!

And that’s it! My final installment into my exploration into these fabulous little pots of paint. I love how versatile they are! If you haven’t checked them out before, be sure to head over to the Shimmerz website and take a look! They have so many gorgeous colors and effects.

I will be back Saturday for July’s The Ton Challenge blog post. Have a marvelous day, friends!!!

Filed Under: simon says stamp Tagged With: emboss resist, shimmerz, watercolor

Primary Sidebar

  • Facebook
  • Instagram
  • Pinterest
  • YouTube

Favorite Shops

Secondary Sidebar

Subscribe

Enter your email address to subscribe to this blog and receive notifications of new posts by email.

Instagram
Something is wrong.
Instagram token error.
Follow
Load More

Archives

Tags

3D embossing folder alcohol markers better press birthday birthday card blog hop card kit christmas christmas card christmas tag colored pencil copic copic coloring Daniel Smith die cutting embossing folder embroidery felt giveaway holiday holiday card hot foil ink blending karin brushmarker pro layered stencil masculine my monthly hero new release no line coloring no line watercolor OLO marker olo markers original illustration pawsitively saturated rainbow shaker card slimline stamping stamptember stencil thank you thinking of you valentine's day video watercolor

Popular Posts

Simon Says Stamp Joy For You Blog Hop- Day 1!
Simon Says Stamp Joy For You Release-Now Available!
Frozen Fractals All Around with New Simon Says Stamp Joy For You Release!
Shaped Holiday Shaker Card with New Simon Says Stamp Jolly Season Card Kit of the Month!
Holiday Postage with New Simon Says Stamp!
Simon Says Stamp Glory to the Newborn King Holiday Kit-Part II!
Pinkfresh Studio 5th Birthday!
Altenew Build A Flower: Fuchsia Blog Hop+Giveway!
Holiday Joy in Pink and Green with New Simon Says Stamp DieCember!
Honey Bee Stamps September Release Blog Hop!

Disclosure

Some affiliate links are used in my posts. This means that, should you click on one of my links and purchase something from that company, I will receive a small portion of the sale at no extra cost to you. I use the money earned from these sales to help maintain my blog. I so appreciate you visiting and, if you do choose to use one of my affiliate links, thank you so much for your support!
Copyright © 2026 ·Brunch Pro Theme · Genesis Framework by StudioPress · WordPress · Log in
Loading Comments...