• Skip to main content
  • Skip to primary sidebar
  • Skip to secondary sidebar

Sixth Street Sundries

Emily Midgett

  • Home
  • About Me
  • Contact
  • OLO Marker Color Swatch Chart
  • Shop

flourishing bloom

Bridgerton Week Finale: Penelope’s Emerald and Copper Dress!

July 12, 2024

This post was sponsored by Simon Says Stamp. Thanks, Simon!

Hi friends! I am back with my final installment for Bridgerton Week! If you’ve watched the most recent season of Bridgerton, you will have seen the utterly magnificent dress that main character Penelope wears after her “glow up,” a stunning emerald gown with coppery accents that beautifully complement her vibrant auburn hair. I adore the combination of deep emerald green with metallics, particularly with copper and rose gold, so thought I would use that incredible dress as my inspiration starting point for these two cards! Let’s get started with the details.

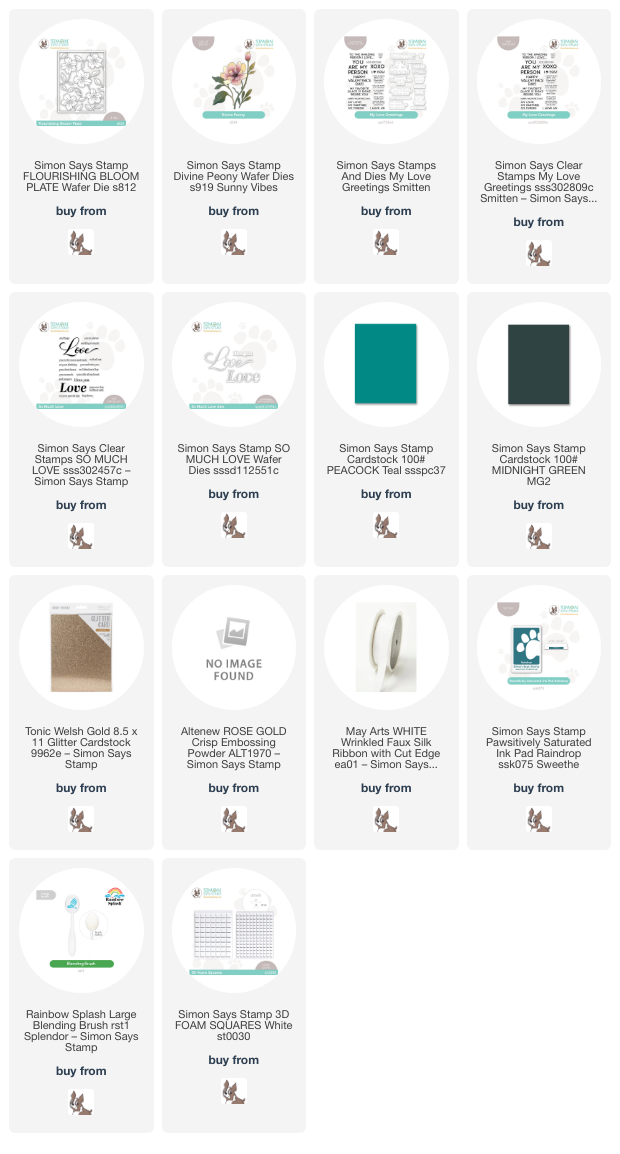
To start, I selected some lush green cardstocks from the Simon Says Stamp line: Peacock Teal and Midnight Green, accented with a beautiful coppery rose gold glitter cardstock. The combination of these three shades of cardstock created an increidbly striking color palette for these intense cards!

I wanted to emulate some more of that gorgeous embroidery that is so prevalent on the clothing in Bridgerton and from the Regency period, and I thought that a metallic floral pattern would definitely have been apropos for the time period, especially on that elegant emerald satin and netting! I started by die cutting the older-but-still-exquisite Flourishing Bloom Plate from some Welsh Gold glitter cardstock. The plate is detailed, but still die cut beautifully from this sturdy glitter cardstock. I then trimmed down an A2 panel of Simon Says Stamp Peacock Teal cardstock and used a blending brush to blend Raindrop Pawsitively Saturated Ink around the edge of the card front, creating a bit of a vignette in the background. The deep, intense background helps that shimmery coppery rose gold die cut pop beautifully! I adhered the die cut to the blended background with some liquid adhesive.

For the greeting, I heat embossed some sentiments from the So Much Love stamp set onto some Midnight Green cardstock using Altenew Rose Gold embossing powder. The contrast between these two colors is just incredible; the sentiment practically glows on the deep green cardstock! I die cut the large “love” sentiment with the coordinating die and trimmed the strip with my trimmer, adhering them to the center of the floral card front with some foam squares. I accented the centers of the flowers with some shimmering gems, then created a custom-colored bow by using a coordinating alcohol marker to dye a length of faux silk ribbon, tucking it beneath the greeting with some strong liquid adhesive.

For my second project, I maintained the same color palette with the deep emerald greens and sparkling coppery gold accents, this time creating a whimsical teal peony with the Divine Peony die. I die cut this peony die three times: once each from Simon Says Stamp Peacock Teal and Midnight Green cardstock and once from Welsh Gold glitter cardstock, then used a combination of all three colors to create the lush bouquet. Before adhering my bouquet to the Peacock Teal card front, I used a blending brush to blend some Raindrop Pawsitively Saturated Ink in the center of the A2 card front, then splattered the blended area with some coordinating glittery watercolors.

For the greeting, I stamped and embossed a sentiment from My Love Greetings using Altenew Rose Gold embossing powder on some more Peacock Teal cardstock, which I die cut with the coordinating die. I used liquid and foam adhesive to add the bouquet to my card front, adding varying heights to keep things interesting, then used a double layer of foam adhesive to add the sentiment die cut. Finally, I added a few shimmering coordinating gems and a coordinating rose gold metallic twine bow!

Well, that’s all for my projects today! I hope you’ve enjoyed delving into the world of Bridgerton with me; I think these cards today are some of my favorite cards that I’ve made recently! Thanks so much for stopping by today, and be sure to come back next week for Christmas in July! Have a marvelous day!
Filed Under: simon says stamp Tagged With: bridgerton, die cutting, divine peony, flourishing bloom, my love greetings, so much love

Matching Copics to Colored Cardstock-Alcohol Marker “Glazing”!

July 17, 2023

This post was sponsored by Simon Says Stamp. Thanks Simon!

Hi friends! With as much work as I’ve been doing in my craft room lately, I’ve been trying to keep things interesting with different color schemes and techniques. I love cornflower blue, and I love all variations of aqua/pool, but the new Tidepool color from Concord and 9th’s 2023 color release has absolutely won my heart, so for today’s post I wanted to combine the two colors to create a pair of elegant floral cards. I have created a collection of color combinations for my alcohol markers to use as a quick reference when I am searching for a color match or looking at different color combinations, but I couldn’t find just the right match for the gorgeous and unique Tidepool. No matter; I pulled out my Hex Chart and started swatching different combinations of colors that were a close match to the beautiful blueish-green cardstock.

When watercoloring, one can use a technique called “glazing” to add a subtle wash of diluted color over a dry, previously-watercolored area. This addition can completely change the overall feel of the color, brightening or muting the area, depending on the color of the glaze. I frequently use this technique when watercoloring large florals to add reflections of the surrounding colors and to add interest to the image. When searching for an exact match for Tidepool amongst my Copic markers, every combination that I tried was either too blue or too green. After trying a dozen different combinations, I settled on BG78, 75, and 72, which are lovely shades of a muted gray-turquoise, adding a “glaze” of G00 to brighten up the green.

For my first card, I die cut the Flourishing Blooms Plate from some Hammermill cardstock. This beautiful floral cover plate is totally stunning cut from basically any cardstock; I used it HERE with metallic cardstock and pale blush cardstock, adding a bit of interest with some ink blending. Today, I wanted to go more in depth with some coloring, adding dimension and shape to the flat die cuts with some alcohol markers. I used the debossed lines on the floral die cuts to determine which petals were on top vs. tucked beneath. The shape of the flowers reminds me of forget-me-nots, so I used Copics B39, 37, 34, and 32 to create beautiful blue flowers. I used the BG78, 75, 72 with a G00 glaze for all of the foliage, then added some sparkling handmade gold watercolor to the centers of the flowers. I absolutely love the finished product!

To coordinate with the “Tidepool” Copic colored foliage, I trimmed down a panel of Tidepool cardstock to A2 size, then blended some Tidepool ink around the edges to add interest to the background. I also splattered the background with some of the same sparkling golden watercolors that I used on the flower centers. (I hope you’re not sick of watercolor splatters-I just adore the texture and interest that they provide to a colorful background!)

To finish off the card, I die cut the Bold Thanks die from Simon Says Stamp three times from deep navy blue cardstock, adhering them together to create a dimensional die cut greeting. I adhered that to a strip of heavyweight vellum and fussy cutting around it, leaving a border around the die cut. This vellum border helps differentiate the sentiment from the rest of the similar textures on the card. I popped up the colored floral cover plate die cut and sentiment die cut on the blended Tidepool background using foam adhesive.The final touch was a few shimmering iridescent blue pearls!

My second card features the same color combination and Copic colors, this time using the Etched Primrose Blooms and Windswept Leaves dies for the focal point. I die cut the large Etched Primrose Blooms and Windswept Leaves dies again from white cardstock, then used the same Copic combinations to add lots of depth and color to the plain die cuts.

For the background, I ran a panel of Tidepool cardstock through my Platinum 6 machine using the Exotic Vines Embossing Folder. The elegant detail on this folder is spectacular; to enhance it, I first trimmed the panel down to smaller than A2 size, then blended Tidepool ink around the edges. I also lightly swiped the Antique Gold pigment inkpad from Altenew onto the raised areas of the embossed panel, which adds a gilded effect to the background. It almost reminds me of the patina on the Statue of Liberty! I matted the panel with an ever-so-slightly larger panel of matte gold cardstock to add a gold frame and coordinate with the gold accents on the card. To coordinate with my blue flowers, I mounted the embossed panel with the gold frame on a panel of Blueberry cardstock from Concord and 9th.

For the greeting, I heat embossed the newer Elegantly Modern Hot Foil Plate + Dies from Simon Says Stamp, creating both the positive sentiment image and the negative by using the leftover foil panel with the Pinkfresh Studio Solid Hot Foil Plate. I die cut the sentiments with the coordinating die, selecting one and saving the rest for a rainy day. I lightly blended more Tidepool ink over the white areas on the foiled sentiment to coordinate with the rest of my card, then arranged the flowers and foliage on the card front, tucking the sentiment in the corner with a double layer of foam adhesive. The final touch was a few more shimmering iridescent blue pearls.

Well, that’s all for my projects today! I am so excited to try color glazing with my Copics to match even more of my (copious) colored cardstock stash! I hope you will give it a try, too. Thanks so much for stopping by, and have a marvelous day!

Filed Under: simon says stamp Tagged With: bold thanks, colored cardstock, copic, copic coloring, copic glazing, elegantly modern greetings, etched primrose, exotic vines embossing folder, flourishing bloom, solid hot foil plate, tidepool, windswept leaves

Simon Says Stamp Hugs & Kisses Release Blog Hop + Giveaway!

January 20, 2023

Hi there! I am thrilled to be a stop on Day 1 of the Hugs & Kisses Release Blog Hop! You should have arrived here from Alberto Gava, and your next stop is Vicky Papaioannou. You can also start back at the beginning at the Simon Says Stamp Blog. After a little holiday break, we are celebrating both the Simon Says Stamp Hugs release from December 2022 and the brand new Kisses release from January 2023! Both of these releases are love-themed, and many of the products work beautifully together. I have two blushing projects to share with you today, so let’s get started with the details!

Every few weeks, we get little glimpses of springtime with some lovely mild temperatures, and I was channeling those memories of pleasant spring days when I worked on these projects. I realized after I created them that the color palette was very similar to my projects from the November Holiday Sparkle Blog Hop, this time with a floral springtime vibe! I can’t seem to get enough of that blushy cardstock paired with metallic accents, and both of these cards feature that soft pink, this time paired with the new Champagne Matte Cardstock and a ton of new and old goodies!

My first card features the Heart Panes die from the Hugs release, die cut from the new Champagne Matte Cardstock. The heart opening in the center is the perfect size to fit the “sending love” greeting from the new From the Heart Messages stamp set. I cut a piece of blush colored cardstock down to A2 size, then arranged my champagne cover plate die cut over the top of the blush background and placed the entire panel inside my MISTI. I placed the stamp from the From the Heart Messages set in the center and closed the door, then removed the die cut.

I heat embossed the greeting using Metallic Platinum Sparkle embossing powder, which was a near-perfect match for the Champagne Matte Cardstock. After I had embossed the greeting in the center, I lightly blended some Cheeky ink around the edges to add a little extra dimension to the background. I adhered the cover plate die over the top of the blended, embossed background panel.

To accent the heart, I wanted to add some simple die cut flowers from that same blush cardstock. I die cut the Etched Magnolia Blossom and Blossom Vine dies from the blush cardstock, then die cut some foliage from the leftover panes of Champagne cardstock using the Privet Branch die. I lightly blended some more Cheeky ink around the edges of the die cut magnolia pieces using a small blending brush and adhered the pieces using both liquid and foam adhesive for lots of dimension. I arranged the die cuts in a swag around the foil heart and sentiment, adding a sentiment strip and some Champagne Glitter Drops for some more sparkle!

My second card features the same color scheme, this time using the Flourishing Bloom cover plate die to create a lovely floral background! I began with another A2 panel of the blush cardstock, blended around the edges with Cheeky ink to add some extra interest to the background. I then die cut the Flourishing Bloom cover plate die from the Champagne Matte Cardstock and mounted it on the blush background using liquid adhesive.

To accent the foiled foliage, I die cut the Flourishing Bloom cover plate from another panel of the blush cardstock, then used my sharp scissors to trim each of the individual flowers off of the large die cut. I used the same small blending brush with Cheeky ink to add some extra dimension to the blooms. This helps them pop from the background a bit! I adhered all of the die cut blooms to the floral background using foam tape to help give them even more interest and dimension.

For the greeting, I used the brand new Hi There sentiment die set. I die cut the background layer from some heavyweight vellum, then adhered the detail layer cut from some Champagne Matte Cardstock. I popped the sentiment up with some thin strips of foam tape, hidden behind the solid portion of the die cuts to keep it from showing through the semi-transparent vellum! I also added some Champagne Glitter Drops to the center of the flowers. Lots of height and texture on this card’s background!

Well, that’s all for my projects today! Now for some fun giveaways and freebie information!

Simon Says Stamp is giving away a $25 coupon to each stop on the hop. The winner will be selected from the comments and announced on the Simon Says Stamp blog on January 25, 2023! To be entered to win, simply leave a comment on each blog across the hop. The more comments you leave, the more chances you have to win!

Simon Says Stamp is also adding a sweet little freebie with purchase. Simply add code RBW23 at checkout to receive the Rainbow 3×4 stamp set with your order!

Your next stop is Vicky Papaioannou Thanks so much for stopping by today, and happy hopping!

Filed Under: simon says stamp Tagged With: blossom vine, champagne matte cardstock, etched magnolia, flourishing bloom, from the heart messages, heart panes cover plate, hi there, ink blending, privet branch

Primary Sidebar

  • Facebook
  • Instagram
  • Pinterest
  • YouTube

Favorite Shops

Secondary Sidebar

Subscribe

Enter your email address to subscribe to this blog and receive notifications of new posts by email.

Instagram
Something is wrong.
Instagram token error.
Follow
Load More

Archives

Tags

3D embossing folder alcohol markers better press birthday birthday card blog hop card kit christmas christmas card christmas tag colored pencil copic copic coloring Daniel Smith die cutting embossing folder embroidery felt giveaway holiday holiday card hot foil ink blending karin brushmarker pro layered stencil masculine my monthly hero new release no line coloring no line watercolor OLO marker olo markers original illustration pawsitively saturated rainbow shaker card slimline stamping stamptember stencil thank you thinking of you valentine's day video watercolor

Popular Posts

Simon Says Stamp Joy For You Blog Hop- Day 1!
Simon Says Stamp Joy For You Release-Now Available!
Frozen Fractals All Around with New Simon Says Stamp Joy For You Release!
Shaped Holiday Shaker Card with New Simon Says Stamp Jolly Season Card Kit of the Month!
Holiday Postage with New Simon Says Stamp!
Simon Says Stamp Glory to the Newborn King Holiday Kit-Part II!
Pinkfresh Studio 5th Birthday!
Altenew Build A Flower: Fuchsia Blog Hop+Giveway!
Holiday Joy in Pink and Green with New Simon Says Stamp DieCember!
Honey Bee Stamps September Release Blog Hop!

Disclosure

Some affiliate links are used in my posts. This means that, should you click on one of my links and purchase something from that company, I will receive a small portion of the sale at no extra cost to you. I use the money earned from these sales to help maintain my blog. I so appreciate you visiting and, if you do choose to use one of my affiliate links, thank you so much for your support!
Copyright © 2026 ·Brunch Pro Theme · Genesis Framework by StudioPress · WordPress · Log in
Loading Comments...