• Skip to main content
  • Skip to primary sidebar
  • Skip to secondary sidebar

Sixth Street Sundries

Emily Midgett

  • Home
  • About Me
  • Contact
  • OLO Marker Color Swatch Chart
  • Shop

glitter foam

Using Leftovers: Nordic Christmas on a Line with Simon Says Stamp!

October 29, 2025

This post was sponsored by Simon Says Stamp. Thanks, Simon!

Hi friends! I have a project to share with you today using silvery glitter foam die cuts leftover from THIS project using goodies from the  Simon Says Stamp Sugar and Spice release (which you can check out HERE). I love it when a single die has enough of an impact to create multiple projects!! Versatility is key. The Wintertime Celebration Plate negative die cut definitely has a Nordic feel to it, with its collage of simplistic holiday imagery, but the positive die cuts that are created with the same single die cut work beautifully to create visually simplistic, elegant projects like this one. Let’s get started with the details on my project!

*I have gathered links to all of the products used at the bottom of the post for your convenience, using affiliate links. Thank you for shopping with my links! I truly appreciate your support for my work!*

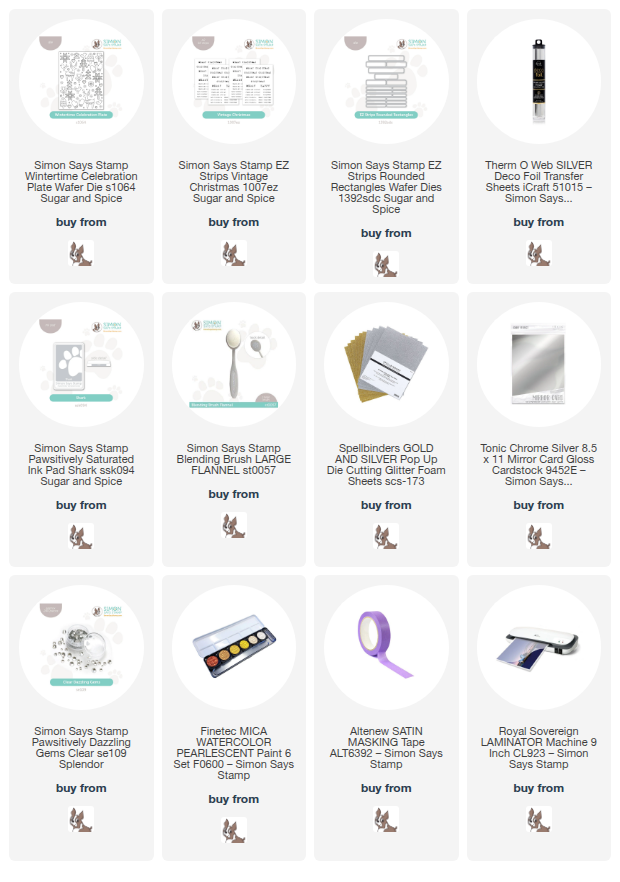
To begin, I selected the standalone trees and a sweet little deer from the leftover silver glitter foam positive die cuts that were created using the Wintertime Celebration Plate. Using the glitter foam allows you to add dimension to your die cut projects without the fuss of additional foam adhesive and those little bits of release paper floating all over your desk! I wanted to create a clean horizon line upon which my images could stand, so I used some masking tape and some computer paper to mask off the bottom portion of my white A2 card front, then used a blending brush to blend Shark Pawsitively Saturated Ink. While the mask was still in place, I splattered some silvery glitter watercolors over the blended area to create some snowy imagery.

Once my splatters had dried, I arranged the glitter foam die cuts on the line in a symmetrical pattern with the deer in the center surrounded by a glittering forest of trees. I adhered the images with liquid adhesive easily, quickly adding dimension to my project with very minimal effort!

For the greeting, I die cut the new EZ Strips Vintage Christmas sentiment cards using the new EZ Strips Rounded Rectangles, creating many sentiment strips with one quick run through my die cutting machine. I wanted to maintain the icy silver and white color palette, so used some silver toner foil and my laminator to add shining silver foil to the sentiment strip. I popped the strip up beneath the silver glitter images with some thin foam adhesive, then added a couple of Clear Pawsitively Dazzling Gems on either side, maintaining the clean symmetry of the glitter die cuts throughout the rest of the card. Finally, I added two strips of silver foil cardstock beneath the sentiment, filling in the white gap beneath the main focal point and adding another final element of silvery shine!

Well, that’s all for my project today! Isn’t it great when you can create two completely unique cards with one set of die cuts? I never tire of the versatility of standalone die cuts!! Thanks so much for stopping by today, and have a marvelous day!
Filed Under: simon says stamp Tagged With: christmas card, die cutting, ez strips rounded rectangles, glitter foam, holiday card, laminator, toner foil, wintertime celebration

Nordic Sky Christmas Blessings with Simon Says Stamp!

October 27, 2025

This post was sponsored by Simon Says Stamp. Thanks, Simon!

Hi friends! I have some unusual holiday inspiration to share with you today, featuring an interesting combination of colors designed to evoke an icy winter’s sky! I loved the Nordic aesthetic of the new Wintertime Celebration Plate from the  Simon Says Stamp Sugar and Spice release (which you can check out HERE), as well as the ability to use both the positive and negative die cuts for your projects. I used an interesting combination of ink colors with some sparkling glitter foam to create this unique holiday card. Let’s get started on the details!

*I have gathered links to all of the products used at the bottom of the post for your convenience, using affiliate links. Thank you for shopping with my links! I truly appreciate your support for my work!*

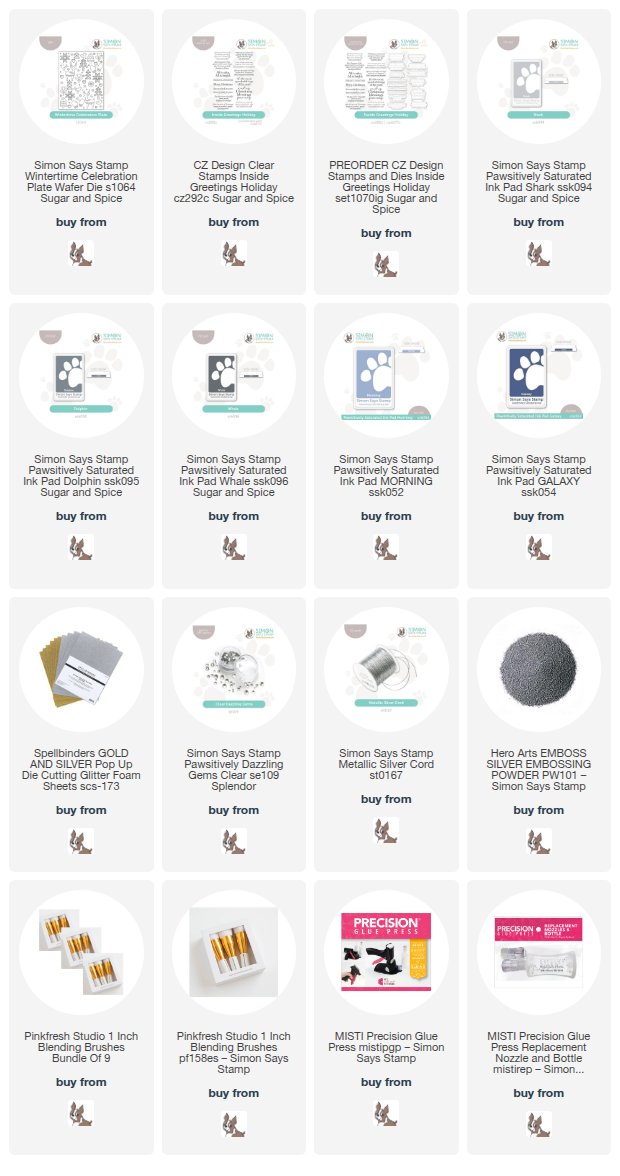
To begin my project, I used blending brushes to blend Pawsitively Saturated Inks in shades of Morning, Shark, Dolphin, Galaxy, and Whale, creating the icy blues and grays of a wintertime dawn. Mixing blue and gray ink blending was not on my color palette bingo card, but I absolutely love the final result! I did go over the A2 panel twice with each ink, making sure that each color blended seamlessly into the next using the Pinkfresh Studio 1″ Blending Brushes.

Next, it was time to up the sparkle factor for this project. I die cut the Wintertime Celebration Plate from silver glitter foam, creating both positive and negative sparkling die cuts with one pass through my die cutting machine! (Be sure to save those positive die cuts, too!) I love how the use of glitter foam adds such texture and height without adding tons of extra bulk or having to fuss with tiny pieces of foam adhesive release paper. A little liquid glue and you’re ready to go! Side note: I do recommend liquid glue over other types of adhesive simply because the foam can be finicky with tape. The MISTI Precision Glue Press is perfect for this project with it’s needle-nose nozzle, and you can fill the extra bottles with your favorite liquid adhesive! I have 4 different bottles with four different types of adhesive that I switch out depending on the project!

For the greeting, I kept things simple, heat embossing a poignant message from Inside Greetings Holiday onto white cardstock using silver embossing powder, then die cutting the finished sentiment with it’s coordinating die. I used residual ink left on my blending brushes to add some subtle coordinating color to the sentiment die cut, then popped it up on my card front using a double layer of foam adhesive so that it had a bit of extra height from the foam cover plate die cut. I addd a few sparkling Clear Pawsitively Dazzling Gems and a silver twine bow for one last touch of sparkle!

Well, that’s all for my project today! I know that blue and gray aren’t traditional holiday colors, but the Nordic imagery works so well with them, I think. Do you prefer traditional holiday colors or are you loving the non-traditional holiday colors that are gaining in popularity? I love them all! Thanks so much for stopping by today, and have a marvelous day!

Filed Under: simon says stamp Tagged With: christmas card, die cutting, glitter foam, holiday card, ink blending, sugar and spice, wintertime celebration plate

Childhood Inspiration for Christmas with Spellbinders!

July 15, 2023

Hi friends! I have some more inspiration for you today using the new  De-Lightful Christmas Collection from the  July 2023 Spellbinders Holiday Release. Earlier this week, I posted some super saturated inspiration with a more traditional color scheme of intense, vibrant red and accents of green, but today my inspiration comes from my childhood. My mom had a couple of different themes for our Christmas trees when I was growing up, ranging from the more traditional hodgepodge of handmade and hand-me-down ornaments with colorful lights to a sophisticated and coordinated Victorian tree, complete with aqua, pink, gold, and pearl color scheme-and even pink lights! I channeled that tree when I was creating these two cards, so let’s get started with the details.

To start, I pulled out several different color elements that I wanted to incorporate into my projects, including Pink Lemonade and Sea Glass cardstock from Concord and 9th, as well as Pink Lemonade, Sea Glass, and Juniper inks, also from Concord and 9th.

For my first card, I began by hot foiling the beautiful Glimmer Holly Background on some Hammermill cardstock (super smooth and my preferred white cardstock for basically everything) using Satin Rose Gold Foil from Spellbinders. This background is so beautifully detailed, so full and rich, that it could easily stand on its own. I can’t wait to try adding watercoloring or alcohol markers!

For this card, though, I used the Layered Glimmer Holly Stencil Set with Pink Lemonade, Sea Glass, and Juniper inks from Concord and 9th, increasing the intensity of the Juniper ink for the holly leaves and decreasing it for the little spruce sprigs to get multiple colors from just one ink pad! The Layered Glimmer Holly Stencils are designed to be a bit stylized, leaving some of the images without color, some completely colored, and some with bare spots to add some highlights to the images. Such a unique look without compromising the beautiful design in the slightest! I trimmed down the full background panel and added a couple of strips of Pink Lemonade and Sea Glass cardstock to accent the colors in the stenciled panel.

The background is so lovely that I kept the card itself very simple so as to allow the background to be a main point of focus. I hot foiled one of the large sentiments from A Merry Little Christmas Sentiments using Satin Rose Gold Foil and die cut it with the coordinating die. I popped up the greeting using some foam adhesive, orienting it over the seam of the colored cardstock. The final touch was to add a few Aura AB gems for some sparkle. A simple card, but so effective!

My second card features the gorgeously detailed Poinsettia Bloom Dies. I began by die cutting the Poinsettia Bloom Dies twice from white cardstock. I removed each individual piece from the die cut and used a small blending brush to lightly blend some Pink Lemonade ink, concentrating the darkest blending towards the center of the flower. Once I had finished blending each piece, I die cut the solid outline piece from some heavyweight vellum cardstock and adhered the super detailed piece from the top layer using liquid adhesive. I then placed each blended petal in it’s appropriate spot using liquid adhesive. A bit fiddly, but replacing each piece honestly went a lot more quickly than you would think!

For the background, I ran an A2 panel of Pink Lemonade cardstock through my Platinum 6 using the Holly & Foliage 3D Embossing Folder . My matchy-matchy-loving heart adores that each element from the De-Lightful Christmas Collection coordinates perfectly together! To add a little interest to the background, I also blended some Pink Lemonade ink around the edges of the embossed panel, giving it just a touch more depth and dimension.

I popped up the blended poinsettia die cut using some foam adhesive, then added a few sprigs of pine cut using the Christmas Blooms Dies from White Glitter Foam. I love adding little individual botanical die cuts to bouquets like this; it helps to fill out the bouquets and direct your eye to the sentiment, because you can orient the direction of the bouquet based on where you place the additional sprigs. For the greeting, I used another hot foiled sentiment from the A Merry Little Christmas Sentiments using Satin Rose Gold Foil. I popped it up using a double layer of foam tape to give it a little extra height from the poinsettia. The final touch was a few more sparkling Aura AB gems!

Well, that’s all for these projects!

One last thing: the Christmas In July sale from Spellbinders is going on through July 16, and there are tons of stunning holiday products and essentials on sale for up to 50% off! (Click HERE to check it out!)

I have lots more to share with you using these beautiful new products from Spellbinders, so be sure to check back for more holiday inspiration! Thanks so much for stopping by today, and Merry Christmas in July!

Filed Under: spellbinders Tagged With: a merry little christmas, christmas, christmas blooms, christmas in july, glimmer holly background, glitter foam, holiday card, holly & foliage embossing folder, hot foil, layered stencils, poinsettia bloom

Simon Says Stamp Be Creative Blog Hop-Day 2!

February 18, 2023

Hi friends! I’m super excited to be a part of the Simon Says Stamp Be Creative Blog Hop on Day 2! You can check out Day 1 HERE. You should have arrived here from Heather Ruwe, and your next stop is Lea Lawson. You can also head back to the Simon Says Stamp Blog to see the full hop list. This month’s Be Creative release is full of a huge variety of fun new products, and I have two projects to share with you featuring the new goodies, so let’s get started with the details.

My first card features a clean and simple design created with the new Vitamin Sea stamp set (I have a more involved card that I shared earlier this week HERE on my blog). I stamped the mermaid lounging on a rock from Vitamin Sea using some Intens-ified Black ink from Hero Arts, then used my Copic markers to add color to the images. I used the coordinating dies to cut the images out, trimming off the water around the rock to simplify the look.

I wanted to create a window behind my pensive mermaid with a colorful sky background, so I die cut a circle from an A2 sized card panel using the Thin Frames dies. On a second piece of A2 cardstock, I lined up the two panels and then used a pencil to lightly trace the window opening so that I would know where to do do my ink blending. I then used blending brushes with the Horizon stencil to blend Taffy, Iris, and Galaxy inks and create a luscious sunset background. I used some of the bird stamps in the Vitamin Sea stamp set to add some flying birds onto the cloudy background. I then adhered the A2 circle frame with some foam tape and the thin frame (left over from die cutting the large frame) with some liquid adhesive.

I popped up the mermaid with a double layer of foam tape to help her pop from the background, then stamped a greeting from Vitamin Sea using black ink and used the coordinating dies to cut it out, popping it up with another double layer of foam tape. I love the extra dimension that the foam tape adds to the different layers! Keeps this relatively simple card from looking boring, in my opinion.

My second card is an homage to Lisa Frank! Remember the Lisa Frank trapper keepers, pencils, notebooks, stickers, etc that we were obsessed with as kids? Well, I couldn’t resist using the Animal Print stencils with several of my favorite Paws-itively Saturated inks to create a fun, colorful Lisa Frank-inspired background to go with the new Simply Fabulous sentiment die! I started by blending Rose, Amethyst, Iris, Cadette, and Lucky inks on the diagonal on an A2 panel of cardstock.

Next, I placed the blended panel in the center of the new Stamp & Stencil Mat and used the sticky area around the mat on the edges of the panel to place the Animal Print stencil and keep it perfectly in place while I blended black ink over the top of the stencil, creating my rainbow leopard print background! Having the adhesive all the way around the edge kept my stencil nice and snug against my blended background, helping to create a super crisp stenciled background!

I used black glitter foam from Spellbinders to die cut the outline background from the new Simply Fabulous die, then die cut the detail layer from some silver holographic cardstock. The foam base layer helps to add a bit of height to the sentiment without any extra effort! I added some sentiment strips from the previously-released Spring in my Step, heat embossed in silver on some thin strips of black cardstock. Before I adhered the sentiment pieces, I die cut a black frame using the A2 Thin Frames and adhered it in the corner of the blended card front with liquid adhesive at a jaunty angle. I adhered the sentiment pieces with liquid and foam adhesive, then added a few iridescent gems that matched the rainbow feel of the card!

Well, that’s all for my projects for today! Now, to celebrate the Be Creative release, Simon Says Stamp is giving away a $25 shopping spree to one commenter on each of the hop stops! Simply leave a comment on each hop stop, then check the winners announcement on February 22 to claim your prize.

Simon Says Stamp is also offering a super cute freebie with purchase! Simply enter code ART4U at checkout to receive the Handcrafted With Love stamp set for free.

Your next stop on the hop is Lea Lawson. Thanks so much for stopping by today, and happy hopping!

Filed Under: simon says stamp Tagged With: A2 thin frames, animal print stencil, glitter foam, horizon stencil, leopard print, lisa frank, mermaid, pawsitively saturated, simply fabulous, spring in my step, stamp and stencil mat, thin frames, vitamin sea

The Flower Challenge: Guest Designer

October 4, 2022

Hi there! I’m honored to be back as a guest designer for The Flower Challenge this month. The theme is Use A Sentiment, and so I dug out one of my older finished coloring panels (from a set called Lo How A Rose E’er Blooming) and one of the newer holiday sentiment die sets from Spellbinders: Mix & Match Holiday Greetings. These medium-sized sentiment dies are a great complement to the bold poinsettia flower on my holiday card. Let’s get started with the details!

I had already colored this image using Copic markers for my holiday coloring panel release last year (be sure to subscribe to my blog in the box in the upper left hand corner to be notified about my new coloring panel release later this month!), so I used some sharp scissors to fussy cut the image. It’s already helpfully tucked into the corner, so I just had to carefully cut around the bottom edge of the image.

For the greeting, I die cut the Mix & Match Holiday Greetings “Holiday Hugs” from Red Glitter Foam from Spellbinders. Spellbinders’s Glitter Foam is such a quick (not to mention sparkly!) way to add some quick dimensionality to your sentiment die cuts, and it comes in a huge range of beautiful colors. I find myself reaching for it constantly. If you haven’t checked it out, I encourage you to do so! You can see all wide variety of colors that they have available HERE.

I had a shiny foiled background that I had previously created with the Spellbinders Plaid Tidings hot foil plate and Crimson Stars hot foil tucked into my stash, just waiting for the right project. The red foil matched the red poinsettia perfectly, so I popped up the colored poinsettia corner using some foam tape, tucking a strip of vellum behind. The vellum helps ground the sentiment from the busy, shiny background. I adhered the foam sentiment die cuts using liquid adhesive, then added a few iridescent white pearls for some more shine! This project is quintessentially Christmas, I think!

Well, that’s all for my project today! To celebrate The Flower Challenge’s 6th Birthday, I am donating two sets of coloring panels to the winner of the challenge-winner’s choice! All you have to do to be eligible to win is create a project using the prompt (Use A Sentiment) and some flowers, then upload your project to the inLinkz list. The dates for the new challenge, as well as all of the details, can be found on the The Flower Challenge‘s blog post! Thanks so much for stopping by today, and have a marvelous day!

Filed Under: coloring panels, spellbinders Tagged With: christmas, glitter foam, holiday, hot foil, mix and match holiday greetings, plaid tidings

  • Page 1
  • Page 2
  • Go to Next Page »

Primary Sidebar

  • Facebook
  • Instagram
  • Pinterest
  • YouTube

Favorite Shops

Secondary Sidebar

Subscribe

Enter your email address to subscribe to this blog and receive notifications of new posts by email.

Instagram
Something is wrong.
Instagram token error.
Follow
Load More

Archives

Tags

3D embossing folder alcohol markers better press birthday birthday card blog hop card kit christmas christmas card christmas tag colored pencil copic copic coloring Daniel Smith die cutting embossing folder embroidery felt giveaway holiday holiday card hot foil ink blending karin brushmarker pro layered stencil masculine my monthly hero new release no line coloring no line watercolor OLO marker olo markers original illustration pawsitively saturated rainbow shaker card slimline stamping stamptember stencil thank you thinking of you valentine's day video watercolor

Popular Posts

Simon Says Stamp Sending Cheer Blog Hop- Day 2 + Freebie + Giveaway!
Altenew October 2026 Release Blog Hop + Giveaway!
Rustic Monochromatic Stars for Christmas with Rainbow Splash!
Waffleflower July Release Blog Hop!
Hero Arts Partners Blog Hop: Lawn Fawn!
March 2020 Essentials By Ellen Blog Hop+Giveaway!
December 2018 My Monthly Hero Blog Hop + Giveaway!
The Ton Stamps Summer Release: Day 1
The Ton Anniversary Release: Day 1!
Altenew Paint A Flower: Carnation Blog Hop+Giveaway!

Disclosure

Some affiliate links are used in my posts. This means that, should you click on one of my links and purchase something from that company, I will receive a small portion of the sale at no extra cost to you. I use the money earned from these sales to help maintain my blog. I so appreciate you visiting and, if you do choose to use one of my affiliate links, thank you so much for your support!
Copyright © 2026 ·Brunch Pro Theme · Genesis Framework by StudioPress · WordPress · Log in
Loading Comments...