• Skip to main content
  • Skip to primary sidebar
  • Skip to secondary sidebar

Sixth Street Sundries

Emily Midgett

  • Home
  • About Me
  • Contact
  • OLO Marker Color Swatch Chart
  • Shop

pumpkin

Felted Gourd Wall Hanging with Simon Says Stamp!

October 6, 2026

This post was sponsored by Simon Says Stamp. Thanks, Simon! *I have gathered links to all of the products used at the bottom of the post for your convenience, using affiliate links at no extra cost to you. Thank you for shopping with my links! I truly appreciate your support for my work!*

Hi friends! I am back with another little home decor piece, this time working in a new-ish medium for me: felt! I love the homey warmth that the texture of felt provides, making it exceptionally perfect for use with autumnal and winter images. I love the idea of using papercrafting supplies to create a little door hanger, something easily switched out with each new season and easily customized to match your personal aesthetic. I think that the new Harvest Heirloom die set has lovely clean lines that work beautifully with felt, while also being so elegant. I created this pretty door hanger in some unique fall colors to mimic the end of summer/early autumn colors that we are seeing outside. Let’s get started with the details on my project!

To begin, I wanted to create the canvas upon which I would arrange my die cut images, I cut a warm blue felt background using the new A7 Notched Rectangles. I also die cut another notched rectangle in the same size using heavyweight cardstock, which adds a sturdy back to my door hanger without adding weight to the project! I used felt glue to adhere the pieces together, generously applying glue to the entire piece of felt and then placing the pieces beneath a heavy book to dry. This ensures that the cardstock would dry flat, which was a concern when using such abundance of liquid glue.

While I waited for the base to dry, I die cut the various pieces of the Harvest Heirloom die set, cutting the gourd from peachy felt and the greenery from lime green, pine green, and some metallic copper felt from my stash. When working with delicate images like the greenery, I like to use 100% wool felt, rather than a felt blend, because I find the 100% wool fibers stay intact better than the blends. After the base had dried completely, I began arranging the gourd and greenery on the notched rectangle background, adhering the pieces with liquid felt glue, snipping greenery here and tucking it there to create a custom arrangement. I also added some beautifully iridescent Sunset Tiny Flower Embellishments to fill in some of the bare spots on my arrangement.

Once I had completed the arrangement and allowed it to dry sufficiently, again placing the entire piece beneath that heavy book, I created the hanger using ribbon and Simon Says Stamp’s Antique Brass Eyelets. I used my Crop-A-Dile hole punch to cut holes in the top corners, then added the eyelets, which will keep the holes intact even if the ribbon is handled roughly! I threaded a pretty ribbon through the eyelets and tied it so that it could be hung easily from a door handle or a hook.

Well, that’s all for my project today! I love how warm textures are having such a moment in home decor, and it’s so lovely to be able to follow home trends without having to do invasive (or expensive!) updates. Thanks so much for stopping by today, and have a marvelous day!
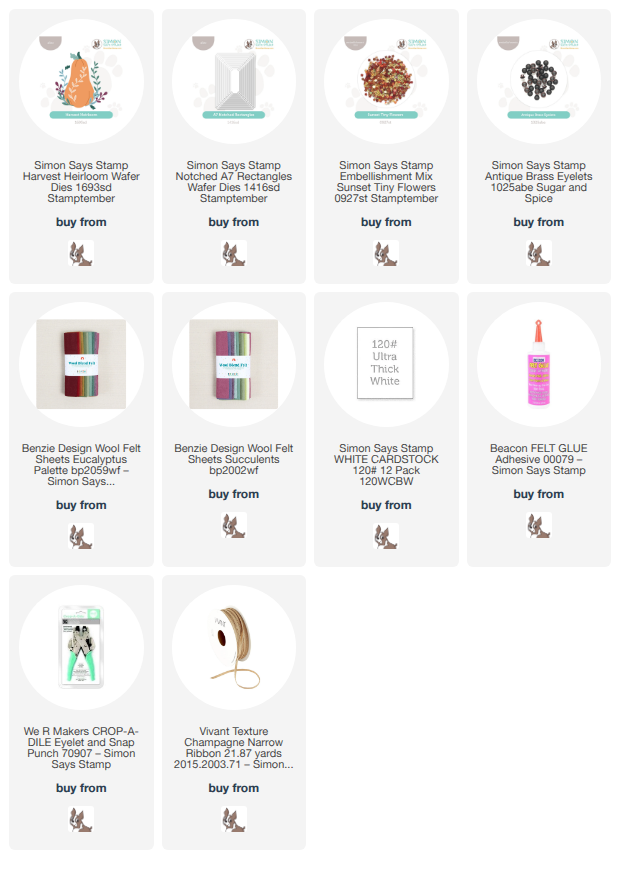
Filed Under: simon says stamp Tagged With: autumn, die cutting, eyelets, fall, gourd, harvest heirloom, home decor, notched A7 rectangles, pumpkin, wall hanging

“Blue” Pumpkins with Simon Says Stamp!

October 29, 2024

This post was sponsored by Simon Says Stamp. Thanks, Simon!

Hi friends! As we wind down on the month of October, I thought I’d share another pumpkin project for you, this time inspired by the recent trip to the pumpkin patch that we took last weekend! I was pleasantly surprised to find a wide variety of pumpkin types in the you-pick fields. Usually, we find the typical dark orange pumpkins, but at this particular pumpkin patch, there were at least 3 different colors, plus gourds and warty pumpkins! I was inspired by the “blue” pumpkins, which actually are more like sage green, for today’s project. In case you haven’t noticed yet, I like pushing the envelope with my color palettes, pairing unique colors with traditional imagery to create unique projects. I paired those “blue” pumpkins with some crisp white and cool silver metallic accents for a unique autumn card! Let’s get started with the details on my project!

*I have linked all of the products used at the bottom of the post for your convenience using affiliate links. Thank you for shopping with my links! I truly appreciate your support for my work!*

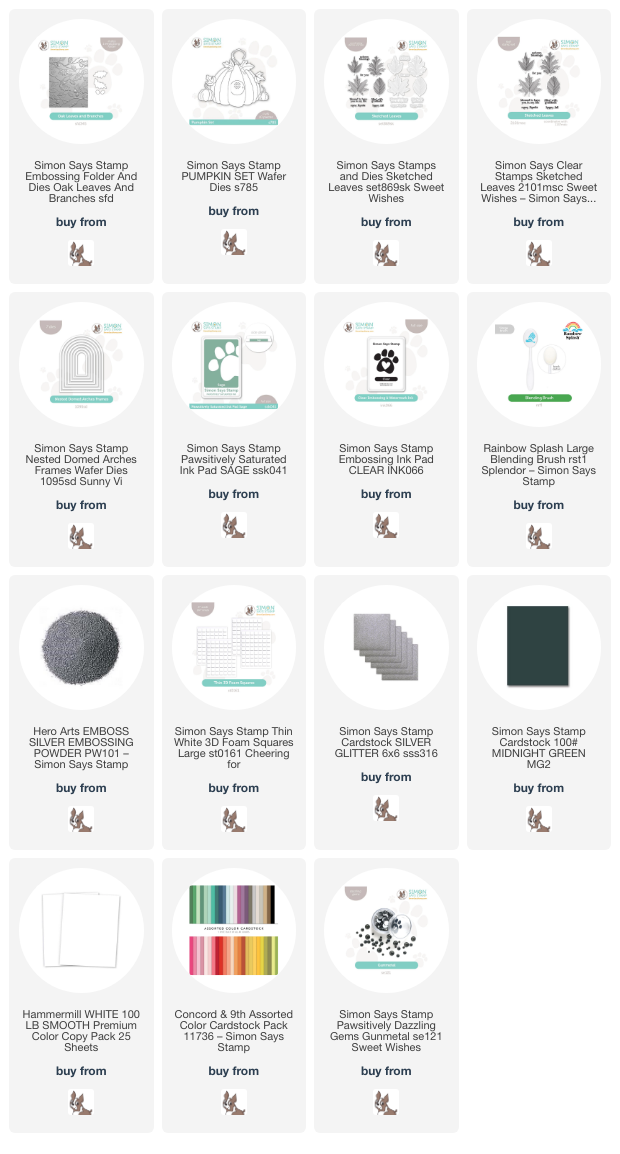
To start, I ran a panel of white cardstock through my die cutting machine using the Oak Leaves & Branches Embossing Folder. I love the somewhat neutral texture that this embossing folder provides behind the pumpkins; it looks just like the horizon behind the pumpkin patch this past weekend with gusts of wind blowing leaves from the trees! I trimmed the panel down a bit and then splattered it with some shimmering glitter watercolors, then adhered the splattered and embossed panel to my full size A2 card front.

For my pumpkins, I die cut the Pumpkin Set dies, cutting the large pumpkin from sage green cardstock, then the details one time each from white cardstock and deep Midnight Green cardstock. (I just love the unique shape of that large pumpkin, don’t you?) I used a blending brush to blend Sage Pawsitively Saturated Ink around the edges of the large pumpkin, then used a super pale gray-green marker from OLO to add some subtle color to the white leaves that I had die cut. I love being able to customize die cuts with alcohol markers or ink blending to create the exact color palette that I have envisioned in my mind’s eye!

After ensuring that my splattered background was completely dry, I die cut a Nested Domed Arches Frame from some silver glitter cardstock and popped it up on my card front with thin strips of thin foam adhesive squares. I arranged the pumpkins on the corner of the frame, allowing the leaves to “climb” up the sides like a real pumpkin vine. I added a silver embossed sentiment from the Sketched Leaves stamp set, tucking it amongst the pumpkin trio with some foam adhesive, then added a smattering of Gunmetal Pawsitively Dazzling Gems to coordinate beautifully with the cool silver metallic accents on the rest of the card.

Well, that’s all for my project today! I have another pumpkin project to share with you that I worked on last week using my new favorite thing: felt. I have a few more finishing touches to add to it, but I am hoping to share it on Halloween. If you love felt and the fun texture it adds to your projects, feel free to come back and take a peek! Thanks so much for stopping by today, and have a marvelous day!

Filed Under: simon says stamp Tagged With: autumn, autumn blessings, die cutting, fall, ink blending, nested domed arches frames, oak leaves and branches, pumpkin, pumpkin set, sketched leaves, thanks

Pastel October Pumpkins with Simon Says Stamp!

October 3, 2024

This post was sponsored by Simon Says Stamp. Thanks, Simon!

Hi friends! I thought it appropriate to usher in the month of October with a pretty pumpkin! I have been noticing pumpkins in lots of fun colors at the grocery store lately, and I thought I would try to recreate one of the pretty peachy-blush pumpkins with some dies from Simon Says Stamp. I am always up for making a traditional color combination more interesting or unique! Let’s get started with the details!

*I have linked all of the products used at the bottom of the post for your convenience using affiliate links. Thank you for shopping with my links! I truly appreciate your support for my work!*

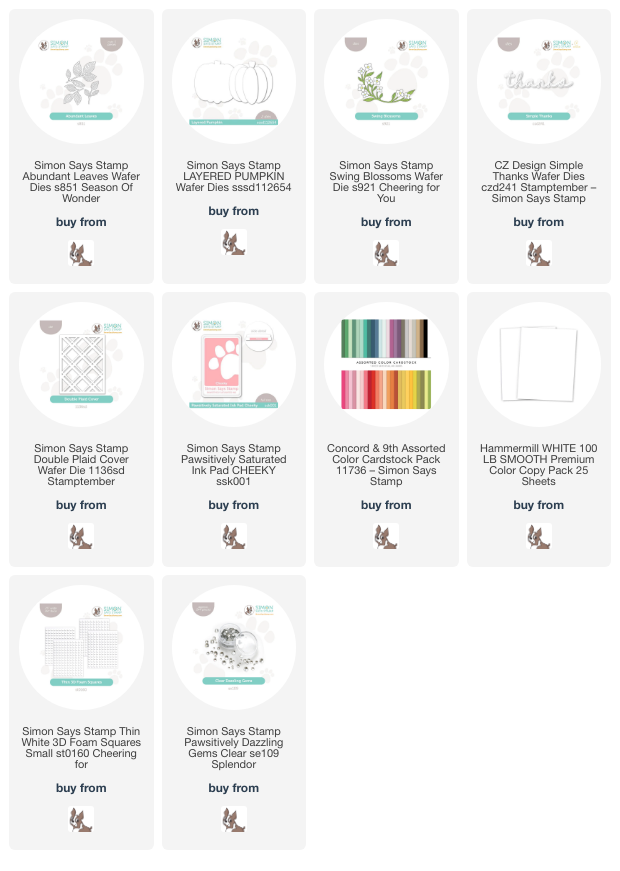
I started my project by die cutting the Layered Pumpkin die from some very pale blushy peach cardstock. I used a small blending brush to lightly blend Cheeky Pawsitively Saturated Ink on each individual die cut piece to add extra dimension to the pumpkin image, then assembled the pumpkin on its solid die cut base using liquid adhesive.

To adorn my chunky pumpkin, I die cut the Abundant Leaves die in a lovely and soft sage green cardstock from Concord and 9th, as well as some blooms and foliage sprigs using the Swing Blossoms die, continuing the muted green and peach colors into these flowers. For the background, I adhered a white Double Plaid Cover Plate die to a white A2 card front, creating a tone-on-tone textured plaid background that continued the light and airy feel of the pale peach pumpkin while still offering some traditional autumnal imagery!

I assembled my pumpkin and floral images on the plaid card front using foam adhesive, then added a Simple Thanks die cut, the detail layer of which I cut twice from white cardstock and adhered together to give it a bit more height, then added that to a pearlescent vellum shadow layer. Finally, I added some Clear Pawsitively Dazzling Gems to the flower centers for a touch of sparkle!

Well, that’s all for my first post for the month of October. I can’t believe that we are entering the final months of the year. These first ten months have absolutely flown by! I am ready for the cooler temperatures that we’ve been enjoying, for sure. Thanks so much for stopping by today, and have a marvelous day!

Filed Under: simon says stamp Tagged With: abundant leaves, autumn, die cutting, double plaid cover, ink blending, layered pumpkin, pumpkin, simple thanks, swing blossoms, thanks

Colorado Craft Company Halloween with Anita Jeram + GIVEAWAY!

September 29, 2022

Hi there! My friends over at Colorado Craft Company are releasing a darling new Halloween and Autumn collection with some new Big and Bold sets, as well as some super sweet new Anita Jeram sets! We are hopping along to share lots of inspiration using these new sets. You should have arrived here from Daniel West, and your next stop is Jasleen Kaur. You can see all of the bloggers HERE. I have some super saturated inspiration for you today using the new Scary Pumpkin Big & Bold (CCC|SSS) paired with the sweet little mouse from Pumpkin Bucket (CCC|SSS). I don’t do “scary” very well, but these cute little critters from Anita Jeram are just my cup of tea! Let’s get started with the details!

As soon as I saw the giant pumpkin in the Scary Pumpkin stamp set, I knew that I wanted to pair it with some of the Anita Jeram critters. They’re drawn in different styles, but I worked my way around that by doing some no-line coloring. This way, I could make them both work together seamlessly. The huge pumpkin was the perfect size to pair with the cute little mouse from Pumpkin Bucket! I stamped both of the images onto some alcohol marker-friendly white cardstock using Hero Arts’s Contour Ink.

I colored the images using my OLO markers. I fell in love with the orange color family from the OLO marker set that I used on this Cinderella card, and couldn’t resist using it again for today’s project. The large size of the pumpkin gave me plenty of room to really work those dark to light values. After I’d finished coloring the large pumpkin, I stamped it again on some masking paper and cut it out, laid the mask atop the colored pumpkin, and blended Nautical and Grape Soda inks in the corner to create a semi-spooky sky. While the mask was still in place, I also splattered some shimmery handmade metallic watercolors to create a star-strewn sky!

I also colored the little trick-or-treating mouse from Pumpkin Bucket, adding some black pen to the whiskers, eyes, and ear. I trimmed the image using my sharp scissors, then colored around the white edge with light orange and lavender to help keep the color continuity throughout the card front.

I heat embossed a greeting from Pumpkin Bucket onto some coordinating peach cardstock using platinum embossing powder, then matted it with some coordinating sparkly gold cardstock to help it pop from the colorful card front. I popped both the mouse and the sentiment up on the pumpkin card front using foam adhesive.

Well, that’s all for my project today! To celebrate this release, Colorado Craft Company is giving away one stamp set from the new release to a commenter on each stop on the blog hop! Simply leave comments along the hop to be eligible to win. The more comments you leave, the more chances you have to win! They are also doing something super unique and giving away the entire release to one lucky shopper who shops using an affiliate link! To enter this giveaway, use your favorite blogger’s affiliate link (you can click HERE to use mine) and place your order. The contest ends at midnight on 10/1/22.

I appreciate those of you who have shopped through my affiliate links in the past! As this hobby has morphed into a job, I and my family have become ever more deeply grateful for those of you who have shopped using my links. You’re helping me to take care of my family doing something that I love, and for that I cannot thank you enough. <3

Your next stop is Jasleen Kaur. Thanks so much for stopping by today, and happy hopping!

Filed Under: colorado craft company Tagged With: anita jeram, halloween, no line coloring, olo markers, pumpkin

Hero Arts September 2022 My Monthly Hero Blog Hop + Giveaway!

September 6, 2022

Hi there! Today, Hero Arts is releasing their latest My Monthly Hero and coordinating product collection, and we are celebrating the imminent arrival of autumn! (We will just ignore that it’s still most likely sweltering outside haha) You should have arrived here from Daniel West, and your next stop is Ilina Crouse. Here’s a peek at this month’s kit:

This month’s kit includes: • Clear Stamp Set, 4” x 6”, • 6 Coordinating Frame Cuts, • Rub-On Transfer Sheet, • Cling Background Stamp, 6“ x 6”, • 2 Sheets Each of Cardstock in Sand & Antique Ivory, 5.5” x 8.5”, • Rose Gold Metallic Floss, 5 yds. The contents of the kit retail individually for $70, but the cost of the kit is $34.99! These kits are limited edition, so once they’re gone, they won’t be restocked! To keep from missing out on future kits, you can always subscribe to be guaranteed to receive your My Monthly Hero kit each month!

I have a couple of vivid projects using an oft-neglected color in my typical color palette: burnt orange. Both of my projects feature lots of watercoloring and saturated color, mimicking the intensity of the colors of autumn. Let’s get started with the details!

I began by gold embossing the main floral bouquet from the September My Monthly Hero kit onto some watercolor paper. This is an extremely detailed image, so I made sure to stamp my embossing ink multiple times to ensure that I captured all of that beautiful detail. I then wet the entire embossed panel, both in and around the image, and dropped in lots of diluted color in shades of burnt orange, hot pink, and mustard yellow from my Daniel Smith palette. After the watercoloring had dried, I went back and added some details and more intense color to the larger flowers and foliage. The initial layer of watercolor helps to make sure that all of the little areas in the middle of the busy bouquet are attended to. I knew that I wanted a vivid, color saturated project, so adding the color around the edges of the bouquet helps to avoid those pesky white die cut edges, as well!

Next, I used the background cling stamp that is included in the My Monthly Hero kit with some tone-on-tone stamping to create a subtly interesting background. I stamped the background on Pumpkin cardstock using the coordinating Pumpkin ink, then used a blending brush to blend some more Pumpkin ink around the edges to create a vintage, almost distressed look.

I die cut an Oval Woodgrain Infinity Die from some more Pumpkin cardstock and popped it up on the card front using foam tape. I added a double layer of foam tape to the bouquet to give it lots of height and really make it the focal point from the textured orange background, placing it in the center of the frame. I added a gold embossed greeting from the My Monthly Hero kit. I am kind of in love with this card, and it makes me want to use orange more often in my crafting. The monochrome background is saturated without detracting from the pretty floral bouquet, while the extra height and texture added from all of the foam tape keeps things super interesting.

My second project uses the new Fall Leaves Cover Plate die. I die cut the background from some more watercolor paper, then taped it down to my watercolor board. I saturated it with plenty of clean water, then dropped in more of the same color palette that I used for the first card: burnt orange, hot pink, mustard yellow, and added in a bit of deep violet. I swirled and maneuvered the colors until I was satisfied with the color meld and movement. Some of the color pooled around the edges of the die cut areas, highlighting the pattern and details of the leaves. I splattered some metallic Glimmer paints on the dry watercolored background for extra texture!

I heat embossed the previously-released Grateful Pumpkin images using gold embossing powder on some watercolor paper. I used the same colors to do some more wet-on-wet watercolor on the leaves and around the edges of the pumpkin. I love the way the watercolor works on the wet watercolor paper. It creates such life-like color on the leaves, especially! I added lots of intense orange to the pumpkin, then die cut all of the images.

I trimmed the edge of the Fall Leaves Cover Plate die and mounted it on an Eggplant card front, then gold embossed a greeting from Grateful Pumpkin on a strip of Eggplant cardstock. I arranged all of the die cuts and sentiment strip on the card front, adhering them with lots of foam tape. I added a few iridescent gems from my stash to add one last element of shine!

Well, that’s all for my projects today! Now for some fun giveaway information:

Hero Arts will give away a $50 gift card, drawn from the comments left across the hop. Enter by Sunday, September 11th at 11:59pm Pacific, and the winner will be announced on the Hero Arts blog the following week.

Your next stop is Ilina Crouse. Thanks so much for stopping by today, and happy hopping!

Filed Under: Hero Arts Tagged With: autumn, Daniel Smith, my monthly hero, pumpkin, woodgrain frames

Primary Sidebar

  • Facebook
  • Instagram
  • Pinterest
  • YouTube

Favorite Shops

Secondary Sidebar

Subscribe

Enter your email address to subscribe to this blog and receive notifications of new posts by email.

Instagram
Something is wrong.
Instagram token error.
Follow
Load More

Archives

Tags

3D embossing folder alcohol markers better press birthday birthday card blog hop card kit christmas christmas card christmas tag colored pencil copic copic coloring Daniel Smith die cutting embossing folder embroidery felt giveaway holiday holiday card hot foil ink blending karin brushmarker pro layered stencil masculine my monthly hero new release no line coloring no line watercolor OLO marker olo markers original illustration pawsitively saturated rainbow shaker card slimline stamping stamptember stencil thank you thinking of you valentine's day video watercolor

Popular Posts

Simon Says Stamp Sending Cheer Blog Hop- Day 2 + Freebie + Giveaway!
Altenew October 2026 Release Blog Hop + Giveaway!
Rustic Monochromatic Stars for Christmas with Rainbow Splash!
Hero Arts Partners Blog Hop: Lawn Fawn!
Waffleflower July Release Blog Hop!
December 2018 My Monthly Hero Blog Hop + Giveaway!
March 2020 Essentials By Ellen Blog Hop+Giveaway!
The Ton Anniversary Release: Day 1!
The Ton Stamps Summer Release: Day 1
Autumn Legs with Colorado Craft Company and Catherine Pooler!

Disclosure

Some affiliate links are used in my posts. This means that, should you click on one of my links and purchase something from that company, I will receive a small portion of the sale at no extra cost to you. I use the money earned from these sales to help maintain my blog. I so appreciate you visiting and, if you do choose to use one of my affiliate links, thank you so much for your support!
Copyright © 2026 ·Brunch Pro Theme &middot; Genesis Framework by StudioPress &middot; WordPress &middot; Log in
Loading Comments...