• Skip to main content
  • Skip to primary sidebar
  • Skip to secondary sidebar

Sixth Street Sundries

Emily Midgett

  • Home
  • About Me
  • Contact
  • OLO Marker Color Swatch Chart
  • Shop

Archives for September 2022

Hero Arts September 2022 My Monthly Hero Blog Hop + Giveaway!

September 6, 2022

Hi there! Today, Hero Arts is releasing their latest My Monthly Hero and coordinating product collection, and we are celebrating the imminent arrival of autumn! (We will just ignore that it’s still most likely sweltering outside haha) You should have arrived here from Daniel West, and your next stop is Ilina Crouse. Here’s a peek at this month’s kit:

This month’s kit includes: • Clear Stamp Set, 4” x 6”, • 6 Coordinating Frame Cuts, • Rub-On Transfer Sheet, • Cling Background Stamp, 6“ x 6”, • 2 Sheets Each of Cardstock in Sand & Antique Ivory, 5.5” x 8.5”, • Rose Gold Metallic Floss, 5 yds. The contents of the kit retail individually for $70, but the cost of the kit is $34.99! These kits are limited edition, so once they’re gone, they won’t be restocked! To keep from missing out on future kits, you can always subscribe to be guaranteed to receive your My Monthly Hero kit each month!

I have a couple of vivid projects using an oft-neglected color in my typical color palette: burnt orange. Both of my projects feature lots of watercoloring and saturated color, mimicking the intensity of the colors of autumn. Let’s get started with the details!

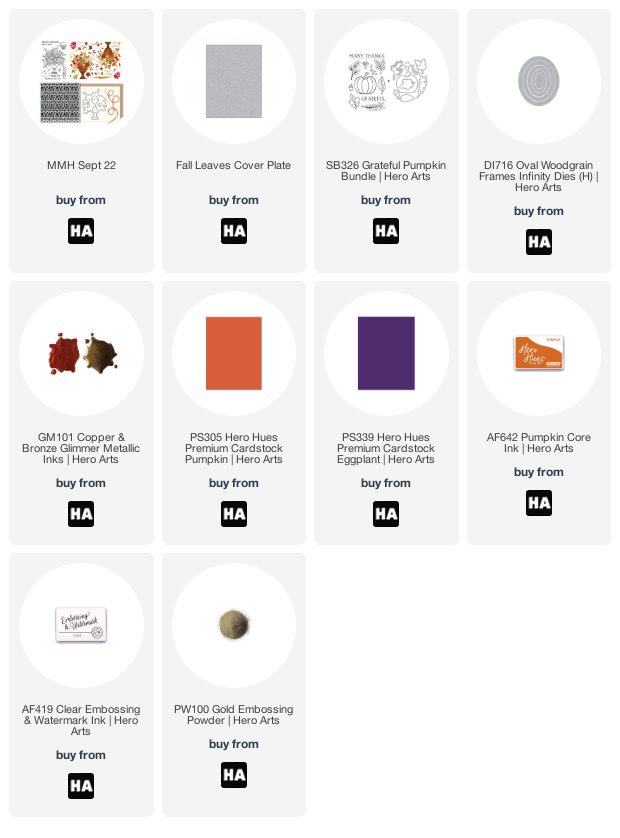
I began by gold embossing the main floral bouquet from the September My Monthly Hero kit onto some watercolor paper. This is an extremely detailed image, so I made sure to stamp my embossing ink multiple times to ensure that I captured all of that beautiful detail. I then wet the entire embossed panel, both in and around the image, and dropped in lots of diluted color in shades of burnt orange, hot pink, and mustard yellow from my Daniel Smith palette. After the watercoloring had dried, I went back and added some details and more intense color to the larger flowers and foliage. The initial layer of watercolor helps to make sure that all of the little areas in the middle of the busy bouquet are attended to. I knew that I wanted a vivid, color saturated project, so adding the color around the edges of the bouquet helps to avoid those pesky white die cut edges, as well!

Next, I used the background cling stamp that is included in the My Monthly Hero kit with some tone-on-tone stamping to create a subtly interesting background. I stamped the background on Pumpkin cardstock using the coordinating Pumpkin ink, then used a blending brush to blend some more Pumpkin ink around the edges to create a vintage, almost distressed look.

I die cut an Oval Woodgrain Infinity Die from some more Pumpkin cardstock and popped it up on the card front using foam tape. I added a double layer of foam tape to the bouquet to give it lots of height and really make it the focal point from the textured orange background, placing it in the center of the frame. I added a gold embossed greeting from the My Monthly Hero kit. I am kind of in love with this card, and it makes me want to use orange more often in my crafting. The monochrome background is saturated without detracting from the pretty floral bouquet, while the extra height and texture added from all of the foam tape keeps things super interesting.

My second project uses the new Fall Leaves Cover Plate die. I die cut the background from some more watercolor paper, then taped it down to my watercolor board. I saturated it with plenty of clean water, then dropped in more of the same color palette that I used for the first card: burnt orange, hot pink, mustard yellow, and added in a bit of deep violet. I swirled and maneuvered the colors until I was satisfied with the color meld and movement. Some of the color pooled around the edges of the die cut areas, highlighting the pattern and details of the leaves. I splattered some metallic Glimmer paints on the dry watercolored background for extra texture!

I heat embossed the previously-released Grateful Pumpkin images using gold embossing powder on some watercolor paper. I used the same colors to do some more wet-on-wet watercolor on the leaves and around the edges of the pumpkin. I love the way the watercolor works on the wet watercolor paper. It creates such life-like color on the leaves, especially! I added lots of intense orange to the pumpkin, then die cut all of the images.

I trimmed the edge of the Fall Leaves Cover Plate die and mounted it on an Eggplant card front, then gold embossed a greeting from Grateful Pumpkin on a strip of Eggplant cardstock. I arranged all of the die cuts and sentiment strip on the card front, adhering them with lots of foam tape. I added a few iridescent gems from my stash to add one last element of shine!

Well, that’s all for my projects today! Now for some fun giveaway information:

Hero Arts will give away a $50 gift card, drawn from the comments left across the hop. Enter by Sunday, September 11th at 11:59pm Pacific, and the winner will be announced on the Hero Arts blog the following week.

Your next stop is Ilina Crouse. Thanks so much for stopping by today, and happy hopping!
Filed Under: Hero Arts Tagged With: autumn, Daniel Smith, my monthly hero, pumpkin, woodgrain frames

Bold and Dramatic Holiday Cards with Spellbinders!

September 3, 2022

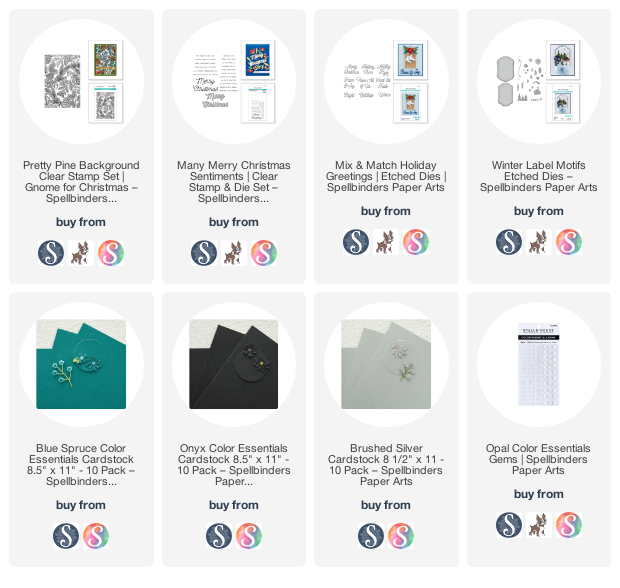
Hi there! Spellbinders has recently released some absolutely stunning new holiday products, and I was thrilled to have the opportunity to play with some of them! Creating holiday cards is one of my most favorite crafting themes, and finding ways to infuse classic, elegant looks with modern color palettes makes my heart so happy! I love a bold and unique color palette for holiday cards, something besides the traditional red and green, and today’s cards definitely fit that bill. Let’s get started with the details!

Both of today’s cards feature the beautiful Pretty Pine clear background stamp from the August Spellbinders release. I love creating subtly interesting backgrounds with super detailed stamps like this by using tone-on-tone stamping. Both of these cards feature Pretty Pine stamped onto some Blue Spruce cardstock from Spellbinders using a super dark green ink. These backgrounds were the starting point for my cards!

This first card is one of my favorite holiday cards that I’ve made (so far) this year. After I’d stamped the Pretty Pine background onto the Blue Spruce cardstock, I blended around the edges of the card front, first using the same deep green, followed by the slightest touch of black (yes, black) ink blended very shallowly around the edge of the card. Adding those dark neutrals to your dark, vivid colors can really intensify them and make them even more dramatic! I also splattered some handmade silver metallic watercolors on this background to look like snowfall. The blending around the edges of the card front helps to highlight the focal point in the center of the card.

For the greeting, I die cut the “Merry Christmas” from the Mix and Match Holiday Greetings die set using Brushed Silver Cardstock. I die cut some berries and sprigs of foliage from some more Blue Spruce, Brushed Silver, and Onyx cardstock using the flora from the Holiday Label Motifs die set. I silver embossed a sentiment strip from the Many Merry Christmas Sentiments stamp set onto a strip of black cardstock. I layered all of the components in the center of the blended card front. The subtle stamped background surrounded by the intense, jewel green and black ink blending really helps that greeting to pop! I added a few Opal gems for one last bit of shine and texture on this dramatic card.

My second card features another panel created using the Pretty Pine background stamp. I stamped it first on a full size panel of Blue Spruce cardstock using that same dark green ink, then die cut the tag from the newly-released Winter Label Motifs die set. I again blended around the edges of the stamped panel to create a focal point in the center. I layered this stamped and blended die cut on a full size A2 panel of Blue Spruce cardstock with some foam tape.

I die cut another greeting from the Holiday Label Motifs with some more Brushed Silver cardstock, adding the sentiment and some more foliage and berries in coordinating colors to the stamped and blended die cut. The Opal pearls were a perfect finishing touch to this simple, but elegant, project!

Well, that’s all for this pair of projects today! I have another set of cards using some of the new Seasonal Label Motifs dies from Spellbinders that I will hopefully share later this week. I am so excited for the Christmas crafting season to be in full swing! Thanks so much for stopping by today, and have a marvelous day!

Filed Under: spellbinders Tagged With: christmas, holiday, holiday label motifs, mix and match holiday greetings, pretty pine

Simon Says Stamp Stamptember Blog Party!

September 2, 2022

STAMPtember is officially in full swing, and we’re celebrating with a blog party! If you’re new to STAMPtember: September is Simon Says Stamp‘s birthday month, so the entire month is filled with fabulous releases, celebrations, prizes, challenges… good, clean, inky fun (and prizes!) for an entire month!! I am so thrilled to have illustrated two of the sets that were released during yesterday’s introductory release:  Floral Frames and Butterfly Ranunculus. I have a previous blog post with some watercolored projects using these new sets, which you can check out HERE. Today’s post again features the Butterfly Ranunculus set, this time with Copic markers! I have a video that you can watch below or HERE on YouTube.

In my cardmaking, I am all about making things as seamless and coordinated as possible. To that end, the white edge on die cut images drives me a little nuts when I am working with a vibrant, saturated, colorful background. I recently saw Dawn from Wplus9 use a pale blue Copic marker around her images before die cutting, and I thought that it would translate well to other colors, too! The beautiful Shamrock cardstock from Hero Arts is such a stunning shade of green, and it reminded me of beautiful brocade fabrics, with intense emerald silk for the background and brilliant blue embroidery. Monochromatic, but not really monochromatic, if you know what I mean. I just had to channel that inspiration into a card!

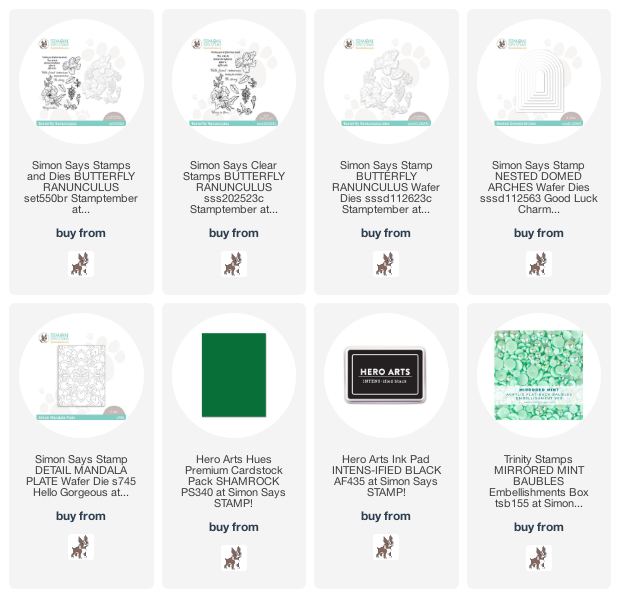
I began by stamping all of the images from the Butterfly Ranunculus set using Hero Arts Intens-ified Black ink onto some white, Copic-friendly cardstock. I used G07 Copic marker to color a halo around the edge of the images, making sure to extend far enough that the entire edge would be green when die cut. I then colored the images, using BG49, BG53, BG01, B00, B000 for the flower and T7, BG78, G28, G09 for the foliage.

Because I wanted to keep the flower a very light shade of blue, I colored the petals first with the four lightest shades of aqua, then added touches of BG49 wherever the shadows would be deepest, blending them out with the lighter shades to get a smooth blend. A little goes a long way with the darker shades, so don’t add too much, because it’s basically impossible to remove once you put the ink on the paper!

Once I had my flowers colored and die cut, I cut a Nested Domed Arch from the Shamrock cardstock, running it through my die cut machine once more with the Detail Mandala Plate from Simon Says Stamp. This extra step adds just a touch of subtle interest and texture to the background of my flowers. I adhered the domed arch to an A2 Shamrock card base using foam tape, then arranged the colored flowers, adhering them with lots of foam tape, sometimes in double layers to add extra height. I heat embossed a greeting from Butterfly Ranunculus onto a strip of Shamrock cardstock using silver embossing powder, finally adding a smattering of Mirrored Mint pearls for some shine!

Well, that’s all for my project today. To celebrate the beginning of STAMPtember, we have a scavenger hunt of all kinds of great freebies that you can receive with your order!

Enter code EH5M427Q at checkout to receive the darling Party Like a Puffin stamp set free with your purchase of $30 or more! You can also check out the other Blog Party participants to see what other kinds of fabulous free gifts you can receive in addition to utterly amazing inspiration!

Thanks so much for stopping by today, and happy STAMPtember!!

Filed Under: original illustrations, simon says stamp Tagged With: butterfly ranunculus, copic markers, monochromatic, original illustrations, stamptember

  • « Go to Previous Page
  • Page 1
  • Page 2
  • Page 3
  • Page 4

Primary Sidebar

  • Facebook
  • Instagram
  • Pinterest
  • YouTube

Favorite Shops

Secondary Sidebar

Subscribe

Enter your email address to subscribe to this blog and receive notifications of new posts by email.

Instagram
Something is wrong.
Instagram token error.
Follow
Load More

Archives

Tags

3D embossing folder alcohol markers better press birthday birthday card blog hop card kit christmas christmas card christmas tag colored pencil copic copic coloring Daniel Smith die cutting embossing folder embroidery felt giveaway holiday holiday card hot foil ink blending karin brushmarker pro layered stencil masculine my monthly hero new release no line coloring no line watercolor OLO marker olo markers original illustration pawsitively saturated rainbow shaker card slimline stamping stamptember stencil thank you thinking of you valentine's day video watercolor

Popular Posts

Simon Says Stamp Joy For You Blog Hop- Day 1!
Simon Says Stamp Joy For You Release-Now Available!
Frozen Fractals All Around with New Simon Says Stamp Joy For You Release!
Shaped Holiday Shaker Card with New Simon Says Stamp Jolly Season Card Kit of the Month!
Holiday Postage with New Simon Says Stamp!
Simon Says Stamp Glory to the Newborn King Holiday Kit-Part II!
Holiday Joy in Pink and Green with New Simon Says Stamp DieCember!
Pinkfresh Studio 5th Birthday!
Altenew Build A Flower: Fuchsia Blog Hop+Giveway!
July My Monthly Hero Blog Hop+Giveaway!

Disclosure

Some affiliate links are used in my posts. This means that, should you click on one of my links and purchase something from that company, I will receive a small portion of the sale at no extra cost to you. I use the money earned from these sales to help maintain my blog. I so appreciate you visiting and, if you do choose to use one of my affiliate links, thank you so much for your support!
Copyright © 2026 ·Brunch Pro Theme · Genesis Framework by StudioPress · WordPress · Log in
Loading Comments...