• Skip to main content
  • Skip to primary sidebar
  • Skip to secondary sidebar

Sixth Street Sundries

Emily Midgett

  • Home
  • About Me
  • Contact
  • OLO Marker Color Swatch Chart
  • Shop

snowflake

Sweet Snowman Hugs for 2024!

January 2, 2024

This post was sponsored by Simon Says Stamp. Thanks, Simon!

Hi friends! Happy New Year! I am flabbergasted that we are already at the dawn of a new year; I sometimes still feel like I haven’t finished processing 2020! Anyway, I have a project featuring some gorgeous newer products from Simon Says Stamp, perfect for those icy days that we’ve been experiencing after the warmth that we had on Christmas Day. We even woke up to a bit of snow on the ground last week…. as you can imagine, my kiddos were beside themselves with joy even if the snow only lasted until 10 am! For today’s project, I paired the utterly precious Cocoa and Joy stamps and dies with the new Cheery Snowflakes embossing folder. Let’s get started with the details!

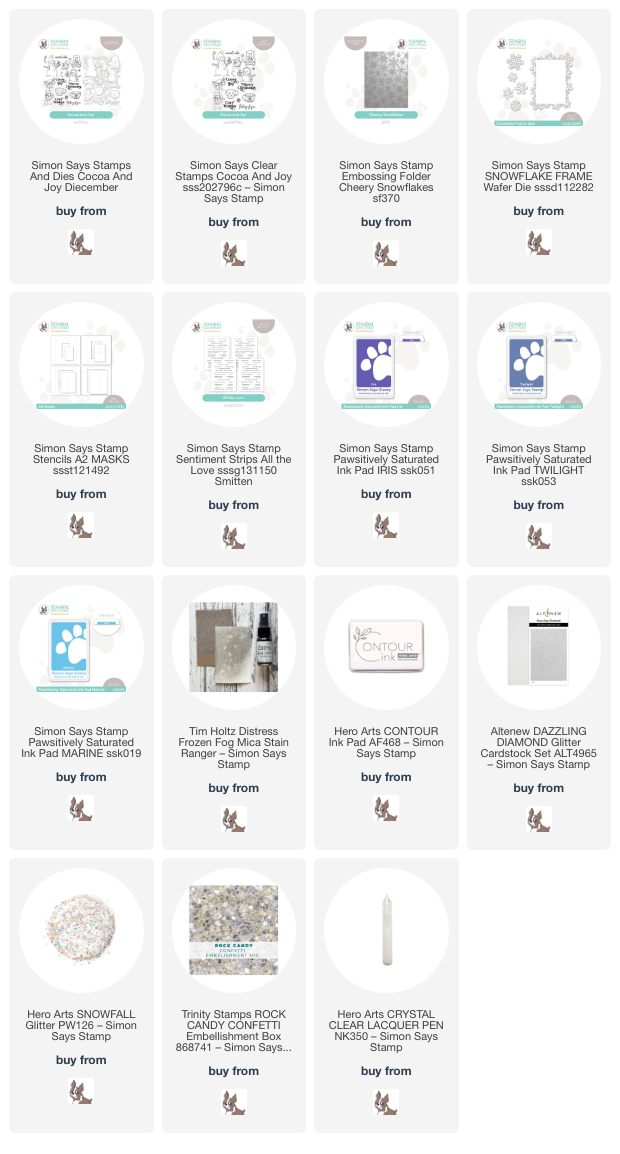
To start my project, I stamped the adorable snowman from Cocoa and Joy (which is back in stock- HOORAY!!! Right?) onto some Hammermill white cardstock using Contour Ink. I used my Copic markers to add some subtle shading on the “white” snowman, giving him a vivid blue hat and scrumptious-looking hot cocoa! I used a fine tip black pen to enhance some of the finer details on the snowman, like the steam from the hot chocolate, his smile, and his little poufs on his hat. I die cut the finished image with the coordinating die, as well as one of the sentiments. For a finishing touch, I also added some black gems for his “coal” buttons and eyes.

For the background, I began by masking off the center of a panel of white cardstock using a stencil from the A2 Stencils and Masks set. I then used blending brushes to blend Iris, Twilight, and Marine Pawsitively Saturated inks in the open area on the white cardstock. While the stencil was still in place, I spritzed the finished background with Frozen Fog Mica Spray to add some extra wintry-looking shimmer behind my snowman. Once my blended and shimmering background was dry, I removed the stencil and ran the entire panel through my die cutting machine using the Cheery Snowflakes embossing folder from the Smitten release!

After I had adhered my snowman to my embossed background using foam tape, I wanted to add some sparkling snowflakes to enhance the icy feeling of the card. I die cut the standalone snowflakes from the Snowflake Frame dies from some Dazzling Diamond glitter cardstock. I tucked the snowflakes behind snowman on the blended area, allowing the white frame to draw the eye to the snowman. I added some extra sparkly glitter “snow” using Clear Lacquer and Snowfall Glitter from Hero Arts. For the greeting, I added the stamped greeting die cut from Cocoa and Joy and a coordinating sentiment strip from the All the Love sentiment cards pack. I added a few shimmering confetti for one last addition of snowy texture and sparkle!

Well, that’s all for my project today! I hope your 2024 is off to an amazing start! Thanks so much for stopping by today, and have a marvelous day!
Filed Under: simon says stamp Tagged With: A2 masks, all the love sentiment strips, cheery snowflakes, cocoa and joy, copic, copic coloring, ink blending, mica stain, no line coloring, snowflake, snowman

Simon Says Stamp: STAMPtember with Gina K. Designs!

September 6, 2023

The Gina K. Designs STAMPtember limited edition collaboration set is always perfection, but this year’s large 6×8 set is absolutely stunning! I have a thing for snowflakes… I think they’re the most elegant embodiment of the winter season. I used all of the snowflakes from the Gina K. Designs STAMPtember set, sparkly silver embossing powder, and some ink blending to create this super wintry holiday card. Let’s get started with the details!

I began by blending Morning, Twilight, Galaxy, and Charcoal Pawsitively Saturated Inks on a panel of white cardstock with one of the Simon Says Stamp A2 Masks Stencils. I just discovered these stencils and love how they have the etched tick marks to show you exactly where to place your card front so that your blended area is perfectly centered! I love this gradient with the blue to the charcoal… I think it perfectly illustrates a bitterly cold winter’s night sky! With the stencil still in place, I splattered this crisp night sky with some sparkling silver handmade watercolors to create some tiny snowflakes.

To accent the splattered snowflakes, I heat embossed several of the smaller snowflakes included in the Gina K. Designs STAMPtember set on the background, trying to keep the spacing random so that it looked like the snowflakes were gracefully falling to the ground in a natural way. I used Silver Sparkle Embossing Powder to add extra shimmer and drama to the card, allowing the snowfalkes to overlap the edge of the blended area. I also heat embossed the larger flakes onto some heavyweight Vellum and fussy cut them with my sharp scissors (though you could certainly use the dies!).

For the greeting, I heat embossed several different sentiment stamps from the Gina K. Designs STAMPtember set using silver embossing powder onto more Hammermill white cardstock. After trimming and cutting these pieces out, I blended the Twilight and Galaxy inks over the embossing so that the sentiment components would coordinate with the background. I popped the snowflakes up with clear dimensional adhesive and the sentiment pieces with regular foam adhesive. Finally, I added a few Pinkfresh Studio Starry Sky Ombré Glitter Drops, which coordinated beautifully with the silver and blue color scheme of my project!

Well, that’s all for my project today! These limited edition STAMPtember collaborations frequently sell out within the first day (sometimes within the first hour!!!), so if you think you would like this set, be sure to order quickly so that you are able to get your hands on it! AND the fabulous folks at Simon Says Stamp have offered FREE SHIPPING for a limited time… score!!! Simply use code FRSHP at checkout to receive free shipping for purchases over $25, or code 799 to receive a discount on international shipping. Thanks so much for stopping by today, and Happy STAMPtember!

Filed Under: simon says stamp Tagged With: christmas, holiday, ink blending, snowflake, stamptember

Songs of the Season, August 2023: Silent Night

August 25, 2023

This post was sponsored by Simon Says Stamp. Thanks, Simon!

Hi friends! I am back with another installment of my Songs of the Season holiday series, where I use Christmas songs throughout the year as inspiration for a holiday card! This is a great way to get ahead on my holiday cardmaking by building up a little stash throughout the year so that the long list of names to whom I will send a card doesn’t seem quite so daunting come December! This month, I was inspired by that most classic of holiday songs: Silent Night. I jokingly said a few years ago, when my little boys were still babies and still up multiple times a night, that all I wanted for Christmas was a silent night. (I didn’t receive it, haha!) But the mental imagery that that song provides, of a peaceful, deep blue night sky with snowflakes gently falling to the ground, gave me some serene inspiration for today’s project. Let’s get started with the details!

One of my favorite ways to create unique projects is by stamping, or in this case die cutting, my own completely custom patterned backgrounds. I have been moving my craft room to a new space recently, and so have been “shopping” in some of my un- or under-used supplies, and I found a stash of gorgeous pearlescent colored cardstocks, including this stunning peacock teal cardstock. Tip: pearlescent or foil cardstocks die cut beautifully, especially with intricate dies like these snowflake dies for today’s project! I die cut Simon Says Stamp’s Sophie snowflake, Kate snowflake, Alicia snowflake, and Daphne snowflake dies from that pearlescent peacock teal cardstock, then turned my attention to the card base.

To create my vivid, peaceful blue background, I started by trimming down an A2 panel of Island Blue cardstock. I then blended Island Blue ink around the edges, keeping the center clean, then lightly blended some Galaxy Pawsitively Saturated Ink around the edges, keeping this dark blue area fairly subtle and right up against the edge. The combination of these two ink colors on this super saturated colored cardstock creates the most gorgeous glow! I also splattered some handmade glittery watercolors to add some shimmer to the blended background. Once my card front was dry, I began arranging my snowflake pattern, beginning with the largest snowflake die cuts, turning them so that they were falling at different angles, and trying to keep the spacing random so that the pattern would not look forced. I trimmed off the overhang, then used those leftover bits and bobs to fill in some of the edges of the card front. The combination of these steps helps to make the pattern look cohesive and continuous!

Finally, I die cut the Snowy Greetings die from some glittery turquoise cardstock. I chose this lighter shade of turquoise as a bit less saturated version of the peacock teal pearlescent cardstock, in order to ensure that it would stand out from the super vibrant background. I heat embossed a coordinating greeting from the Simple Holiday Greetings stamps using silver embossing powder on a strip of more Island Blue cardstock. I popped up the sentiment pieces with foam adhesive, then added a smattering of iridescent gems for some sparkle!

Well, that’s all for this month’s Songs of the Season post! I hope you will try using your favorite Christmas songs and carols as inspiration for your holiday cardmaking. It’s such a fun way to incorporate more music into your life, and it even gives you an excuse to listen to Christmas music all year long! Thanks so much for stopping by today, and have a marvelous day!

Filed Under: simon says stamp, Uncategorized Tagged With: christmas card, die cutting, holiday, holiday card, island blue, simple holiday greetings, snowflake, snowy greetings, songs of the season

Simon Says Stamp Holiday Sparkle Release Blog Hop + Giveaway- Day 2!

November 12, 2022

Hi there! Today, I am thrilled to be taking part in the second day of the Simon Says Stamp Holiday Sparkle Blog Hop. We are celebrating the stunning new release and hopping along with tons of inspiration to share with you using the new products. You should have arrived here from Heather Hoffman, and your next stop is Jennifer Kotas. You can also start back at the beginning at the Simon Says Stamp Blog.

I am a huge fan of monochromatic projects, and I am an even bigger fan of non-traditional holiday color palettes. I was searching through my Simon Says Stamp product when I was brainstorming my projects for today, and I came across the stunning Rose Gold Metallic Foil cardstock from Simon Says Stamp and thought how fun and unique it would be to create some shining rose gold snowflakes using the new Sparkling Snowflake Frame and Trio dies. I have a pair of cards to share with you today using these new dies and beautiful foil paper, so let’s get started with the details!

My first card focuses on the frame part of the Sparkling Snowflake Frame and Trio. I began by die cutting it from the Rose Gold Metallic Foil cardstock, as well as cutting a few extra individual snowflakes to create a lovely organic background pattern.

For the card base, I pulled some super pale blush cardstock from my stash and cut it down to an A2 card base size. I then blended some Rosie Cheeks ink around the edges using a Simon Says Stamp Cheeky blending brush. I also splattered some shimmery pearlescent watercolors. I love the effect of the splatters behind the die cut snowflakes; it creates the illusion of different levels of perspective, with large snowflakes close to you and tiny snowflake pinpricks farther away. Before adhering the foil frame over the blended and splattered card base, I placed the frame on the card front and used some of the tiny snowflake stamps in the Holiday Sparkle Greetings stamp set to stamp a mid-size group of snowflakes to my card front using Rosie Cheeks ink.

I adhered my foil snowflakes on my blended, splattered, and stamped card front using liquid adhesive. I heat embossed a greeting from Holiday Sparkle Greetings onto some more of the same blush cardstock using coordinating rose gold embossing powder and die cut it using the coordinating dies. I popped the greeting up on the card front using foam adhesive. Adding that little extra pop of height helps to keep the sentiment die cut from fading into the background!

My second card uses the same color scheme, but features a completely different layout! I began by die cutting several of the standalone snowflakes from the Sparkling Snowflake Frame and Trio from both white cardstock and the Rose Gold Metallic Foil cardstock.

I knew that I wanted to create a focal point in the center of the blush card front, so I used the Simon Says Stamp Cheeky blending brush to lightly blend some Rosie Cheeks ink in the center of the card front. I also added some more pearlescent watercolor splatters using shimmery pearlescent watercolors. (Tip: drop some clean water onto your pearlescent watercolors and allow to sit for a few minutes. This allows the watercolor to activate so that you are able to more easily pick up the shimmery goodness with your paintbrush!) I arranged the snowflakes in a cluster in the center of the blended card front, adhering them with liquid adhesive.

For the greeting, I die cut the detail layer of the Snowy Greetings die several times: once from some sparkling white glitter cardstock, then twice more from plain white cardstock, adhering them together with liquid adhesive. I added the dimensional die cut to a vellum background layer, then added it to the center of the snowflake cluster using some clear dimensional adhesive. The final step was to add some Trinity Stamps Milk Glass gems to add one more element of sparkle and texture to my snowflake cluster. These gems have the added bonus of helping to further create the visual cascade from the top left to the bottom right of the card.

Well, that’s all for my projects today! You can check out another project that I shared using the new Holiday Sparkle release HERE.

Now for some fun giveaways and freebies!

Simon Says Stamp is giving away a $25 gift card to one winner selected from the comments on each stop on the hop! Simply leave a comment on each stop of the hop for maximum chances to win, then check out the Simon Says Stamp blog on November 16, 2022 to see if your name was selected. You can also enter on all of the stops from Day 1 of the hop, as well, for tons of chances to win!

Simon Says Stamp is also offering a super fun free gift with purchase! Simply enter code CUTEBAG at checkout for your purchase of $50 or more to receive the super cute Holiday Zipper Pouch for free with your order!

Your next stop is Jennifer Kotas. Thanks so much for stopping by today, and happy hopping!

Filed Under: simon says stamp Tagged With: christmas card, holiday card, holiday sparkle greetings, ink blending, rose gold metallic cardstock, snowflake, snowy greetings, sparkling snowflake frame and trio

Altenew September 2022 Winter Magic Collection Release Blog Hop + Giveaway ($300 in Total Prizes!)

August 31, 2022

Hi there! Thanks so much for joining us for Altenew’s Winter Magic Release and celebratory blog hop. You should have arrived here from Berina Rajakumar, and your next stop is Caly Person. You can also start back at the beginning at the Altenew Card Blog. Holiday crafting is easily in my top three. I adore creating elegant, unique holiday cards that are full of sparkling, shiny details, and so many of the new products in Altenew’s Winter Magic Release are perfect for creating elegant holiday cards. I have two project to share with you today with lots of sparkle and turquoise, so let’s get started with the details!

It is always so fun for me to create a “pair” of cards using totally different products. They coordinate, but are unique projects in their own right. Today’s projects feature the beautiful new Poinsettia and Berries stamp/die bundle, Tiny Festive Patterns Hot Foil Plate, Winter Typography dies, Magic Burst Hot Foil Plate, and Layered Snowflakes 2 dies. I kept the color palette cool and crisp for both pieces, with lots of white space and pops of turquoise.

My first card is an homage to the snowflake. I began by hot foiling the new Magic Burst Hot Foil Plate using some sparkly holographic hot foil, offset to the side of a white A2 card base. I also die cut several snowflakes from the new Layered Snowflakes 2, cutting from both plain white cardstock and Dazzling Diamond glitter cardstock from Altenew.

Next, I die cut the “winter magic” greeting from some bright turquoise cardstock using the new Winter Typography dies, as well as a coordinating turquoise stamped sentiment strip.

I arranged the snowflake die cuts and greeting, allowing the largest sparkling snowflake to be highlighted by the holographic foil burst on the card base by popping that snowflake up with some foam tape. I arranged the sentiment pieces amongst the snowflakes, then added a few iridescent white gems for some more sparkle. I think that sparkly, textured white and turquoise is so elegant and festive!

My second project features the same color combination. I began by embossing several of the images from the beautiful new Poinsettia and Berries stamp/die bundle using pearlescent white embossing powder on some crisp white cardstock. I added color using some bright turquoise alcohol markers, carefully siphoning off any extra ink that was left behind on the embossing powder using the colorless blender marker.

Next, I hot foiled the small plaid background from the new Tiny Festive Patterns Hot Foil Plate using some bright turquoise foil. The shiny and crisp plaid background perfectly complements the bright poinsettia flower!

I die cut a few sprigs from the Itty Bitty Branches die set using some more Dazzling Diamond glitter cardstock, then arranged the poinsettia, berries, and foliage in the corner of the foiled plaid on the card base, adhering the die cuts with both liquid and foam adhesive for tons of dimension. I added a small “season’s greetings” from the Poinsettia and Berries. A few more shiny iridescent gems helps to complete this super festive and special holiday card!

Well, that’s all for my projects today! Now for some fun giveaway information!

$300 in total prizes! To celebrate this release, Altenew is giving away a $50 gift certificate to 2 lucky winners and a $25 gift certificate to 8 winners! Please leave a comment on the Altenew Card Blog and/or each designer’s blog post on the blog hop list below by 09/06/2022 for a chance to win. Altenew will draw 10 random winners from the comments left on each stop of this blog hop and announce the winners on the Altenew Winners Page on 09/07/2022.

Your next stop is Caly Person. Thanks so much for stopping by today, and happy hopping!

Filed Under: altenew Tagged With: christmas, holiday, hot foil, poinsettia, snowflake, tiny festive patterns, winter typography

  • « Go to Previous Page
  • Page 1
  • Page 2
  • Page 3
  • Go to Next Page »

Primary Sidebar

  • Facebook
  • Instagram
  • Pinterest
  • YouTube

Favorite Shops

Secondary Sidebar

Subscribe

Enter your email address to subscribe to this blog and receive notifications of new posts by email.

Instagram
Something is wrong.
Instagram token error.
Follow
Load More

Archives

Tags

3D embossing folder alcohol markers better press birthday birthday card blog hop card kit christmas christmas card christmas tag colored pencil copic copic coloring Daniel Smith die cutting embossing folder embroidery felt giveaway holiday holiday card hot foil ink blending karin brushmarker pro layered stencil masculine my monthly hero new release no line coloring no line watercolor OLO marker olo markers original illustration pawsitively saturated rainbow shaker card slimline stamping stamptember stencil thank you thinking of you valentine's day video watercolor

Popular Posts

Simon Says Stamp Joy For You Blog Hop- Day 1!
Simon Says Stamp Joy For You Release-Now Available!
Frozen Fractals All Around with New Simon Says Stamp Joy For You Release!
Shaped Holiday Shaker Card with New Simon Says Stamp Jolly Season Card Kit of the Month!
Holiday Postage with New Simon Says Stamp!
Simon Says Stamp Glory to the Newborn King Holiday Kit-Part II!
Altenew Build A Flower: Fuchsia Blog Hop+Giveway!
Holiday Joy in Pink and Green with New Simon Says Stamp DieCember!
Pinkfresh Studio 5th Birthday!
Honey Bee Stamps September Release Blog Hop!

Disclosure

Some affiliate links are used in my posts. This means that, should you click on one of my links and purchase something from that company, I will receive a small portion of the sale at no extra cost to you. I use the money earned from these sales to help maintain my blog. I so appreciate you visiting and, if you do choose to use one of my affiliate links, thank you so much for your support!
Copyright © 2026 ·Brunch Pro Theme · Genesis Framework by StudioPress · WordPress · Log in
Loading Comments...