• Skip to main content
  • Skip to primary sidebar
  • Skip to secondary sidebar

Sixth Street Sundries

Emily Midgett

  • Home
  • About Me
  • Contact
  • OLO Marker Color Swatch Chart
  • Shop

Archives for November 2022

Simon Says Stamp DieCember Has Begun!

November 30, 2022

Are you ready to party? Simon Says Stamp’s 10th DieCember celebration has begun! So. Many. Cute. Products. I know coloring is my “thing,” but I cannot get enough of die cutting either, so the wonderful products in this release made me so happy! I created a super wintry scene using some older and some brand new products from Simon Says Stamp, so let’s get started with the details!

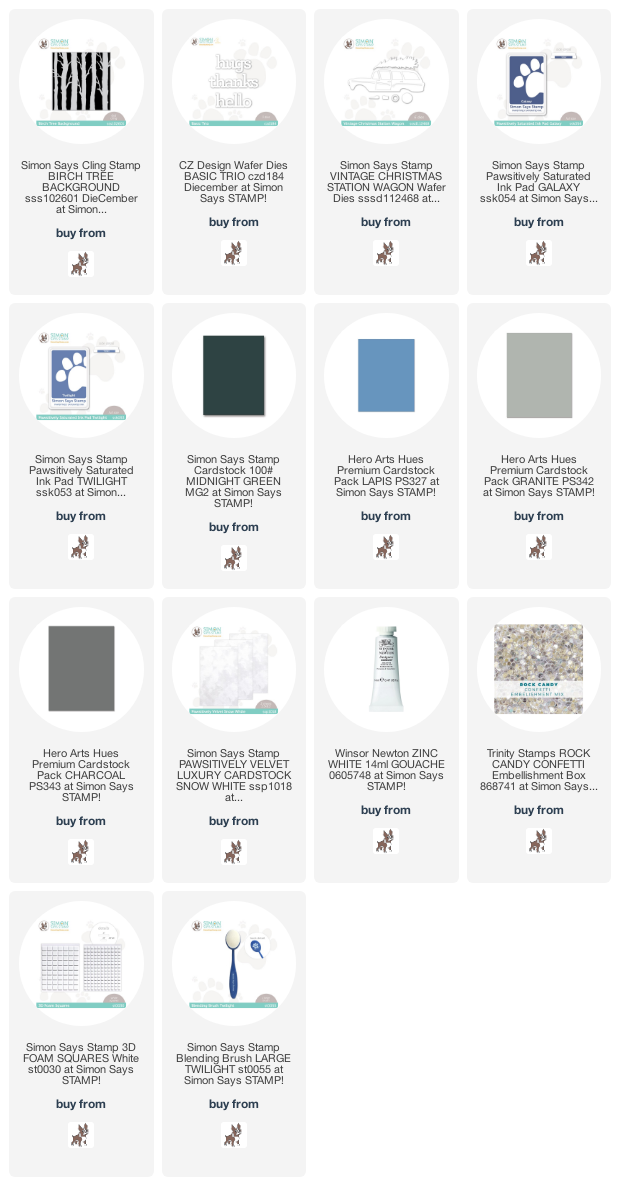
I definitely was channeling my inner Clark Griswold with this project. (I am actually watching that movie as I type, ha!) I was picturing the opening scene of Christmas Vacation the entire time I was creating this card! I began by white heat embossing the brand new Birch Tree Background stamp onto some Lapis cardstock from Hero Arts. I then used blending brushes to blend Galaxy and Twilight Paws-itively Saturated inks over the top of the embossed trees to create a wintry twilight background. I also splattered some white gouache to add some delicate snowflakes to complete the wintry feel of the card!

To create the Griswold front-wheel drive sleigh, I die cut the Vintage Christmas Station Wagon from some medium gray cardstock, backing the window openings with some vellum to create some frosty windows! I added the wheels using some shimmery silver cardstock and the tree using Simon Says Stamp Midnight Green cardstock. I trimmed some darker gray cardstock to create a hilly road for my station wagon.

For the greeting, I die cut the “hugs” from the new CZ Design Basic Trio dies twice from white cardstock and once from the beautifully textured Snow White Pawsitively Velvet cardstock, adhering them all together using liquid adhesive to create a dimensional die cut. I used the same technique for the “winter” die cut, which unfortunately looks as though it is discontinued. For a final touch and to add a bit of shine, I added a few Rock Candy confetti to add some dimensional snowflakes to the card front.

Well, that’s all for my project today! I hope you’ll take a peek at the new DieCember release-it’s totally amazing! Thanks so much for stopping by today, and have a marvelous day!
Filed Under: simon says stamp

Using Foil Leftovers with Spellbinders Solid Shaped Hot Foil!

November 30, 2022

Hi there! Today, I have a couple of projects for you using some beautiful new products from Spellbinders’s November Release. I will admit, sometimes the amount of waste that can be created with this hobby hurts my heart thinking of how quickly my trash can (and subsequently, the landfill) can be filled. It helps to alleviate my guilt a tiny bit when I am able to get double duty from products, like using tiny scraps of colored cardstock for those tiny layering dies, saving the interior die cuts from die cut frames, and…. using a solid hot foil plate with my hot foil scraps! Spellbinders has released several super useful shaped solid hot foil plates, which are great on their own, but also work so beautifully with your foil scraps to get double duty and make that little scrap of plastic waste from your original hot foiled piece go an extra step further! I have two cards to share with you today, using the original hot foiled image and the negative. Let’s get started with the details!

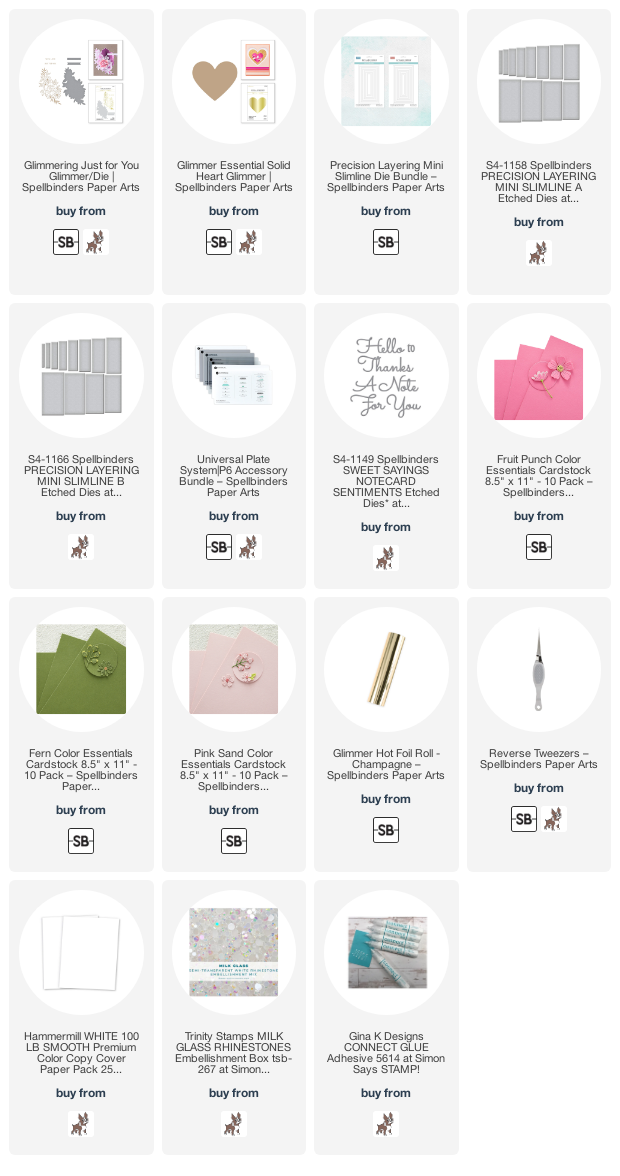
The main focal points for my projects today started with some Champagne Hot Foil and the Glimmering Just For You hot foil plate and die. (I love that this hot foil plate comes with the coordinating die-makes things so easy!) I hot foiled that beautiful floral swag from Glimmering Just For You onto some Hammermill white cardstock. I find that detailed images hot foil superbly on this super smooth cardstock, and it also works a treat with your OLO markers!

After hot foiling this beautiful peony swag from the Glimmering Just For You set and die cutting it using the coordinating die, I used several pinks and some lime green OLO markers (use my link to receive 10% off your OLO marker order!) to add lots of vibrant color to the image. The combination of the vibrant marker coloring and the super shiny hot foil make this such a striking image!

The size of the peony image worked beautifully for a mini-slimline card, so I used the Mini Slimline Precision Layering dies to create a super thin and delicate frame. I used the rubber embossing mat from the Universal Plate System with the Dazzling Diamonds Hot Foil Plate to add some beautiful texture to the interior die cut. I popped both the frame and the embossed center piece up on a mini-slimline (3.5″x6″) card front using some thin foam tape.

For the greeting, I wanted something simple and classy so that the focus was entirely on that vibrant floral swag, so I die cut the large sentiment (which appears to be discontinued, but you can still find it HERE at Simon Says Stamp) once from some glittery white cardstock and twice from some plain white cardstock to add extra stability. I adhered the floral swag with a double layer of foam tape for extra height and added the dimensional die cut greeting, finally adding a few iridescsent white gems for one last touch of sparkle!

For this second card, I paired the leftover floral panel from the Glimmering Just For You project with the Glimmer Essential Solid Heart to do some “reverse foiling.” I placed the heart in the center of my white A2 card front, and when I pulled back the hot foil piece I was left with this beautiful patterned heart!

I decided to continue with the bright bubblegum pink-and-champagne color scheme, so I paired the Sealed Bouquet dies with Fruit Punch, Pink Sand, and Fern cardstocks with some pops of super hot pink for the berries (one of those tiny cardstock scraps I mentioned earlier to get extra mileage from my colored cardstock and reduce waste!). I adhered them all together using tiny dots of liquid adhesive. I recently purchased the Spellbinders Reverse Tweezers, and I have to say… I’m in love. They are so handy for assembling tiny die cuts like these! I am going to purchase another pair as soon as I’m done writing this post just so that I have a backup!

I arranged the flowers into a Valentine’s Day bouquet, wrapping the stems with some champagne colored twine and tying a fat bow. I adhered the bouquet to the card front with foam adhesive, allowing the shiny patterned-foil heart to peek out from behind, then added another white glitter greeting from the Notecard Sentiments die set. A trio of sparkling iridescent white gems helped to finish it off!

Well, that’s all for my projects today! The November release is full of beautiful new products-including that Pastel Satin variety pack of hot foil rolls. I hope you’ll go take a peek! And if you’re still shopping for Cyber Monday, those deals end at midnight tonight, so don’t miss out. 😉 Thanks so much for stopping by today, and have a marvelous day!

Filed Under: OLO markers, spellbinders Tagged With: glimmer hot foil, glimmer solid heart, glimmering just for you, mini slimline, olo markers, reverse foiling, valentine's day

Video: Adding Tons of Sparkle to your Holiday Cards!

November 30, 2022

Hi there! Today, I am over on the Pinkfresh Studio YouTube channel with this holiday card that has so much sparkle, you might need some sunglasses to look at it! Sparkle is one of my favorite ways to differentiate my holiday cards from the cards that I make the rest of the year. If you can’t add sparkle on Christmas cards, when can you add sparkle? It just makes them so terribly festive!! Here’s the video:

Or you can click HERE to watch it on YouTube in HD.

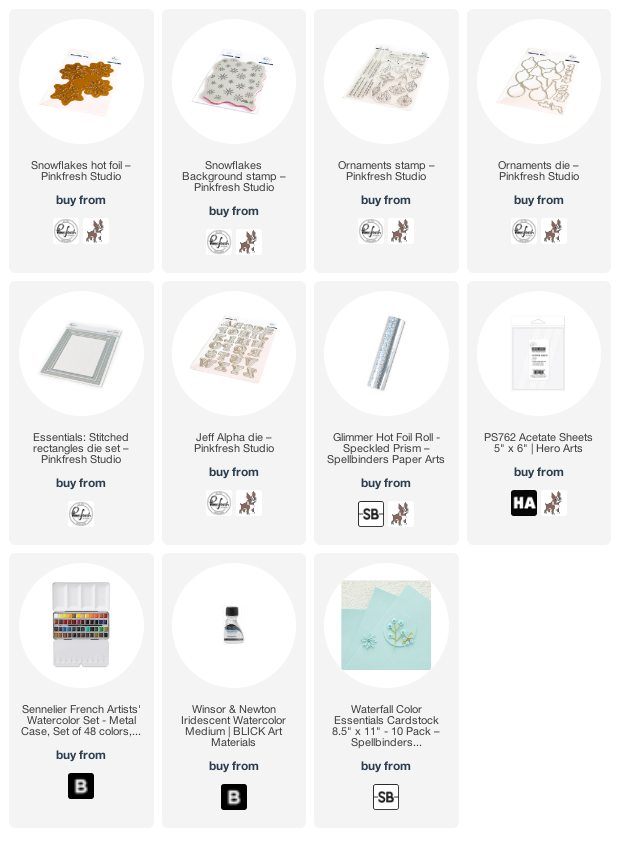
This entire card began when I was experimenting with the new-ish Snowflakes Hot Foil Plate. I love the look of hot foiling on vellum, but I get mixed results, and I read somewhere that you could heat emboss on Hero Arts’s acetate. I thought to myself “if you can heat emboss on it, can you hot foil on it?” I feared that it would melt and ruin my plate, but it was a risk I was willing to take… and just look at the result!! I am so in love with this new-to-me technique, and I can’t wait to apply it to other projects. I hot foiled the Snowflakes Hot Foil Plate on some acetate using Speckled Prism hot foil from Spellbinders, which creates a beautiful, iridescent effect, which is particularly striking on the clear acetate!

Once I had my snowflake acetate panel, I knew that I wanted to create a snowy scene with snowflakes in various sizes, so I heat embossed the Snowflakes Background stamp on some watercolor paper using White Satin Pearl embossing powder. I taped the panel down to my watercolor board, spritzed the entire panel with some clean water using a fingertip sprayer, then used Sennelier watercolors to add some diagonal color. I started with a few stripes of blue, blended that into some minty turquoise, then created a custom purple by mixing the same blue with some bright magenta. The already-damp watercolor paper helped the colors to meld together beautifully and seamlessly. I hit the very wet panel with my heat gun and added some Winsor & Newton Iridescent Medium along the blue areas to create a sparkly, wintry, almost Aurora Borealis effect on my background. Once that had dried, I added some Payne’s Grey around the edges, pulling the color out to a nice fade using a clean damp brush, which created a halo effect around my sparkly AB background.

While my panel was drying, I created a frame using some pure white glitter cardstock and the Stitched Rectangles Essentials Dies. I used some super strong tape to adhere my clear snowflake panel to the sparkling frame. Once my watercolor panel had dried, I used some thin foam squares to adhere the framed acetate panel to my watercolored piece. I love how the foiled snowflakes look as though they’re floating on the watercolored background!

For the greeting, I heat embossed two different sentiments from the Ornaments Stamp set onto some Spellbinders Waterfall cardstock using white embossing powder. I used the Ornaments Dies to die cut the cursive greeting, which I think makes it look so incredibly clean and polished. I die cut the solid halo piece from the Jeff Alpha dies from some more Waterfall cardstock, then die cut the detail layer using the same white glitter cardstock, adhering them together with liquid adhesive. I added them to the clear snowflake panel with small dots of liquid adhesive to keep everything nice and clean, orienting them in the bottom right corner to allow the hot foiled snowflakes and watercoloring to take center stage!

Well, that’s all for this project and video! I can’t wait to try this hot foil-on-acetate technique out on more projects, and I hope you’ll try it out too. Thanks so much for stopping by today, and have a marvelous day!

Filed Under: pinkfresh studio, video Tagged With: acetate, christmas card, holiday card, hot foil, snowflakes, video, watercolor

Black Friday Specials!

November 24, 2022

‘Tis the season…. for crafty shopping! Maybe you’re getting a gift for a crafty friend, maybe you’re inspiring a new crafter with a starter kit, or maybe you’re gifting yourself… but there are lots of awesome sales from our favorite companies happening to tempt you!

**Affiliate links used at no extra cost to you. When you shop using one of my links, you’re helping to support my family and keep my blog running. I so appreciate those of you who have shopped using my links at any point. Thank you so much!**

First up, OLO Markers!

OLO Markers are running a special holiday sale: Receive a $25 digital gift card when you spend $125.00 (excluding shipping) on olomarker.com. Your digital gift card will be emailed within 24 hours to the email address provided when you place your order. Remember, if you shop using my link or add code emily at checkout, you will receive 10% off your order, in addition to your $25 digital gift card!! Talk about an awesome deal! I’ve had the pleasure of using these markers quite a lot over the last 8 months, and I am so impressed with their vibrance and ease of use. I have several videos showcasing their use over on YouTube, which you can check out HERE.

The vibrance is just incredible with these markers!

Next, Hero Arts:

The wonderful folks at Hero Arts are running a Season of Thanks sale from 11/23-11/28. You will receive 20% off all clear stamps, as well as double reward points for your entire purchase! This includes stamp+die bundles as well as Stamp & Cuts, so this is a really awesome deal!

Next, Pinkfresh Studio:

Pinkfresh Studio is running a super rare site-wide discount code from 7 am CST on 11/24 through midnight on 11/27. Simply enter code THANKS20 at checkout to receive 20% off on nearly everything in the shop! (A few exclusions apply; check out the graphic for those.)

Now for Altenew:

Altenew is running an enormous sale on tons of individual items, as well as 25% off stamp, die, and stencil bundles, and 25% off Embossing Folders from 11/24-11/25.

**Simon Says Stamp is also running a massive sale! Take 30% off of your order of Simon Says Stamp branded products using code PIE22 at checkout, plus receive a free gift for purchases over $100! Score, right? I just added a bunch of the Paws-itively Saturated Inks to my collection!

**Spellbinders has 20+ pages of goodies all marked down up to 60% off, including the Glimmer Hot Foil system for $99.99… that’s an awesome deal! I stocked up on Hot Foil Rolls, too.

I will try to keep this page updated if I can, but we will be doing all of the family things over the next few days, plus my husband’s birthday is also on Thanksgiving, so we will be birthday-ing it up, as well!

Wishing you and your family a most wonderful Thanksgiving! May your turkey be covered in gravy, may your pumpkin pie be covered in whipped cream, and may your hearts be full of love and family! Cheers, friends!

Filed Under: Uncategorized Tagged With: black friday sales

Art Supply Favorites-A Long List!

November 23, 2022

Hi there! So I’ve recently had some questions about what watercolor supplies I would recommend, so I thought I would put a post together sharing some of my favorite items in case you wanted to ask Santa for them for your stocking… 😉

I want to preface this post by saying that I am a firm believer in the statement that you get what you pay for. Sometimes the inexpensive items are okay, like when you’re dealing with store-brand food vs name brand, but with art supplies, I’ve definitely found a difference in quality when using the student grade options. Of course, this is not an inexpensive hobby to begin with, so watching for sales and using coupons is a great way to expand your collection of art supplies while also not compromising quality. I have been stamping for 13 years, watercoloring seriously for 6+ years, and so have been building up my collection gradually. I have been lucky to have been provided some of these supplies through my work with different companies, but the vast majority of these supplies have been purchased by me over time, watching for sales and with birthday money or Christmas gift cards. I only recommend supplies that I really think will provide great results, regardless of whether they’ve been purchased by me or if companies have generously sent them to me to try. This list is not at all intended to encourage you to make purchases that you don’t need; I only want to recommend my favorite supplies if you are planning to do some artsy shopping or want to ask for some art supplies for Christmas! 🙂

***I will be providing affiliate links where applicable. When you use these links, no extra cost is added to your purchase, and it helps me to support my blog and my family. This is my job, so any support that you give me by using my affiliate links is immensely appreciated!***

First up, watercolors.

Watercolors hold true to the idea that you get what you pay for. Student grade watercolors contain less pigment and more fillers in order to make them less expensive; thus, the student grade watercolors will require more paint in order to achieve better vibrancy. The artist grade watercolors are more expensive, but contain much higher ratio of pigment to fillers, so I find that they last longer than the student grade and give better results from the start. Over the course of my watercolor journey, I have found that saving the “good” supplies and using the less expensive supplies for practice is a waste of time and money, because the good supplies behave vastly differently to the less expensive, so your results between the student grade vs artist grade will be very inconsistent. If I had known this at the start, I would not have bothered with the student grade and instead focused on building my artist-grade collection (slowly, ha) rather than wasting the time and money on the less expensive products.

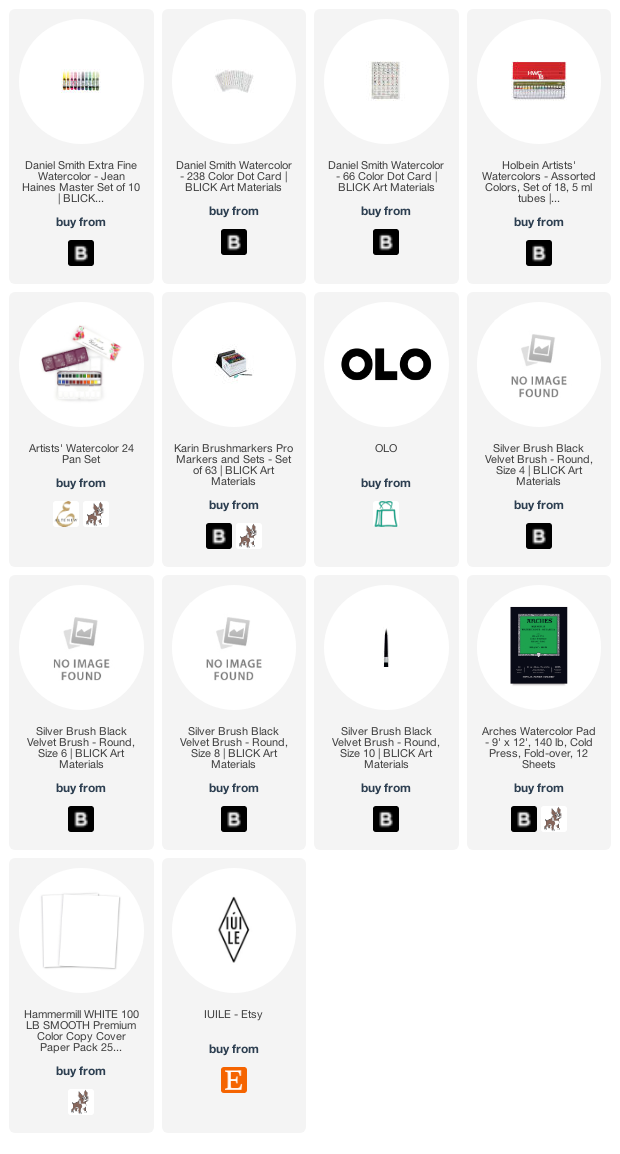
Pan Watercolors-Watercolors are one of those things that depend a lot on your personal preferences. If given the choice, I will choose to work with pan watercolors over watercolor markers, simply because I feel that I have better control over the amount of pigment and thus the intensity of the colors on my image. Artist watercolors also have better lightfast ratings, meaning that they will be less likely to fade over time. I have two artist-grade brands that I reach for over and over again: Daniel Smith Extra Fine Watercolors (Blick|SSS) and Holbein Artist Watercolors (Blick).

I have watercolors from a wide variety of brands, and I have found the stunning variety of colors in both of these brands to be unmatched. The Daniel Smith paints use many natural pigments, so the color palettes tend to be a bit more muted and earth-toned, while the Holbein palette seems to be a bit brighter and cooler. I used the Daniel Smith watercolors on the holiday paintings in the photo above; the Holbein palette is pictured below. You can see the difference in overall tone and brightness in the photos!

Both of these brands offer watercolor sets, in which they have selected a variety of shades that offer the majority of the rainbow. I have been collecting these watercolors over the last several years, and while I do enjoy having a huge variety of shades at my disposal, these watercolor sets would certainly be sufficient for quite a lot of projects. It’s amazing what custom colors you can create by mixing colors in different intensities. Holbein offers a very affordable set of 18 colors (Blick), which could easily be customized by adding a few extra pinks, purples, and greens (because we know how much I love pink!). Daniel Smith offers several different watercolor sets that are great for beginners. I personally love the color palette in the Jean Haines Master Set of 10 (Blick), which includes some of my favorite shades. One of my favorite things about the Daniel Smith line is that you can also purchase Dot Cards (Blick) that have a small sample of each color, so that you can try each color out, find your favorites, and build your own custom palette! You would be amazed at how long those little dots of watercolor will last-totally worth the money! Once you find your favorites, you can build your custom palette by purchasing the individual watercolor tubes.

I also wanted to mention the Altenew Artists’ 24 Pan Watercolors (ALT|SSS). I have found that these pan watercolors are of excellent quality and at an extremely affordable price point. If you are looking to dip your toe into watercoloring but don’t know if you want to invest in the artist grade watercolor tubes, this is a marvelous, super economical set of 24 pan watercolors that have a gorgeous color palette and move beautifully. I have been able to create tons of beautiful paintings with my 24 pan set, with a wide variety of color palettes, because mixing and matching the colors is super easy! These watercolors frequently go on sale, and they are 100% worth the money. I have a class on the Altenew website (only $8.95 for 6 videos!) that delves into these watercolors, great for beginners! You can check out the class HERE.

Watercolor Markers– While I adore pan watercolors, I can also appreciate the ease and vibrance of watercolor markers. There are several different brands of watercolor marker available, but I have found that the Karin Brushmarker Pro (Blick|SSS) markers offer wonderful quality and a huge variety of colors. I have found that I get better results by scribbling the color onto a ceramic palette, then picking the color up with my damp paintbrush, rather than putting the marker directly to the paper. This provides more control for my style of watercolor.

Next up: Alcohol Markers.

OLO Markers (OLO) are relatively new to the art world, as they were just debuted this past winter at NAMTA. I have been lucky enough to have the opportunity to work with these OLO markers over the last 8 months or so, and I have to say-I find them to be a wonderful addition to my work space. They have an incredible vibrance and blend super smoothly. I also really love the ease of selecting your blending colors; the color families are very clearly delineated and blend beautifully together, which takes the guesswork out of your color selection. They have 4 fluid ounces of ink in the barrel -nearly twice as much as other brands- and feature a unique ink delivery system that cuts down on the amount of ink wasted. Refilling them is extremely simple. I have a longer blog post with video detailing all of the unique qualities of these markers HERE. You can check them out HERE, and you will automatically receive a 10% discount when you shop using my personal link!

You can see the incredible vibrance of these markers in the photo above. I can’t wait for them to release even more colors!

Next up, paintbrushes and paper.

Watercolor Brushes-You cannot go wrong with Silver Black Velvet. I’ve tried tons of different brands of paintbrushes (don’t tell my hubby! Teehee.), and the Silver Black Velvet brushes win every time. The bristles release water very gradually, and they come to a nice crisp point giving you the ability to create really sharp edges for no-line watercoloring. I would recommend a Round Number 4 (Blick) or 6 (Blick), and a round number 8 (Blick) for large washes. If you only watercolor very small images, as many stamped images are fairly small and detailed, you might prefer the finely detailed point that a Round Number 4 brush provides. I know that these brushes are a little pricy to start, but again, you get what you pay for with watercolor supplies, and I do find that they last for quite a long time if you take care of them.

Watercolor paper– watercolor paper is a very personal choice. Your unique style of watercoloring may suit the features of one paper over another. Sometimes, it takes some experimentation to figure out which paper brand works best with your own personal style. That being said, I have always had good results with Arches cold press watercolor paper (Blick|SSS). Cold press paper has a textured side and a smooth(er) side, while hot press paper is very smooth, and I have found that texture to be an invaluable trait with my style of watercolor no matter the brand. The color moves beautifully, lifts and scrubs easily, and holds up to repeated layers of water and even embossing folders, without worrying about the fibers of the Arches cold press paper disintegrating.

You can see how well the Arches cold press holds up to a 3D embossing folder and some pretty intense watercoloring!

Alcohol Marker Cardstock– For alcohol marker coloring, no matter which brand, I have found that the Hammermill 100 lb cardstock (SSS) works wonderfully. The super smooth surface of the paper allows the colors to blend beautifully, and the weight is great for papercrafting.

Bonus: Metallic Watercolors.

If you like all things sparkly, as I do, you will love checking out the IUILE shop on Etsy. They feature handmade, unbelievably sparkly watercolor pans that add so much sparkle to your projects… it’s almost unreal. I use them for splattering backgrounds, for adding metallic sparkle to large brushed sentiments, and adding sparkly accents to alcohol marker pieces, as you can see in the Cinderella project above. They are such a fun little accent to add to your projects to help kick them up a notch!

I hope that you find this list helpful! I want to reiterate that these are my own personal preferences, and this is by no means an exhaustive list. I am by no means an expert, but I have done quite a lot of experimentation (and shopping, ha) so hopefully you can benefit from my artistic experimental trial-and-error over the last several years! If you have any questions, please feel free to reach out to me via email or DM on Instagram. I’m happy to help in any way that I can! Thanks so much for reading, if you’ve made it this far, and Happy Thanksgiving!

Filed Under: Uncategorized Tagged With: artists 24 pan watercolors, daniel smith watercolors, holbein watercolor, IUILE watercolors, karin brushmarker pro, olo markers, silver black velvet

  • Page 1
  • Page 2
  • Page 3
  • Page 4
  • Go to Next Page »

Primary Sidebar

  • Facebook
  • Instagram
  • Pinterest
  • YouTube

Favorite Shops

Secondary Sidebar

Subscribe

Enter your email address to subscribe to this blog and receive notifications of new posts by email.

Instagram
Something is wrong.
Instagram token error.
Follow
Load More

Archives

Tags

3D embossing folder alcohol markers better press birthday birthday card blog hop card kit christmas christmas card christmas tag colored pencil copic copic coloring Daniel Smith die cutting embossing folder embroidery felt giveaway holiday holiday card hot foil ink blending karin brushmarker pro layered stencil masculine my monthly hero new release no line coloring no line watercolor OLO marker olo markers original illustration pawsitively saturated rainbow shaker card slimline stamping stamptember stencil thank you thinking of you valentine's day video watercolor

Popular Posts

Simon Says Stamp Joy For You Blog Hop- Day 1!
Simon Says Stamp Joy For You Release-Now Available!
Frozen Fractals All Around with New Simon Says Stamp Joy For You Release!
Shaped Holiday Shaker Card with New Simon Says Stamp Jolly Season Card Kit of the Month!
Holiday Postage with New Simon Says Stamp!
Simon Says Stamp Glory to the Newborn King Holiday Kit-Part II!
Holiday Joy in Pink and Green with New Simon Says Stamp DieCember!
Pinkfresh Studio 5th Birthday!
Altenew Build A Flower: Fuchsia Blog Hop+Giveway!
July My Monthly Hero Blog Hop+Giveaway!

Disclosure

Some affiliate links are used in my posts. This means that, should you click on one of my links and purchase something from that company, I will receive a small portion of the sale at no extra cost to you. I use the money earned from these sales to help maintain my blog. I so appreciate you visiting and, if you do choose to use one of my affiliate links, thank you so much for your support!
Copyright © 2026 ·Brunch Pro Theme · Genesis Framework by StudioPress · WordPress · Log in
Loading Comments...