• Skip to main content
  • Skip to primary sidebar
  • Skip to secondary sidebar

Sixth Street Sundries

Emily Midgett

  • Home
  • About Me
  • Contact
  • OLO Marker Color Swatch Chart
  • Shop

Archives for December 2022

A Look Back: My Favorite Projects from 2022!

December 31, 2022

Hi friends! Somehow, some way, we are coming to the end of another year. I won’t say that 2022 has been the easiest year for me, personally, just because navigating life as a mom of four in this crazy world is pretty scary right now. But, I have always been someone who tries to be positive and compartmentalize the negative, and my cardmaking job/hobby (jobby? haha) has played a huge part in doing that successfully (mostly, ha). I am so, so lucky to be able to help support my family doing something that I love so much. 2022 was a wonderful year in the crafting world, with such an enormous array of beautiful new products to play with, so I thought I’d take a walk down memory lane and select my favorite projects from each month. This is a long post covering each month of the year, so let’s get started!

January 2022

I have been lucky enough to illustrate several floral stamp sets for some of my favorite companies over the last few years, and the project above features the first stamp set that I illustrated for Simon Says Stamp: Beautiful Bouquet. One of the reasons that I was so thrilled to start illustrating stamps was so that I could create massive blooms that people who loved to color would really enjoy coloring with their favorite medium. This Beautiful Bouquet stamp set is huge and covers most of the slimline card above, which I stamped using Contour Ink and used Copic markers to color in no-line style. I masked off the edges to do a little light ink blending to create a frame and added a vellum sentiment! You can see more of the details on this project HERE.

February 2022

Boy, looking through my archives for February made selecting a favorite really difficult. I couldn’t narrow it down to just two projects, because two of my favorite stamp sets that I’ve illustrated this year were released in February. The first set, Orchid Rose Bouquet, is another of my illustrations for Simon Says Stamp, which I colored using Copic markers on Neenah Desert Storm cardstock. These projects were especially unique for me, as this red/kraft combo is not a color combination that I use frequently. You can check out all of the details for these projects HERE.

My second project that I couldn’t help adding to this list features the Chrysanthemum Slimline stamp set that I illustrated for Pinkfresh Studio. Another stamp that is huge and hugely fun to color! I loved really digging into the nooks and crannies with my most favorite Copic color combo: RV99, RV69, RV09, RV17. You can read all of the details HERE or watch a video demonstration HERE. February was a good month for big fat flower stamps! 🙂

March 2022

The war in Ukraine sent the entire world reeling in so many ways. I was so proud that Pinkfresh Studio used the Sunflower Washi Suite that I illustrated to do a fundraiser to benefit the children impacted by the war in Ukraine. I created four projects, two using the Sunflower Washi Tape + Dies, and two using the Sunflower Stamps +Dies.
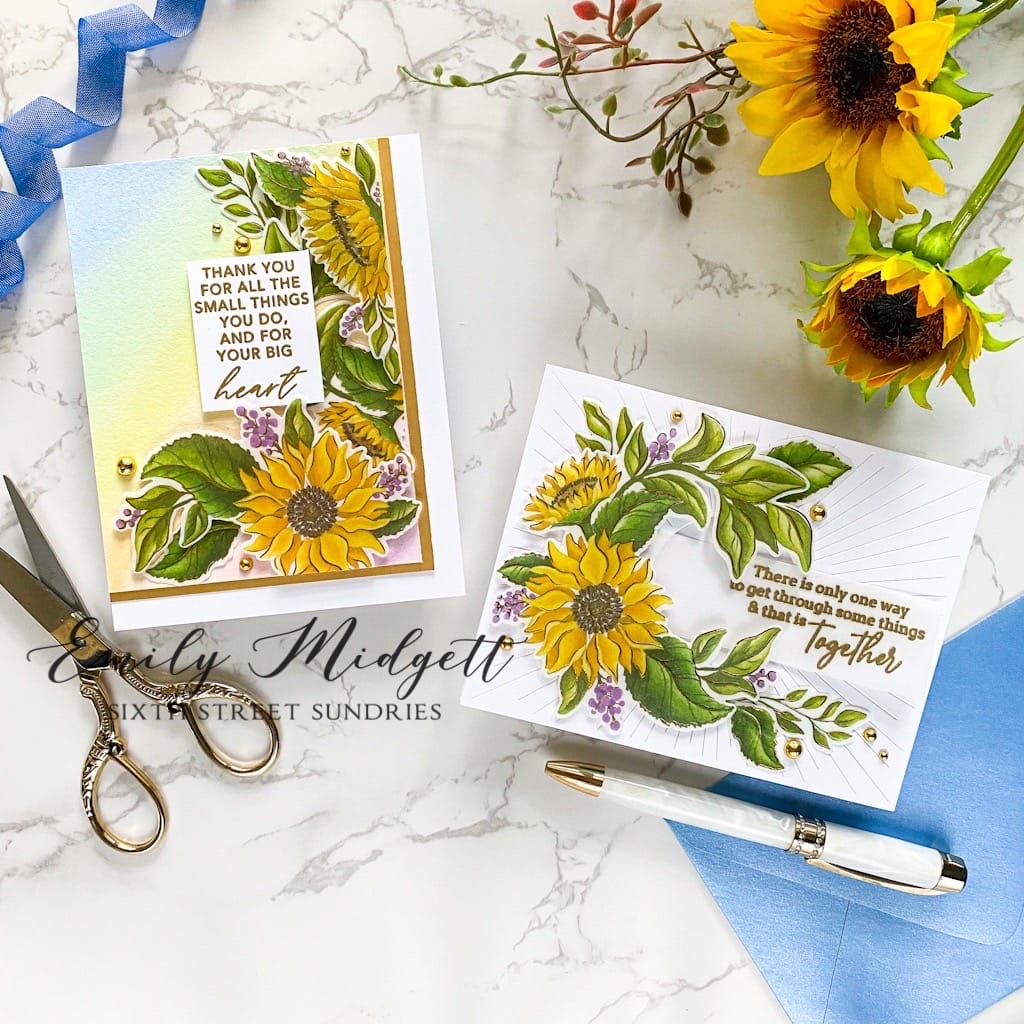
The different washi tapes from Pinkfresh Studio make creating an absolute breeze, like you have an endless supply of stickers! I am especially proud of the ones that I’ve illustrated and watercolored, because they help me to remember that even though I have no formal art training, I am an artist (no matter what the dreaded imposter syndrome might whisper in my ear!). These Sunflower Washi Tape images were the first washi tape images that I created, and they mark an important milestone for me, professionally.

The Sunflower Stamps coordinate perfectly with the dies used for the Sunflower Washi tape, allowing endless possibilities for creativity! I created a pair of cooler cards, adding pops of blue and crisp white, with accents of silver, to go along with my cheerful yellow watercolored sunflowers. You can read all of the details about the projects above HERE.

April 2022

April was the month of flowers. I promise this entire blog post is not going to be a catalog of stamps that I’ve illustrated, but the release of these stamp sets are so exciting to me, even months later, and the projects that I created with them remain some of my favorite projects from the year! This favorite project from April features the Lisianthus stamp set that I illustrated for Simon Says Stamp, but I actually illustrated four different sets for the April release: Thankful Magnolia, Just A Note Pansy, Celebrate Rose Corner, and Lisianthus.

Colored pencils are one of my most favorite mediums to use, but using them is quite hard on my wrists, so I have to limit how frequently (and intensely) I use them. You can’t beat the beauty of colored pencils on colored cardstock, in my book anyway, and so I thought they were a perfect match for this huge Lisianthus stamp and some lovely lavender cardstock. You can check out all of the details for this blog post (along with four other projects using stamps that I illustrated!) HERE.

May 2022

May was a month of experimentation for me. The Hero Arts Creative Team was challenged by Hero Arts to create Mixed Media projects for their new Mixed Media catalog. Now when I think of Mixed Media, I think of grunge and vintage, with splatters and lots of sepia tones. Totally the opposite of my normal super colorful, somewhat clean style! But I was informed by some of the Mixed Media masters on the Hero Arts team to not overthink it and that Mixed Media is exactly as it sounds: using more than one medium on a project, which can be different kinds of paint, different stamping mediums, different textures… using more than two different kinds of media on one project technically makes it “Mixed Media.” Cool, right?

These projects that I created for the Hero Arts Catalog feature one of my most favorite “discoveries” from 2022: colorful gouache on vividly colored cardstock. I mixed the Hero Arts Liquid Watercolors with white gouache to paint these floral images on deep navy blue Nautical cardstock. I absolutely love how they turned out! Lots of color, a little sparkle, a clean design… but still definitely checks the “mixed media” boxes. You can check out all of the specific details on my projects HERE.

June 2022

June was a bit of a slower month for me, with my big kiddos home from school and trying to keep everybody entertained and happy, ha! But, I was able to create a few projects that I really loved, including this pretty watercolored project using Altenew products.

No-line watercoloring continued to be a favorite technique of mine, and this project for the Altenew June release showcases just that! I love “leveling up” a somewhat simple image by stamping it first with no-line coloring ink, then watercoloring or coloring with alcohol markers. I think it lends an air of elegance to a simple image, like this image from the Sentimental Florals stamp set, and makes it look more complicated than it really is. I paired the Sentimental Florals wreath with the Artists 24 Pan Watercolor set, which is one of my most favorite watercoloring mediums. You can check out all of the details from this project HERE.

July 2022

July featured lots of different styles and subjects, including Christmas in July and lots of flowers (even a new Magnolia Apple Blossom set that I illustrated for Simon Says Stamp), but my favorite card that I created that month featured one of my favorite techniques that I really loved playing with in 2022: alcohol markers on standalone die cuts!

I used the Simon Says Stamp Ice Cream Scoop dies with my Copic markers to create these super fun vanilla, strawberry, and mint chocolate chip ice cream cones, then used coordinating colored inks and Layered Confetti stencils to blend this super festive and colorful bokeh background. Creating birthday cards is one of my most favorite “excuses” to create, following closely behind flowers and holiday cards, and this festive, happy, colorful card ticks all of the boxes for me! You can read all of the details on this project HERE.

August 2022

As the summer came to a close, the color combinations in my projects for August seemed to reflect the color combinations of late summer: lots of intense, warm colors, reminiscent of the warmth of the August sunsets. My two favorite projects from this month showcase those warm, rich tones.

This project from the Pinkfresh Studio August release utilizes lots of ink blending, both with stencils and without. I used the Happy Dance stamps with the coordinating stencils and dies, layering the stencils over a softly ink blended background. Layering the same shades of ink on top of each other created such a beautifully subtle effect, with each color fading into each other while still picking up the shading details on the stencils. Check out the full blog post HERE.

My second favorite project is technically for Stamptember, but the releases go live at 11 pm my time, so I’m sneaking this one in under the wire for August. Teehee! One of my favorite sets that I’ve illustrated this year was the Butterfly Ranunculus stamp set. The fluid grace of these blooms creates lots of movement, and I made sure to include lots of different sprigs of foliage and filler flowers to make creating bouquets a breeze. I did some no-line watercoloring, adding in a few sprigs of metallic solid leaves, an embossed background, and some metallic splatters to create this almost-autumn card. Check out the full blog post (featuring this project and another project that I created using another of my new sets- called Floral Frames) HERE.

September 2022

September was the month in which Christmas crafting started in full swing, and I. was. here for it! Christmas crafting season is one of my most favorite times of the year, and I could easily buy my weight in holiday themed stamps, dies, and hot foil plates. I did not have nearly enough time to use all of the beautiful holiday products that are currently residing in my stash, but I am really, really happy with the holiday projects that I was able to create in my (somewhat limited) crafting time!

These “blue Christmas” cards using a bunch of different goodies from Spellbinders were some of my most favorite holiday cards that I created this year. I am a sucker for unique, non-traditional holiday color combinations, as well as being a big fan of monochromatic color schemes, and the multiple shades of blue with those tiny pops of peach and sparkly, shiny silver accents made my heart go pitter-patter. Can we also just talk about the perfection of that Plaid Tidings hot foil plate? A more perfect plaid background cannot be found! Check out the full blog post HERE.

Switching gears slightly… September was a particularly prolific month for me in blog-land, so I have another favorite project to share with you from September. This almost-one-layer card features marvelously whimsical Anita Jeram stamps from Colorado Craft Company. I paired these sweet stamps with another of my most favorite new finds from this year: OLO markers! The vibrancy and intensity of these markers, as well as the simplicity of use, makes them one of my most favorite new additions to my craft room for the year. (Full disclosure-OLO sent me the markers to test out, but I absolutely love them and would not share my enthusiasm with you if I didn’t!) You can check out all of the details on this project, as well as another movie-themed project using Anita Jeram stamps, HERE. You can also check out several of my videos featuring the OLO markers on my YouTube Channel.

October 2022

Ah, October. The month of the holiday cards. Nearly every card that I created throughout the month was using one of the phenomenal holiday releases from the phenomenal companies with whom I get to work. I hope that I get the opportunity to create more projects with these beautiful products, because they are so creative and so inspiring!
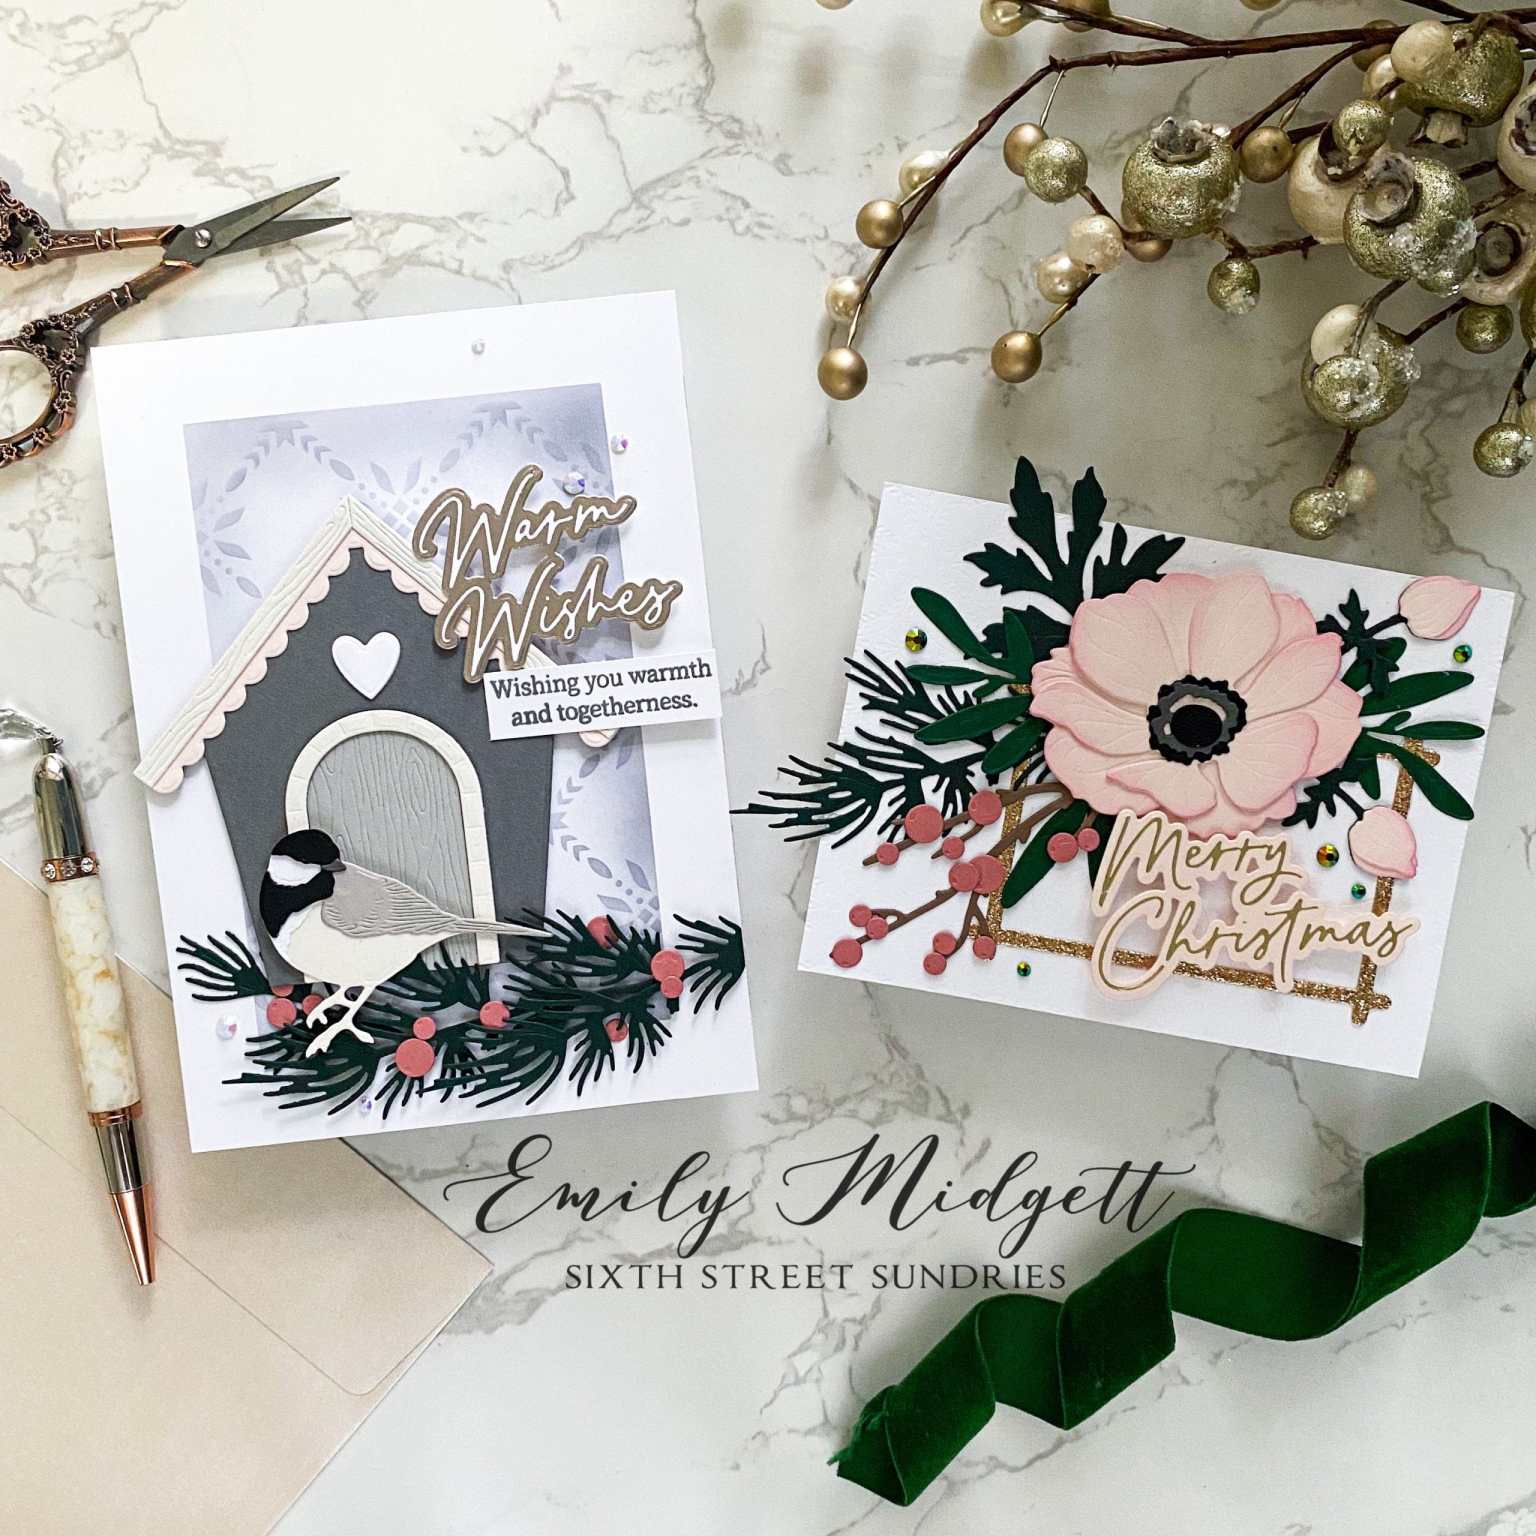
Honey Bee Stamps had a particularly spectacular holiday release, and I was lucky enough to be able to play with several of the products from their release. These muted holiday cards feature more of my favorite non-traditional holiday color schemes, while the berries, pine needles, and overall wintry feel helped to make them feel very holiday-appropriate. If you haven’t taken a look at the Lovely Layers: Winter Greenery standalone dies, you absolutely should, because these dies are so infused with holiday imagery, they are sure to be a staple in my holiday crafting for a long time! Check out the full blog post with all of the products and creating details HERE.

The Grandma’s Christmas Tree Dies, 3D Embossing Folder, and Layering Stencils were some of the most unique and, may I just say incredibly clever, holiday products that was released this year from all of the companies. I’m sure that nearly everybody had a grandma, aunt, or other relative who had those beautiful lighted ceramic Christmas trees growing up. My Grammy had the most gorgeous white one, which my husband painstakingly replicated for me for my birthday a few years ago. The holiday cards above showcase these wonderfully clever products, creating a traditional A2 holiday card as well as a shaped card. Check out all of the details HERE.

November 2022

November was filled with more holiday goodness, with a few non-holiday releases sprinkled in here and there. I, however, was in full on Christmas crafting mode, so I was loathe to let go of my holiday stamps and dies!

I have to say…. I think these might be my most favorite holiday cards that I’ve created this year, which is saying something considering ho w many holiday cards I created with some utterly amazing products. The combo of Sparkling Snowflake Frame and Trio from Simon Says Stamp, peachy-pink cardstock, subtle ink blending, metallic splatters, and Rose Gold Metallic Foil cardstock (also from SSS) makes my pink-loving, monochromatic-obsessed heart go all-aflutter! Check out the full blog post HERE.

This card is a close runner-up for my favorite card of the month. I took part in the Honey Bee Stamps video hop and shared how I created this custom-colored die cut card using OLO markers and Honey Bee Stamps’s Lovely Layers: Poinsettia and Lovely Layers: Winter Greenery dies. I am in love with the rich Spruce cardstock and that intense, vivid, plum-colored poinsettia. It’s one of my top five favorite holiday cards from the year, to be sure. You can check out all of the details and the video HERE.

December 2022

Finally, we have December. The crafting community is starting to transition out of the holiday mindset, and with that comes a whole host of new product themes that are not Christmas related. Some people might be saying “hallelujah!” but I am personally quite sad, because I didn’t get to accomplish as many projects as I wanted. I guess there’s always next year! Hopefully, my entire family and I won’t be sick for 10 days in the middle of December 2023. Totally threw a wrench in my holiday plans!

Looking back over my projects from December, I particularly loved this celestial project that I created for the Hero Arts My Monthly Hero blog hop. It used the super creative and beautifully designed new Star Cluster Stencil, which I paired with a vibrant, ink blended background and White Hero Wax. I love that this is an outer space card that still feels like “me” with the pinks, purples, and navy blue galaxy. I sometimes struggle with projects that are not inherently feminine, so I was really happy with the finished product! You can check out all of the details for this project on THIS post.

Whew. That was a long blog post. I hope you’ve enjoyed this trip down memory lane as much as I have. I noticed during my tour of my 2022 blog posts was just how lucky I am to be able to have the opportunities to work with so many wonderful companies and their phenomenal product. So many of these products have been neglected in my craft room, because I always have new product coming in with which to create and share with you, so one of my goals for 2023 is to utilize these older products that I really love, perhaps with a new coloring medium, or paired with product from other companies! I tend to stick to one company’s product line when working on a card, so it will be fun to put my thinking cap on and pair the products of several companies together.

One last bit before I sign off on this New Year’s Eve day: I could not do this job without your support, your kind words of encouragement, and your use of my affiliate links when you are inspired. Your affiliate link purchases or the purchase of coloring panels or FOTG art supplies helps me to continue supporting my family while still being at home to do all of those important wife & mom things, too. Thank you. Thank you from the bottom of my heart. I sincerely send all of my best wishes for a peaceful and prosperous 2023 to each of you!

Filed Under: Uncategorized Tagged With: happy new year, memory lane

VIDEO: Quick Holiday Thank You with Pinkfresh Studio!

December 29, 2022

Hi there! I’m over on the Pinkfresh Studio YouTube channel with this holiday thank you card, an homage to vintage holiday colors and graphics!

Watch the video below or click HERE to watch on YouTube.

In case you can’t watch the video or prefer the written explanation, here’s a brief rundown of how I created this project:

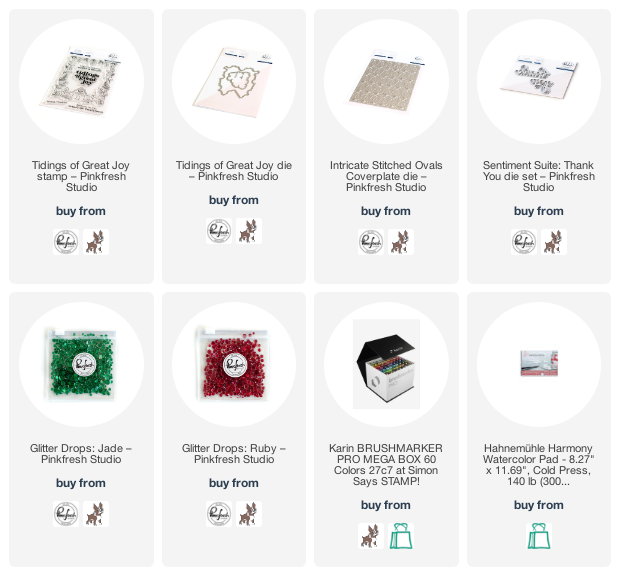
I began by gold embossing the Tidings of Great Joy stamp set onto some watercolor paper. I used the coordinating die to cut out the center of the watercolored panel, creating a detailed frame. I love that this can easily be turned into a shaker card or used as a simple frame as I’ve done here! I then used my Karin markers to add color, using two different techniques to add the color to the paper. For the first technique, I scribbled the color onto my glass work surface, then picked it up with a damp paintbrush and applied the color to the paper, creating a more diluted, less intense version of the marker color. For the second technique, I applied the marker directly to the watercolor paper and then moved the color with a damp paintbrush to create very intense color. Using both techniques on your project is a great way to get extra mileage out of your watercolor markers, because you can create super intense, vibrant color or softer, more muted color depending on which technique you use!

To add a bit of fun texture to the area in the window of my holiday border, I trimmed down an A2 sized panel of matte gold foil cardstock. I ran it through my die cut machine using the Intricate Stitched Ovals Cover Plate die. If you really want to let the details on your stitched cover plate dies from Pinkfresh shine through, I highly encourage you to try them with foil cardstock. The super smooth surface of the foil enhances the details so beautifully! I popped up the watercolored frame on the stitched background using lots of foam adhesive.

To create the thank you portion of the card, I die cut the Sentiment Suite: Thank You dies, cutting the bubble layer from some heavyweight vellum and the more intricate sentiment die itself from gold glitter foam. The vellum helps to keep the gold glitter from disappearing into the gold foil background. I like to vary the metallic textures on my cards to keep things interesting, and using both glitter and foil is a great way to keep things super festive and sparkly while still making each element individually unique! I adhered the greeting to the center of the frame at a jaunty angle using small dots of liquid adhesive. I added a little cluster of “holly berries” around the sentiment using Jade and Ruby Glitter Drops, adding one last element of sparkle!

Well, that’s all for my project today! This project was super quick and should be very easy to drop in the mail, making it a great thank you note to show your gratitude for holiday generosity! Thanks so much for dropping by today, and have a marvelous day!

Filed Under: pinkfresh studio Tagged With: christmas, holiday, karin brushmarker pro, thank you, watercolor

Altenew: A Year In Review: Crafters’ Edition Blog Hop #2 + Giveaway 

December 22, 2022

Hi there! Today, Altenew is continuing the fun with Day 2 of their Year In Review: Crafters’ Edition Blog Hop! You should have arrived here from Altenew Card Blog, and your next stop is Penny Pynnonen. When Altenew asked me to select my four favorite projects from 2022, I certainly had a difficult time coming up with only four. Being part of the design team means that I get to work with utterly marvelous products every single month, and the giant flowers and innovative products that Altenew produces make working with them seem more like fun than actual work!

My four favorite projects feature my favorite way to craft: with lots of flowers, color, and coloring with my favorite mediums!

Watercolored Christmas Rose Hot Foil Card

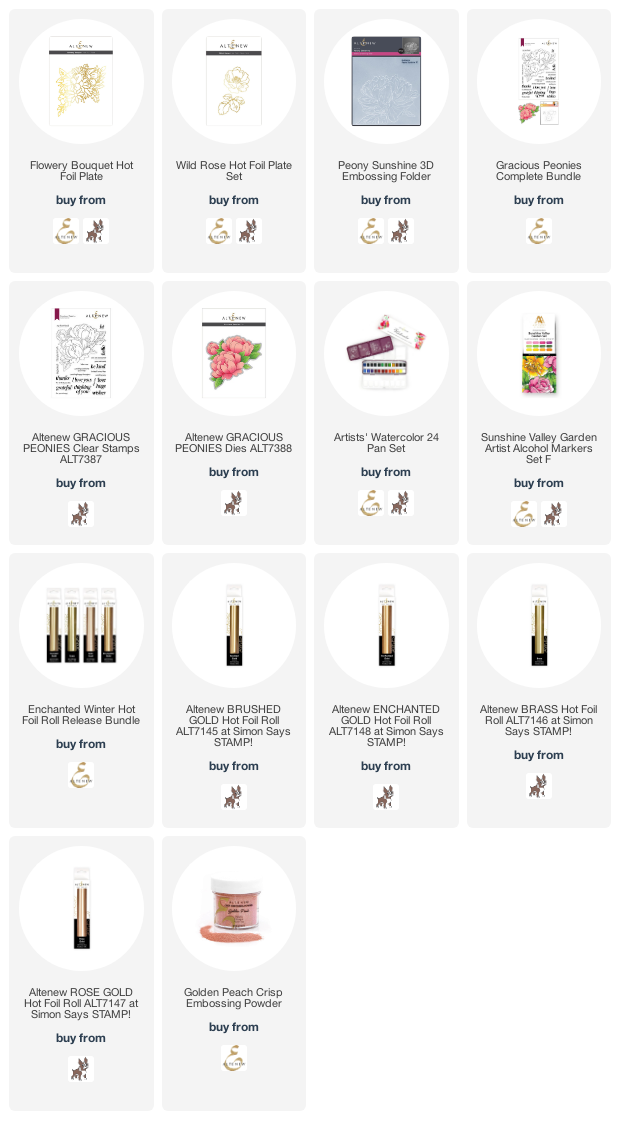
This first card is one of my favorite holiday cards from this year, and it uses the Wild Rose Hot Foil Plate and Dies and the Artists’ 24 Pan Watercolor set. I love the softness of the watercoloring in the background paired with the bold hot foil and glittery branches.You can read all of the details on how I created this project HERE.

Hot Foiled Alcohol Marker Card

This next card features one of my biggest obsessions for 2022: hot foil. Altenew has some truly gorgeous hot foil plates, not to mention a line of beautiful matte metallic foil rolls, and combining hot foil with alcohol markers is one of my most favorite new techniques! I used the Flowery Bouquet Hot Foil Plate with alcohol markers to create this incredibly vibrant card. This card features another of my favorite techniques that can be seen frequently on my cards: accenting a floral image with multiple sizes of die cut frames. The frames help to draw the eye to the focal point, while the varying widths of the frames lend an air of elegance and class (at least I think so!). You can read all of the details on this card HERE.

Ethereal Watercolored Card

My third card features more watercoloring using the Artists’ 24 Pan Watercolor and the Craft Your Life Project Kit: Always Sunshine. I adore the graceful draping of the flowers on this card, as well as the ethereal watercolor wash in the background. The lilac and bluebell watercoloring with the rose gold embossing just makes me swoon! You can read more details about this card (and another coordinating project!) HERE.

Preppy Watercolored Embossed Peony

My final card features another technique that I grew to really love over the last year: watercolor on 3D embossed images! This project uses the Peony Sunshine 3D Embossing Folder, paired with the Artists’ 24 Pan Watercolor. (Can you tell that I really love those watercolors? They are a fantastic price point and give amazing results!) The combination of the detailed watercoloring with the incredible depth and texture of the 3D embossed image create such a unique, tactile look. It reminds me of stucco or Italian sculpture. You can read all of the details on this particular project HERE.

This card gets an honorable mention because… who doesn’t love utterly massive, violently pink peonies and shiny gold? I paired the Gracious Peonies stamp set with the Sunshine Valley Garden Artist Markers to create this bold, vibrant card. You can read all about it HERE on the Altenew Blog!

Well, that’s all for this walk down memory lane! I can’t believe another year has gone by. I guess time flies when you are working with some of the most beautiful flower stamps that you can find anywhere! (Also, four energetic and kinda nutty kids, so there’s that, haha!) Now for some fun giveaway information:

Over $500 in total prizes! Altenew is giving away a $100 gift card to 1 lucky winner, 3 $50 gift cards, and 27 $10 gift cards. Winners will be chosen from both blog hop #1 and blog hop #2. Please leave a comment on the Altenew Card Blog HERE by 12/28/2022 for a chance to win. 

(Feel free to share your favorite projects using #Altenew and #AltenewBest2022 when you share blog hop projects on social media. Don’t forget to tag Altenew!)

Wait, there’s MORE!

We would also LOVE to see YOUR favorite handmade cards, layouts, home decor, etc. featuring Altenew products! Feel free to share them on social media or on your blog using the hashtag #AltenewBest2022. You may also add a link by clicking the blue button below.

FOUR lucky crafters will each win a $15 gift certificate to our store! Winners will be announced on the Altenew Winners Page on 12/30/2022. We are looking forward to seeing your beautiful creations!

Your next stop on the hop is Penny Pynnonen. Thanks so much for stopping by today, and happy hopping!

Filed Under: altenew Tagged With: 3D embossing folder, alcohol markers, altenew artist markers, Altenew Artist Watercolors, hot foil, watercolor, year end review

December 2022 Blossoming Creativity Blog Hop + Giveaway ($300 in Total Prizes!)

December 20, 2022

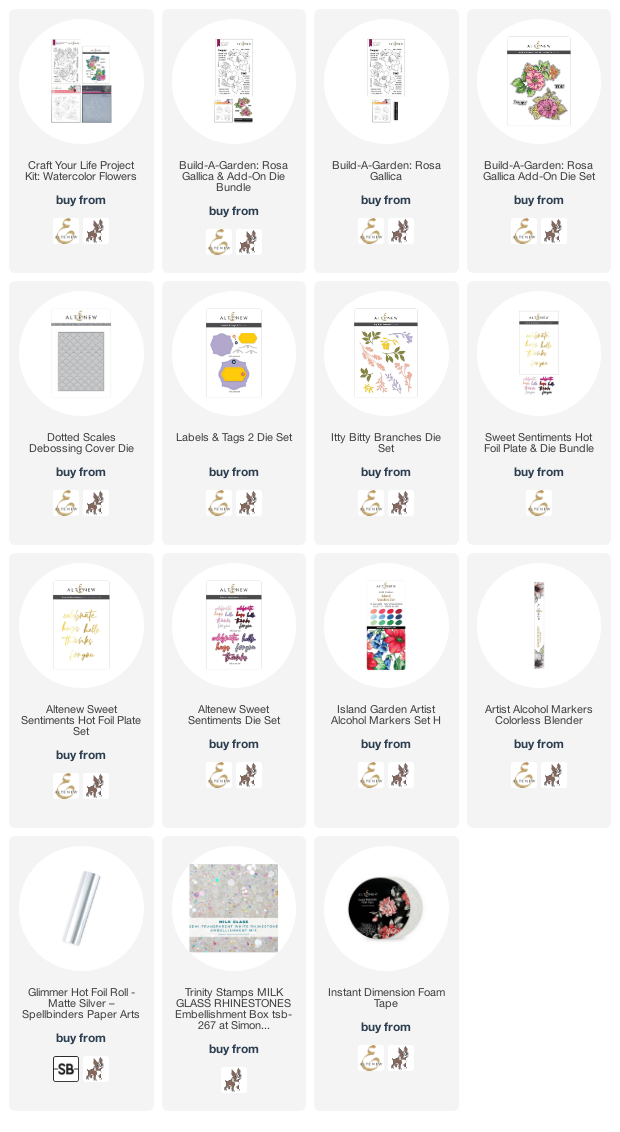
Hi there! I’m so excited to be continuing the celebration for this month’s Altenew Marvelous Monthly release with a second blog hop! You should have arrived here from Preeti Chandran, and your next stop is Teri Wilson. You can also start back at the beginning at the Altenew Blog in case you get lost! The Marvelous Monthly release for December 2022 featured so many beautiful new blooms in an assortment of styles, arrangements, and textures; I was so inspired for springtime with these gorgeous new sets! I used the new Craft Your Life Project Kit: Watercolor Flowers and the Build A Garden: Rosa Gallica sets with two completely different mediums to create this pair of super springy, coral-bluebell-white-and-silver projects.

Here’s a peek at the Craft Your Life Project Kit: Watercolor Flowers kit:

So many amazing products that work beautifully together, as well as individual components!

Here’s a peek at the Build A Garden: Rosa Gallica set (with the add-on die, too):

You can also purchase the Rosa Gallica set without the die HERE.

I kept both of my projects for today extremely light and airy, with a touch of mint and blue to contrast with the warmth of the coral flowers. I am totally loving this color combo! I try to keep my color combinations unique with each project that I create, and these were so fun to work outside of my normal pink zone.

I began this project by heat embossing one of the bouquets from Build A Garden: Rosa Gallica onto some white cardstock using white pearl embossing powder. I love how different this looks to the typical metallic or black stamped images; the white pearl embossing adds such a feeling of lightness to the project, almost like no-line coloring, but still with the helpful lines to keep your coloring process a little more simplified! I used the lightest markers from the Island Garden Altenew Artists Alcohol Markers set to color the flowers and foliage, using the Colorless Blender marker as the final marker to keep those highlights nice and bright and keep the overall feel of the finished product super pastel and pretty. I cut the finished image out with the coordinating die.

For the greeting, I used several elements from the Build A Garden: Rosa Gallica stamp set, embossing them in silver on white cardstock, then using the Add-On Die to die cut the “happy.” To help make the sentiment pieces stand out a bit from the background, I also die cut a tag from the Labels and Tags 2 die set.

The size of the finished bouquet immediately put me in mind of a mini-slimline card, so I used the Dotted Scales Debossing Cover Plate to add some subtle texture to a 3″x5.5″ panel (this fit perfectly, as this cover plate was meant to cover an entire A2 panel at 4.25″x5.5″) and mounted it to a full size mini-slimline card front (3.5″x6″) using foam tape. I mounted the colored bouquet to the textured, raised panel using some more foam tape, creating a double layer in spots, then filled in some of the bare areas with some white sprigs cut using the Itty Bitty Branches dies. I nestled the label and sentiment strips into the bouquet, allowing both the bouquet and the sentiment pieces to spill over the sides to create a truly dramatic and unique card front. The final touch was to add a few iridescent white gems for some sparkle.

My second card using the Craft Your Life Project Kit: Watercolor Flowers features the same airy color palette with lots of white space and subtle color, this time created with stencils and ink blending! I was absolutely thrilled to discover that the stencils for the Craft Your Life Project Kit: Watercolor Flowers work not only with the stamped images, but the 3D Embossed images, as well.

I began by die cutting the shape that coordinates with the 3D embossing folder included in the Craft Your Life Project Kit: Watercolor Flowers kit. I then aligned the die cut with the embossing folder and ran it through my die cut machine. It created such a beautiful, ornate piece that I almost didn’t want to add color to it! It would look lovely just as a textured white piece!

I taped the die cut down to a piece of scrap paper with some washi tape, then added each layer of stencil over the top, keeping the stencils in place with pieces of washi tape. I used only four shades of ink for this image, preferring to keep the shading softer by doubling up on the same color of ink rather than creating intense shadows with a darker ink color. I added some silver metallic watercolor to the flower centers to keep things cool and artsy.

For the card base, I used white pearl embossing powder to emboss the other bouquet from the stamp set, adding subtle texture to the background. I also splattered some silver metallic watercolor to the background for a bit of added texture. I popped up the stenciled, 3D embossed panel with some foam tape. For the greeting pieces, I paired one of the greetings from the Craft Your Life Project Kit: Watercolor Flowers that I heat embossed in silver with a hot foiled “thanks,” foiled using the Sweet Sentiments Hot Foil and Coordinating Dies with some matte silver foil. I popped up both pieces with a double layer of foam tape to make them really stand out. Finally, I added a few more iridescent white gems for one last touch of sparkle!

Well, that’s all for these projects! Now for some fun giveaway information:

$300 in total prizes! To celebrate this release, Altenew is giving away a $100 gift certificate to 1 lucky winner and a $20 gift certificate to 10 winners! Please leave a comment on the Altenew Card Blog and/or each designer’s blog post on the blog hop list below by December 25, 2022 for a chance to win. Altenew will draw 10 random winners from the comments left on each stop of this blog hop and announce the winners on the Altenew Winners Page on December 27, 2022.

Here’s the full link list for the hop stops:

You are invited to the Inlinkz link party!

Click here to enter

Filed Under: altenew Tagged With: 3D embossing folder, alcohol markers, build a garden, craft your life project kit, craft your life project kit watercolor flowers, hot foil, ink blending, mini slimline, rosa gallica

More Simon Says Stamps Hugs Release!

December 17, 2022

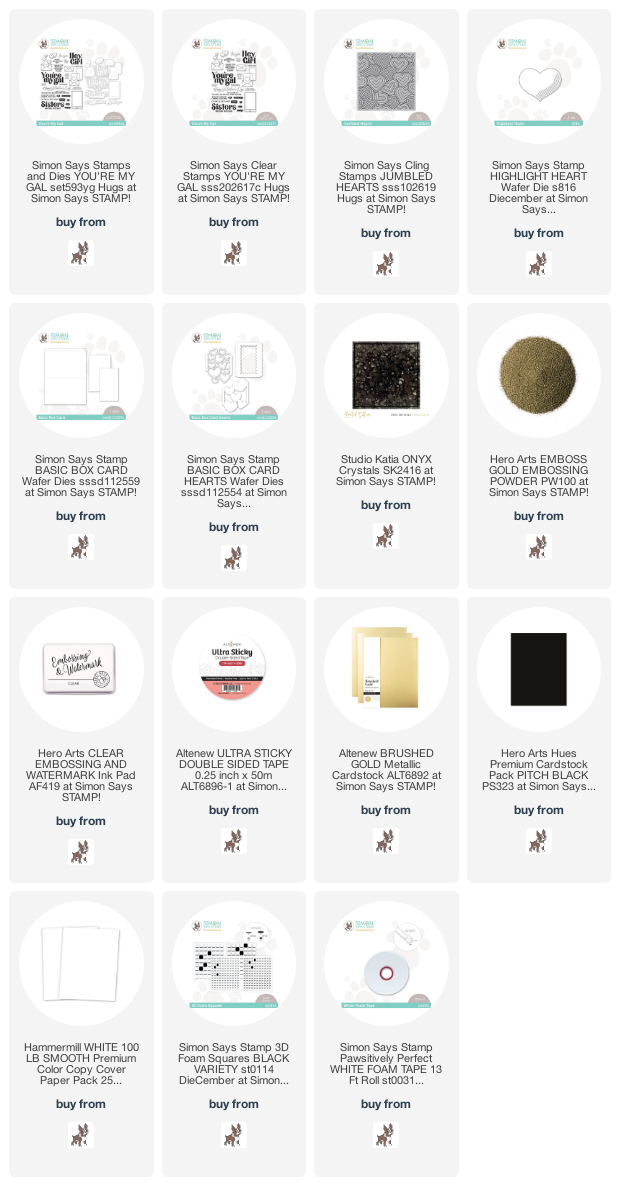
Hi there! I’m still not 100%, but I wanted to share these projects that I made using new goodies from the Simon Says Stamp Hugs release while my brain was a little lucid. (Kids, man, they bring home some wicked germs!! I can’t remember the last time I felt this bad. Even hubby, my redheaded man of steel who never gets sick, has been knocked down for days.) I have a pair of cards using the fabulous new You’re My Gal and the Jumbled Hearts background stamp along with some old and new goodies, so let’s get started with the details!

Both of my cards feature backgrounds created by watercoloring the new Jumbled Hearts background stamp and my Holbein watercolors. I began by heat embossing the entire 6×6 background stamp on a panel of watercolor paper using gold embossing powder. I used my Holbein watercolors to add lots of fun, Valentine-y colors to the heat embossed hearts.

For my first card, I trimmed down the watercolored Jumbled Hearts panel so that it covered most of my card front. I wanted to add black accents, so I used a black Karin marker to complete the “background” that behind all of the hearts. I added a strip of matte gold cardstock along the edge, then completed the rest of the A2 card front by tucking a strip of black cardstock beneath it.

After I’d finished my card base, I used the same brushed gold cardstock to die cut the Highlight Heart die from the DieCember release. The lines on the heart die cut match the graphic feel of the hearts on the embossed, watercolored background!

For the greeting, I heat embossed a few of the sentiments from the You’re My Gal stamp set onto some more black cardstock and trimmed them down to sentiment strips. I popped up the gold heart with some black foam tape, then added the sentiment strips using a double layer of the black foam tape. The final touch was to add some black gems for one more accent of shiny black!

My second card features the “leftover” strip of my watercolored Jumbled Hearts panel as the background on a Basic Box Card project. I die cut the main portion of the box card from some watermelon cardstock, coordinating with the watercolored hearts on my embossed panel.

Before assembling the Basic Box Card, I also die cut a few of the elements from the Basic Box Card Hearts add-on dies, cutting the scalloped panel from some white glitter cardstock, then cutting the super detailed heart outline layer once from gold glitter and once from plain white cardstock. I reserved the interior die cuts from the gold glitter die cut, then used Paws-itively Saturated Peony, Cheeky, and Taffy inks with the  Simon Says Stamp Blending Brushes to carefully blend a pretty ombre on the detailed die cut. I adhered the blended die cut and the white glitter die cut to the interior of the Basic Box Card according to the instructions, then turned my attention to the card front.

I gold heat embossed a couple of greetings from the You’re My Gal onto some white cardstock and die cut them. I adhered the sentiment pieces to the front of the box card using some of Altenew’s Ultra Sticky Tape, then added a trio of glittery gold hearts that we’d reserved earlier. Such a pretty card to give to your favorite gal pal, and I love how the card folds up so nicely to fit flat in an envelope! Such a unique look.

Well, that’s all for my projects today! I hope you’ll take a peek at the Hugs release, because it’s filled with all kinds of beautiful products perfect for your Valentine’s Day projects! Thanks so much for stopping by today, and have a marvelous day!

Filed Under: simon says stamp Tagged With: basic box card die, basic box card hearts die, highlight heart die, holbein watercolor, jumbled hearts, valentine's day, watercolor, you're my gal

  • Page 1
  • Page 2
  • Page 3
  • Go to Next Page »

Primary Sidebar

  • Facebook
  • Instagram
  • Pinterest
  • YouTube

Favorite Shops

Secondary Sidebar

Subscribe

Enter your email address to subscribe to this blog and receive notifications of new posts by email.

Instagram
Something is wrong.
Instagram token error.
Follow
Load More

Archives

Tags

3D embossing folder alcohol markers better press birthday birthday card blog hop card kit christmas christmas card christmas tag colored pencil copic copic coloring Daniel Smith die cutting embossing folder embroidery felt giveaway holiday holiday card hot foil ink blending karin brushmarker pro layered stencil masculine my monthly hero new release no line coloring no line watercolor OLO marker olo markers original illustration pawsitively saturated rainbow shaker card slimline stamping stamptember stencil thank you thinking of you valentine's day video watercolor

Popular Posts

Simon Says Stamp Joy For You Blog Hop- Day 1!
Simon Says Stamp Joy For You Release-Now Available!
Frozen Fractals All Around with New Simon Says Stamp Joy For You Release!
Shaped Holiday Shaker Card with New Simon Says Stamp Jolly Season Card Kit of the Month!
Holiday Postage with New Simon Says Stamp!
Simon Says Stamp Glory to the Newborn King Holiday Kit-Part II!
Holiday Joy in Pink and Green with New Simon Says Stamp DieCember!
Pinkfresh Studio 5th Birthday!
Altenew Build A Flower: Fuchsia Blog Hop+Giveway!
July My Monthly Hero Blog Hop+Giveaway!

Disclosure

Some affiliate links are used in my posts. This means that, should you click on one of my links and purchase something from that company, I will receive a small portion of the sale at no extra cost to you. I use the money earned from these sales to help maintain my blog. I so appreciate you visiting and, if you do choose to use one of my affiliate links, thank you so much for your support!
Copyright © 2026 ·Brunch Pro Theme · Genesis Framework by StudioPress · WordPress · Log in
Loading Comments...